Omega OTEC IECS-D Series User manual


1
1. PRECAUTIONS
CAUTION
CONTENTS PAGE
PRECAUTIONS......................................................................................1
OVERVIEW............................................................................................2
INSTALLATION......................................................................................3
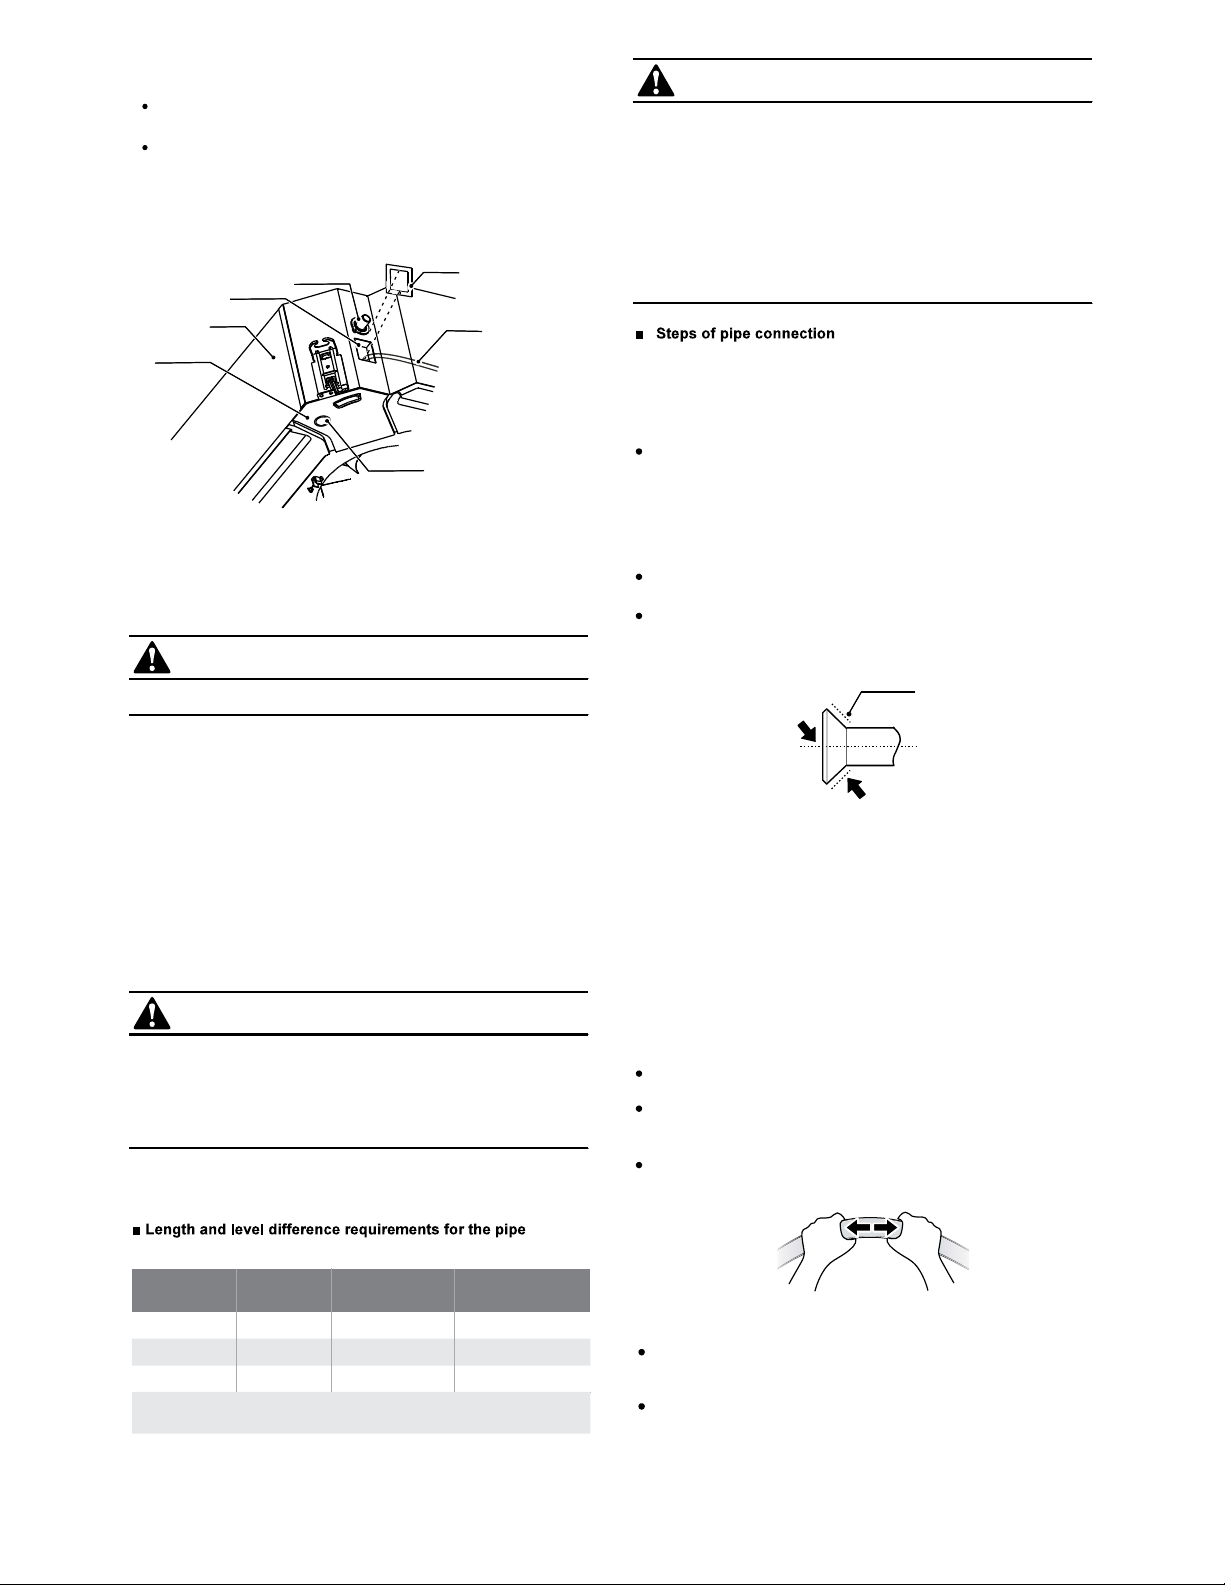
OUTDOOR UNIT INSTALLATION............................................................7
WATER DISCHARGE PIPING LAYOUT....................................................8
ELECTRIC CONNECTION.......................................................................11
ELECTRIC WIRE DIAGRAM...................................................................12
TRIAL RUN...........................................................................................12
Ensure that all Local, National and International regulations
are satisfied.
Read this ”PRECAUTIONS ” carefully before Installation.
The precautions described below include the important
items regarding safety. Observe them without fail.
After the installation work, perform a trial operation to check
for any problem.
Follow the Owner’s Manual to explain how to use and
maintain the unit to the customer.
Turn off the main power supply switch (or breaker) before
maintenance the unit .
Ask the customer that the Installation Manual and the Owner’s
Manual should be kept together .
New Refrigerant Air Conditioner Installation
CAUTION
Do not connect the Appliance from Main Power Supply.
WARNING
THIS AIR CONDITIONER ADOPTS THE NEW HFC
REFRIGERANT(R410A)WHICH DOES NOT DESTROY OZONE
LAYER.
The characteristics of R410A refrigerant are; Hydrophilic, oxid-
izing membrane or oil, and its pressure is approx.1.6 times high-
er than that of refrigerant R22.Accompanied with the new refrig-
erant, refrigerating oil has also been changed ,Therefore, during
installation work, be sure that water, dust, former refrigerant, or
refrigerating oil does not enter the refrigerating cycle.
To prevent charging an incorrect refrigerant and refrigerating oil,
the sizes of connecting sections of charging port of the main
unit and installation tools are charged from those for the
conventional refrigerant.
Accordingly the exclusive tools are required for the new
refrigerant (R410A):
For connecting pipes, use new and clean piping designed for
R410A,and please care so that water or dust does not enter.
Moreover, do not use the existing piping because there are
problems with pressure-resistance force and impurity in it.
This unit must be connected to the main power supply by
means of a switch with a contact separation of at least 3 mm.
The installation fuse must be used for the power supply line of
this conditioner.
If the supply cord is damaged, it must be replaced by the
manufacturer or its service agent or a similarly qualified person
in order to avoid a hazard.
An all-pole disconnection switch having a contact separation of
at least 3mm in all poles should be connected in fixed wiring.
The appliance shall be installed in accordance with national
wiring regulations.
The temperature of refrigerant circuit will be high, please keep
the interconnection cable away from the copper tube.
An all-pole disconnection device which has at least 3mm
separation distance in all pole and a residual current
device(RCD) with the rating of above 10mA shall be incorporated
in the fixed wiring according to the national rule.
The power cord type designation is H05RN-R/H07RN-F or above.
Ask an authorized dealer or qualified installation professional to
install/maintain the air conditioner.
Inappropriate installation may result in water leakage,electric shock
or fire.
Turn off the main power supply switch or breaker before
attempting any electrical work.
Make sure all power switches are off.Failure to do so may cause
electric shock.
Connect the connecting cable correctly.
If the connecting cable is connected in a wrong way, electric parts
may be damaged.
When moving the air conditioner for the installation into another
place, be very careful not to enter any gaseous matter other
than the specified refrigerant into the refrigeration cycle.
If air or any other has is mixed in refrigerant, the gas pressure in the
refrigeration cycle becomes abnormally high and it may resultingly
causes pipe burst and injuries on persons.
Do not modify this unit by removing any of the safety guards or
by by-passing any of the safety interlock switches.
Exposure of unit to water or other moisture before installation
may cause a short-circuit of electrical parts.
Do not store it in a wet basement or expose to rain or water.
After unpacking the unit, examine it carefully if there are
possible damage.
Do not install in a place that might increase the vibration of the
unit.
To avoid personal injury (with sharp edges), be careful when
handling parts.
Perform installation work properly according to the Installation
Manual.
Inappropriate installation may result in water leakage, electric shock
or fire.
When the air conditioner is installed in a small room, provide
appropriate measures to ensure that the concentration of
refrigerant leakage occur in the room does not exceed the
critical level.
Install the air conditioner securely in a location where the base
can sustain the weight adequately.
Perform the specified installation work to guard against an
earthquake.
If the air conditioner is not installed appropriately, accidents may
occur due to the falling unit.
If refrigerant gas has leaked during the installation work,
ventilate the room immediately.
If the leaked refrigerant gas comes in contact with fire, noxious gas
may generate.
After the installation work, confirm that refrigerant gas doer not
leak.
If refeigerant gas leaks into the room and flows near a fire source,
such as a cooking range, noxious gas might generate.
Electrical work must be performed by a qualified electrician in
accordance with the Installation Manual. Make sure the air
conditioner uses an exclusive power supply.

2
Wired controller is standard.
The air conditioner is delivered from the factory without
connecting pipes.
All the figures in the manual explain only the general
appearance and dimensions of the unit. The air conditioner
you purchased may not be completely consistent with the
appearance and functions listed in the figures. Please refer to
the actual product.
CAUTION
2.1 Accessories
2.2 Locally Purchased Accessories
An insufficient power supply capacity or inappropriate installation
may cause fire.
Use the specified cables for wiring connect the terminals
securely fix. To prevent external forces applied to the
terminals from affecting the terminals.
Be sure to provide grounding.
Do not connect ground wires to gas pipes, water pipes, lightning
rods or ground wires for telephone cables.
Conform to the regulations of the local electric company when
wiring the power supply.
Inappropriate grounding may cause electric shock.
Do not install the air conditioner in a location subject to a risk
of exposure to a combustible gas.
If a combustible gas leaks, and stays around the unit, a fire may
occur.
6) Reamer
7) Gas leak detector
8) Tape measure
9) Thermometer
10) Mega-tester
11) Electro circuit tester
12) Hexagonal wrench
13) Flare tool
14) Pipe bender
15) Level vial
16) Metal saw
17) Gauge manifold (Charge hose:R410A special requirement)
18) Vacuum pump (Charge hose:R410A special requirement)
19) Torque wrench
20) Copper pipe gauge adjusting projection margin
21) Vacuum pump adapter
Required tools for installation work
1) Philips screw driver
2) Hole core drill(65mm)
3) Spanner
4) Pipe cutter
5) Knife
2. OVERVIEW
6.4×0.8
53
Water
discharge
pipe PVC
Insulation
casing
Model Piping Liquid side Gas side
Remarks
12.7×0.8
6.4×0.8
71
15.9×1.0
9.5×0.8
90/105
15.9×1.0
(Unit: mm)
Copper pipe
This is used
as the IDU’s
drain pipe.
The length is
determined
according to
actual
needs.
It is used to connect
the IDU and ODU
refrigerant systems. A
soft copper tube (T2M)
is recommended. The
length is determined
according to actual
needs.
The inner diameter
should match the
corresponding
copper tube and
rigid polyethylene
plastic tube. The
thickness is usually
10mm (or above). If
the pipe is used in
a closed humid
area, the thickness
should be
increased.
9.5×0.8
120/140/160
15.9×1.0
Installation Manual
Installation instructions (Make sure you
hand over to the user)
Brass nut
For use in the installation of
connecting pipe (the quantity is one for
models with a process pipe)
Ring clamp
For use in the installation of connecting
pipes
Insulation piping
For insulation of piping connections
NAME SHAPE
User Manual
Operating instructions (Make sure you
hand over to the user)
Remote controller
Flexible hose tube
Soundproof / insulation sheath
Out-let pipe sheath
Tightening band
Bolt M6
Nut
Washer
Sponge (250*250*10)
Sponge (60*100*5)
QUANTITY
1
1
1
1
2
2
4
2
1
5
1
8
8
1
1

3
Installing the unit in the following places may cause it to
malfunction (please enquire if it is unavoidable):
Places that contain mineral oil such as machine oil for
cutting.
Places with high salt content in the air such as the sea.
Areas like hot springs where there are corrosive gases like
sulphur gases.
Factories with major voltage fluctuations in the power
supplies.
Places like a car or cabin room.
Areas filled with cooking oil and gas like kitchens.
Places where strong electromagnetic waves are present.
Places where flammable gases or materials are present.
Areas where there is evaporation of acid or alkaline gases.
Other special environmental conditions.
CAUTION
Choose the correct move-in path.
Carry the device in its original package.
Electrical insulation measures can be taken in accordance
with relevant technical specifications of electrical equipment if
the air conditioner is to be installed onto the metal part of a
building.
If the height difference is greater than the allowed level
difference, it is recommended to place the ODU above the
IDU.
CAUTION
The IDU should be handled with care, and it should not be
subjected to heavy pressure.
After the IDU is installed, in case of construction, the IDU
should be protected to prevent garbage and dust from falling
into the unit.
The fan should be rotated before the test run. Make sure that
there is no abnormal friction before powering on the unit.
CAUTION
Install the air conditioner in a location with sufficient strength
to support the weight of the unit. Take reinforcement
measures when necessary.
The unit may fall and cause personal injury if the location is
not strong enough.
Carry out the specified installation works to prevent strong
winds or earthquakes.
Improper installation may cause the unit to drop leading to
accidents.
Before wiring/pipe layout, make sure that the installation area
(walls and floor) is safe and free of water, power, gas, and
other hidden dangers.
WARMING
Enough space for installation and maintenance.
The ceiling is level, and the structure is strong enough to support
the weight of IDU; take reinforcement measures when
necessary.
Airflow in/out of the machine is not obstructed, and the external
air exerts minimum impact.
Easy to supply airflow to every corner in the room.
Easy to drain fluids from the connected piping and water
discharge piping.
No direct heat radiation.
Avoid installation in narrow spaces or where there are more
stringent noise require-ments.
Enough space for installation and maintenance.
Unobstructed airflow in/out of the unit; no strong breeze.
The site should be dry and well-ventilated.
The supporting surface should be flat and able to bear the
weight of the unit. The ODU should be able to be installed
horizontally without increasing vibration and noise. Take
reinforcement measures when necessary.
The operating noise and the discharged air should not affect
neighbours.
There should be no leakage of flammable gas nearby.
It should be easy to install the connecting pipes and complete
electrical connections.
The level difference of connection pipes and the lengths of
connection pipes must be within the allowed ranges.
3.1 Choosing an Installation Site
3.2 IDU Installation
3. INSTALLATION
A
H
Connet to the outlet
of drain pipe
Connective port of
refrigerant pipe
(Air side)
(Liquid side)
Connective port
of refrigerant pipe
Floor
Ceiling
Panel
Air outlet Air inlet Air outlet
910mm (Ceiling hole)

145
N
Figure 3
Mounting hooks
Hexagon nut
(Level adjustment)
Ceiling Panel
Indoor Unit A mm H mm
53/71/90 230
105/120/140/160 300
Main body of air
conditioner
4
> 1000 mm
> 1000 mm
> 1000 mm
> 1000 mm
Existing ceiling (which must be level)
New room and ceiling
4. Remove the installation board.
Dimensions (unit: mm)
Installation board
Screws M6×12
(Accessories) Figure 1
M
DB
C
H
A
(Fresh air inlet)
Figure 2
A
M
G
Enough space for installation and maintenance.
Unobstructed airflow in/out of the unit; no strong breeze.
The site should be dry and well-ventilated.
The supporting surface should be flat and able to bear the weight
of the unit. The ODU should be able to be installed horizontally
without increasing vibration and noise. Take reinforcement
measures when necessary.
The operating noise and the discharged air should not affect
neighbours.
There should be no leakage of flammable gas nearby.
It should be easy to install the connecting pipes and complete
electrical connections.
The level difference of connection pipes and the lengths of
connection pipes must be within the allowed ranges.
Choose the correct move-in path.
Carry the device in its original package.
Be sure to take electrical insulation measures in accordance
with relevant technical specifications of electrical equipment if
the air conditioner is to be installed onto the metal part of a
building.
If the height difference is greater than the allowed level
difference, it is recommended to place the ODU above the IDU.
1. Drill a 910 mm × 910 mm square hole into the ceiling based on the
layout of the installation board (see Figures 1, 2, and 3).
a. The center of the ceiling opening should match that of the unit.
b. Determine the length and outlets of the connecting pipes, water
discharge piping and the electrical wiring.
c. To keep the ceiling level and prevent vibrations, reinforce the
strength of the ceiling when necessary.
b. Adjust the position of the unit, and make sure that the gap with the
ceiling is evenly spaced on all four sides of the unit, and the base of
the unit is 10–12 mm into the base of the ceiling (see Figure 5).
c. Once the position and level of the unit is adjusted, use the nuts on
the mounting hooks to secure the air conditioner (see Figure 6).
2. Install the hooks in four corners based on the layout for the hooks
outlined in the installation board.
a. Drill four holes with a diameter of 12 mm and a depth of 50–55 mm
in the ceiling. Then, insert and fix the expansion hook anchors.
b. During the installation of the hooks, make sure that the concave
portion of the hanger corresponds to that of the expansion hook
anchors. Determine the appropriate hook length for installation based
on the ceiling's height. Remove any excess.
c. Use M10 or W3/8 bolts for the screws of the mounting hooks.
d. Take approximately 1/2 of the screw length for the installed hooks
as the excess length L, as shown in Figure 5.
3. Use the hex nuts on the four mounting hooks to evenly adjust and
make sure that the unit is level.
a. If the water discharge pipe is slanted, it may cause the water level
switch to malfunction, and water may leak.
1. Install the unit according to the above description. Pre-bury the
hooks in the new ceiling, and make sure that they are strong enough
to bear the weight of the IDU, and that the unit will not become loose
when the concrete shrinks.
2. After lifting the unit, use M6×12 screws (accessory) to secure the
installation board on the main body of the air conditioner to
pre-determine the size and position of the opening in the ceiling (see
Figure 1).
a. Before you mount the ceiling, make sure it is level.
b. Operate according to the above description (step 1 in "Existing
ceiling").
3. Operate according to the above description (step 3 in "Existing
ceiling").
Position the hole at the center of
the ceiling opening
Main body of the
air conditioner
Refrigerant piping vent
(gas side L)
Refrigerant piping vent
(liquid side K)
water discharge pipe)
CAUTION
E
F

CAUTION
CAUTION
CAUTION
NOTE
To match the existing structure, set the screw pitch according to the
product dimensions shown below.
Set using embedded appliances and embedded type of bolts.
Knife-type
insertion
piece
Sliding-type
insertion
piece
Reinforced bar
Embedded bolt
(hanging and embedded
bolt for piping)
Newly set concrete slab Structure
Directly set and use an angle steel for support.
Suspension
bolt
Angle steel
for support
Suspension bolt
Steel framework
Square bar material
Beam
Ceiling
Lifting bolt
Place the square bar by crossing the beams and set the lifting
bolts.
Use embedded bolts, embedded pull bolts, and embedded plug
columns
Wooden Structure
Original concrete slab Structure
All the figures in the manual explain only the general appearance
and dimensions of the unit. The air conditioner you purchased
may not be completely consistent with the appearance and
functions listed in the figures. Please refer to the actual product.
Figure 4
Figure 5 Figure 6
Ceiling
Main IDU body
53
71
90
105-160
840
840
840
840
230
230
230
300
A B C D E F G
Before IDU installation, make sure that the buffers used for
transportation between the fan and the pipe socket are removed.
Running the unit without removing the buffers may damage the
fan motor.
Make sure that the IDU body is level; otherwise, it may cause
water to leak. Calibrate the levelness of the IDU using a spirit
level or polyethylene tube filled with water.
The IDU is equipped with a built-in drain pump and float switch.
Do not tilt the unit in the reverse direction of the drain pan;
otherwise, the float switch may malfunction and cause water
leakages.
All bolts should be made from high quality carbon steel (with
galvanized surfaces or other rust preventive treatment) or
stainless steel.
How the ceiling is treated will differ with the type of building. For
specific measures, please consult the building and renovation
engineers.
How the lifting bolt is secured depends on the specific situation,
and it must be secure and reliable.
Do not place the panel such that it faces downwards or leans
against the wall. Do not place it on a protruding object either.
Do not hit or squeeze the air deflector.
There is an air vent shorter than the other three vents in the
panel. This air vent must match the shorter air vent of the unit
body (see the warning label on the unit body). Otherwise, it will
cause air leak and water condensation.!
680
680
680
680
Water discharge
pipe
Main body of air conditioner
5
Remove the air inlet grille.
Grille switch
45°
Press the two grille locks at the
same time to lift it up.
Raise the air inlet grille to about
45°, and remove the grille.
680
680
680
680
780
780
780
780
780
780
780
780
126
126
126
197
Main IDU body
53
71
90
105-160
105
105
105
105
70
70
70
70
H J K L M N
46
46
46
46
950
950
950
950

6
Installing the panel
1. Align the "PIPING SIDE" and "DRAIN SIDE" sections marked on
the panel with the corresponding piping connector and water
discharge connector of the unit.
2. When installing the panel, first hang its hooks on the swing motor
side and opposite side of the panel to the corresponding drainage
pan hooks on the unit (see a in the figure). Then, hang the two
remaining panel hooks to the corresponding suspension bracket of
the unit (see b in the figure).
3. Slot the guide wire of the swing motor to the card slot on the panel,
and connect the power supply terminal of the swing motor to the
corresponding connector of the electric control box. 1. Secure the installation cover rope onto the bolt on the installation
cover with screws.
2. Gently press the installation cover into the panel.
4. Adjust the four panel hook screws to keep the panel level, and lift
it evenly up to the ceiling (see a in the figure).
5. Adjust the panel slightly in the direction indicated by d in the figure,
so that the center of the panel aligns with the center of the opening
of the ceiling. Verify that the hooks in all four corners are securely
in place.
6. Continue to evenly tighten the screws under the hooks of the panel
until the foam thickness between the unit and the air outlet on the
panel is reduced to about 4–6 mm, and the panel has a steady
contact with the ceiling surface.
d
Swing motor
Piping side
Drain side
a
b
c
Panel hook
Drainage
pan hook
Hook screw
Phillips
screwdriver
Swing motor
Foam at panel side
Unit
Ceiling
Panel
Panel bubble 1 Air outlet Air deflector
Panel bubble 2
4–6 mm
The plastic cover plate protruding from the swing motor must
be embedded within the concave area of the sealing plate.
Make sure the wiring of the swing motor is not caught inside
the sealed foam.
Improper screw tightening will result in the fault shown in the
right figure.
If there is still a gap between the ceiling and panel after the
screws are tightened, re-adjust the IDU height (Figure I).
Without affecting the lifting, lowering, and levelness of the IDU
and the water discharge piping, you can use the openings at
the four corners of the panel to adjust the IDU height (Figure
II).
First hang the air inlet grille on the panel, and then connect the
leads of the swing motor and control box to the corresponding
connectors on the unit respectively.
Reinstall the air inlet grille by performing the steps used to
remove the air inlet grille in the reverse order.
Reinstall the installation cover.
Air
leakage
Ceiling
Droplets of condensed water,
dripping water.
Pollution
No gap allowed
A. First loosen the upper nut
B. Adjust the lower nut
Figure II
Figure I
Bolt
Display part connection wire
Exert pulling force from
the position for
installing/removing
buckle
During the cover installation, slide four
fasteners into the corresponding slots
on the panel.
Installation cover rope
self-tapping screws
Remove the screws from all four corners of the installation cover
plate to release the cover plate rope, and take out the cover plate,
facing outwards.
CAUTION

Table 2-1 mm
(in=mm/25.4)
The outdoor unit should be installed in the location that meets
the following requiements:
Fig 4.1
S
Fig 4.2
4.2 Figure of body size
4.1 Installation Place
4 OUTDOOR UNIT INSTALLATION
NOTENOTE
All the figures in this manual are for explanation purpose only.
They may be slightly different from the air conditioner you
purchased.The actual uint shall prevail.
Strong wind
A
7
There is enough room for installation and maintenance.
The air outlet and the air inlet are not impeded, and can not be
reached by strong wind.
It must be a dry and well ventilating place.
The support is flat and horizontal and can stand the weight of
the outdoor unit. And will no additional noise or vibration.
Your neighborhood will not feel uncomfortable with the noise or
expelled air.
It is easy to install the connecting pipes or cables.
Determine the air outlet direction where the discharged air is not
blocked.
There is no danger of fire due to leakage of inflammable gas.
The piping length between the outdoor unit and the indoor unit
may not exceed the allowable piping length.
In the case that the installation place is exposed to strong wind
such as a seaside, make sure the fan operating properly by
putting the unit lengthwise along the wall or using a dust
shield.(Refer to Fig 4.1)
If possible, do not install the unit where it is exposed to direct
sunlight.
If necessary, install a blind that does not interfere with the air
flow.
Select the position where it will not be subject to snow drifts,
accumulation of leaves or other seasonal debris. If unavoidable,
please cover it with a shelter.
Locate the outdoor unit as close to the indoor unit as possible.
If possible, please remove the obstacles nearby to prevent the
performance from being impeded by too little of air circulation.
The minimum distance between the outdoor unit and obstacles
described in the installation chart does not mean that the same
is applicable to the situation of an airtight room. Leave open two
of the three directions (M,N,P)
Model
53
71/90
105/140
160
A
795
910
900
1040
B
514
663
590
656
C
340
403
390
463
D
365
427
440
523
E
287
345
360
410
F
330
390
406
452
H
555
712
840
865
Remark
Fig.4.2
Fig.4.2
Fig.4.3
Fig.4.3
Fig 4.3

5 WATER DISCHARGE PIPING LAYOUT
5.1 Installation of water discharge piping for
the IDU
Use PVC pipes for the water discharge pipes (outer diameter:
37–39 mm, inner diameter: 32 mm). Based on the actual
installation circumstance, users can purchase pipes with
appropriate length from sales agent or local after-sales service
center, or purchase directly from the market.
Insert the water discharge pipe into the end of the water suction
connecting pipe of the unit, and use the ring clamp (accessory)
to clamp the water discharge pipes with the insulation casing for
the water outlet piping securely.
Use insulation casing to evenly wrap the water suction piping
connections and water discharge piping of the unit (especially
the indoor portion) and bind them firmly to make sure air does
not enter and condense to form water.
In order to prevent the back-flow of water into the interior of the
air conditioner when the unit stops operating, the water
discharge pipe should slope downwards towards the outside
(drainage side) at a slope of more than 1/100. Make sure that
the water discharge pipe does not swell or store water,
otherwise it will cause abnormal sounds.
When connecting the water discharge piping, do not use force to
pull the pipes to prevent the water suction pipe connections from
coming loose. At the same time, set a supporting point at every
0.8–1.0 m to prevent the water discharge pipes from bending.
Slope of 1/100 or more
0.8–1.0 m
> 1.0 m
Make sure all the connections in the piping system are
properly sealed to prevent water leakages.
When pipe bending is required, use water outlet connecting
fittings in the junction box for pipe layout.
When a long water discharge pipe is connected, the indoor
portion must be covered with insulation casing to prevent the
long pipe from becoming loose.
When the outlet of the water discharge pipe is higher than the
pipe connection for water suction, try to keep the water
discharge pipe as vertical as possible, and the water outlet
connecting fittings will bend so that the height of the water
discharge pipe should be within 1000 mm away from the base of
the drainage pan. Otherwise there will be excessive water flow
when the operation stops.
The end of the water discharge pipe must be more than 50 mm
above the ground or from the base of the water discharge slot. In
addition, do not submerge it in water. To discharge the condensed
water directly into a ditch, the water discharge pipe must bend
upwards to form a U-shaped water plug to stop the odour from
entering the room via the water discharge pipe.
50–100 mm
200 mm
Water outlet
pipe fittings
Main water
outlet pipe
Slope of
1/100 or more
200 mm 200 mm
50–100 mm 50–100 mm
Do not exert too much force in order not to break the pipes.
Wrap both the suction piping and water discharge piping
evenly with heat insulation casing to prevent water
condensation.
Water discharge pipes from multiple units are connected to the main
water discharge pipe to be discharged through the sewage pipe.
>30cm
/11.81in
>30cm
/11.81in
>200cm
/78.74in
>60cm
/23.62in
(Wall or obstacle)
Maintain channel
Air outlet
Air inlet
M
P
Air inlet
N
Fig 4.4
4.3 Space of installation and maintenance
4.4 Moving and installation
Fig 4.5
Fix with bolt
Since the gravity center of the unit is not at its physical center,
so please be careful when lifting it with a sling.
Never hold the inlet of the outdoor unit to prevent it from
deforming.
Do not touch the fan with hands or other objects.
Do not lean it more than 45°, and do not lay it sidelong.
Make concrete foundation accoding to the sepecif-ications of
the outdoor units.(Refer to Fig.4.5)
Fasten the feet of this unit with bolts firmly to prevent it from
collapsing in case of earthquake or strong wind.(Refer to
Fig.4.6)
CAUTION
CAUTION
8

5.2 Water Discharge Test
Before the test, make sure that the water discharge pipeline is
smooth, and check that each connection is sealed properly.
Conduct the water discharge test in a new room before the
ceiling is paved.
2. Connect the power supply, and set the air conditioner to operate in
cooling mode. Check the sound of the drain pump, and check
whether the drainage outlet is discharging water properly (based on
the length of the pipe, the discharge may occur 1 minute), and check
for water leakage at each joint.
To water suction pipe
Test water outlet
Unit
Drainage pan
Water cover assembly
Water injection pipe
Water discharge trench
Faults, if any, need to be rectified in time.
The drainage plug at the bottom of the unit is used to discharge
accumulated water from the drainage pan when the air
conditioner malfunctions. When the air conditioner is operating
normally, make sure the drainage plug is properly plugged to
prevent water leakage.
3. Stop the air conditioner. Wait for three minutes, and then check if
there is anything unusual. If the water discharge piping layout is not
correct, the excessive water flow will cause the alarm indicator on the
control box to flicker. There may even be water overflowing from the
drainage pan.
4. Continue to add water until the alarm for excessive water levels is
triggered. Check if the drain pump drains water immediately. After
three minutes, if the water level does not fall below the warning level,
the unit will shut down. At this time, you need to turn off the power
supply, and drain away the accumulated water before you can start
up the unit normally.
5. Turn off the power supply, remove the water, and put the water
cover assembly back to the original place.
1. Remove the water cover assembly to connect to the test water
outlet, and use the water injection pipe to inject 2000 ml of water into
the drainage pan.
Measure the required length of the connecting pipe. Make the
connecting pipe using the following method (see the column Pipe
Connection for details).
1. Connect the IDUs before the ODU.
Bend and arrange pipes carefully without damaging the pipes
and their insulating layers.
Before tightening the flare nut, apply refrigerant oil on the outer
surface at the pipe flaring position and the conical surface of the
connecting nut (the refrigerant oil used must be compatible with
the refrigerant of this model), and screw it 3 to 4 turns with your
hand to tighten it as shown in the Fig 3-9.
When connecting or removing a pipe, use two wrenches at the
same time.
Do not put the weight of the connecting pipe on the connector of
the IDU. Otherwise, the heavy weight will deform the connector
and affect the cooling (heating) effect.
Do not bend a pipe more than 90 degrees (see the figure on the
right).
The bend should be as close as possible to the center of the
tube and the bend radius should not be less than 3.5D (pipe
diameter).
Do not bend the flexible tube back and forth more than 3 times.
When bending a pipe, cut off the required recess in the
insulation pipe at the bend and expose the pipe (wrap the bend
with a binding tie after bending).
Keep the elbow radius as much as possible to prevent flattening
or crushing. Use a pipe bender to make tight elbows.
2. The check valve of the ODU should be completely closed (e.g.
the ex-factory condition).
3. After the refrigerant pipe is connected to the IDU and ODU,
discharge the air according to the column Air Discharge. After the
air is discharged, tighten the service nut.
Precautions for flexible pipes:
Bend a thin-walled connecting pipe (see the right figure):
Unscrew nuts from the check valve in each connection, and
connect the flared tube immediately (within 5 minutes). When the
nut at the check valve is removed and placed for too long, dust
and other sundries may enter the pipeline system and cause
failures at a later time.
Fig 3-9
Apply refrigerant oil
Bend the pipe with your thumbs
connections of IDU and ODU
5.3 Connection of Connecting Pipe
Do not let air, dust, or other particles invade the pipeline system
during installation of the connecting pipes.
Install the connecting pipes only when the indoor and outdoor
units are secured.
Make sure to keep the connecting pipes dry during installation
so that no water will enter the piping system.
Connecting copper pipes must be wrapped with insulation
materials (thicker than 10mm, the thickness should be increased
if the unit is installed in a closed humid place).
CAUTION
Maximum
length (m) Maximum level
difference (m)
Maximum number
of bends
Notes: If the height difference is greater than the allowed level
difference, it is recommended to place ODU above the IDU.
20 15 15
Product
Model
53/71
30 20 15
90/105/120
50 25 15
140/160
CAUTION
CAUTION
9

After the refrigerant pipe is installed and before the refrigerant pipe
is connected to an ODU, inject nitrogen at a certain pressure and at
the same time from both gas and liquid sides (for the R410A
refrigerant model, inject 40 kgf/cm2 nitrogen (at 3.9 MPa)) for a
24-hour air tightness test.
Connect the refrigerant pipe to the gas side and liquid side of the
ODU. Use a vacuum pump to vacuumize the gas side and liquid
side of the ODU.
Turn on/off the valve core of the ODU by using a 5 mm hex wrench.
If the one-way pipe length is less than 5 m (including 5 m), the
refrigerant charging amount is determined according to the
nameplate.
If the one-way pipe length exceeds 5 m, the supplementary
refrigerant charging amount should be calculated according to
the pipe diameter and length of the liquid-side pipes of the IDU
and ODU. See the table below for details.
Record the amount of refrigerant charged and retain the record
for use during future maintenance.
Supplementary
Refrigerant Amount Remarks
L is the one-way
pipe length
L is the one-way
pipe length
Diameter of
Liquid-side Pipe
0.0115 kg (L-5)
0.027 kg (L-5)
Model
53/71
90/105/120
/140/160
The refrigerant sealed into the ODU must not be used for
vacuumizing.
Do not let air, dust, or other particles invade the pipeline
system during installation of the connecting pipes.
Install the connecting pipes only when the indoor and outdoor
units are secured.
Make sure to keep the connecting pipes dry during installation
so that no water will enter the piping system.
Connecting copper pipes must be wrapped with insulation
materials (thicker than 10 mm, the thickness should be
increased if the unit is installed in a closed humid place).
NOTE
Depending on the installation conditions, excessive torque will
damage the pipe socket, while inadequate torque will cause air
leakage. Refer to the following table to determine the tightening
torque.
1. Bend the pipe or drill a hole in the wall as needed. The
cross-sectional area of the pipe bending deformation must not
exceed 1/3 of the original pipe section. A protective casing should
be provided at the wall or floor hole. The weld joint must not be
inside the casing. The drill hole on the external wall must be sealed
and tightly wrapped with a binding tie to prevent impurities from
entering the pipe. The pipe must be insulated with an insulation pipe
of suitable size.
2. Insert the bundled piping and wiring from outside the room
through the wall opening into the room. Be careful when laying out
the pipes. Do not damage them.
After completing the above steps, the check valve stem of the ODU
should be fully opened to ensure that the refrigerant pipeline of the
IDU and ODU is unobstructed.
Use a leak detector or soapy water to carefully check for leakage
and ensure that there is no leakage. Cover the joint of the IDU with
a sound/heat insulation sleeve (accessory) and wrap it tightly with a
binding tie to prevent condensation and water leakage.
1. Flaring
2. Insert the pipe into the connection nut flare.
Align the connection pipe, tighten the
connecting nut with a hand, and tighten
them with a wrench as shown in the right
figure.
Use a pipe cutter to cut off the pipe, and rotate the pipe cutter
repeatedly to cut off the pipe.
If a copper pipe purchased from the market is used, the heat
insulation material of the copper pipe must be the same (thicker
than 10mm, the thickness should be increased if the unit is installed
in a closed humid place).
Method of unwinding the coil:
Straighten the pipe end
Pipe cutter
Rough
Slope Burrs
90 degrees
Outer diameter
(mm) Max. Min.
A (mm)
8.7
12.4
15.8
8.3
12.0
15.4
19.0 18.6
23.3 22.9
90 degrees ± 4
R0.4~0.8
A
Pipe size Tightening torque N.m
14.2 17.2 N.m (144 176 kgf.cm)
32.7 39.9 N.m (333 407 kgf.cm)
49.5 60.3 N.m (504 616 kgf.cm)
61.8 75.4 N.m (630 770 kgf.cm)
97.2 118.6 N.m (990 1210 kgf.cm)
CAUTION
CAUTION
10

Check leakage at the valve connector in the piping connection part
by using soap bubbles.
Carry out heat insulation treatment for the pipes at the gas and
liquid sides respectively. Pipes on the liquid and air sides have a
low temperature during cooling. Take sufficient insulation measures
to prevent condensation (see the figure on the right).
Attached
insulation belt
On-site
piping side
Unit
body
1. The pipes at the gas side must use heat insulation material that
can withstand high temperature up to at least 120°C.
2. The attached insulation material for the part of the IDU where the
pipe connects must undergo heat insulation treatment that leaves no
gaps.
The electric circult must be installed RCCB and manual switch.
6 ELECTRIC CONNECTION
Use special power supply for the air conditioner. Design power
supplies specific to the indoor unit and outdoor unit. The supply
voltage must comply with the nominal voltage.
The external supply circuit of the air conditioner must have a
ground wire, and the power supply ground wire of the indoor unit
must be connected with the external ground wire firmly.
The wiring must be performed by professional technicians
according to the circuit diagram labels.
Distribute the wires according to the relevant electric technical
standards promulgated by the State, and set the Residual
Current-operated Circuit Breaker (RCCB) properly.
The power wire and the signal wire shall be laid out neatly and
properly, without mutual interference or contacting the
connection pipe or valve.
No power cable is attached to this equipment. The user can
select the power cable by reference to the stipulated power
supply specifications. No joint of wires is allowed.
Upon completion of wire connection, double check it and then
connect the power supply.
An all-pole disconnection device which has at least 3mm
separation distance in all pole and a residual current
device(RCD)with the rating of above 10mA shall be incorporated
in the fixed wiring according to the national rule.
The appliance shall be installed in accordance with national
wiring regulations.
CAUTION
NOTE
Table 6-1
Please identify outdoor main unit and auxilary unit. Only main unit
connects with signal wire of indoor unit. Users should adjust the
dial on electric control board of outdoor unit as follows, otherwise
incorrect adjustment may cause malfunction.
Ground the air conditioner properly in case to affect its
anti-interference function
11
Specifications of power supply
Model Power
Switch capacity
of the main
power suppliy
(A)
Indoor/Outdoor
unit power
cable includes
grounded wire
(mm2)
4X2.5
53
2X2.5+1X2.5
220-240V~
50Hz 20
25
220-240V~
50Hz
71
2X4.0+1X4.0
4X2.5
Model Power
Switch capacity
of the main
power suppliy
(A)
power cable
includes
grounded wire
(mm2)
Connective
wire
(mm2)
3X0.75
3X0.75
3X0.75
3X0.75
6
6
6
6
220-240V
~ 50Hz
220-240V
~ 50Hz
220-240V
~ 50Hz
220-240V
~ 50Hz
120
140
105
90
2X1.0+1X1.0
2X2.5+1X2.5
3X0.75
6
220-240V
~ 50Hz
160
25
32
32
40
40
2X1.0+1X1.0
2X4.0+1X4.0
2X1.0+1X1.0
2X4.0+1X4.0
2X1.0+1X1.0
2X6.0+1X6.0
2X1.0+1X1.0
2X6.0+1X6.0
indoor unit
outdoor unit
indoor unit
outdoor unit
indoor unit
outdoor unit
indoor unit
outdoor unit
indoor unit
outdoor unit
power cable
includes
grounded wire
(mm2)

12
7 ELECTRIC WIRE DIAGRAM
Fig 7.1
indoor
unit
N
L
L
N
L
N
S
Outdoor
unit
Power Supply
220-240V
~ 50Hz
Indoor unit
power wire Outdoor unit
power wire
indoor
unit
L
N
Outdoor
unit
Indoor unit
power wire
Outdoor unit
power wire
L
N
P
Q
E
X
Y
E
53/71
90-160
Pay attention to the phase sequence of the power supply. If the
phase sequence is reversed, the compressor will not start.
Meanwhile, the fault indicator of the outdoor electric control
board will light up. For details, see outdoor unit wring diagram
on the cover plate of the electric control box .
After shifting the phase sequence, power on the unit until the
fault indicator goes out and the compressor starts up normally.
For t he mo d el 3 2 , 53 a nd =, it i s n ecc ess ary t o i ns tal l a
Time-delay relay on the electric wire to prevent the compressor
with frequent start-stop, refer to Fig 7.1. It is recommended to
set about 10~15 minute delay on the Time-delay relay.
NOTE
8 TRIAL RUN
Please conduct in accordance with “Trial Run Tenor Nameplate”
on the electric control box.
Perform trial run only after all installations are finished.
Confirm the following issues before trial operation, and the
box for the confirmed items.
Perform the trial run only after the outdoor unit has been
powered on for over 12 hours.
Check that all valves are opened before trial run.
Check the electric safety before trial run.
Do not perform compulsory operation in any way.(It is very
dangerous if the protection device is not active)
Check whether the indoor unit and the outdoor are
installed properly.
Check whether the piping and wiring are correct.
Check whether the refrigerant pipeline system is
inspected for leakage.
Check whether the drain is smooth.
Check whether the heat insulation is perfect.
Check whether the ground cables are connected
correctly.
Check whether the pipe length and the refrigerant
amount are recorded.
Check whether the supply voltage is equal to the rated
voltage of the air conditioner.
Check whether any obstacles exist at the air
inlet/outlet of the indoor or outdoor unit.
Open the gas valve and the liquid valve.
Connect the power supply to preheat the air
conditioner.
CAUTION
P
Q
E
Power Supply
220-240V
~ 50Hz
Power Supply
220-240V
~ 50Hz
S
Central controller
Power
Supply
indoor
unit
remote
controller
The communication wire should be 3-core
shielding wire, and the sheilding wire
layer must be connected the earth of sheet metal.
(Optional)

Other manuals for OTEC IECS-D Series
2
Table of contents
Other Omega Air Conditioner manuals
Popular Air Conditioner manuals by other brands

Mitsubishi Electric
Mitsubishi Electric PEFY-P-VML-E Operation manual

Gree
Gree GWA2107BM operating instructions

Linea 2000
Linea 2000 DOMO DO-261A Instruction booklet

Taurus
Taurus ALPATEC AC 3100 KT manual

LG
LG UB18 owner's manual

Mitsubishi Heavy Industries
Mitsubishi Heavy Industries FDTC40ZSXVF Technical manual