Omega OTEC IEWB Series User manual

IEWB/ICHB Series
208~230V/1/50-60Hz
19 SEER Hygienic Mini Split
Service Manual

Content
1. Safety Precautions.........................................................................................................................1
2. Troubleshooting ...........................................................................................................................4
2.1 Safety caution....................................................................................................................4
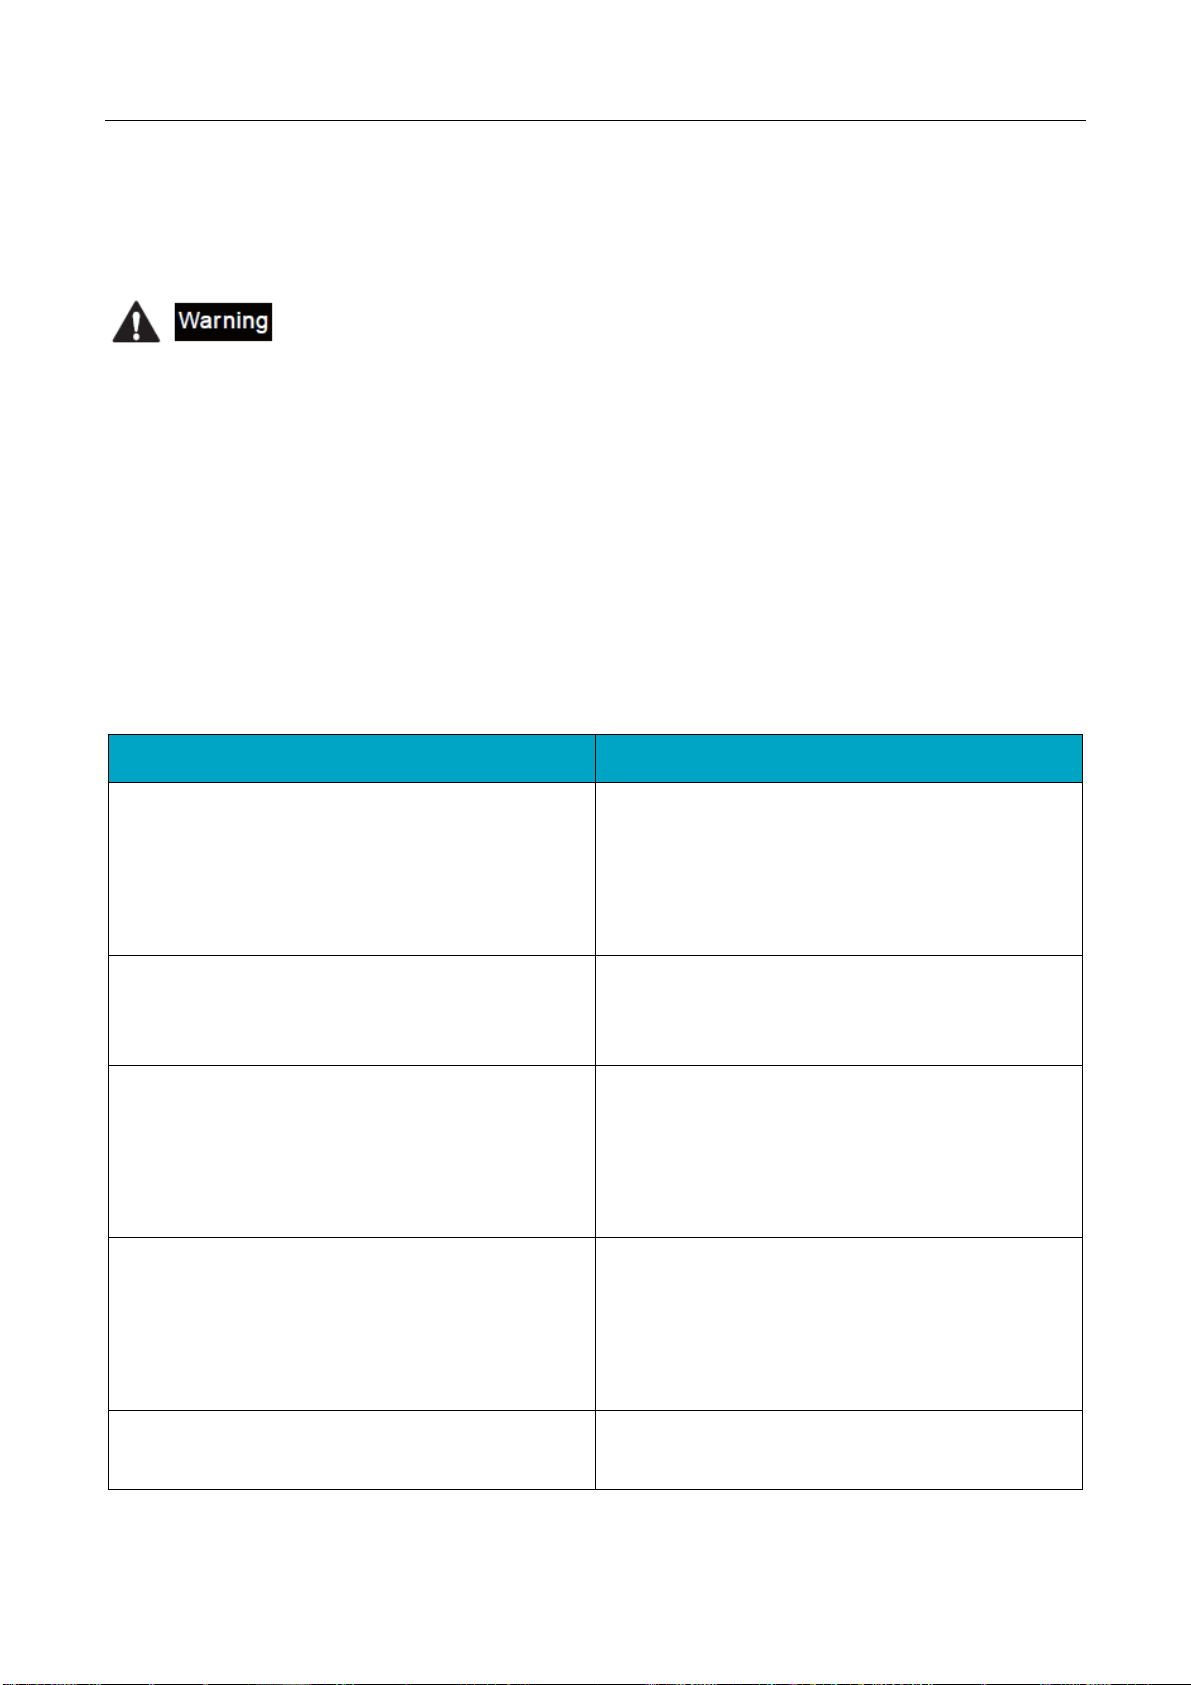
2.2 Error diagnosis and solution without error code.................................................................4
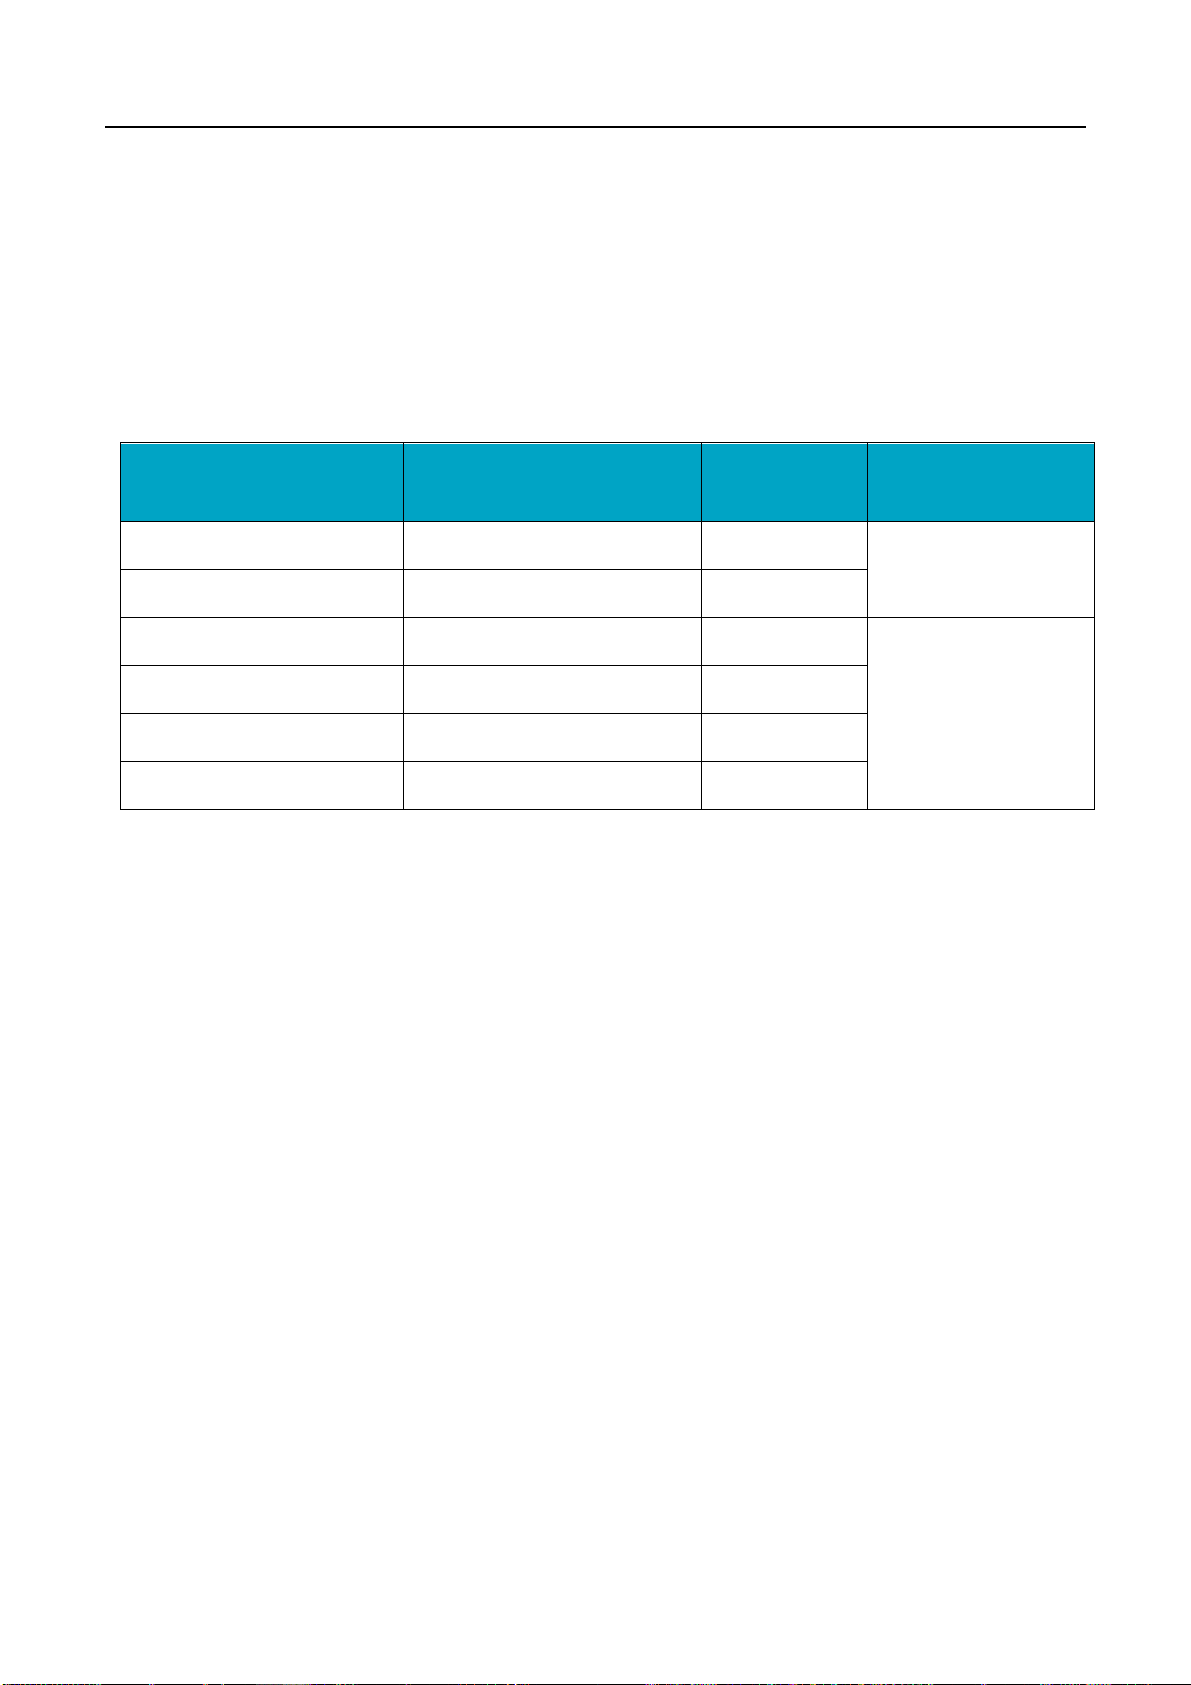
2.3 Error code list....................................................................................................................6
2.4 Spot check.........................................................................................................................7
2.4 Troubleshooting by error code ...........................................................................................8
Indoor unit error ..............................................................................................................8
2.4.1 E1 (IDU) Communication failure between indoor and outdoor unit.........................8
2.4.2 E2, E3, E4 (IDU) temperature sensor fault ..............................................................8
2.4.3 E6 (IDU) Zero-crossing detection fault ...................................................................9
2.4.4 E7 (IDU) EEPROM error........................................................................................9
2.4.5 E8 (IDU) PG fan motor stall protection...................................................................9
2.4.6 E9 (IDU) Communication fault of wired controller .................................................10
2.4.7 HC Room card port disconnected port.....................................................................10
Outdoor unit error............................................................................................................11
2.4.8 E2 (ODU) Communication failure between indoor and outdoor unit .......................11
2.4.9 E4, E5, E6 (ODU) temperature sensor fault.............................................................11
2.4.10 E9 (ODU) AC over-voltage / under-voltage protection..........................................11
2.4.11 E10 (ODU) Outdoor unit EEPROM error..............................................................11
2.4.12 E11 (ODU) Indoor unit fan motor fault .................................................................11
2.4.13 E12 (ODU) IPM temperature sensor fault .............................................................11
2.4.14 E2x Outdoor unit fan motor fault ..........................................................................12
2.4.15 H2x Compressor fault ...........................................................................................12
2.4.16 P3 Primary / secondary over-current protection.....................................................12
2.4.17 P4 High discharge temperature protection .............................................................13
2.4.18 P5 High condenser temperature protection ............................................................13
2.4.19 P6 IPM module fault.............................................................................................13
2.4.20 P7 IDU anti-frosting protection.............................................................................14
2.4.21 P8 High IPM temperature protection.....................................................................14
2.4.22 P9 Outdoor unit fan motor stall protection.............................................................15
2.4.23 P11 High evaporator temperature protection .........................................................15

1
1. Safety Precautions
Read Safety Precautions Before Installation
Incorrect installation due to ignoring instructions can cause serious damage or injury.
The seriousness of potential damage or injuries is classified as either a WARNING or CAUTION.
This symbol indicates that ignoring instructions may cause death or serious injury.
This symbol indicates that ignoring instructions may cause moderate injury to
your or damage to your appliance or other property.
This appliance can be used by children aged from 8 years and above and persons with reduced physical,
sensory or mental capabilities or lack of experience and knowledge if they have been given supervision
or instruction concerning use of the appliance in a safe way and understand the hazards involved.
Children shall not play with the appliance. Cleaning and user maintenance shall not be made by
children without supervision.
I. Installation Warnings
Ask an authorized dealer to install this air conditioner. Inappropriate installation may cause
water leakage, electric shock, or fire.
All repairs, maintenance and relocation of the unit must be performed by an authorized service
technician. Inappropriate repairs can lead to serious injury or product failure.
II. Warnings for product use
If an abnormal situation arises (like a burning smell), immediately turn off the unit and pull
the power plug.
Call your dealer for instructions to avoid electric shock, fire or injury.
Do not insert fingers, rods or other objects into the air inlet or outlet. This may cause injury,
since the fan may be rotating at high speeds.
Do not use flammable sprays such as hair spray, lacquer or paint near the unit. This may cause
fire or combustion.
Do not operate the air conditioner in places near or around combustible gases. Emitted gas
may collect around the unit and cause explosion.
Do not operate the air conditioner in a wet room (e.g., bath room or laundry room). This can
cause electrical shock and cause the product to deteriorate.
Do not expose your body directly to cool air for a prolonged period of time.

2
III. Electrical Warnings
Only use the specified power cord. If the power cord is damaged, it must be replaced by the
manufacturer or certified service agent.
Keep power plug clean. Remove any dust or grime that accumulates on or around the plug.
Dirty plugs can cause fire or electric shock.
Do not pull power cord to unplug unit. Hold the plug firmly and pull it from the outlet. Pulling
directly on the cord can damage it, which can lead to fire or electric shock.
Do not use an extension cord, manually extend the power cord, or connect other appliances
to the same outlet as the air conditioner. Poor electrical connections, poor insulation, and
insufficient voltage can cause fire.
IV. Cleaning and Maintenance Warnings
Turn off the device and pull the plug before cleaning. Failure to do so can cause electrical
shock.
Do not clean the air conditioner with excessive amounts of water.
Do not clean the air conditioner with combustible cleaning agents. Combustible cleaning
agents can cause fire or deformation.
⚫If the air conditioner is used together with burners or other heating devices, thoroughly ventilate
the room to avoid oxygen deficiency.
⚫Turn off the air conditioner and unplug the unit if you are not going to use if for a long time.
⚫Turn off and unplug the unit during storms.
⚫Make sure that water condensation can drain unhindered from the unit.
⚫Do not operate the air conditioner with wet hands. This may cause electric shock.
⚫Do not use device for any other purpose than its intended use.
⚫Do not climb onto or place objects on top of the outdoor unit.
⚫Do not allow the air conditioner to operate for long periods of time with doors or windows open,
or if the humidity is very high.

3
2 Specifications
2.1 Model Reference
Refer to the following table to determine the specific indoor and outdoor unit model number of your
purchased equipment.
Hygienic Heat pump
Indoor unit model Outdoor unit model Capacity
(Btu/h) Power supply
IEWB009J1A-CWJ026CWA ICHB009J1A-CTJ026GFA 9K 115V/60Hz/1Ph
IEWB012J1A-CWJ035CWA ICHB012J1A-CTJ035GFA 12K
IEWB009J0A-CWJ026CWA ICHB009J0A-CTJ026GFA 9K
208~230V/50-60Hz/1Ph
IEWB012J0A-CWJ035CWA ICHB012J0A-CTJ035GFA 12K
IEWB018J2A-CWJ053CWA ICHB018J0A-CTJ053GFA 18K
IEWB024J0A-CWJ070CWA ICHB024J0A-CTJ070GFA 24K

4
2 Troubleshooting
2.1 Safety caution
⚫Be sure to turn off all power supplies or disconnect all wires to avoid electric shock. While
checking indoor/outdoor PCB, please equip oneself with antistatic gloves or wrist strap to avoid
damage to the board.
⚫Electricity remains in capacitors even when the power supply is off.
⚫Ensure the capacitors are fully discharged before troubleshooting.
(Test the voltage between P and N on back of the main PCB with multimeter. If the voltage is lower
than 36V, the capacitors are fully discharged.)
2.2 Error diagnosis and solution without error code
Some phenomena are easily thought as error, but actually not.
Phenomena
Reasons
The unit can’t be restarted just after shut down.
(RUN lamp is ON)
Restart stop for 3 minutes after shut down to
protect the unit. Three minutes protection timer
incorporated in the microcomputer actuates
automatically. Except that power is connected,
this function does not actuate.
Air is not blown out at starting of heating
operation.
Air blow is stopped to prevent blowing out cold
air when the indoor heat exchanger is not
warmed enough. (2 to 5 min)
Air is not blown out for 6 to 12 min in heating
mode
When outdoor temperature is low and humidity
is high, the unit sometimes performs defrosting
mode automatically. Please wait. During
defrosting mode, water or steam are raising from
the outdoor unit.
The unit will not stop blowing out the air
immediately after shut down at cooling operation
(some model)
The drying function may be activated, please
wait for the end of the operation or use the
remote control to turn off the drying function.
The louver will not close down until after 30
seconds.
Air is not blown out at dehumidification
operation.
Indoor fan is sometimes stopped to prevent
moisture from evaporating and to save energy.

5
Mist is blown out.
When the room humidity is relatively high, the
cooling operation or heating operation defrosting
ends, the air outlet may blow out water mist,
which is a normal physical phenomenon.
Water may on the air outlet grilles.
When the ambient humidity is relatively
high, water droplets will be generated in the
air outlet, panel and other parts, which is a
normal physical phenomenon;
Long-term cooling operation in an open
space will produce water droplets, please
close the doors and windows.
If the panel is not tightly closed, causing air
leakage, water droplets may be generated on
the panel. Please close the panel securely.
Stop after some time running
Reach setting temperature
In defrosting mode
Timer OFF is set
Strange sound in indoor unit
The dust filter accumulates too much dust.
Please clean the dust filter in time;
When the plastic parts of the indoor unit
expand and contract with heat, it may
produce frictional sound.
After the "TURBO" function is turned on,
the wind noise is loud.
The indoor unit panel is not closed tightly or
the air inlet is obstructed. Please close the
panel again or remove the obstruction of the
air inlet.
Strange sound in outdoor unit
The sound of refrigerant flowing when it is
running or just stopped, which is a normal
phenomenon.
After running for a period of time, a "puff"
sound is made, which is the sound of the
four-way valve reversing when the outdoor
unit turns to defrosting mode, which is a
normal phenomenon.

6
2.3 Error code list
2.2.1 Indoor unit error code
Definitions of malfunction
Error code
Communication failure between indoor and outdoor unit
E1
T1 room temperature sensor fault
E2
T2 temperature sensor fault
E3
T2B temperature sensor fault
E4
Outdoor unit fault
E5
Zero-crossing detection fault
E6
EEPROM error
E7
PG fan motor stall protection
E8
Communication fault of wired controller
E9
Room card port disconnected port
HC
When it shows E5, press to show more error code.
Definitions of malfunction
Error code
Communication failure between indoor and outdoor unit
E2
T4 ambient temperature sensor fault
E4
T5 discharge temperature sensor fault
E5
T3 condenser pipe temperature sensor fault
E6
Indoor unit EEPROM error
E7
AC over-voltage / under-voltage protection
E9
Outdoor unit EEPROM error
E10
Indoor unit fan motor fault
E11
IPM temperature sensor fault
E12
Outdoor unit fan motor fault
E2x
Compressor fault
H2x
PFC fault
H3x

7
Primary / secondary over-current protection
P3
High discharge temperature protection
P4
High condenser temperature protection
P5
IPM module fault
P6
IDU anti-frosting protection
P7
High IPM temperature protection
P8
Outdoor unit fan motor stall protection
P9
High evaporator temperature protection
P11
DC bus low voltage protection
L1
DC bus high voltage protection
L2
MCE fault / sync / compressor start fault
L4
Zero speed protection
L5
Phase sequence error protection
L7
Compressor stall fault
L8
Frequency limitation because of voltage
LA
Frequency limitation because of evaporator temperature
LB
Frequency limitation because of condenser temperature
LC
Frequency limitation because of discharge temperature
LD
Frequency limitation because of high IPM temperature
LE
Frequency limitation because of current
LF
2.4 Spot check
⚫Method 1: After powering on 5s, long press the button in indoor unit PCB for 5s, to enter spot
check. And then short press this button to read more parameters.
⚫Method 2: After powering on, press “up & down swing” and “left & right swing” button alternately
5 times within 10 seconds to enter spot check. Press “up & down swing” and “left & right swing”
button to read more parameters.
⚫Spot check table:

8
No.
Content
0-
Setting temperature
1-
Indoor temperature (T1),
2-
Indoor unit evaporator temperature (T2 or T2B)
3-
EEPROM code
4-
Software code
5-
Outdoor unit error code
6-
Outdoor unit running frequency
7-
Outdoor unit condenser temperature (T3)
8-
Outdoor ambient temperature (T4)
9-
Indoor unit fan speed (f0 means 1500rpm, a1 means 1010rpm)
2.4 Troubleshooting by error code
Indoor unit error
2.4.1 E1 (IDU) Communication failure between indoor and outdoor unit
Description: the indoor unit didn’t receive feedback from outdoor unit within 1 minute.
Possible reason:
Bad connection of communication wire
Fault indoor or outdoor unit PCB
Troubleshooting and repair:
a) Check if the wiring connection between outdoor and indoor unit is loose.
b) Power off and then repower on the unit after 3 minutes. If error code disappear, problem is solved.
If not, go to next step.
c) Measure the DC voltage between P and N on back of the main PCB with multi meter.
2.4.2 E2, E3, E4 (IDU) temperature sensor fault
Description: the sampling voltage is lower than 0.06V or higher than 4.94V.
Possible reason:
Open circuit or short circuit of relevant port.
Faulty temperature sensor

9
Faulty PCB
Troubleshooting and repair:
a) Check the connection between temperature sensor and PCB.
b) Measure the resistance of sensor, and compare it with appendix table.
c) If above items are no problem, replace a new PCB.
2.4.3 E6 (IDU) Zero-crossing detection fault
Description: When PCB does not receive zero crossing signal feedback for 4 minutes or the zero
crossing signal time interval is abnormal.
Possible reason:
Wrong connection
Faulty PCB
Troubleshooting and repair:
a) Check the wire connections one by one according to wiring diagram.
b) Check power supply.
c) Change a new indoor unit PCB.
2.4.4 E7 (IDU) EEPROM error
Description: Indoor PCB main chip does not receive feedback from EEPROM chip.
Possible reason:
Faulty indoor unit PCB
Troubleshooting and repair:
a) Cut off the power supply and then repower on the unit after 3 minutes.
b) If the error still occurs, change a new PCB.
2.4.5 E8 (IDU) PG fan motor stall protection
Description: When the indoor fan speed is below 300rpm or over 2100rpm for 50s, the unit will stop
and show E8 error.
Possible reason:
Wrong wires connection
Faulty fan assembly
Faulty fan motor
Faulty PCB
Troubleshooting and repair:
a) Cut off the power supply and then repower on the unit after 3 minutes. If it still has problem, go
to next step.

10
b) Cut off the power supply and rotate the fan blade by hand. If it can’t rotate smoothly, check if
there is any block. Otherwise, go to next step.
c) Check the wiring of fan motor.
d) Measure the voltage of fan motor from PCB. If the parameters are normal, replace a new fan motor.
If not, replace indoor unit PCB.
Note:
DC fan motor voltage: Measure the voltage when the unit is in standby.
No.
Color
Signal
Voltage
1
Red
Vdc
150~340V
2
--
--
3
Black
GND
0V
4
White
Vcc
14~17.5V
5
Yellow
Vsp
0~5.6V
6
Blue
FG
14~17.5V
AC fan motor voltage: Power on and set the unit running in fan mode at high fan speed. After
running for 15 seconds, measure the voltage of red and black wire. If the value of the voltage
is less than 100V (208~240V power supply), the PCB must has problems and need to be
replaced.
2.4.6 E9 (IDU) Communication fault of wired controller
Troubleshooting and repair:
a) Check the connection between wired controller and indoor PCB.
b) Change another wired controller.
c) Change a new indoor PCB.
2.4.7 HC Room card port disconnected port
Possible reason:
Short circuit is not connected in CN2 port

11
Faulty problem
Troubleshooting and repair:
a) Check if there is a short circuit in CN2 port.
b) Change a new PCB.
Outdoor unit error
2.4.8 E2 (ODU) Communication failure between indoor and outdoor unit
Same as 5.4.1
2.4.9 E4, E5, E6 (ODU) temperature sensor fault
Same as 5.4.2
2.4.10 E9 (ODU) AC over-voltage / under-voltage protection
Description: Abnormal increases or decreases in voltage are detected by checking the specified
voltage of detection circuit.
Possible reason:
Power supply error
Refrigerant system leakage or block
Faulty outdoor unit PCB
Troubleshooting and repair:
a) Check the power supply and measure the voltage.
b) Repower on the unit and measure the voltage between P and N. When the unit is in standby, is the
voltage between P and N about 310VDC, 340VDC or 380VDC? When start up the unit, is it in
220V~400V? If not, replace a new outdoor PCB. If yes, go to next step.
c) Check the reactor.
2.4.11 E10 (ODU) Outdoor unit EEPROM error
Same as 5.4.4
2.4.12 E11 (ODU) Indoor unit fan motor fault
Please refer to 5.4.5
2.4.13 E12 (ODU) IPM temperature sensor fault
Description: the sampling voltage is not at 5V
Possible reason:
Power supply error

12
Refrigerant system leakage or block
Faulty outdoor unit PCB
Connection problem
Troubleshooting and repair:
a) Check the power supply.
b) Check the fastening screws on the PCB and IPM radiator. If they are not fixed tightly, tighten the
screws and apply silicon grease. Otherwise, go to next step.
c) Change a new outdoor unit PCB.
2.4.14 E2x Outdoor unit fan motor fault
Description: When the chip detects the fan IPM overcurrent, it reports a fault
Troubleshooting and repair:
a) Cut off power supply and then rotate the fan blade by hand, to check whether the fan is blocked
or the screws are not tightened.
b) Check the connection between fan motor and PCB
c) Change a new PCB
2.4.15 H2x Compressor fault
Description: An abnormal inverter compressor drive is detected by a special detection circuit,
including communication signal detection, voltage detection, current detection, compressor rotation
speed signal detection and so on.
Possible reason:
Wrong wiring connection
IPM malfunction
Compressor malfunction
Faulty outdoor unit PCB
Outdoor unit fan motor
Troubleshooting and repair:
a) Check the wiring between PCB and compressor according to wiring diagram.
b) Check the outdoor unit fan and outdoor unit ventilation.
c) Check the compressor resistance
d) If all are no problem, change the outdoor PCB.
2.4.16 P3 Primary / secondary over-current protection
Description: detected current is higher than setting value.
Possible reason:

13
Refrigerant is too much
Liquid side is block
Heat exchanging in outdoor unit is not good
Compressor malfunction
2.4.17 P4 High discharge temperature protection
Description: discharge temperature is higher than 115℃.
Possible reason:
Lack of refrigerant
High ambient temperature or heat exchanging in condenser side is bad
There is air or N2 or water in refrigerant system
Block in low pressure side
Troubleshooting and repair:
a) Check the refrigerant charging record and check if there is any leakage point.
b) Whether it is too dirty in outdoor coil? Improve the ventilation condition.
c) Check whether the fan motor can work normally.
2.4.18 P5 High condenser temperature protection
Description: in cooling mode or dry mode, the T3 temperature is higher than setting value.
Possible reason:
Bad ventilation
Faulty temperature sensor
Faulty PCB
Troubleshooting and repair:
a) Check the heat exchange of outdoor unit condenser is good or not.
b) Check the temperature sensor resistance.
2.4.19 P6 IPM module fault
Description: Below table shows detailed error code about P6.
DC bus low voltage protection
L1
DC bus high voltage protection
L2
MCE fault / sync / compressor start fault
L4
Zero speed protection
L5

14
Phase sequence error protection
L7
Compressor stall fault
L8
Possible reason:
Wrong wire connection
IPM malfunction
Compressor malfunction
Faulty PCB
Troubleshooting and repair:
a) Check the wiring between PCB and compressor.
b) Check the outdoor unit fan and ventilation.
c) Check the IPM in PCB.
d) Check the resistance of compressor.
e) If all are normal, change a new PCB.
2.4.20 P7 IDU anti-frosting protection
Description: indoor unit evaporator temperature T2 is lower than 0℃.
Possible reason:
Filter or evaporator is dirty
Indoor fan motor can’t work normally or the flap is closed
Troubleshooting and repair:
a) Clear the filter and evaporator
b) Check the fan motor
2.4.21 P8 High IPM temperature protection
Description: the detected temperature of IPM is higher than 100℃.
Possible reason:
Power supply issue
System leakage or block
Faulty outdoor unit PCB
Connection problem
Troubleshooting and repair:
d) Check the power supply.
e) Check the fastening screws on the PCB and IPM radiator. If they are not fixed tightly, tighten the
screws and apply silicon grease. Otherwise, go to next step.

15
f) Change a new outdoor unit PCB.
2.4.22 P9 Outdoor unit fan motor stall protection
Please refer to 5.4.5
2.4.23 P11 High evaporator temperature protection
Description: Indoor unit evaporator temperature (T2) is higher than 65℃.
Possible reason:
Abnormal T2 temperature sensor
Faulty 4-way valve
Bad ventilation
Refrigerant is not enough
Troubleshooting and repair:
a) Measure the resistance of T2 sensor
b) Check the 4-way valve connection. If unit is in heating mode, there is a 220V output in 4-way
valve port.
c) Check if evaporator is too dirty.
d) Confirm the refrigerant volume.

OMEGA IEWB/ICHB Certified Mini Split Service Manual
info@otecomega.com
www.otecomega.com
info@otecomega.com
www.otecomega.com
IEWB(CHB)I(J)0(1,2)A-SM1G0922
This manual suits for next models
13
Table of contents
Other Omega Air Conditioner manuals
Popular Air Conditioner manuals by other brands

Hitachi
Hitachi RA-13JF1 Operation and installation manual

Frigidaire
Frigidaire LRA257ST216 installation instructions

Diplomat
Diplomat DX-80CHRC instruction manual

nedis
nedis ACMB1WT9 quick start guide

Mitsubishi Electric
Mitsubishi Electric Mr.Slim MS-GK36VA operating instructions

LG
LG LP0711WNR specification

Sharp
Sharp AH-AP18DR Service manual

Mitsubishi Electric
Mitsubishi Electric Mr. SLIM SLZ-M15FA2.TH Technical & service manual

Mitsubishi
Mitsubishi Mr.Slim PKA-A-GA installation manual

Arctic King
Arctic King wwk05cr61n Energy guide

LG
LG LS243HLV3 Engineering manual

Mitsubishi Electric
Mitsubishi Electric MS-D30VC operating instructions