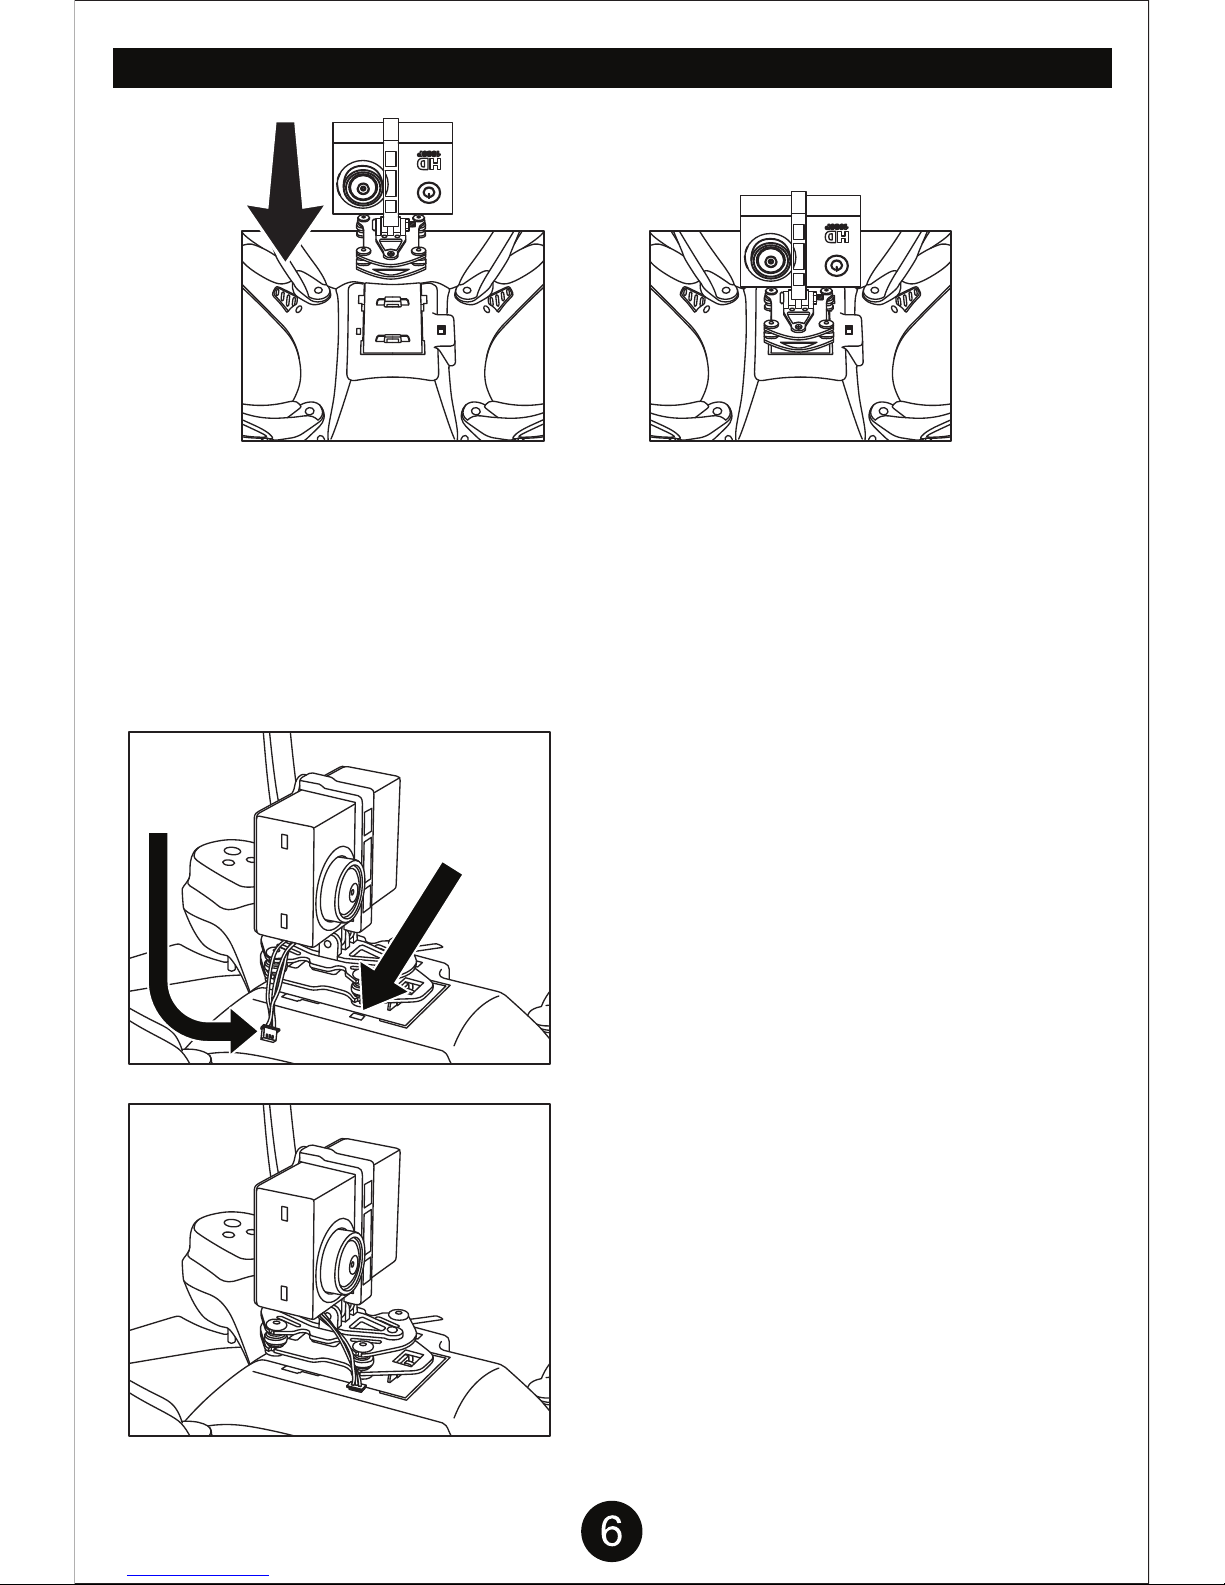
SD Card Installation: Insert the SD card into the slot, lightly press until the SD card clicks into place. Press the SD card to
eject the card. The camera indicator WILL BLINK unless the SD card is properly inserted.
Turn the drone off. Remove the SD card, then install it into the included memory card USB adaptor and plug it into a
computer. Videos and photos can be viewed using media players. If you are having issues viewing your drone videos, try
downloading and viewing the video files with VLC media player.
SYNCING AND LCD INTERFACE PROCEDURE
USING THE CAMERA
VIEWING VIDEO/PHOTO FILES ON THE COMPUTER
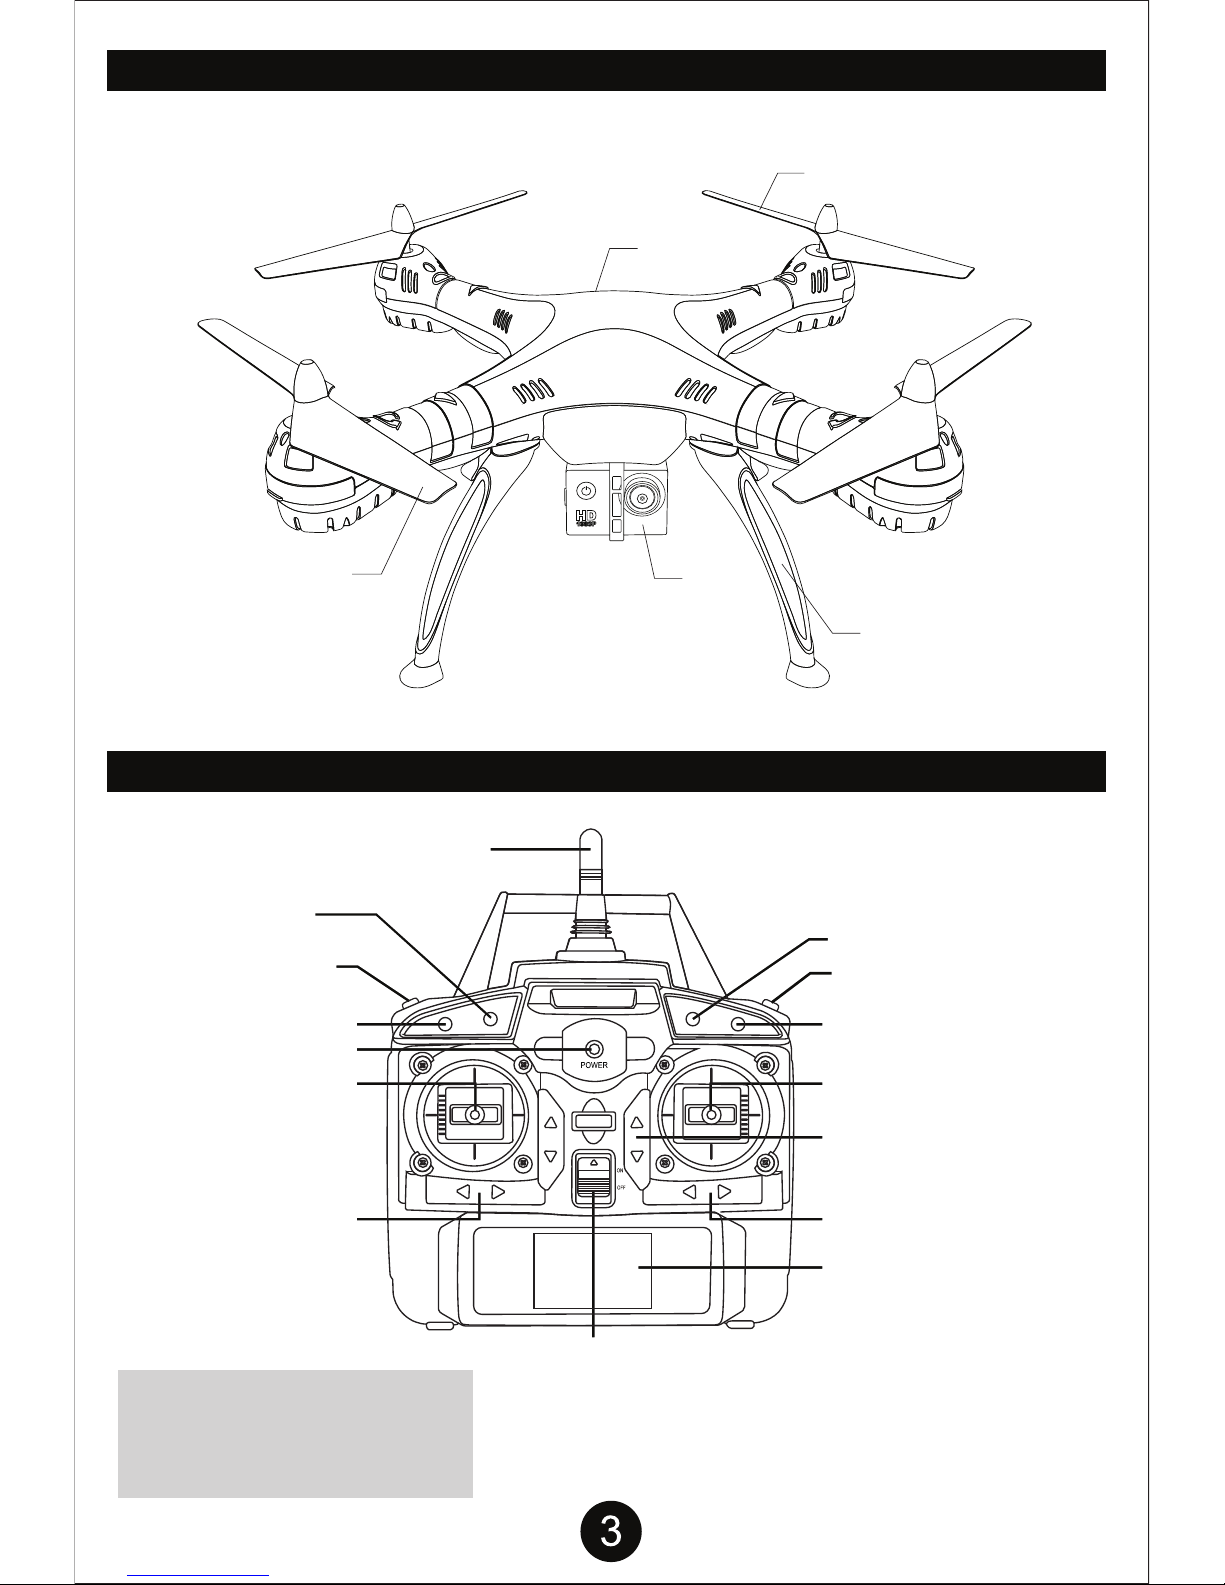
Signal Icon
Speed Display
Left/Right Turn
Trimming Display
Camera Indicator
Battery Level
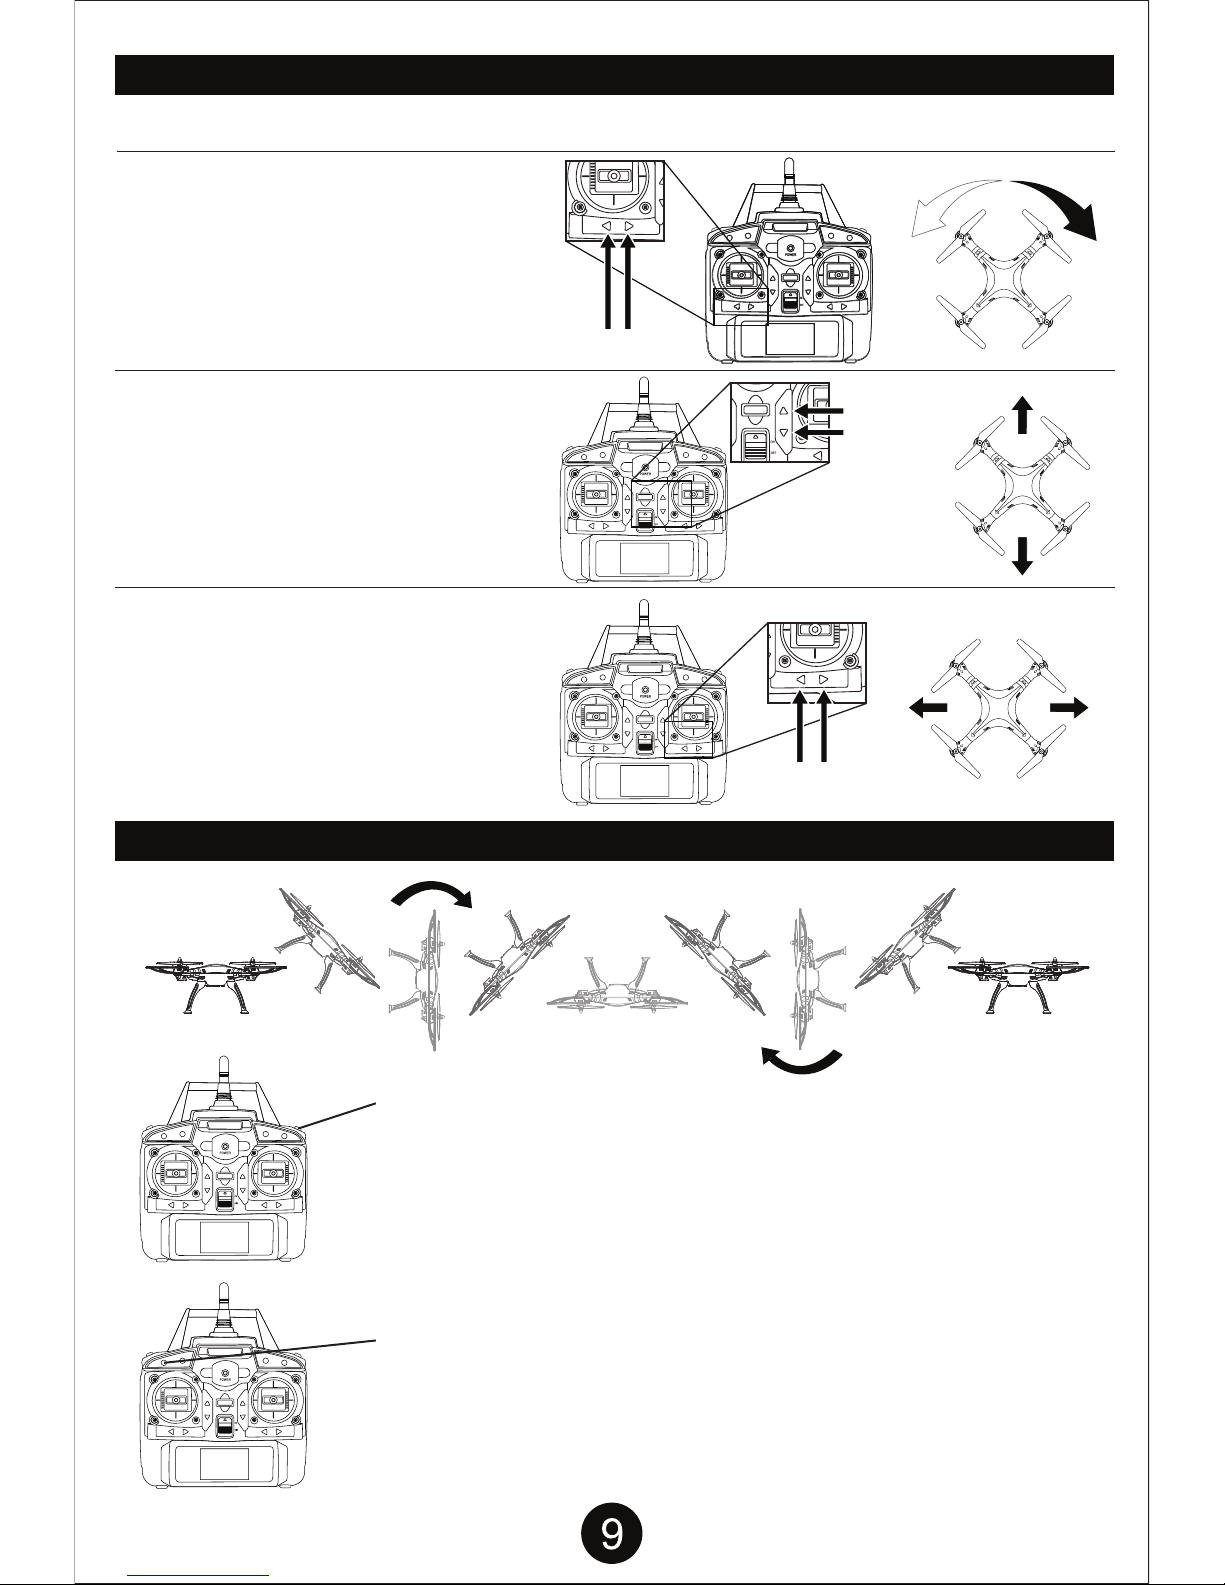
Stick Modes
Display
Forward/Backward
Trim Display
Left/Right
Sideways
Trim Display
After installing the batteries, turn the transmitter
switch to “ON.” The power indicator light flashes
and the signal icon “ ” appears in the top left of
the LCD screen, when there is no signal. After the
transmitter successfully pairs with the drone, the
transmitter will beep twice and the signal icon
changes to “ ”. Push the Ascend/Descend
control to the top, then pull the control back to the
bottom. The transmitter will beep once. The power
indicator will light. The transmitter has successfully
paired with the drone and control information
appears on the LED screen.
Once the USB adaptor with the memory card is plugged in, Windows AutoPlay will give you options to quickly access files
saved, select “Open folder to view files” to go directly to the files location on card.
In Mac, locate the memory cards mounted image and open folder to access the saved files.
Right click video files and select “Open with” to select VLC media player and open and view video files.
To save time in the future select “Choose default program...” to select VLC as the program to open the selected file type.
Once set files will automatically open in VLC media player when double clicked to open.
Download the latest version for the operating system you are using and install the VLC program. Restart your
computer if necessary.
http://www.videolan.org/vlc/index.html
VLC media player
Recording Video/Taking Photos: Turn on the drone, press the Video Record button to start recording video.
Press the button again to stop recording and save the video onto the SD card. Press the Photo button to take a single
image When the light flashes once, a photo will be taken, which will then be saved onto the SD card.
NOTE: Pictures cannot be taken while camera is in Video Recording Mode.
• Blue: Camera Standby Status
•Blue Light Flashing: Recording Video
• Blue Light Stops Flashing: Stops Recording Video
• Green Light Flashes Once: Taking Photo
Indicator Lights of Camera: