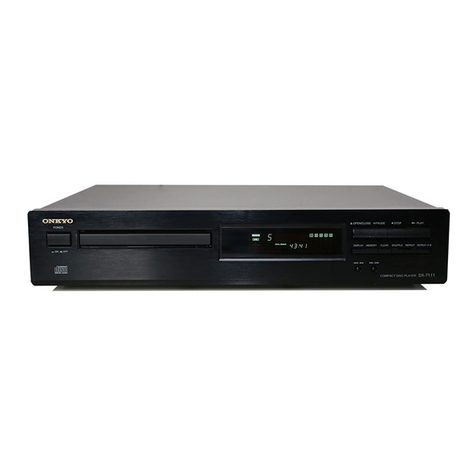
Onkyo DX-3500 User manual

DX-3500
Compact
Disc
Player
Compact
Disc-spieler
Lecteur
dedisque
audionumérique
Tocadiscos
CD
Compact
Disc
Speler
CD-skivspelare
Riproduttore
didischi
compatti
Page
Instruction
Manual z
Bedienungsanleitung 12
Manuel
d'instructions zz
Manuel
de instrucciones
s2
Gebruiksaanwijzing 42
Bruksanvisning s2
lstruzioni
perI'uso 62
I

SPECIALCAUTIONS FOR
COMPACT DISC PLAYÊR
This CompactDisc Pl6yeÍcontainsa sêmiconductor
lsseÍsystêmand isctassiíiedass "CLASS 1 LASÊRPRODUCT".
So,to usethis modstpÍoperty,
read
this Owneí's Manualcàêíully. In casêoí sny trcuble, pleáse
conlactthe storewheíeyou puÍchásed
th€ unit.To píevent
beingexpGed ro th€ lasêÍbeam,
do not try to oDenthe ênclosuÍs,
BESONDEREVORSICHTSMASSNAHMEN FUA CD-SPIELER
Dies€r
CD-Spielelentháhein Hálbl€heílassrsystem
und i3tdáher6an
"LASERERZEUGNIS
DERKLASS€1'. RichrigeB€diênungisteístnach DuÍchtes€n
der Bedienungsanleitung
móOlich.N€hmên
Sieim Falle
eineÍStóÍung Kontaklaul mit lhíemVenrcgshándler.Um BesrÍahlungzu vermeiden,
solltenSiedas
Gehàuseniemals
óíínen.
MISE ENGAROÉ PARTICULIERE
POUR LESLECTEURSDE OISOUE
AUOIONUMERIOUE
Celecleurdedisqueaudionumériq
uêcontie
ntun laseretestclassádanslafubrique
1des
produitstaisánt
áppelàcettetechnique.Lire
cemanueld'insrructions
ave'csoinaíind omploysfcêta
ppaleil
coírectement.Encasd€dótaurdefonctionnemenl
pÍendÍe
conÉct 6veclemagasinoÈIsppareila éréacheré.Aíin d évhêr
Iexposition áu íáiscsaulas€r,nêpsstentefd'ouvrarl'appárci|.
PRËCAUCIONESESPECIALESPARA NEPRODUCTORESOEDISCOS
COMPACIOS
Este
TocadiscosCOAudiodigital contiena un sistemade láser
y estáclasilicado
como um "PROOUCTO
DÊ LASERDE PRIMERACLASE". Par6utitizal
este
modelo
coftectamenle,skvsseleer
con atenciónêsiemanual
y guárdelopafa
íuturasrcíerencias,Êncásode cualquiêr
píoblemapógase
êncontactocon
latienda donde compÍó su unidad. No abrala cajapaÍá
evftar
qu€ quede
expuestoal hszde táser.
BIJZONDERE
VOORZORGSMAATRÉGELENVOOR CD-SPELERS
Dit 3
pp6Íaat
iseenklassê1 laserpÍod
ukt,voorzionvan las€Íeenheid. Maakdit appsrsárnietopsn omdií€kteblootstelling
a€
n.sêrstrsle
ntevooÍkomen!Sc
hakel
voor seruiceuw ONKYOdêals in! Neemvoor seryicskontaktop met de handeisar
vánwaeu hstappaÍaathêbtgekocht,
SPECIELLAFORSIKTIGHEÍSATGÀRDER
FORCD.SPEI.ARE
DennaCD-spelaÍeinnehállerlssercystem
och haf klassiíieÍats
'klass 1 lsseípíodukt".
lás dàrí& noggrántigenombÍuksanvisningeníór Íàn anvàndningav
appalslen.Behàllochsáanvisningênfèr íramlids bruk.Kontaktáalftid denaífàí,
dàÍdu kópreCD-spelsÍen,vid €v€ntu€llafêl pàapparaten.Apparatêns
hólie
tàr inte óDonárvid riskl direktblottstàllelseav las€lsrrálen.
S,/ERLIG
ADVARSEL MED HENSYNTIL COMPACT DISC
AFSPILLER
OenneCompactOiscPlayerindeholder
et lás€Ísyst€mog erklassificeret
som "klasse
1 l6er
produkt'. LaesderÍoÍbfugsanvisningen
grundigt og opb€vard€n
somopslagsbogi Íemtiden. HvisderopstáÍ
problemeÍ
medanlaegget,kontakter
deníoÍrctning hvoÍapparatsnindikobtes. PÍovikke
atábneaískaeÍmningenj
D€ kunn€ bliv€ udsattill direktelsseí-stráling.
AvvERTENZE SPECIALISUI RIPROOUTÍORI DI DISCHI
COMPATTI
OuestoÍipÍoduttoÍe di dischi compalti contieneun sidema las€ra semiconduttori
ed è classificarocome "PRODOTÍO LASERDl 1'CLASSE". Peílanto,si
píega
dileggeÍeattentamênte
queso
manuale
di istruzionip€r
unusocoíretto
deil'apparccchio.Incssodiproblomi,siprcgadiÍivolgersiall eseÍciriocommeÍciale
in cui lápparecchioè statoacquistato,Per
evitare
peÍicoloss
ssposizioni
6l rsggiolsser,
non aprireil Íivestimènto,
Denna
maekning
eranbragt
pá
apparatets
hojre
side
ogindikerer,
at
apparatet
arbejder
medlaserstráler
af
klasse1,hvilket
betyder,
at
deranvendes
laserstráler
afsvagesteklasse,
og atmanikke
pá
apparatets
yderside
kan
bliveudsat
forutilladelig
kraftig
stráling.
APPARATET
B@IRKUN
ABNESAFFAGFOLK
MED
SE
RLIGT
KENDSKAB
TIL
APPARATER
MEDLASERSTRALER!
Indvendigt
i apparateteranbragtden
her
gengivne
advarselsmérkning,
somadvarer
imod
at
foretage
sádnne
indgreb
iapparatet,
at
mankankomme
tilatudsaettesig
forlaserstráling.
VAROITUS!
Suojakoteloaei saaavata.
Laite
sistaltaalaserdiodin,
joka lahettaa
(nakymatonta)
simille
vaarallistalasersateilya.
,,CLASS
1 LASER
PRODUCT"
ADYARSEI.:TÁIYÏUG LASERSTRAUilG
YEDAB$rc, ilAR $KGRIGGAF-
BRYÍ'ERERUDE
AF FUXXNOil.
uxocAuDe/ETrElsE
ron srnAurrc.
l-

-1
o lvongratulations on yourpurchaseof the ONKYODX-3500 CDPlayer. o Pleasereadthis
manual thoroughly beforemaking connectionsand turning power on. o Following the in-
structionsin thismanual will enableyou to obtain optimum performance
and listening en-
joyment from your new DX-3500. o Pleaseretain thismanualfor future reference.
Features
o 8-Tim€8Overaampling Digitgl Filter
The DX-3500raisesthe normalsamplingÍrequency
oÍ 44.1 kHzto 352.8 kHz
- eighttimesthe convêntionalrate.This hasthe efÍect
oí raisingthe point atwhich quantization
noisebeginswell intoihe upperreachesoÍ theultrasonicrange,laÍ beyondthe highestaudible
Ír€quencies.An analoglow-passíilter with a gentlê
cutoÍí slop6canthon beusedto clêarupthe rsmnants,svoiding phaso
dêviations
in the uppertrebleíange.Theresulting
aoundiscrystalclêaí.
a Discr.to LoÍt and Right Channol D/A Convortors with Opto-Drive.
Onkyo'sOpto-Díive is a revolutionarynew typeoÍ steadystat€curÍentsupplywhich ensuresthat thg output Írom the D/A convono|s
is completêlyÍreêoÍ electromagneticintelÍerencê.Instêád
oÍ usinga conventionalZener
diodeasthe curent source,Opto-Driveusg6
a phototransistoÍ
to conven light snergyinto electricity.Thooutpur isthen ampliÍiedandusedasthê steadystatecurrêntsupply.The
DX-3500Íeatuíe6two suchOpto-DrivoD/A convoneÍ6.one6achíorthe lêÍtandrightchannêlsignals.Thiseliminatos
phaso
difterènces
betweenthe stereochannêlswhich cancause
muddv,
unÍocusedsound.
a Optical and Êl6ctrical Digital Outputs
OwnersoÍ ampliÍiersequippêdwith digital inputÍacilitiês
(suchastheOnkyo
A-8800) or outboardD/A converterscanchoosebetweên
two typesoÍ digilal output. Digiral
dalatÍansíerbetwsenCD player
and ampliíi6r
pÍovidês
unmatchêdsignalintegíity.OpticaltransÍêr
boaststh€ additionaladvantag6of 6liminatingany possibility
oÍ elêctricalinterÍeíènce
-looping- from the CD playeÍ
to the ampliÍioÍ
viátheACpoweí
Êupply.
a 20"Track Random Music Calendar
o Thr€o-Beam Laser Pickup
Shuffle (Random) Play
(20
Tracks
Maximum) and A-B Block RepeatFunction
Included Infrared Remote Control also Covers Functions of Ílll -Compatible Onkyo CassetteDecks.
O
o
Important safeguards
"WARNING"
"TO
REDUCETHERISK
OF
FIRE
OR
ELECTRIC
SHOCK.
DONOT
EXPOSETHIS
APPLIANCETORAIN
OR
MOISTURE."
CAUTION
"TO
REDUCETHERISK
OF
ELECTRIC
SHOCK.
DONOTREMOVE
covER
(oR BACK).
NOUSER-SERVTCEABLEPARTS
lNStDE.
REFER
SERVICING
TO
OUALIFIEDSERVICEPERSONNEL."
CAUTION
The lightning flash with arrowhead symbol, within
an equilateral triangle, is intended to alert the user
to the presence of uninsulated "dangerous voltage"
within the product's enclosure that may be of suffi-
cient magnitude to constitute a risk of electric shock
to persons.
The exclamation
point within an equilateral triangle
is intended to alert the user to the presence oÍ im-
portant operating and maintenance (servicing) in-
structions in the literatuÍeaccompanying the appli-
ance.
FOR POWER CORDS WITHOUT PLUGS
a Replacement
and mounting of an AC plug on the power cord
of this unit should be performed
only by qualifiedservice
per-
sonnel.
o IMPORTANT: The wires in this mains lead arecoloured in ac-
cordancewith the following code:
Blue: Neutral
Brown: Live
As the coloursof the wires in the mainslead
of this apparatusmay
notcorrespond
with thecolouredmarkingsidentifying
theterminals
in your plug, proceed
as
follows:
The wire which iscolouredblue must be connected
to the terminal
which is marked
with the letterN or coloured black.
The
wirewhich is
colouredbrown must
beconnectedto theterminal
which is markedwith the letterL or coloured red.
A
A
A-2-

a Cleaning
of the internal
parts
should be performed
only by
qualifiedservice
personnel.
o Damage Requiring Service
- The unit should be serviced
by
qualified service
personnel
when:
A. The poweÍ supply cord or the plug has beendamaged;or
B. Objectshavefallen or liquid hasbeen spilled into the ap-
pliance;
or
C.The appliancehas been exposedto rain;
or
D.The
appliancedoes
notappearto operatenormally
orexhibits
a marked
change in performance;
or
E.The appliance
has
beendropped or the enclosure
damaged.
o Servicing
- The usershould not attempt
to servicetheappliance
beyond that described
in the operating instructions.
All other
servicing
should be referred
to qualifiedservice
personnel.
o This apparatuscomplies with requirements
of EEC
directive
821499/EEC.
SPECIAL CAUTIONS FOR COMPACT DISC PLAYER
THIS PRODUCT
UTILIZES
A LASER.
USER
OF CONTROLS
OR
ADJUSTMENTS
OR PERFORMANCE
OF PROCEDURES
OTHER
THANTHOSE
SPECIFIED
HEREIN
MAY RESLUTINHAZARDOUS
RADIATION
EXPOSURE.
This label
on the rear
panelstatesthat:
1. This
unit is
a CLASS1 LASERPRODUCT and employsa laser
inside
the cabinet.
2. To prevent
the laserfrom being exposed,do not remove
the
cover. Referservicingto qualified personnel.
Precautions
1. Warranty Card
Theserialnumberiswrittenon
the
rear
panel
ofthisunit.
Copy
theserial
number
and
modelnumber
onto
your
warranty
card
andkeep
it inasafe
place.
2. Power
WARNING
BEFORETURNING
ON
POWERFORTHE
FIRSTTIME,READ
THEFOLLOWING
SECTION
CAREFULLY.
o Some
models
aredesigned
for
useon
lywiththe
power
supply
voltage of the region where they aresold.
U.K.andAustralianModels: AC 240V.
3. Do Not Touch the Player with Wet Hands
Do not handle
the player
or power cord when your hands are
wetordamp. lfwater
or
anyotherliquid
entersthe
playercabinet,
takethe player
to an authorizedservice
stationfor inspection.
4. Location of the Player
o Place
the Playerin a Well-Ventilated Location.
Takespecialcare
to provide plenty of ventilationon allsides
of the player
especially
when it is placed in an audio rack.
lf ventilation is blocked,
the player
may overheatand mal-
function.
o Do not exposethe player
to directsunlight or heating units
asthe player's
internal
temperaturemay rise
and shortenthe
life oÍ the pickup.
o Avoid damp and dusty places
and places
directly affected
by vibrations
from the speakers.
ln particular,
avoid placing
the unit on or above one of the speakers.
o Be surethe player
is placed in a horizontal
position. Never
placeit on itsside or on a slantedsurfaceas it may mal-
f
unction.
o Do Not Place
Near
Tunersand TV Sets.
lf placednext to a TV or othertuner, it may causereception
interferenceresulting
insomenoiseinthe
TV ortuneroutput.
5. Care
From
time to time you should wipe off the front and rear
panels
and the cabinet with a silicon or other soft cloth. For heavier
.dirt, dampen a soft cloth in a weak solution oÍ mild detergent
and water,wring it outjry, and wipe away the dirt. Following
this, dry immediately
with a clean cloth. Do not userough
material,
thinners,alcohol or other chemicalsolventsor cloths
sincethese
may
damagethe finish or remove
the panel
lettering.
6. Points to Remember
o lf the player
is brought from a cold environmentto a warm
one or is in a cold roomthat is
quickly heated,
dew mayform
on the pickup, preventingpÍoper operation. In this case,
remove
the disc and leavethe power ON for about one hour
to remove
the dew.
o Always
closethe disctray
when not loading
or unloading
discsto protect delicate
internal
parts
from dust.
o When transportingthe player.
be carefulnot to bump it .
Handling compactdiscs
How to open a disc caseand remove
a disc.
Always handlecompact discs
with careso that they arenot
scratched,soiledor damaged.
A dry soÍt cloth may be usedto wipe dust, fingerprints.etc off
the surface.
Make absolutelysure
not to useanytype of volatile
agent,such
asthinneror benzine.
Also avoidusing
a conventional
record
cleaneror antistaticagent.
Avoid placing
a discin directsunlight,and locations
subject
to extremely
high humidity or low tempeÍature.
When a disc is
going to be leftunused
for a long period
of time.
be surenot to leaveit in the player
but store it in the case.
AC220V,
50Hz
50Hz TW
Europeanmodel:
(except
U.K.)
USA
&Canadianmodels:
Worldwidemodel: AC120V,60Hz
AC
11
O,12O,22Oand
24OY
switchable,
50/60H2
Voltage Selector (Rear Panel)
Worldwide models areequipped with a voltageselectorto
conformwith local
powersupplies.
Be
sure
to setthisselector
to matchthe voltageof the power supply in your area
before
turning the power switch on. Voltage ischanged by
switching the voltageselector
with a screwdriver
or similar
instrumentto the 1
10V, 12OV,
22OY and240V position.
Confirmthat the selector
hasbeensetto the correct
position
before
turning the power switch on. lf there is no voltage
selectorswitch on the unit you havepurchased,
it can only
be usedin areas
wherethe power supply voltageis
the same
asthatof the unit.
arAC 1
1
0V at AC 1
20V atAC 220V atAC 240 V
Power
Supply Worldwidemodels:AC
1
10V,1
2Ov,220V,240V,50Hz/60H2
,,CLASS
1 LASER
PRODUCT''
-3-
Beforeusingthisunit
How to Release
the Transport Lock
Toprotect
theopticalassembly
includingthelaser
pickup
from
vibration
related
damageduringshipping,
thisunit
is
equipped
with a
transport
lockleverlocated
onthe
base.
o Use
a
screwdriverto tuÍn
the
locklever
in
the
roundholein
the
directionof thearÍow
(rJ about90").
o Beforetransportingtheunit,turnthelockleverin
theopposite
direction.
Systemconnections
o Donotplug
inthe
power
corduntilallconnections
have
been
made.
o This
unithastwosetsoÍanalog
OUTPUT
jacksandtwo
DIGITAL
OUTPUT
jacks.
Connecting to the analog OUTPUT
jacks
. Connect
the
OUTPUT
jacks
ofthisunittotheAUXor
CDinput
jacks
of anamplifier.
Whenmaking
connections,besurethat
theleft
and
right
channelconnectionsare
not
crossed.
o This
unit
is
equipped
with
two OUTPUT
jacks,
FIXED
and
VARIABLE.
Use
the
onethatmatches
yourpurpose.
Remote Control jacks
The remotecontrol jacks areusedto connect ONKYO products
bearing
the " Rl " markvia the accessoryremote control cable.
The cassettedeck with the " Íll I " mark can be operated using the
RC-121C remote
control transmitter
providedas an accessory
with
the DX-3500. When this unit is connected with Onkyo receivers
or amplifiersbearing
the " Rl " mark,it can also be controlled
bytheremote
controltransmitterof thatunit. (
Refer
to the operating
instructions
of your stereo
receiver
or amplifier
for details.)
NOTE:
Do not connect the |lll remote
control jack to any unit that
does
not bearthe Onkyo " Ílll " mark.
Doing so maydamage
the unit.
DX-3500
FEMOTE
CONTROL
Í:lI Remote
ControlCable
(blue) ro ÍIl I remote
control
jack
Connecting
digital signals(DIGITALOUTPUT)
o Thisunit
has
two digital
audiointerface
Íormatdigital
jacks,
oneforcoaxialoutputandone
foropticaloutput.
Use
the
one
thatmatches
yourpurpose.
o Foroptical
output,
removethetip protection
tube
fromthe
optical
fiber
cable
(optional),
thenconnectasshown
in
the
f
igure.
M
Digital
transmission
audio
cable
(75Ocoaxial
cable)
(Optional)
Optical
Íibercable
(Optional)
ó%e*rrro-r=o @
J-r* @
m
LJ_
Speaker
l=:lu
i{o.a).t t: ït ffi
l.@,O.1 le rCIt| --lll-
\
fmrm
\il// v
\//v
\ [| Round
hore
Lock lever \\
(about
90')
t\
L€\
Screwdriver
(+)
NOTES:
a Do not usetheanalog
pin
cordforcoaxialdigitalconnections.
o The optical digital output jack hasa protective
cap. Remove
this cap beforeusing this jack. When not using this jack,
alwaysput this protective
cap back on the jack.
Integrated AmpliÍier
-4-

Frontpanel
tacilities
Power Switch (POWER)
Press
oncetoswitch
power
onand
press
againtoswitch
power
off.
Disc Tray
Place
a
compact
disc
in
thistray.
The
tray
is
openedandclosed
bythe
OPEN/CLOSEbutton
@.
Timer Play
Switch (TIMER)
The
timer
play
switch
is
usedin
conjunction
with
anaudiotimer.
When
adiscisloaded
andthe
power
switch
is
setto ON,
the
playing
will
beginautomaticallywhenthesourceisengaged.
PLAY: The playing
occursin the usual
order,
beginning
with the firsttrack.
SHUFFLE: The contentsof the disc
will be played
back
in
random order.
Open/Close Button (OPEN/CLOSE)
Press
this button to open the tray and press
it againto close
the tray.
Stop Button (STOP)
Press
this button to stop disc play.
Pause Button (PAUSE)
Press
this button to briefly interruptdisc play. To resumedisc
play,press
the PLAY button.
Play Button (PLAY)
Press
this button to startdisc play.lf the tray is
open,pressing
this button automaticallyclosesthe tray,then starts
disc play.
Down Button (SKIP K< )
Press
this button during disc play to return
to the beginning
of the currenttrack. Press
twice to return
to the beginning of
the previous
track,threetimesfor the track before
that, and
so on.
Up Button (SKIP >>l )
Press
thisbuttonduringdisc
play
to advanceto the beginning
of one of the following tracks.The pickup movesaheadone
trackfor eachtime this button is pressed.
Headphone Jack (PHONES)
Stereo
headphoneswith a standardstereo
plug can be con-
nected here.
Level Control Knob (OUTPUT LEVEL)
Usethis knob to adjust
the output level
(VARIABLE)
and
headphone
output level.You can alsousethe attached
remote
control transmitterto automaticallyadjustthe level.
DISPLAY
tr Edit Buttons (EDIT z- , -:)
Usethesebuttons to erasea track number from the Random
Calendar
l28lor add another
track
number
to it.
L : When you press
this,thenumber
ofthe previous
track
will blink.
--s, : When you press
this,the number oí the following
track
will blink.
Thesebuttons haverepeatcapabilities,so by pressing
them
continuously
you will advancethroughthe RandomCalendar
and eachtracknumberwill blink in succession.
NOTES:
o Press
thesebuttons while the unit is in the stopped stateto
automaticallysetthe memorymode.
a These
buttonscannotbe usedduring
playback.
tr shuffte
Button
(SHUFFLE)
Usethis button when you want the contentsof the disc to be
rearrangedfor play in random order.This
function cannot be
used rn memory mode.
[4 Clear Button (CLEAR)
Press
this button to correctthe track number or to cancelthe
last
track number programmed
into memory.
E Memory Button (MEMORY)
Press
this button to program
track numbersinto memory.
m Number Buttons (1
-9, O)
Press
thesebuttons Íor a DirectPlay
or to program a track
number into memory.
E
tr
tr
E
E
E
E
E
E
E
fTmêr n n rTrl
I-tt-l rmllrl
rTlran
rrfimfÏffir.'l iEliEltEltE
E
-5-

EPlusTen Button (+10)
Pressthisbuttontoselector
program
atrack
withatrack
number
oÍ 10
orhigher.Forexample,to selectTrack
Number
30.
press
thisbuttonthree
times,andthen
press
0.
Fast Forward Button (>) )
Whenthisbuttonishelddown,the
pickup
moves
forward
over
thedisc.
Disc
play
isresumed
as
soonasthisbutton
isreleased.
Fast ReverseButton (<<)
When
thisbutton
ishelddown,the
pickup
movesbackward
over
thedisc. Disc
play
isresumedassoonasthisbutton
is
released.
Block Repeat Button (A - B)
Usethisbuttonto repeataspecificsection. Pressthisbutton
tosetthebeginningoftheblock
repeatsectionand
press
again
to setthe endof theblock
repeat
section.
To stopthe block
repeat,
press
this
button
one
more
time. Blockrepeating
is
notpossible
during
memory
play
and
shuffle
play.
Repeat Button (REPEAT)
Press
thisbuttonto activate
the
repeat
play
mode.Repeat
play
can
beused
inconjunction
with
the
normal,
memory
play
and
shuffle
play
modes.
Intro PlayButton (INTRO)
Press
this
buttonto enterthe
"lNTRO"
play
mode.
TheIntro
play
function
automatically
locatesthebeginningsof
thetracks
on adiscand
plays
aboutthefirstsevensecondsof eachone.
It is
particularly
usefulfor rapidly
checking
thecontentsof a
disc.
When
thisbutton
is
pressed,
theINTROindicatorlights
up.
RemoteGontrol Sensor
(REMOTE
SENSOR)
Commandsfromthe remote
control
transmitterarereceived
here.
DisplayButton (DISPLAY)
Pressthisbuttonduring
playing
to switchthe
displayshown
in
the
TimeDisplay
amongthe
followingthreetypes:
Operations
To Loada Disc
1. Elapsedtimedisplay
(SINGLE
LAP)
Shows
how longthecurrent
trackhasbeen
playing.
2. Track
remaining
time
(SINGLE
REMA)
Shows
howmuch
time
is
leftforthetrack
currently
playing.
3. Totalremainingtime
(TOTAL
REMA)
Shows
howmuch
playing
time
isleftfor
the
entiredisc.
During
memory
play,
thisdisplay
showsthe
playing
time
remaining
for
theentire
sequenceof
tracks
programmed
into
memory.
Time Display
This
display
showseithertheelapsed
timeorthe
remaining
time
for
thetrackbeing
played
orthe
remainingtime
for
the
entire
disc.
Duringmemory
play,
thisdisplayshows
eitherthe
elapsedtime
orthe
remaining
time
Íorthetrackbeing
played
orthe
remaining
time
for
theentiresequence
oftracks
in me-
mory.
lt canbesetbytheDISPLAY
buttonÍZl.
Track Number Display
Displaysthetotalnumberof trackson thedisc,
or
theselected
track
numberduringthe
program,
orthe
number
ofthe
track
that
is
currently
being
played.
Indicators
A- B: Lights
up
while
the
block
repeat
(A- B)mode
isset.
REPEAT: Lights
upwhenthe
repeat
play
mode
is
set.
SHUFFLE: Lights
upwhentheshufÍle
play
modeisset.
INTRO: Lights
upwhilethe
"lNTRO"
play
mode
is
operating.
MEMORY: Lights
upduring
memory
play
orwhenase-
lection
is
programmed
into
the
memory.
PAUSE: Lights
upwhenthe
pause
modeis
engaged.
Random Calendar Display
Thenumbers
oÍ thetracksbeing
played
backorthetracks
programmed
in
the
memory
aredisplayed
inthe
playing
order.
* Tracknumbers
above
2Oarenot displayedbut rather
are
representedby a bar
('-").
Press
the POWERswitchto turn on the power.
Pressthe
OPEN/CLOSE
buttonto opentheDiscTray.
Put
thedisc
in
theDiscTraywith itslabel
facing
up.
Press
the
OPEN/CLOSE
buttonagainto closethedisctray.
o WhenthetotalnumberoÍ trackson the disc
anditstotal
playing
timearedisplayed,thedisc
isready.
o lf
nothing
is
displayed,this
maymean
thatthedisc
isinupside
down.
lfthat
is
the
case,
takeout
thediscand
put
it inright
sideup.
o When
youput
thedisc
in
the
disctray,ifyoupress
thePLAY
button
instead
oftheOPEN/CLOSEbutton,the
tray
is
closed
automaticallyandthefirsttrackbeginsto play.
E
EE
m
E
@
m
@
@
B
@
e
E
@
OPEN/CLOSE
-6-

To Play
a Disc (Normal Play)
To listen
to a disc from the beginning, press
the PLAY button.
o The disc begins playing from the first track. lf you playthe
disc all the way to the end, the displayshows the following
and the play stops.
Tracknumber display:
the total number
of tracks
on the disc.
Time display:
The total playing time for the disc.
To start
Írom aspecific
track,usingthe Number Buttons
to select
the desiredtrack (Direct Play).
o The displayappearsas
follows.
Track Number Display:The selectedtrack number
Random
CalendarDisplay:The
track
number
of
the
selections
in the sequencethey will be played.
To pause
during playing,press
the PAUSE button.
o The Pause
Indicatorlights
andthe playing
stops
temporarily.
o To resume
playing,press
the PLAYbutton. Theplaying
starts
up againfrom exactly
where it left off.
@ fo stopthe
playing,press
theSïOP button.
o The
displayappearsas
follows.
TrackNumberDisplay:The
total
number
oftrackson the
disc.
TimeDisplay:
Thetotal
playing
timeforthedisc.
(9) ïo listen
toallthetracksoverand
over,
press
the
REPEAT
button.
(You
can
press
thisbutton
before
playing
beginsor
in
themiddle
of
playing.)
o TheRepeatIndicatorlights
and
when
the
playing
reaches
the
endofthe
disc,
itstartsagain
from
thefirsttrack.
o Tostopthe
repeat
play,press
itagain.
@ fo moveforward
orbackward
quickly
while
adisc
is
playing,
press
the >) buttonorthe
o The
pickup
continues
to moverapidlyforward
or backward
as
long
as
you
hold
downthe >> buttonor
While
the
pickup
ismovingrapidlyÍorward
orbackward,the
music
canbe
heard
at
low
volume
(about
-12 dB).
o lf you
fastforwardallthewayto the
endof thedisc,the
pickup
stops.
@ fo move
on to thenext
track.
press
the >>l button.
o The
playing
ofthecurrenttrack
isinterrupted
andthe
pickup
movesto thebeginningof thenexttrack.
a The
pickup
moves
aheadonetrack
foreachtime
youpress
the Dl button.
@ fo return
tothebeginningofthetrackduring
playing,press
the
l+{ button.
o The
playing
isinterruptedandthe
pickup
movesbacktothe
beginningofthecurrenttrack.
o lfyoupress
the 1+{ buttonagainbeforethe
pickup
reaches
thebeginningofthecurrenttrackor
youpress
the l<<
buttontwice
inarow,
the
pickupgoes
to thebeginningof
the
previous
track.
NOTE:
c
@
@Foratrackbeyondthe20th,the
remaining
time
(SINGLE
REMA)
ofthe
Timedisplay
shows
To program the Memory
PresstheMEMORY
button.
o The
MemoryIndicator
lights,
and
the
TimeDisplay
changesto
the
TotalRemainingïime Display
(TOTAL
REMA).
(
lf the memorybutton ispressed
during play,
thetrackbeing
played
is
stored
into memory
andfurther
trackscan bestored
into memorywith the operation in@ below.)
(!) Select
the trackyou want, using the Number Buttons.
o The
selectedtracknumberis
displayed
inthe RandomCal-
endar
Display.The
Time Display
showsthe total
play
time
of the selected
tracks.
o To continue programmingthe memory,
enterthe number of
the next selectionto be programmed.
Up to 20 songs can
be programmedin the memory by repeating
this step.
@ er"ss the PLAY button
o The
timedisplay
sectionchangesto the elapsedtime (SlN-
GLE LAP) and the disc play starts.
c
PLAY
@ ruumberButtons NOTES:
o lf the Total RemainingTime ismore
than 99 minutes
59
seconds,
"-: - -" is displayed.
o lf you try to program a 21th trackwhile memory play,the
memory
channeldisplay
will show "F" (FULL) for a few
secondsto indicate
that no more
trackscan be programmed
into memory.
-7-

To change the contents of the memory:
@ Pruss
the EDlr buttons ( , EDrr,-r )and serect
theposition
in
the Random
calendar
that
you wantto change.
(The
selected
number
flashes.)
o This function cannot be performed
during the play mode.
To performthis function. you must first press
the STOp
button.
@ witrr the Number Buttons,
select
the track
that you want to add
to the memory.
The addedtrack wiil be memorized
and the
numbers
of the tracks
already
stored in memory will shift back.
@ rt
you press
the CLEARbutton,the tracknumber
that isflashing
will be cleared
and the following track number will replace
the
eliminated
one.
o To delete
allthe programmed
tracks
in the memory,press
either
the MEMORy buttonor the OPEN/CLOSE
button.
o When
theEDIT
buttons
are
pressed
during
the
normal
stop
mode,
all
the
tracks
recorded
on
the
disc
arememorized
and
the
edit
mode
is
set
automatically.
(For
a
discrecorded
with
more
than
21tracks,
only
20tracks
are
memorized.)
o Tocheck
the
number
of atrack
represented
inthe
display
bya
bar
(-), use
the
EDlr
button
toiiluminate
that
selection.
The
track
number
willappear
intheTrack
Number
Display.
o lf
theNumber
Buttons
orthe
cLEAR
button
was
used
without
using
theEDIT
button,
the
selection
is
added
at
the
end
of
the
memory.
orthe.last
Track
Number
ofthememory
is
cancelled.
This
can
be
used
even
during
playback.
NOTES:
@cr-rnn
SKIP
K<
SKIP>>I
PAUSE
To Play
the Memory
To listen
to the discfrom in memory in the programmed
order,
press
the PLAY button.
o Play
begins
in the programmed
order,
i.e. beginning
with
the first track programmedin the Random Calendar.
o rhe current
track
number
is
disprayed
in the Track
Number
Display.
To pause
during playing,
press
the PAUSE
button.
o rhe Pause
Indicator
rights
and
the
praying
stops
temporariry.
o To resumeplaying,
press
the pLAy button. The
playing
starts
up againfrom exactly
where it leftoff.
To stop the playing,press
the STOp burton.
o Thedisplay
appears
asfollows:
Track Number Display:
the last
track number into memorv
Random Calendar
Display:
the contentsof the memory
Time Display:
The Totar Remaining
Time mode is entered,
and the total playback
time of the memorized
tracksis dis-
played.
@ ro listen
to all
the
tracks
over
and
over,
press
the REpEAT
button.
(You can press
this button beforebeginning to pray
the disc
or while playing
the disc.)
o rhe Repeat
Indicator
rights
andwhen thedisc prayer
reaches
the end of the sequence
of tracks
programmedinto memory
it repeats
that sequence.
o To stop the repeatplay,press
it again.
(l) To move
torward or backward
quickry
within thecurrent
praying
track.press
the
o rhe pickup continues
to move rapidry
forward or backward
in the currentplaying track as long asyou hold down the
>> button or
normalplaying
speed.
While
the pickup is
moving rapidly
forward or backward,
the sound can be heard
at row vorume
(about
-12 dB).
o when the pickup is
forwarded
to the end of the current
track
by pressing
the >> button, the pickup comes
to the next
programmed
track and normal playback
begins. When the
of the current
track and normal playback
beginsfrom this
position.
@ fo skip to the next track, press
the >>l button.
o rhe playing
of the current
trackisinterrupted
andthe pickup
moves
to the beginning of the next track in memory.
o rhe playingskips ahead
one track in memoryfor eachtime
you press
the >>l button.
(D To return
to the beginning of the track
during praying,
press
the
1+{ button.
o rhe playing isinterrupted
and the pickup moves
backto the
beginning of the current
track.
o lfyou pressthe K< button again
beforethepickupreaches
the beginning of the current
track or you press
the l+{
button twice in a row. the pickup goesto the beginning of
the preceding
track in memory.
o
@
@
-8-

For Block Repeat (A - B)
o Thisfunctionplays
aspecifiedblock
repeatedly. e fo setthebeginningandending
points
oÍtheblock,
press
the
A - Bbutton.
Pressonce
at
thebeginning
oftheblock
repeat
(point
A) (block
repeatindicator
(A - B)flashes
on andoÍf)
andonceagainattheendoÍtheblock
repeat
(point
B) (block
repeat
indicator
remainslit). The
sectionbetween
A andB is
played
repeatedly.
The
ending
point
must
beatadisc
location
^ afterthestarting
point.
(?) ro canceltheblockrepeat,
press
theA- B buttononcemore.
Disc
play
willthencontinueuntiltheendofthedisc.
NOTE:
Itisnot
possible
tousetheblock
repeatfunctionduringmemory
play
andshuÍfle
play.
To playback in random order (ShuÍfle Play) @ Prersthe
SHUFFLE
button.
a The
shuffle
indicatorlights,
andtracks
entered
on the disc
will be
played
back
inrandom
order.
NOTES:
o A maximum
of 20trackscan
be
played
in
theshuffle
play
mode.
. lnthe
ShufÍle
Play
Repeat
mode,whenall
of
the
tracks
have
been
played
back
once,
theorderwill bechangedandthe
playing
will berepeatedwith adifferenttrack
progression.
a When
theSTOP
buttonispressed,player
operationshiÍts
Írom
theshuffle
play
modeto thenormal
play
mode.
-9-

Usingthe remote
controltransmitter
Allthe opeíations,êxceptfor turningthe unit ON/OFFandtimeí play
canbecontrolledíromremotelocations.Sstthe CD/TAPE
Selector
switch ol thê íemote
controltransmitterto CD.
Whenacass6ttedeckbearingthe Onkyo" Fll " markisconnoct6dto the remote
controljacks
oÍ th€ DX-3500 modêls,the deckcan
bêcontrolledby this remot6
controltransmitteí. Setthe CD/TAPE
s€loctoíswitch to TAPE. At this setting,ths Íorward play,rovorse
play,stop,rec/pause,têstÍoÍward, íastrowindÍunctionscanbeopeíáted
by remotocontrol.
i
I
ri
ll
tl
Batteries
o The remote control transmitter is powered by two batteries.
Before
using this unit for the firsttime, insert
the two batteries
(included)
asshown in the díagram.
a Average
batterylifeis
about one year.
This
period
may
beshorter
depending on the frequencyof useand environment (temper-
atureand humidity) in which the remotecontrol transmitteris
used.
a lf the remotecontrol transmitter
does not operate
eventhough
front panelcontrols function normally,
the batteries
should be
replaced.
Useonly batteries
listedin the following chart.
Type Voltage Size
Manga-
nese 1.5V AA
R6
UM-3
Jransmitter Battery Replacement
@ eusn
the
batterycover
onthe
rear
ofthetransmitterinthedi-
rection
oíthe
arrowandlift
it up.
Load the two batteriesthat camewith the transmitter
or two
batteries
listedin the table. Loadthem with the + and - ends
facing
asshown in the diagram.
Functions for remote control
o CD/TAPESelector Switch
This
switch
switchestransmission
of remote
controlfunctions
for
theremote
controltransmitter
betweentheCD
andcassette
tape
deck.
o Volume Control Buttons ( v VOLUME r 1
Press
V buttonto lower
thevolumelevel
output
from
the
variable
output
jacks
and
headphone
output
jacks,
and
press
a buttonto increase.ltworks
asthe
sameasthe
level
control
knob
oftheDX-3500.
DX-3500
transmitterRC-121
C
o Precautions
1. Remove
thebatteriesiftheremote
control
transmitterisnot going
to be used
for a long time.
2. The batteriesof the remote control transmitter must be replaced
periodically.
3. This unit usesinfrared
rays.Therefore.
commands may not be
received
properlyif the front panel of this unit is exposed
to
bright light. To prevent
this from occurring, place
this unit so
that it is not directlyexposed
to bright light.
4. lf this unit is placed inside
an audio rack behind a glass
door,
the door should not have
coloredglass
or have
any decorations
on it,sincethis could shoÍten the range
or prevent
commands
from being received.
5. Use oÍ other infrared remote control devices in the same room
may causeinterÍerence.
6. The transmitter
operates
up to a distanceof about five meters
(16 feet).The transmitting
window must always be pointed at
the reception
window when a
command is
sent
to the CD player.
7. lf this remote
control transmitter
does not operate
properly,
confirm that the batteriesarenot dead. lf the problem persists,
contact your Onkyo ServiceCenter.
@
NOTES:
1. Do not leave
an expired
batteryin the caseas it may leak
or damage
the batterycase.
2. When inserting
the batteries,be surethe (+; and (-) ends
areproperlyaligned.
3. Do not use nickel-cadmium (rechargeable)
batteries.
4. Do not use one specified (manganese)
batteryand one al-
kalinebatteryat the sametime.
5. Replace
both batteriesat once; do not useone old and one
new battery together.
r=h Á ;'
-v.d
/
>-?
5m
3s
lo.*.o -;í
[-'--'"*-^"1
tl
t.*,t
I t1r|l]t:]í!,'l
I
- ilI
I
:_-
.1.-F-
rJr
-l r_:l@j
"r r..rr] qi
" l-;:rr::;; lÍ--l
,,ru_rlLrJlr=.J
ral"-.-
I I __t t:_J t::J
\ t 6 ....-
l r-_.J t--J E:J
' d 9 -..-..
r l:._r l-,J t=
0 +10 t_=i,;;= 1
.i |'J Er l:]I
I LCJ EJI
f,
Remote
control
@ eut
thebatterycover
backinplace.
l0-

Troubleshootingguide
SpecÍfications
Model DX-3500 Compact Disc Player
Signal
readout
system: Optical
non-contact
Readingrotation: About
500-200 Í.p.m.
(constant
linearvelocity)
Linear
velocity: 1.2-1.4t/t
Errorcorrectionsystem: Crossinterleavereadsolomoncode
Decodedbits: 16 bits
linear
Sampling
frequency: 352.8
kHz
(8timesoversampling)
Numberoí channels: 2 (stereo)
Frequencyresponse: 2 Hz-2OkHz
Totalharmonicdistortion: 0.003%
(at
1 kHz)
Dynamicrange: 96dB
Signal
to noiseratio: 100dB
Channelseparation: 96dB (at
1 kHz)
Wow and
Flutter: Belowthresholdof measurability
Output
level: 2 voltsr.m.s.
Power
consumption: 16watts
Powersupply
rating: U.K.and
Australian
models: AC240V,50Hz
Europeanmodels
(except
U.K.)AC
22OY,SOHz
USA& Canadianmodels: AC 120V,
60Hz
Worldwide
models: AC110V,120V,220V,and
24OV
switchable.
50/60H2
Dimensions
(W
x Hx D): 435 x 118 x
312
mm
17
-1
/8" x 4-518"x 12-1
14"
Weight: 5.0K9.
11.0lbs.
Supplied
accessories; o Output
signalcord
o Remote
control
transmitterRC-121C
O UM-3/R6/AA
a |]l I remote
control
cable
Problem Cause Remedy
Powerswitchispressed
but power
does
notcomeon. o Power
cord
plugisnot properly
con-
nectedto AC outlet. o Insert
plug
firmly.
Discloadedbutplay
does
notbegin. o Discisloaded
upside-down.
o Discis
dirty.
o Dewon pickup.
o Load disc with the label
sideÍacing upward.
o Clean
the disc.
o Place
unit in warm place
for about one hour.
No
sound. o lncompleteconnections.
o lmproperinput
selectorswitchsetting
onamplifier.
o Insertall
plugs
firmlyin
jacks.
o Set
switchto properposition.
Skipping. . Discis
diny.
a Discisscratched.
o Unithasbeenexposedtoastrongbump.
r Thelockleverisnotturned.
o Cleanthedisc.
o Useanother
disc.
o Place
theunit
ín
amorestablelocation.
o Turnthelocklever.
Search
time
(when
moving
to aspecific
track)
isextremely
long. o Discisdirty.
o Discisscratched. o Cleanthe disc.
o Useanotherdisc.
Tracknumbers
cannotbestored
inthe
memory. . No
disc
isinthe
tray.
o A track
numbernotonthe
disc
is
being
used.
o Load a disc.
o Useonly track numberson the disc.
il
Other Onkyo CD Player manuals