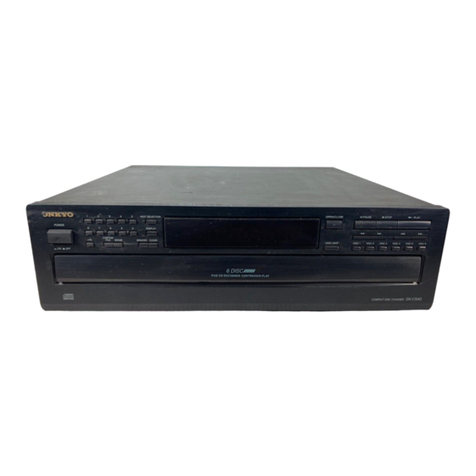
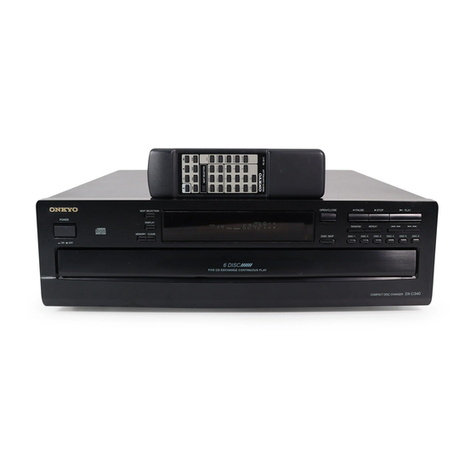
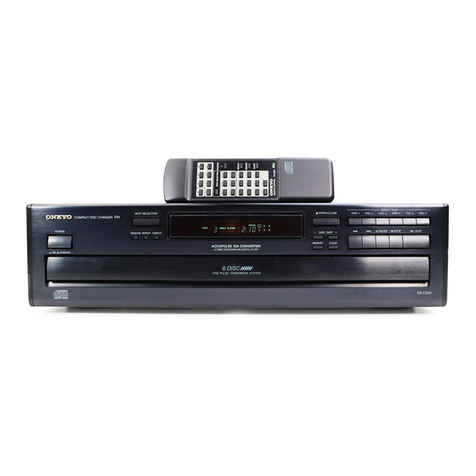
Onkyo DX-C311 User manual

ONKYO.
COMPACT
USyLt
DIGITAL
AUDIO
DX-C311/C211/
Cill
Compact
Disc
Automatic
Changer
Instruction
Manual
ONE
YO)
comer
ose
cancer
1
ACEI
ae
£
ostiose
ose
oset baad
ota
wdc
y
sok
eek
Ieee
mPa
se
CLLI[T
J

T
hank
you
for
your
purchase
of
the
Onkyo
DX-C311/C211/C111
CD
player.
Please
read
this
manual
thoroughly
before
making
connections
and
turning
power
on.
Follow
these
instructions
to
obtain
optimum
performance
and
maximum
listening
enjoyment
from
your
new
DX-C311/C211/C111.
Please
retain
this
manual
for
future
reference.
*
This
apparatus
complies
with
requirements
of
EC
directive
87/308/EEC.
¢
For
models
having
a
power
cord
with
a
polarized
plug
CAUTION:
TO
PREVENT
ELECTRIC
SHOCK,
MATCH
WIDE
BLADE
OF
PLUG
TO
WIDE
SLOT,
FULLY
INSERT.
¢
Sur
les
modéles
don’t
la
fiche
est
polarisée
ATTENTION:
POUR
EVITER
LES
CHOCS
ELECTRIQUES,
INTRODUIRE
LA
LAME
LA
PLUS
LARGE
DE
LA
FICHE
DANS
LA
BORNE
CORRESPONDANTE
DE
LA
PRISE
ET
POUSSER
JUSQ’
AU
FOND.
WARNING
“TO
REDUCE
THE
RISK
OF
FIRE
OR
ELECTRIC
SHOCK,
DO
NOT
EXPOSE
THIS
APPLIANCE
TO
RAIN
OR
MOISTURE.”
CAUTION
“TO
REDUCE
THE
RISK
OF
ELECTRIC
SHOCK,
DO
NOT
REMOVE
COVER
(OR
BACK).
NO
USER-SERVICEABLE
PARTS
INSIDE.
REFER
SERVICING
TO
QUALIFIED
SERVICE
PERSONEL.”
CAUTION
_
RISK
OF
ELECTRIC
SHOCK
DO
NOT
OPEN
¢
The
lightning
flash
with
arrowhead
symbol,
within
an
equilateral
triangle,
is
intended
to
alert
the
user
to
the
presence
of
uninsulated
“dangerous
voltage”
within
the
product’s
enclosure
that
may
be
of
sufficient
magni-
tude
to
constitute
a
risk
of
electric
shock
to
persons.
¢
The
exclamation
point
within
an
equilateral
triangle
is
intended
to
alert
the
user
to
the
presence
of
important
operating
and
maintenance
(servicing)
instructions
in
the
literature
accompanying
the
appliance.
Important
Safeguards
jew
6A.
10.
11.
12.
13.
14.
16.
17.
.
Read
Instructions
—
All
the
safety
and
operating
instructions
should
be
read
before
the
appliance
is
operated.
.
Retain
Instructions
—
The
safety
and
operating
instructions
should
be
retained
for
future
reference.
.
Heed
Warnings
—
All
warnings
on
the
appliance
and
in
the
operating
instructions
should
be
adhered
to.
.
Follow
Instructions
—
All
operating
and
use
instructions
should
be
followed.
.
Water
and
Moisture
—
The
appliance
should
not
be
used
near
water
—
for
example,
near
a
bathtub,
washbowl],
kitchen
sink,
laundry
tub,
in
a
wet
basement,
or
near
a
swimming
pool,
and
the
like.
.
Carts
and
Stands
—
The
appliance
should
be
used
only
with
a
cart
or
stand
that
is
recommended
by
the
manufacturer.
An
appliance
and
cart
combination
should
be
moved
with
care.
Quick
stops,
excessive
force,
and
uneven
surface
may
cause
the
appliance
and
cart
combination
to
overturn.
PORTABLE
CART
WARNING
S3125A
w~S
a
i
.
Wall
or
Ceiling
Mounting
—
The
appliance
should
be
mounted
to
a
wall
or
ceiling
only
as
recommended
by
the
manufacturer.
.
Ventilation
—
The
appliance
should
be
situated
so
that
its
location
or
position
does
not
interfere
with
its
proper
ventilation.
For
example,
the
appliance
should
not
be
situated
on
a
bed,
sofa,
rug,
or
similar
surface
that
may
block
the
ventilation
openings;
or,
placed
in
a
built-
in
installation,
such
as
a
bookcase
or
cabinet
that
may
impede
the
flow
or
air
through
the
ventilation
openings.
.
Heat
—
The
appliance
should
be
situated
away
from
heat
sources
such
as
radiators,
heat
registers,
stoves,
or
other
appliances
(including
amplifiers)
that
product
heat.
Power
Sources
—
The
appliance
should
be
connected
to
a
power
supply
only
of
the
type
described
in
the
operating
instructions
or
as
marked
on
the
appliance.
Polarization
—
The
polarization
of
the
plug
is
a
safety
feature.
The
polarized
plug
will
only
fit
the
outlet
one
way.
If
the
plug
does
not
fit
fully
into
the
outlet,
try
reversing
it.
If
there
is
still
trouble,
the
user
should
seek
the
services
of
a
qualified
electrician.
Under
no
circumstances
should
the
user
attempt
to
defeat
the
polarization
of
the
plug.
Power-Cord
Protection
—
Power-supply
cords
should
be
routed
so
that
they
are
not
likely
to
be
walked
on
or
pinched
by
items
placed
upon
or
against
them,
paying
particular
attention
to
the
cords
at
plugs,
convenience
receptacles,
and
the
point
where
they
exit
from
the
appliance.
Cleaning
—
The
appliance
should
be
cleaned
only
as
recommended
by
the
manufacturer.
Nonuse
Periods
—
The
power
cord
of
the
appliance
should
be
unplugged
from
the
outlet
when
left
unused
for
a
long
period
of
time.
.
Object
and
Liquid
Entry
—
Care
should
be
taken
so
that
objects
do
not
fall
and
liquids
are
not
spilled
into
the
enclosure
through
openings.
Damage
Requiring
Service
—
The
appliance
should
be
serviced
by
qualified
service
personnel
when:
A.
The
power-supply
cord
or
the
plug
has
been
damaged;
or
B.
Objects
have
fallen
or
liquid
has
been
spilled
into
the
appliance;
or
C.
The
appliance
has
been
exposed
to
rain;
or
D.
The
appliance
does
not
appear
to
operate
normally
or
exhibits
a
marked
change
in
performance;
or
E.
The
appliance
has
been
dropped
or
the
enclosure
damaged.
Servicing
—
The
user
should
not
attempt
to
service
the
appliance
beyond
that
described
in
the
operating
instructions.
All
other
servicing
should
be
referred
to
qualified
service
personnel.

Special
Cautions
for
Compact
Disc
Player
This
Compact
Disc
Player
contains
a
semiconductor
laser
system
and
is
classified
as
a
“CLASS
1
LASER
PRODUCT”.
So,
to
use
this
model
properly,
read
this
Owner’s
Manual
carefully.
In
case
of
any
trouble,
please
contact
the
store
where
you
purchased
the
unit.
To
prevent
being
exposed
to
the
laser
beam,
do
not
try
to
open
the
enclosure.
DANGER:
INVISIBLE
LASER
RADIATION
WHEN
OPEN
AND
INTER-
LOCK
FAILED
OR
DEFEATED.
AVOID
DIRECT
EXPO-
SURE
TO
BEAM.
CAUTION:
THIS
PRODUCT
UTILIZES
A
LASER.
USE
OF
CONTROLS
OR
ADJUSTMENTS
OR
PERFORMANCE
OF
PROCEDURES
OTHER
THAN
THOSE
SPECIFIED
HEREIN
MAY
RESULT
IN
HAZARDOUS
RADIATION
EXPOSURE.
FOR
U.S.A.
MODEL:
1.
This
laser
is
covered
by
a
housing
which
prevents
exposure
during
operation
or
maintenance.
However,
this
product
is
classified
as
a
Laser
Product
by
CDRH
(Center
for
Devices
and
Radiological
Health)
which
is
a
department
of
the
Food
and
Drug
Administration.
According
to
their
regulations
21
CFR
section
1002.30,
all
manufactures
who
sell
Laser
Products
must
maintain
records
of
written
communications
between
the
manufacturer,
dealers
and
customers
concerning
radiation
safety.
If
you
have
any
complaints
about
instruc-
tions
or
explanations
affecting
the
use
of
this
product,
please
feel free
to
write
to
the
address
on
the
back page
of
this
manual.
When
you
write
us,
please
include
the
model
number
and
serial
number
of
your
Compact
Disc
Player.
2.
In
compliance
with
Federal
Regulations,
the
certification,
identification
and
the
period
of
manufacture
are
indicated
on
the
real
panel.
3.
FCC
INFORMATION
FOR
USER
CAUTION:
The
user
that
changes
or
modifications
not
expressly
ap-
proved
by
the
party
responsible
for
compliance
could
void
the
user’s
authority
to
operate
the
equipment.
NOTE:
This
equipment
has
been
tested
and
found
to
comply
with
the
limits
for
a
Class
B
digital
device
pursuant
to
Part
15
of
the
protection
against
harmful
interference
in
a
residential
installation.
This
equipment
generates
uses
and
can
radiate
radio
frequency
energy
and
if
not
installed
and
used
in
accordance
with
the
instructions
may
cause
harmful
interfer-
ence
to
radio
communications.
However
there
is
no
guarantee
that
interference
will
not
occur
in
a
particular
installation.
If
this
equipment
does
cause
harmful
interference
to
radio
or
television
reception
which
can
be
determined
by
turning
the
equipment
off
and
on
the
user
is
encouraged
to
try
to
correct
the
interference
by
one
or
more
of
the
following
measures:
¢
Reorient
or
relocate
the
receiving
antenna.
*
Increase
the
separation
between
the
equipment
and
receiver.
*
Connect
the
equipment
into
an
outlet
on
a
circuit
different
from
that
to
which
the
receiver
is
connected.
*
Consult
the
dealer
or
an
experienced
radio/TV
technician
for
help.
FOR
CANADIAN
MODEL:
(POUR
LE
MODELE
CANADIEN)
_
¢
THIS
DIGITAL
APPARATUS
DOES
NOT
EXCEED
)
THE
CLASS
B
LIMITS
FOR
RADIO
NOISE
EMISSION
FROM
DIGITAL
APPARATUS
SET
OUT
IN
THE
RADIO
INTERFERENCE
REGULATIONS
OF
THE
CANADIAN
DEPARTMENT
OF
COMMUNICATIONS.
¢
L’INTERFERENCE,
RADIO
ELECTRIQUE
GENEREE
PAR
CET
APPAREIL
NUMERIQUE
DE
TYPE
B
NE
DEPASSE
PAS
LES
LIMITES
ENONCEES
DANS
LE
REGLEMENT
SUL
LES
PERTURBATIONS
RADIO
ELECTRIQUES.
SECTION
APPAREIL
NUMERIQUE,
DU
MINISTERE
DES
COMMUNICATIONS.
FOR
EUROPEAN
MODEL
(include
U.K.)
“CLASS
1
LASER
PRODUCT”
This
label
on
the
left
hand
panel
of
the
unit
states
that:
1,
This
unit
isa
CLASS
1
LASER
PRODUCT
and
employs
a
laser
inside
the
cabinet,
2.
To
prevent
the
laser
from
being
exposed,
do
not
remove
the
cover.
Refer
servicing
to
qualified
personnel.
Before
using
the
unit
To
protect
the
unit
from
vibration
related
damage
during
ship-
ping,
this
unit
is
equipped
with
transport
lock
screw.
How
to
release
the
transport
lock
Remove
the
screw
on
the
back
of
the
unit
using
a
Philips
screwdriver,
¢
When
shipping
the
unit,
reverse
the
procedure.
cece
(7)

Features
Precautions
M
Six-Disc
Carousel
Changer
1.
Warranty
Card
Onkyo’s
exclusive
six-disc
carousel
changers
not
only
give
The
serial
number
is
written
on
the
rear
panel
of
the
unit.
you
more
music
for
your
money,
they
let
you
add,
remove,
or
(Copy
the
serial
number
and
model
number
onto
your
replace
up
to
three
discs
without
stopping
play—
unlike
a
warranty
card
and
keep
it
in
a
safe
place.)
magazine
changer.
And
since
there
are
no
disc
magazines
to
load,
your
disc
labels
are
in
plain
sight
plus
they
make
it
easy
to
record
tapes
with
your
favorite
songs
from
several
discs.
Fine
Pluse
Conversion
System
Proprietary
technology
developed
for
our
most
expensive,
high-
end
CD
players,
FPCS
gives
your
digital
music
greater
warmth,
more
texture,
and
better
sound-stage
imaging.
Power
WARNING
BEFORE
PLUGGING
IN
THE
UNIT
FOR
THE
FIRST
TIME,
READ
THE
FOLLOWING
SELECTION
CAREFULLY.
*
Some
models
are
designed
for
use
only
with
the
power
supply
voltage
of
the
region
where
they
are
sold.
U.K.
and
Australian
models:
AC
240V,
50Hz
a
ae
D/A
Converters
and
AccuPulse
Quartz
European
models:
AC
230V,
50Hz
U.S.A.
and
Canadian
models:
AC
120V,
60Hz
Single-bit
D/A
converters
give
your
music
a
wider
dynamic
Worldwide
models:
AC
120
and
220V
range
and
sweeter
sounding
quiet
passages.
They
work
in
switchable,
50/60Hz
:
conjunction
with
your
AccuPulse
Quartz
System,
which
*
Voltage
Selector
(Rear
Panel)
:
further
reduces
the
possibility
of
subtle
vibrations
that
might
Worldwide
models
are
equipped
with
a
voltage
selector
cause
timing
errors.
to
conform
with
the
local
power
supply
in
your
area.
m
Front
Panel
Ten-Key
Direct
Track
Access
and
Check
that
the
voltage
selector
is
set
to
the
correct
Direct
Disc
Play
voltage
before
plugging
in
the
unit
(See
“Setting
the
|
For
instant
access
to
any
song
on
the
disc
playing,
simply
NOES
oe
Pe
OEE
oee
ey
ence).
press
the
desired
track’s
number
on
your
DX-311’s
front
NOES
OEE
NO
Hee
or
can
ui
sa
panel,
or
input
the
track’s
number
into
the
DX-311/C211
ae
OE
POs
ey
eee
eee
:
-
of
the
unit.
remote
control’s
keypad.
And
to
start
play
of
a
particular
disc,
jut
press
one
of
the
six
front-panel
disc
buttons.
Do
not
touch
the
player
with
wet
hands
m
Next
Selection
Do
not
handle
the
player
or
power
cord
when
your
hands
are
—-
wet
or
damp.
If
water
or
any
other
liquid
enters
the
player
This
high-end
feature
lets
you
choose
the
next
song
from
any
;
Se
thesis
dies
Ge
These
han
eee
WnGUl
GAICERGG
Ihe
kon
cabinet,
take
the
player
to
an
authorized
service
station
for
|
Bet
PUNE
6
inspection.
that’s
playing.
@
8-Times
oversampling
digital
filter
Location
of
the
player
. .
M
f1(Remote
Interactive)
compatible
30-key
remote
*
Place
the
player
in
a
well-ventilated
location.
control
(DX-C311/C211
only)
M@
Seven
repeat
modes
(entire
side,
all
discs,
A
—
B
(DX-C311
only),
memory,
single
track,
random,
random
memory)
Three-mode
time
display
(single
elapse/remain,
total
remain)
40-Track
memory
Forward/reverse
track
jump
Peak
search
(DX-C311
only)
Output
jack
(analog/fixed)
Supplied
accessories
1
Remote
control
cable
1
Audio
connection
cable
1
Remote
control
transmitter
(DX-C311/C211
only)
2
Batteries
(DX-C311/C211
only)
Take
special
care
to
provide
plenty
of
ventilation
on
all
sides
of
the
player
especially
when
it
is
placed
in
an
audio
rack.
If
ventilation
is
blocked,
the
player
may
overheat
and
malfunction.
¢
Do
not
expose
the
player
to
direct
sunlight
or
heating
units
as
the
player's
internal
temperature
may
rise
and
shorten
the
life
of
the
pickup.
¢
Avoid
damp
and
dusty
places
and
places
directly
affected
by
vibrations
from
the
speakers.
In
particular,
avoid
placing
the
unit
on
or
above
one
of
the
speakers.
¢
Be
sure
the
player
is
placed
in
a
horizontal
position.
Never
place
it
on
its
side
or
on
a
slanted
surface
as
it
may
malfunction.
¢
Do
not
place
near
tuners
or
TV
sets.
If
placed
next
to
a
TV
or
tuner,
it
may
cause
reception
interference
resulting
in
some
noise
in
the
TV
or
tuner
output.
Care
From
time
to
time
you
should
wipe
off
the
front
and
rear
panels
and
the
cabinet
with
a
soft
cloth.
For
heavier
dirt,
dampen
a
soft
cloth
in
a
weak
solution
of
mild
detergent
and
water,
wring
it
out
dry,
and
wipe
away
the
dirt.
Following
this,
dry
immediately
with
a
clean
cloth.
Do
not
use
rough
material,
thinners,
alcohol
or
other
chemical
solvents
or
cloths
since
these
may
damage
the
finish
or
remove
the
panel
lettering.
Points
to
Remember
e
Ifthe
player
is
brought
from
a
cold
environment
to
a
warm
one
or
is
in
a
cold
room
that
is
quickly
heated,
condensation
may
form
on
the
pickup,
preventing
proper
operation.
In
this
case,
remove
the
disc
and
leave
the
power
ON
for
about
one
hour
to
remove
the
condensa-
tion.
¢
Always
close
the
disc
tray
when
not
loading
or
unloading
discs
to
protect
delicate
internal
parts
from
dust.
¢
When
transporting
the
player,
be
careful
not
to
bump
it.
PT
ery
ee
ee
en
ee
Oe
pee
oe
ee
ee
ee
ee
eT
Pe

Control
Positions
and
Names
NOTE:
If
there
is
a
protective
film
on
the
display,
which
is
making
it
difficult
to
read
the
display,
remove
it.
For
more
information
about
buttons,
turn
to
the
page
number
listed
in
the
[_
].
4,
NEXT
SELECTION
7.
DISC
SKIP
es
5.
DISPLAY
ee
8.
&
OPEN/CLOSE
2.
RANDOM
POWER
button
[
6
]
1.
POWER
9.
DIRECT
PLAY
RANDOM
button
[
9
]
REPEAT
button
[
12
]
co
NEXT
SELECTION
button
[
8
|
Sieg.
ce
DISPLAY
button
[
13
]
ce
|
=
|
Ss
Remote
Control
Sensor
(DX-C311/
se
eR
tae
re
a
ond
|
|
rae
DISC
SKIP
buttons
[
8
]
ONIC
YO
cous
ol:
oasca
Rt
ee
ale
creates
ates
re
&
OPEN/CLOSE
button
ee
DIRECT
PLAY
buttons
[
8
]
cs.
0.
REPEAT
A-B
button
(DX-C311
only)
11.
PEAK
SEARCH
[12]
|
11.
PEAK
SEARCH
button
(DX-C311
17.
CLEAR
Pe
enges
aCe
16.
MEMORY
12.
Loading
drawer
[
7
]
[3.
Disc
tray(s)
(1
-
6)
_
14.
Carousel
_
15.
Number
buttons
(1
-
9,
0)
and
Plus
Ten
button
(+10)
(DX-C311
only)
[
8
]
16.
MEMORY
button
[
10
]
17.
CLEAR
button
[
11
]
18.
Operation
buttons
i<i~<q
‘Down
button
—
‘Up
button
Hl
PAUSE
:Pause
button
|
|
M@
STOP
:Stop
button
PAUSE
REPEAT
RANDOM
MEMORY
PB
PLAY
-Play
button
|
TRACK
[7]
[7]
|
SINGLE
ELAPSED](7
[7]
.
LI
Ld}
total
Remain
[II]
f
.
PAUSE
indicator
REPEAT
indicator
RANDOM
indicator
MEMORY
indicator
Disc
number
indicator
TRACK
number
display
ELAPSED/REMAIN
indicator
Time
display
a
A
tas
rua
mo
ao
op
1.
REMOTE
CONTROL
RI
REMOTE
CONTROL
jacks
[
15
]
Power
Supply
Cord
[
6
]
Analog
OUTPUT
jacks
[
6
]
VOLTAGE
SELECTOR
(Worldwide
models
only)
[
6
]
BP
Wh
eR
|
ates
Ye
ere
Boba
|
3.
OUTPUT
4.
VOLTAGE
SELECTOR

Setting
the
Voltage
Selector
worldwide
model
only)
Models
without
a
voltage
selector
can
only
be
used
in
areas
where
the
power
supply
is
the
same
as
that
of
the
CD
player.
1.
Determine
the
proper
voltage
for
your
>
area:
220V
or.
120V.
2.
Ifthe
preset
voltage
is
not
proper
for
your
area,
insert
a
screwdriver
into
the
VOLTAGE
SELECTOR
groove
in
the
switch.
Slide
the
switch
Ls
Ee)
all
the
way
to
the
right
(120V)
or
to
the
220VU
120V"U
left
(220V),
whichever
is
proper.
Making
System
Connections
¢
Do
not
plug
in
the
power
cord
until
all
connections
have
been
made.
-¢
On
each
pair
of
input
or
output
jacks,
the
lower
jack
(marked
R)
corresponds
to
the
right
channel,
and
the
upper
jack
(marked
L)
to
the
left
channel.
Two
types
of
output
jacks
are
located
on
the
rear
panel.
Select
the
appropriate
type
according
to
your
amplifier.
ANALOG
OUTPUT
jacks:
These
are
the
most
commonly
used
jacks.
When
connect-
ing
use
the
supplied
audio
connection
cable
(2
x
RCA
to
2
x
RCA).
See
your
amplifier’s
instruction
manual
for
further
information.
|
Insert
the
AC
power
supply
cord
into
the
—
wall
outlet.

Playing
CDs
oe
+
Sl
Igoe
||
=
=e
1.
Press
the
POWER
button
to
turn
on
POWER
the
power.
When
the
power
is
turned
on,
the
carousel
rotates
to
find
the
position
of
a
MON
mi
STAND-Y
disc
and
stops
automatically
if
there
is
a
disc
on
the
disc
tray.
If
the
4
OPEN/CLOSE
button
is
pressed
immediately
after
the
power
has
been
turned
on
the
carousel
does
not
rotlate.
Press
the
&
OPEN/CLOSE
button
to
open
the
loading
drawer.
Put
the
disc(s)
in
the
Disc
Tray(s)
with
labels
facing
up.
Pressing
the
DISC
SKIP
(-,+)
button
rotates
the
carousel
so
that
you
can
load
ts
discs
in
the
other
disc
trays.
(fe),
tes
Press
the
&
OPEN/CLOSE
button
again
to
close
the
loading
drawer.
The
disc
in
the
front
position
is
ready
to
play.
If
there
is
no
disc
in
the
front
position
of
the
carousel,
the
unit
rotates
to
the
next
Disc
Tray
until
it
finds
a
4
Gh?
Beenie
uede
disc
to
play.
The
Disc
Tray
number
Dison.
(P)
2
3
with
no
disc
in
its
tray
disappears
from
et
me
eee!
:
[[.
TOTAL
REMAIN
Hy
im
»
_]
is
4
the
display.
Press
the
B
PLAY
button.
The
Disc
No.
is
surrounded
by
a
square
and
starts
playing
from
the
first
track.
If
you
put
the
discs
in
the
disc
trays
and
press
the
B>
PLAY
button
instead
of
the
&
OPEN/CLOSE
button,
the
carousel
turns
and
the
disc
which
you
put
in
front
position
while
the
drawer
we
j
SINGLE
ELAPSED
=],
a
ae
was
opened
starts
to
play.
UW
Wu
4
After
all
the
discs
on
the
carousel
have
been
played,
the
display
resets
to
its
initial
condition
when
the
discs
were
loaded.
&
OPEN/CLOSE
12
PAUSE
_
Press
the
If]
PAUSE
button.
osc
(T)
2
3
©
The
PAUSE
indicator
lights
and
the
err
eee
sre
Li
4
playing
stops
temporarily.
¢
To
resume
playing,
press
the
B=»
PLAY
button.
The
playing
starts
up
again
from
exactly
where
it
left
off.
Press
the
Ml
STOP
button.
¢
When
the
loading
drawer
is
open,
the
disc
which
has
been
played
comes
into
the
front
position.

6
hontai
\s=
2s
[===
=
HSC
=
O02
Sse
Oht1
=
Pees
ae
vi
2
DIRECT
PLAY
DISC
1
DISC
2
DISC
3
DISC
4
DISC
5
DISC
6
Select
the
desired
disc
using
the
DIRECT
PLAY
buttons
(DISC
1
-
DISC
6).
Select
the
track
number
you
wish
to
play
using
the
|~<@<@
and
pp
buttons.
¢
Selecting
the
track
number
can
be
Ooo
ce
performed
directly
with
the
Number
‘
5
6
buttons
on
the
front
panel
(DX-C311
only)
or
on
the
ece
control
(DX-
|
[|
C311/C211
only).
The
+10
button
_
oo
selects
a
track
with
a
number
of 10
or
higher.
For
example,
to
select
Track
Number
30,
press
this
button
three
times,
and
then
press
0.
¢
If
you
do
not
select
the
track,
playback
will
start
with
the
first
track
on
the
selected
disc.
Playback
will
start
automatically,
so
the
B
PLAY
button
does
not
need
to
be
pressed.
Nee
oer
1.
Press
the
NEXT
SELECTION
button.
¢
If
you
do
not
operate
within
approxi-
mately
8
seconds,
it
will
be
cancelled.
In
such
a
case,
press
the
button
again.
2.
Select
the
desired
disc,
using
the
DIRECT
PLAY
buttons
(DISC
1
-
DISC
6).
°
If
you
select
a
track
from
the
disc
being
SEE,
played,
this
operation
is
not
necessary.
DISC
1
DISC
2
DISC
3
DISC
4
DISC
§
DISC
6
¢
Nothing
will
operate
for
the
next
8
seconds.
|
3.
Select
the
desired
track
number
using
the
<<
and
|
buttons.
When
the
track
which
has
been
playing
finishes,
the
selected
track
will
be
played.
¢
Selecting
the
track
number
can
be
performed
directly
with
the
Number
buttons
on
the
front
panel
(DX-C311
only)
or
on
the
remote
control
(DX-
Dee.
C311/C211
only).
[fe
II
NOTE:
If
the
disc
which
has
been
selected
is
not
in
the
Disc
Tray,
the
next
disc
is
played
in
the
normal
way,
starting
from
the
beginning.
Ifa
track
which
is
not
on
the
disc
is
selected,
the
disc
which
was
designated
is
played
in
the
normal
way,
starting
from
the
beginning.

RANDOM
|
ONKYO
@).
[a
Pee
hg
eae
5
LEbeL
eee
0):
Ae
2S
4c)
6
8
6
Bek
Lepr
les
toca
Ce
ae
ae
<<
ee
4h
RANDOM
I
{|
ZEA
ANDOM
DISC
NG
4
Lie
Coffets|
aS
v
RANDOM
DISC
No.
(1)
2
3
TRACK
[7]
SINGLE
ELAPSED
rm.
(FUT
a
Lis
byEL
4.
656
During
playback,
press
the
B»B|
button.
The
CD
player
will
stop
playing
the
current
track,
then
move
to
the
beginning
of
the
next
track
where
normal
play
will
continue.
During
playback,
press
the
<<
button.
The
CD
player
will
stop
playing
the
current
track,
return
to
the
beginning
of
the
track,
and
play
the
track
again.
Normal
play
will
continue.
To
jump
to
the
previous
track,
quickly
press
the
|<@«@
button
again
before
playback
begins.
during
normal
play
(6)
during
memory
play
(when
the
track
numbers
3,
5,
6
and
8
are
stored
(inthat
order)
in
the
memory)
(C)
during
random
play
+—
and
—
shows
where
playback
will
skip
to
(skip
mode)
and
L,
indicates
the
normal
order
of
playback.
Press
the
RANDOM
button
to
enter
random
mode.
|
The
CD
player
will
play
all
the
tracks
of
all
the
six
discs
in
a
random
order.
¢
To
stop
the
random
play,
press
the
STOP
button.
*
To
cancel
the
random
play,
press
the
RANDOM
button.
¢
Disc
can
be
exchanged
during
random
play.
However,
if
a
disc
with
a
different
number
of
tracks
is
added,
all
the
tracks
are
played.
A
disc
with
the
same
number
of
tracks
does
not
play
the
track
numbers
which
have
been
already
played.
If
a
disc
whose
tracks
have
been
all
played
is
exchanged,
the
new
disc
is
not
played.
*
Random
mode
can
be
operated
together
with
memory
mode
and
repeat
mode.
However,
if
the
whole
disc
is
stored
into
memory
and
the
disc
is
selected,
other
songs
are
not
played
until
the
random
play
of
the
tracks
of
this
disc
are
completed.

Using
Memory
Function
ONKYO
1
MEMORY
SS)
MEMORY
i
DISC
No.
4
@)
3
rl
~
AI
LJ)
TOTAL
REMAIN
@
1
Ae
a
BD
E
vp
2
DIRECT
PLAY
~
DISCSKIP.
+
DISC
1
DISC
2
DISC
3
DISC
4
DISC
5
DISC
6
ve
ve
MEMORY
Eess)
4
Up
to
40
tracks
can
be
stored
in
memory.
For
the
DX-C311/C211,
the
number
buttons
on
the
remote
control
can
be
used
for
this
operation.
For
the
DX-C111,
the
remote
control
can
be
used
if
you
have
the
supplied
one
with
the
Onkyo
amplifier.
Press
the
MEMORY
button
to
enter
memory
mode.
Select
the
desired
disc,
using
the
DISC
SKIP
(4,
-)
buttons
or
the
DIRECT
PLAY
buttons
(DISC
1
-
DISC
6).
Select
the
desired
track
number,
using
the
|<<
and
wp!
buttons.
You
can
store
all
the
tracks
in
memory
by
pressing
the
@<@
button
until
“AL”
appears
on
the
TRACK
Number
display.
When
using
a
remote
control,
enter
the
track
number
by
pressing
the
number
buttons
on
the
remote
control.
To
store
all
the
tracks
in
the
memory,
select
the
track
number
“0”.
Press
the
MEMORY
button.
The
selected
track
will
be
stored
in
memory.
To
enter
further
track
numbers
into
memory,
repeat
procedure
2
and
4
(or
2
and
3
by
using
a
remote
control).
If
more
than
40
tracks
are
selected,
“FULL”
will
flicker
on
the
time
display
to
indicate
the
memory
is
full.
When
you
press
PLAY
button,
playback
will
occur
in
the
order
you
selected.
If
the
MEMORY
button
is
pressed
during
play,
the
current
track
being
played
is
stored
in
memory.
When
using
aremote
control,
further
tracks
can
be
stored
by
pressing
the
number
button.
NOTES:
10
If
the
total
remaining
time
is
more
than
99
minutes
59
seconds
or
when
the
contents
stored
in
memory
extends
over
2
or
more
discs,
“--:
--”
is
displayed.
If
non-existing
selections
of
disc(s)
or
track(s)
are
entered,
the
corresponding
indicator
(disc
or
track)
will
illuminate
and
the
selection
is
included
in
the
program
count.
During
play,
the
non-
existing
selection(s)
will
be
cancelled
and
the
subsequent
programmed
disc
or
track
will
be
played.

MEMORY
ee
ee
;
:
once
ea
eas
>
==
5555
|
It
is
possible
to
check
what
is
stored
in
Ro
ooo
PS
CTT
memory
and
if
necessary
delete
unwanted
BE
APN
ne
RB
Sait
Wc
lnk
Os
ae
aes
3
a
Enaae]
track(s)
from
memory.
CLEAR
Example:
When
the
sixth
track
of
DISC
No.
5
is
stored
in
memory
as
the
second
track
to
be
played
(P-02).
pee
(a)
Track
number
9.).6
ee
a
oe
|
ee
MEMORY
DISC
No.
1
im
Pb]
Lic
4
(b)
MEMORY
indicator
()
Program
number
|
@_
Disc
number
@)
Press
the
M@
STOP
button.
Press
the
CLEAR
buttons.
The
last
track
stored
in
memory
is
cleared.
_
Press
the
MEMORY
button.
The
contents
of
the
memory
are
completely
Cleared,
MEMORY
=)
When
the
CD
player
enters
the
stop
mode
during
memory
play,
the
last
program
number
stored
in
memory
will
be
shown
on
the
display.
When
you
press
the
>
button
on
the
remote
control,
the
display
will
show
each
track
number
stored
in
memory,
in
turn.
MEMORY
DISCN..
4
29
8
TRACK
[7
_
SINGLE
as
Se
page
4
G6
Ld
REMAIN
11

Useful
Functions
Press
the
PEAK
SEARCH
button.
¢
The
CD
player
checks
the
disc
for
peak
level.
The
‘PS’
(PEAK
SEARCH)
indicator
will
flash
in
the
TRACK
Number
display
section
during
this
operation.
¢
The
part
of
the
track
with
the
highest
volume
on
the
disc
will
be
played
repeatedly
for
4
seconds
and
the
REPEAT
indicator
flashes.
¢
Refer
to
this
level
when
recording
a
cassette
tape.
ee
:
7
SINGLE.
ELAPSED
=
eD)
a
KEI
Ss
fe
Jf
=H
&
=
fa
oe
ae
One
A—||
ae
eg
ee
2
ELAPSED
ee)
=
i,
a
ore
an ak
oI
Row
i
A.
228
PEAK
SEARCH
nea)
—
When
you
want
to
cancel
the
PEAK
SEARCH,
press
the
STOP
button.
Press
the
REPEAT
button
to
enter
repeat
mode.
The
REPEAT
indicator
will
light.
Press
the
B
PLAY
button.
All
discs
inserted
in
the
trays
will
be
played
repeatedly.
Repeat
play
can
be
used
in
conjunction
with
the
normal,
memory,
and
random
play
modes.
You
can
press
this
button
before
play
begins
or
while
playing.
REPEAT
REPEAT
DISC
No.
(1)
ee
TRACK
j
7]
ee
|
ae
er ey
ae
T
t
ro)
6
=
({.
total
Reman
LILI
+
TJ)
4
REPEAT
DISC
No.
TRACK
j
SINGLE
ELAPSED
a
se
ee
|
.
{LJ
-©)
When
you
want
to
cancel
the
repeat
mode,
press
the
REPEAT
button
once
again.
REPEAT
A-B
CI)
1.
Press
the
REPEAT
A-B
button
at
the
start
of
the
portion
(Pcint
A)
to
be
repeated
during
playing.
Press
the
REPEAT
A-B
button
at
the
end
of
the
portion
(Point
B)
to
be
repeated.
The
block
between
A
and
B
is
played
repeatedly.
\|
DISC
No.
9.3
TRACKS
|
7
SINGLE
ELAPSED
ee
ae
@)
ee
ee
Esk
1475-6
male
When
you
want
to
cancel
the
block
repeat
play,
press
the
REPEAT
A-B
button
once
again.
NOTE:
It
is
not
possible
to
use
the
block
repeat
function
during
memory
play,
random
play
or
repeat
play.
REPEAT
A-B
lle
=
REPEAT=
DISC
No.
(1)
2
~
yy
~
poe
Ed]
TRACK
{
SINGLE
ELAPSED
Te
t]
{
Pe
ea
12

The
display
changes
each
time
you
press
the
DISPLAY
button
during
play.
|
TRACK
im
SINGLE.
ELAPSED
|
alee
—~—
0
awe
sane
oe
(a)
SINGLE
ELAPSED:
Shows
how
long
the
current
track
has
been
playing.
(6)
SINGLE
REMAIN:
Shows
how
much
time
is
left
for
the
track
currently
playing.
For
a
track
beyond
the
20th,
the
display
shows
“--:
--”,
(¢c)
TOTAL
REMAIN:
Shows
how
much
playing
time
is
left
for the
entire
disc.
During
memory
play,
this
display
shows
the
playing
time
remaining
for
the
entire
sequence
of
tracks
pro-
grammed
into
memory.
(@
The
display
returns
to
normal,
showing
the
single
elapsed
time.
DISPLAY
(
26
om
Mm
TRACK
[7]
SINGLE
ee
et
REMAIN
1s
coz
Co
2
DISPLAY
()
eae
y)
|
TRACK:
=:
[TJ
{
Soe
5
|
—_|
TOTAL.
REMAIN
f
fe
sj
q
4
DISPLAY
—}
SINGLE
REMAIN
te
|
Press
the
DISPLAY
button
during
stop
mode.
*
When
you
press
the
BB
|
button,
the
display
shows
the
playing
time
of
the
next
track,
following
the
order
of
the
tracks
on
the
CD.
When
you
press
the
@«@
button,
the
display
returns
to
the
previous
track.
|}
SINGLE
fs
PPT
|
mkt
REMAIN
TRACK
~j.
SINGLE
Lfa
es
2TT
REMAIN
.
4
Hold
the
disc
case
in
the
palm
of
one
hand
and
pull
the
lid
up
and
back-
ward.
2.
Push
down
on
the
inside
of
the
disc
case,
through
the
center
hole
of
the
disc.
Carefully
lift
the
disc
from
the
disc
case,
making
sure
to
only
hold
the
disc
by
its
edges
or
the
hole
in
the
middle.
*
A
dry,
soft
cloth
may
be
used
to
wipe
dust
and
fingerprints
off
the
surface
of
CDs.
Do
not
use
volatile
agents
on
discs,
such
as
thinner
or
benzine.
Also,
do
not
use
conventional
record
cleaners
or
antistatic
agents.
*
Do
not
place
a
CD
in
direct
sunlight
or
locations
subject
to
high
humidity
or
low
temperature.
*
Do
not
store
a
CD
in
the
CD
player
tray
for
long
periods
of
time.
13

Features
Only
Available
on
the
Remote
Control
You
can
operate
functions
using
the
supplied
remote
control
(DX-C311/C211
only)
or
an
Onkyo
amplifier’s
supplied
remote
control.
Press
the
buttons
on
the
remote
control
which
correspond
to
the
buttons
on
the
main
unit’s
front
panel.
Using
the
remote
control
-
When
the
remote
control
supplied
with
the
Remote
control
C-311/C211
amplifier
or
receiver
is
used,
operate
the
C-311/Cet1/04
nega
remote
control
by
pointing
it
towards
the
Amolitier
amplifier’s
remote
sensor.
~
Remote
contro!
:
sensor
When
the
supplied
remote
control
RC-
264C
is
used,
operate
the
remote
control
by
pointing
it
towards
the
CD
players
remote
sensor.
(DX-C311/C211
only)
Approximately
on
Approximately
5m
Search
play
This
button
may
not
be
provided
on
the
front
panel.
Hold
down
the
pp»
button
to
fast
forward
the
current
track
during
playback.
Hold
down
the
«q«q
button
to
fast
reverse
the
current
track
during
playback.
Release
the
pp
or
«qq
button
when
@
you
reach
the
specific
place
on
the
track
LL
=
you
want.
|
Os
z
:
ie
aaa!
The
CD
player
will
automatically
play
——
aL
when
you
release
the
pp
or
~q~—q
button.
pe.
TE
you
fast
forward
0-the
end
of
the
disc.
L,
a
mo
|
the
CD
will
return
to
track
|
and
then
stop.
ee
(a)
during
normal
play
(b)
during
memory
play
(c)
during
random
play
«—
and
+«—
indicates
fast
forward
and
fast
reverse.
L,
indicates
the
normal
order
of
playback.
Operation
buttons
(DX-C311/C211
only)
You
can
use
the
following
buttons
to
control
your
CD
player.
~
:
Open/close
button
i
:
Pause
button
|
:
Stop
button
>
:
Play
button
~<q-~<q
:
Fast
reverse
button
>
Pp
:
Fast
forward
button
ONHFO
~<a
:
Down
button
>
P|
:
Up
button
NEXT
SELECTION
:
Next
selection
button
DISC1~6
:
Direct
play
buttons
1-9,
0,
+10
:
Number
buttons
RANDOM
:
Random
button
REPEAT
:
Repeat
button
MEMORY
:
Memory
button
CLEAR
:
Clear
button
14

Connecting
Onkyo
Components
for
RI
Operation
When
the
DX-C311/C211/C111
is
connected
to
an
amplifier
or
receiver
with
the
Onkyo
FRI
mark,
you
can
operate
it
by
pressing
the
CD
operation
buttons
on
the
amplifier
or
receiver’s
supplied
remote
control.
When
connecting
Onkyo
products,
it
is
necessary
to
attach
the
FRI
cable
to
be
able
to
use
the
remote
control
of
the
amplifier
(or
receiver)
to
control
the
entire
system.
1.
To
use
this
CD
player
with
an
amplifier
(or
receiver),
cassette
tape
deck
and
tuner
with
the
FRI
mark,
insert
the
remote
control
cable
plugs
into
the
REMOTE
CONTROL
jacks
as
shown.
As
the
exact
connection
sequence
of
the
fRI
cable
is
unimportant,
you
can
connect
from
the
amplifier
(or
receiver)
to
either
the
tuner,
the
cassette
tape
deck
or
to
the
compact
disc
player.
To
operate
correctly
the
remote
control
must
face
towards
the
remote
control
sensor
of
the
amplifier
or
receiver.
NOTE:
¢
The
upper
and
lower
fRI
remote
control
jacks
have
the
same
function.
*
Remote
control
operation
is
not
possible
when
only
the
remote
control
cable
is
connected
—
the
audio
connection
cables
must
also
be
connected.
¢
An
fRI
remote
control
cable
equipped
with
a
1/8"
(3.5mm)
diameter
miniature
two-conductor
phone
plug
is
included
with
the
DX-C311/C211/C111
and
with
every
tuner
and
compact
disc
player
with
the
(RI
mark.
Ol:
Op
You
can
use
the
following
buttons
to
control
your
amplifier
or
receiver.
Pl
:
Stop
button
il
:
Pause
button
—
:
Play
button
be
Ret
<iq
:
Down
button
>
p
:
Up
button
1~9,
0,
+10
eae
:
Alternatively,
you
can
use
a
remote
control
MEMORY
that
has
been
provided
with
an
Onkyo
unit
such
as
the
A-911.
If
this
is
the
case,
the
CLEAR
following
buttons
can
be
used.
~
:
Open/close
button
L
~+-~<q
:
Fast
reverse
button
oy
>
p-
:
Fast
forward
button
REMOTE
CONTAOL
TRANSMITTER
AC-289S
1-9,
0,
+10
:
Number
buttons
MEMORY
:
Memory
button
CLEAR
_—
:
Clear
button
The
illustration
on
the
left
shows
the
remote
control
provided
with
the
Onkyo
A-
911
amplifier.
The
remote
control
you
use
may
be
different
to
the
one
shown.
15

Troubleshooting
Specifications
a
G
Ul
d
e
Compact
Disc
Automatic
Changer
Model
DX-C311/C211/C111
Signal
readout
system:
Optical
non-contact
*
POWER
button
is
pressed,
but
power
does
not
come
on.
Reading
rotation:
About
500
-
200
r.p.m.
Cause:
Power
cord
plug
is
not
properly
connected
to
AC
(constant
linear
velocity)
outlet.
Linear
velocity:
1:2.=.1.4
mis
Remedy:
Insert
plug
firmly.
Error
correction
system:
Cross
interleave
Reed-Solomon
code
*
Disc
is
loaded
in
the
disc
tray,
but
playback
will
not
begin.
D/A
converter:
L'bit
PW
Mi
Cause:
Disc
is
in
the
disc
tray
upside
down.
ee
Gare
ee
Remedy:
Load
the
disc
with
the
label
facing
upward.
Sampling
frequency:
392.8
kHz
(8
times
oversampling)
Cause:
Disc
is
dirty.
Number
of
channels:
2
(stereo)
Remedy:
Clean
the
disc.
Frequency
response:
—
2Hz
-
20kHz
Cause:
Moisture
has
accumulated
inside
the
CD
player.
Total
harmonic
distortion:
0.004%
(at
kHz)
Remedy:
Remove
the
disc
from
the
disc
tray,
place
the
Dynamic
ee
96dB
(at
1kHz)
CD
player
in
a
warm
place
and
leave
the
power
Signal
to
noise
Beno
90dB
(at
kHz)
on
for
about
one
hour
Channel
separation:
90dB
(at
1kHz)
Wow
and
Flutter:
Below
threshold
of
measurability
¢
No
sound
Output
level:
2
volts
r.m.s.
Cause:
Incomplete
or
incorrect
connections.
Power
consumption:
13
watts
Remedy:
Check
all
cable
connections
(See
pages
6)
Power
supply
rating:
U.K.
and
Australian
models:
Remedy:
Insert
all
plugs
firmly
into
jacks.
AC
240V,
50Hz
Cause:
Improper
input
selector
switch
setting
on
amplifier.
European
model:
Remedy:
Set
switch
to
proper
position.
See
your
AC
230V,
50Hz
(Except
U.K.)
amplifiers
operating
instructions
for
more
USA
&
Canadian
models:
information.
AC
120V,
60Hz
Worldwide
model:
*
Disc
skipping
Cause:
Disc
is
dirty.
Remedy:
Clean
the
disc.
Cause:
Disc
is
scratched.
Remedy:
Replace
the
disc.
Cause:
CD
player
has
been
bumped.
Remedy:
Place
the
CD
player
in
a
more
stable
location.
AC
120V
and
220V
Dimensions
(W
x
H
x
D):
455
x
120
x
425
mm
(17-15/16"
x
4-3/4"
x
16-11/16")
Weight:
7.4
kg
(16.3
Ibs)
Specifications
and
external
appearance
are
subject
to
change
without
notice
because
of
product
improvements.
|
*
Search
time
(when
moving
to
a
specific
track)
is
extremely
|
long.
Cause:
Disc
is
dirty.
Remedy:
Clean
the
disc.
Cause:
Disc
is
scratched.
Remedy:
Use
another
disc.
¢
Track
numbers
cannot
be
stored
in
the
memory.
Cause:
No
disc
in
the
tray.
Remedy:
Load
a
disc
into
the
tray.
Cause:
A
track
number
not
on
the
disc
is
being
input.
Remedy:
Use
only
the
track
numbers
on
the
disc.
ONKYO
CORPORATION
Sales
Planning
&
Promotion
Dept.:
2-1,
Nisshin-cho,
Neyagawa-shi,
OSAKA
572,
JAPAN
Tel:
0720-31-8111
Fax:
0720-33-5222
ONKYO
U.S.A.
CORPORATION
200
Williams
Drive,
Ramsey,
N.J.
07446,
U.S.A.
Tel:
201-825-7950
Fax:
201-825-8150
ONKYO
DEUTSCHLAND
GMBH
ELECTRONICS
Industriestrasse
18-20,
82110
Germering,
GERMANY
Tel:
089
84
93
20
Fax:
089
84
93
226
ONKYO
FRANCE
Immeuble
Le
Diamant,
Domaining
Technologique
de
Saclay,
4
Rue
René
Razel,
91892
SACLAY,
FRANCE
Tel:
(1)
69
33
1400
Fax:
(1)
69
41
35
84
SN29341942AY
E]
107960
Printed
by:
Schaltungsdienst
Lange
Berlin
(Germany)
This manual suits for next models
2
Table of contents
Other Onkyo CD Player manuals