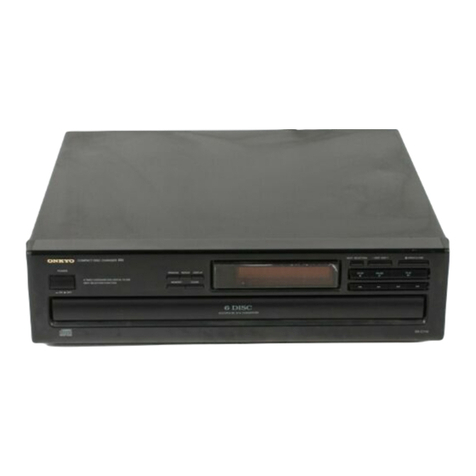
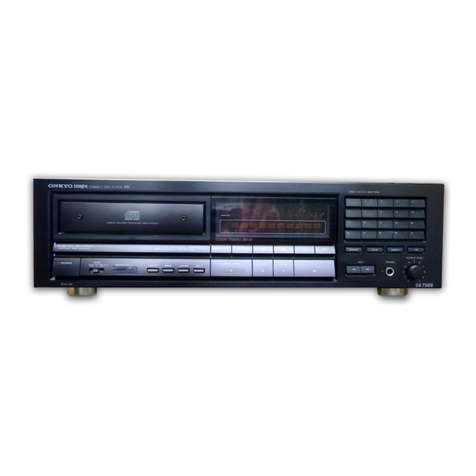
Onkyo C-711 User manual

ONKYO
aise
DIGITAL
AUDIO
-7\1
Compact
Disc
Player
Instruction
Manual
ONKYO
POWER
COMPAGT
DISC
PLAYER
C-711
RV
2
OPEWOLOSE
FRCS.
FINE
PULSE
CONVERS'OH
SYSTEM
(|
CONTENTS
oS
Using
thes
memor
Dee
functions...
Specificat
ons..

Thank
you
for
your
purchase
of
the
Onkyo
C-711
CD
player.
Please
read
this
manual
thoroughly
before
making
con-
nections
and
plugging
in
the
unit.
Following
the
instructions
in
this
manual
will
enable
you
to
obtain
optimum
performance
and
_
listening
enjoyment
from
your
new
C-711.
Please
retain
this
manual
for
future
reference.
e
This
apparatus
complies
with
requirements
of
EC
directive
87/
308/EEC.
FOR
CANADIAN
MODEL:
]
(POUR
LE
MODELE
CANADIEN)
e
For
models
having
a
power
cord
with
a
polarized
plug.
CAUTION:
TO
PREVENT
ELECTRIC
SHOCK,
MATCH
WIDE
BLADE
OF
PLUG
TO
WIDE
SLOT,
FULLY
INSERT.
@
Sur
les
modéles
dont
la
fiche
est
polarisée.
ATTENTION:
pouUR
EVITER
LES
CHOCS
ELEC-
TRIQUES,
INTRODUIRE
LA
LAME
LA
PLUS
LARGE
DE
LA
FICHE
DANS
LA
BORNE
CORRESPONDANTE
DE
LA
PRISE
ET
POUSSER
JUSQ’AU
FOND.
ATTENTION
FOR
BRITISH
MODEL
e@
Replacement
and
mounting
of
an
AC
plug
on
the
power
supply
cord
of
this
unit
should
be
pertormed
only
by
qualified
service
personnel.
e@
IMPORTANT:
The
wires
in
the
mains
lead
are
coloured
in
accordance
with
the
following
code:
Blue:
Neutral
Brown:
Live
As
the
colours
of
the
wires
in
the
mains
lead
of
this
apparatus
may
not
correspond
with
the
coloured
markings
identifying
the
termi-
nals
in
your
plug,
proceed
as
follows:
The
wire
which
is
coloured
blue
must
be
connected
to
the
terminal
which
is
marked
with
the
letter
N
or
coloured
black.
The
wire
which
is
coloured
brown
must
be
connected
to
the
termi-
nal
which
is
marked
with
the
Jetter
L
or
coloured
red.
“WARNING”
“TO
REDUCE
THE
RISK
OF
FIRE
OR
ELECTRIC
SHOCK,
DO
NOT
EXPOSE
THIS
APPLIANCE
TO
RAIN
OR
MOISTURE.”
CAUTION:
“TO
REDUCE
THE
RISK
OF
ELECTRIC
SHOCK,
DO
NOT
REMOVE
COVER
(OR
BACK).
NO
USER-SER-
VICEABLE
PARTS
INSIDE.
REFER
SERVICING
TO
QUALIFIED
SERVICE
PERSONNEL.”
CAUTION
RISK
OF
ELECTRIC
SHOCK
DO
NOT
OPEN
The
lightning
flash
with
arrowhead
symbol,
within
an
equilateral
triangle,
is
intended
to
alert
the
user
to
the
presence
of
uninsulated
“danger-
ous
voltage”
within
the
product’s
enclosure
that
may
be of
sufficient
magnitude
to
constitute
a
risk
of
electric
shock
to
persons.
The
exclamation
point
within
an
equilateral
trian-
gle
is
intended
to
alert
the
user
to
the
presence
of
important
operating
and
maintenance
(servicing)
instructions
in
the
literature
accompanying
the
appliance.
Important
safeguards
1.
N
6.
6A.
9,
Read
Instructions
-
All
the
safety
and
operating
instructions
should
be
read
before
the
appliance
is
operaied.
Retain
Instructions
—
The
safety
and
operating
instructions
should
be
retained
for
future
reference.
Heed
Warnings
—
All
warnings
on
the
appliance
and
in
the
operat-
ing
instructions
should
be
adhered
to.
Foliow
Instructions
—
Al!
operating
and
use
instructions
should
be
tollowed.
Water
and
Moisture
—
The
appliance
should
not
be
used
near
water
~
for
example,
near
a
bathtub,
washbowl,
kitchen
sink,
laundry
tub,
in
a
wet
basement,
or
near
a
swimming
pool,
and
the
like.
Carts
and
Stands
—
The
appliance
should
be
used
only
with
a
cart
or
stand
that
is
recommended
by
the
manufacturer.
An
appliance
and
cart
combination
should
be
moved
with
care.
Quick
stops,
excessive
force,
and
uneven
PORTABLE
CART
WARNING
surfaces
may
cause
the
appliance
and
cart
combination
to
over
turn.
Seis
//\
Bt
Ud
Wall
or
Ceiling
Mounting
—
The
appliance
should
be
mounted
to
a
wall
or
ceiling
only
as
recommended
by
the
manufacturer.
Ventilation
~
The
appliance
should
be
situated
so
that
its
location
or
position
does
not
interfere
with
its
proper
ventilation.
For
example.
the
appliance
should
not
be
situated
on
a
bed,
sofa,
rug,
or
similar
surface
that
may
block
the
ventilation
openings:
or,
placed
in
a
built-in
instal-
lation,
such
as
a
bookcase
or
cabinet
that
may
impede
the
flow
of
air
through
the
ventilation
openings.
Heat
—
The
appliance
should
be
situated
away
from
heat
sources
such
as
radiators,
heat
registers,
stoves,
or
other
appliances
(including
amplifiers)
that
produce
heat.
.
Power
Sources
-
The
appliance
should
be
connected
to
a
power
supply
only
of
the
type
described
in
the
operating
instructions
or as
marked
on
the
appliance.
.
Polarization
—
If
the
appliance
is
provided
with
a
polarized
plug
having
one
blade
wider
than
the
other,
please
read
the
following
infor-
mation:
The
polarization
of
the
plug
is
a
safety
feature.
The
polarized
plug
will
only
fit
the
outlet
one
way.
Ef
the
plug
does
not
fit
fully
into
the
outlet,
try
reversing
it.
If
there
is
still
trouble
inserting
it,
the
user
should
seek
the
services
of
a
qualified
electrician.
Under
no
cireum-
stances
should
the
user
attempt
to
defeat
the
polarization
of
the
plug.
.
Power-Cord
Protection
—
Power-supply
cords
should
be
routed
so
that
they
are
not
likely
to
be
walked
on
or
pinched
by
items
placed
upon
or
against
them,
especially
near
plugs,
convenience
receptacles.
and
the
point
where
they
exit
from
the
appliance.
.
Cleaning
—
The
appliance
should
be
cleaned
only
as
recommended
by
the
manufacturer.
.
Nonuse
Periods
—
The
power
cord
of
the
appliance
should
be
unplugged
from
the
outlet
when
left
unused
for
a
long
period
of
time.
.
Object
and
Liquid
Entry
—
Care
should
be
taken
so
that
objects
do
not
fall
and
liquids
are
not
spilled
into
the
enclosure
through
openings.
.
Damage
Requiring
Service
—
The
appliance
should
be
serviced
by
qualified
service
personnel
when:
A.
The
power-supply
cord
or
the
plug
has
been
damaged;
or
B.
Objects
have
fallen,
or
liquid
has
been
spilled
into
the
appliance:
or
C.
The
appliance
has
been
exposed
to
rain;
or
D.
The
appliance
does
not
appear
to
operate
normally
or
exhibits
a
marked
change
in
performance;
or
E.
The
appliance
has
been
dropped,
or
the
enclosure
damaged.
.
Servicing
—
The
user
should
not
attempt
to
service
the
appliance
beyond
that
described
in
the
operating
instructions.
All
other
servicing
should
be
referred
to
qualified
service
personnel.

Special
cautions
for
compact
disc
player
This
Compact
Dise
Player
contains
a
semiconductor
laser
system
and
is
classified
as
a
“CLASS
1
LASER
PRODUCT”
.
So,
to
use
this
model
properly,
read
this
Owner’s
Manual
carefully.
In
case
of
any
trouble,
please
contact
the
store
where
you
purchased
the
unit.
To
prevent
being
exposed
to
the
laser
beam,
do
not
try
to
open
the
enclosure.
DANGER:
INVISIBLE
LASER
RADIATION
WHEN
OPEN
AND
INTER-
LOCK
FAILED
OR
DEFEATED.
AVOID
DIRECT
EXPOSURE
TO
BEAM.
CAUTION:
THIS
PRODUCT
UTILIZES
A
LASER.
USE
OF
CONTROLS
OR
ADJUSTMENTS
OR
PERFORMANCE
OF
PROCEDURES
OTHER
THAN
THOSE
SPECIFIED
HEREIN
MAY
RESULT
IN
HAZARDOUS
RADIATION
EXPOSURE.
i
8.
FOR
U.S.A.
MODEL:
.
The
laser
is
covered
by
a
housing
which
prevents
exposure
dur-
ing
operation
or
maintenance.
However,
this
product
is
classified
as
a
Laser
Product
by
CDRH
(Center
for
Devices
and
Radiolog-
ical
Health)
which
is
a
department
of
the
Food
and
Drug
Admin-
istration.
According
to
their
regulations
21
CFR
section
1002.30,
all
manufacturers
who
sell
Laser
Products
must
maintain
records
of
written
communications
between
the
manufacturer,
dealers
and
customers
concerning
radiation
safety.
If
you
have
any
com-
plaints
about
instructions
or
explanations
affecting
the
use
of
this
product,
please
feel
free
to
write
to
the
address
on
the
back
page
of
this
manual.
When
you
write
us,
please
include
the
model
number
and
serial
number
of
your
Compact
Disc
Player.
In
compliance
with
Federal
Regulations,
the
certification,
iden-
tification
and
the
period
of
manufacture
are
indicated
on
the
rear
panel.
FCC
INFORMATION
FOR
USER
CAUTION:
The
user
that
changes
or
modifications
not
expressly
approved
by
the
party
responsible
for
compliance
could
void
the
user's
authority
to
operate
the
equipment.
NOTE:
This
equipment
has
been
tested
and
found
to
comply
with
the
limits
for
a
Ciass
B
digital
device
pursuant
to
Part
15
of
the
FCC
Rules.
These
limits
are
designed
to
provide
reasonable
protection
against
harmful
interference
in
a
residential
installa-
tion.
This
equipment
generates
uses
and
can
radiate
radio
fre-
quency
energy
and
if
not
installed
and
used
in
accordance
with
the
instructions
may
cause
harmful
interference
to
radio
com-
munications.
However
there
is
no
guarantee
that
interference
will
not
occur
ina
particular
installation.
If
this
equipment
does
cause
harmful
interference
to
radio
or
television
reception
which
can
be
determined
by
turning
the
equipment
off
and
on
the
user
is
encouraged
to
try
to
correct
the
interference
by
one
or
more
of
the
following
measures:
e
Reorient
or
relocate
the
receiving
antenna.
e
Increase
the
separation
between
the
equipment
and
receiver.
e
Connect
the
equipment
into
an
outlet
on
a
circuit
different
from
that
to
which
the
receiver
is
connected.
e
Consult
the
dealer
or
an
experienced
radio/TV
technician
for
help.
FOR
CANADIAN
M
(POUR
LE
MODELE
CANADI
e
THIS
DIGITAL
APPARATUS
DOES
NOT
EXCEED
THE
CLASS
B
LIMITS
FOR
RADIO
NOISE
EMISSION
FROM
DIGITAL
APPARATUS
SET
OUT
IN
THE
RADIO
INTER-
FERENCE
REGULATIONS
OF
THE
CANADIAN
DEPARTMENT
OF
COMMUNICATIONS.
L’INTERFERENCE,
RADIO
ELECTRIQUE
GENEREE
PAR
CET
APPAREIL
NUMERIQUE
DE
TYPE
B
NE
DEPASSE
PAS
LES
LIMITES
ENONCEES
DANS
LE
REGLEMENT
SUL
LES
PERTURBATIONS
RADIO
ELEC-
TRIQUES,
SECTION
APPAREIL.
NUMERIQUE,
DU
MIN-
ISTERE
DES
COMMUNICATIONS.
FOR
EUROPEAN
MODEL
(include
U.K.)
_
i“CLASS
1
LASER
PRODUCT”
This
tabel
on
the
left
hand
panel
of
the
unit
states
that:
Ls
2
é
This
unit
isa
CLASS
1
LASER
PRODUCT
and
employs
a
laser
inside
the
cabinet.
.
To
prevent
the
laser
from
being
exposed,
do
not
remove
the
cover,
Refer
servicing
to
qualified
personnel.

Features
@
FPCS
(Fine
Pulse
Conversion
System)
Based
on
the
latest
advances
in
computer-graphic
technology,
FPCS
“smoothens”
interpolation
—-
or
makes
a
better
“edu-
cated
guess”
at
the
value
of
missing
data
—
to
give
you
warmer,
more
“musical”
sounding
music.
Single-bit
D/A
Converters
Backed
by
AccuPulse
Quartz
System
Onkyo’s
single-bit
converters
eliminate
the
zero-cross
distor-
tion
and
nonlinearity
that
plagues
conventional
CD
players,
especially
at
low
signal
levels.
Its
backed
by
our
proprietary
AccuPulse
Quartz
System,
which
is
a
small,
oscillating
element
mounted
on
Polysorb,
a
damping
material
designed
by
Onkyo
that
dramatically
reduces
vibration.
20
Track
Random
Memory
You
can
program
up
to
20
tracks
for
playback
in
any
order
you
like,
and
your
C-711
will
insert
four
seconds
of
blank
time
between
tracks
—-
which
is
convenient
for
recording.
8-times
oversampling
digital
filter
Four
repeat
modes
(entire
disc,
single
track,
memory
and
random)
@
Optical
digital
output
e
This
C-711
Compact
Disc
Player
can
be
operated
using
an
optional
RC-133C
remote
control.
To
obtain
an
RC-133C,
con-
tact
the
dealer
where
you
purchased
the
C-711,
or
contact
Onkyo
directly,
at
the
address
on
the
back
cover
page.
CSB
5
“TZ,
aaa
—SSS====
Supplied
accessories
1
Remote
control
cable
1
Audio
connection
cable
Precautions
1.
Warranty
Card
The
serial
number
is
written
on
the
rear
panel
of
this
unit.
Copy
the
serial
number
and
model
number
onto
your
warranty
card
and
keep
it
in
a
safe
place.
2.
Power
WARNING
BEFORE
TURNING
ON
POWER
FOR
THE
FIRST
TIME,
READ
THE
FOLLOWING
SECTION
CAREFULLY.
e@
Some
models
are
designed
for
use
only
with
the
power
sup-
ply
voltage
of
the
region
where
they
are
sold.
ULK.
and
Australian
models:
AC
240V,
5O0Hz
European
model
(except
U.K.):
AC
230V,
50
Hz
U.S.A.
and
Canadian
models:
AC
120V,
60
Hz
Worldwide
model:
AC
120V/220V
switchable,
50/60
Hz
e
Voltage
Selector
(Rear
Panel)
Worldwide
models
are
equipped
with
a
voltage
selector
to
conform
with
local
power
supplies.
Be
sure
to
set
this
switch
to
match
the
voltage
of
the
power
supply
in
your
area
before
plugging
in
the
unit.
(See
“Setting
the
voltage
selector
[worldwide
models
only]”’,
p.
6.)
Models
without
a
voltage
selector
can
only
be
used
in
areas
where
the
power
supply
is
the
same
as
that
of
the
unit.
3.
Do
not
touch
the
player
with
wet
hands
6.
Do
not
handle
the
player
or
power
cord
when
your
hands
are
wet
or
damp.
If
water
or
any
other
liquid
enters
the
player
cab-
inet,
take
the
player
to
an
authorized
service
station
for
inspec-
tion.
Location
of
the
player
e
Place
the
player
in
a
well-ventilated
location.
Take
special
care
to
provide
plenty
of
ventilation
on
all
sides
of
the
player
especially
when
it
is
placed
in
an
audio
rack.
If
ventilation
is
blocked,
the
player
may
overheat
and
malfunction.
e@
Do
not
expose
the
player
to
direct
sunlight
or
heating
units
as
the
players
internal
temperature
may
rise
and
shorten
the
life
of
the
pickup.
e
Avoid
damp
and
dusty
places
and
places
directly
affected
by
vibrations
from
the
speakers.
In
particular,
avoid
placing
the
unit
on
or
above
one
of
the
speakers.
e
Be
sure
the
player
is
placed
in
a
horizontal
position.
Never
place
it
on
its
side
or
on
a
slanted
surface
as
it
may
malfunc-
tion.
e
Do
not
place
near
tuners
or
TV
sets.
If
placed
next
to
a
TY
or
tuner,
it
may
cause
reception
inter-
ference
resulting
in
some
noise
in
the
TV
or
tuner
output.
Care
From
time
to
time
you
should
wipe
off
the
front
and
rear
panels
and
the
cabinet
with
a
soft
cloth.
For
heavier
dirt,
dampen
a
soft
cloth
in
a
weak
solution
of
mild
detergent
and
water,
wring
it
out
dry,
and
wipe
away
the
dirt.
Following
this,
dry
immedi-
ately
with
a
clean
cloth.
Do
not
use
rough
material,
thinners,
alcohol
or
other
chemical
solvents
or
cloths
since
these
may
damage
the
finish
or
remove
the
panel
lettering.
Points
to
Remember
e
Ifthe
player
is
brought
from
a
cold
environment
to
a
warm
one
or
is
ina
cold
room
that
is
quickly
heated,
condensation
may
form
on
the
pickup,
preventing
proper
operation.
In
this
case,
remove
the
disc
and
leave
the
power
ON
for
about
one
hour
to
remove
the
condensation.
e@
Always
close
the
disc
tray
when
not
loading
or
unloading
discs
to
protect
delicate
internal
parts
from
dust.
e@
When
transporting
the
player,
be
careful
not
to
bump
it.

Control
positions
and
names
NOTE:
If
there
is
a
protective
film
on
the
surface
of
the
display,
which
is
making
it
difficult
to
read
the
display,
remove
it.
TN
—
—
—_—__
_
_
_
__,__«
ee
For
more
information
about
buttons,
turn
to
page
number
listed
in
the
[
].
4
wena
3
5
=
2.
OPEN/CLOSE
6
>
1.
POWER
Power
Button
[7]
Open/Close
Button
[8]
Dise
Tray
[8]
Down
Button
[9]
Stop
Button
[8]
Play
Button
[8]
Up
Button
[9]
Stand-by
Indicator
[7]
Remote
Control
Sensor
[13]
i
1
SS
GO
SMe
OM
oe
eR
8.
STAND-BY
14.
REPEAT
10.
Display
Button
[12]
g
|
13.
RANDOM
°
ii.
Memory
Button
[10,
11]
10.
DISPLAY
12.
CLEAR
_
12.
Clear
Button
[11]
11.
MEMORY
_
13.
Random
Button
[12]
14,
Repeat
Button
[12]
Display
SINGLE
“ELAPSED
3
.
‘
MEMORY
:
:
TOTAL.
REMAIN
:
-
a,
Elapsed/Remaining
Time
Indi-
:
cator
b.
Time/Track
Number/Programmed
Track
Number
Display
Repeat
Indicator
Track
Number
Indicator
6.
VOLTAGE
SELECTOR
.
Memory
Indicator
-
Pause
Indicator
amar
| t
Pascale
BAS”
powsee
=
Ste
rer
Over
Indicator
“hs
|
:
.
Random
Indicator
|
ap.
remo
es
RI
ANALOG
DIGITAL
REMOTE
OUTPUT
OUTPUT)
(CONTROL)
ONKYO.
COMPACT
DISC
PLAYER
MODEL
NO.
C-714
AG
OUTLET
C2IOV
A)
SOHZ
UNSIITCHEO
100W
MAX
Rear
panel
~
Analog
Output
Jacks
[6]
Digital
Output
Jack
[6]
Remote
Control
Jacks
[15]
AC
Outlet
[6]
Power
Supply
Cord
[7]
es
1.
ANALOG
3.
Ri
REMOTE
CONTROL
OUTPUT
2.
DIGITAL
OUTPUT
Aw
Voltage
Selector
(Worldwide
models
only)
[6]
RE
SERS
ROSS
SORE

Setting
the
voltage
selector
(worldwide
models
only)
Models
without
a
voltage
selector
can
only
be
used
in
areas
where
the
power
supply
is
the
same
as
that
of
the
CD
player.
Ee
SS
Re
RRS
RG
ORE
RO
eee
HS
Making
system
connections
220V
L
120V™
Do
not
plug
in
the
power
cord
until
all
connections
have been
made.
1.
Determine
the
proper
voltage
for
your
area:
220V
or
120V.
2. If
the
preset
voltage
is
not
proper
for
your
area,
insert
a
screwdriver
into
the
groove
in
the
switch.
Slide
the
switch
all
the
way
to
the
right
(120V)
or
to
the
left
(220V),
whichever
is
proper.
e
On
each
pair
of
input
or
output
jacks,
the
lower
jack
(marked
R)
corresponds
to
the
right
channel,
and
the
upper
jack
(marked
1)
to
the
Soe
left
channel.
CD
OPTICAL
Connecting
to
an
amplifier
Two
types
of
output
jacks
are
located
on
the
rear
panel.
Select
the
appropriate
type
according
to
your
amplifier.
ANALOG
OUTPUT
jacks:
These
are
the
most
commonly
used
jacks.
When
connect-
ing,
use
the
supplied
audio
connection
cable
(2
x
RCA
to
2
x
RCA).
DIGITAL
OUTPUT
jacks:
If
your
ampli-
fier
has
an
optical
digital
input
jack,
you
can
connect
the
CD
player
to
the
amplifier
using
an
optional
optical
fiber
cable.
The
output
level
from
this
jack
cannot
be
changed.
See
your
amplifier’s
instruction
manual
for
further
information.
AC
outlet
(UNSWITCHED)
-
The
power
cable
from
another
unit
can
be
connected
here.
(Maximum
capacity
1[OOW)

Connecting
the
power
POWER
Y
7
©
sTAND-BY
wees
POWER
1.
Insert
the
AC
power
supply
cord
into
the
wall
outlet
and
the
standby
indica-
tor
will
light
up.
.
When
you
press
the
POWER
button,
the
standby
indicator
will
go
off
and
the
display
will
light
up.
e
If
you
press
the
4
OPEN/CLOSE
button
while
the
unit
is
in
the
standby
mode,
the
power
will
turn
on
and
the
display
will
ight
up
auto-
matically.
Many
amplifiers
(such
as
the
ONKYO
A-911)
have
switched
AC
outlets
on
them.
[f
possible,
plug
the
AC
cord
of
the
C-7!1
into
one
of
these
outlets,
and
turn
the
power
ON
on
the
amplifier.
Turning
the
ampli-
fier
OFF
will
turn
the
CD
player
off
too.

Playing
CDs
|
4
OPEN/CLOSE
Press
the
4
OPEN/CLOSE
button
to
open
the
disc
tray.
2.
Put
the
disc
in
the
disc
tray,
with
the
label
side
of
the
disc
facing
up.
3.
Press
the
4
OPEN/CLOSE
button
to
close
the
disc
tray.
~
4,
Press
the
m
button.
The
CD
player
2?
o
will
start
playing.
z
The
CD
player
will
play
the
first
track
(track
1).
*&
If
you
want
to.
you
can
skip
step
3
by
pressing
the
m
button
instead
of
the
4
OPEN/CLOSE
button.
The
disc
tray
wil
close
automatically
and
play
track
lL.
—
4
OPEN/CLOSE
.
i
If
the
CD
player
does
not
start
playing
when
the
m
button
is
pressed:
@
The
disc
may
be
upside
down
in
the
tray,
Press
the
&
OPEN/CLOSE
button
to
open
the
disc
tray.
If
you
cannot
read
the
label
on
the
disc,
turn
the
dise
over,
Jabel
side
up.
e
Moisture
may
have
formed
inside
the
CD
player.
Remove
the
CD
disc
from
the
disc
tray
and
leave
the
power
on
for
about
one
hour
to
evaporate
the
mois-
ture,
eae
ee
ee
|
sR
RNS
Sa
eet
HY
Oa
oe
LE

ee
LEEER
ELE
LF
ene
bk
peace
:
2
play,
using
the
track
up
and
track
down
buttons
(<4
and
PP).
2.
Press
the
=
button.
The
CD
player
will
start
playing.
When
the
remote
control
is
to
be
used
for
this
operation,
simply
press
the
number
button
on
the
remote
control
corresponding
to
the
desired
track.
Playback
will
start
automatically
so
the
play
button
does
not
need
to
be
pressed.
-
Skip
play
During
playback,
press
the
>»
button.
The
CD
player
will
stop
playing
the
current
track,
then
move
to
the
beginning
of
the
next
track
where
normal
play
will
continue.
During
playback,
press
the
4
button.
The
CD
player
will
stop
playing
the
current
track,
return
to
the
beginning
of
the
track,
and
play
the
track
again.
Normal
play
will
continue.
To
jump
to
the
previous
track,
quickly
press
the
Ke
button
again
before
playback
begins.
(@)
during
normal
play
bp)
during
memory
play
(when
the
track
numbers
3,
5,
6
and
8,
are
stored
(in
that
order)
in
the
memory)
(C)
during
random
play
<«—
and
—»
shows
where
playback
will
skip
to
(skip
mode)
and
&
indicates
the
normal
order
of
playback.
ntents
of
the
display
@
Before
starting
playback
after
you
have
inserted
a
disc
The
total
number
of
tracks
on
the
disc.
A
number
appears
on
the
display
for
every
track
on
the
disc.
When
the
number
of
tracks
exceeds
20,
the
OVER
indicator
lights.
@
®
M@
After
you
have
started
playback
©
The
current
track
number
@
Tracks
that
have
finished
playing
do
not
have
numbers
displayed.

Using
the
memory
function
Up
to
20
tracks
can
be
stored
in
memory.
If
you
have
the
optional
remote
control
(RC-133C),
or
another
remote
control
which
was
supplied
with
your
Onkyo
amplifier,
the
number
buttons
on
the
remote
control
can
be
used
for
this
opera-
tion.
into
mem-_
MEMORY
.
ree
aa
—_
1.
Press
the
MEMORY
button
to
enter
memory
mode.
2.
Use
the
<4
and
p>»
buttons
to
select
the
track
you
want.
3.
Press
the
MEMORY
button.
The
selected
track
will
be
stored
in
memory.
*&
When
using
a
remote
control,
enter
the
track
number
by
pressing
the
number
buttons
on
the
remote
control.
e@
To
enter
further
track
numbers
into
memory.
repeat
procedures
2
and
3
or
the
procedure
marked
with
an
asterisk.
4.
When
you
press
m,
playback
will
occur
in
the
order
you
selected.
NOTES:
e
If
more
than
20
tracks
are
selected,
“FULL”
will
flicker
on
the
time
display
to
indicate
the
memory
is
full,
e
Ifthe
MEMORY
button
is
pressed
dur-
ing
play.
the
current
track
being
played
.
is
stored
into
memory.
If
the
remote
control
used,
further
tracks
can
be
stored
into
memory
with
the
opera-
sexo
tion
with
the
asterisk.
MEMORY
‘The
contents
of
the
display
Example:
After
storing
tracks
2,
5,
7,
10
and
11
into
memory
_
Mi
Before
starting
playback
aaa
.»
®
A
total
of
5
tracks
are
stored
in
the
memory.
©
|
(b)
The
stored
track
number(s)
in
memory
is
(are)
Shown.
{Ci}
MEMORY
is
displayed
showing
that
the
C-711
is
in
memory
mode.
M@
After
starting
playback
(@
Track
No.
2
is
currently
being
played
(the
first
track
in
memory).
(©:
The
stored
track
number(s)
in
memory
is
(are)
shown.
When
each
track
is
com-
:
pleted,
the
corresponding
track
number
on
the
display
will
be
turned
OFF.
)
MEMORY
is
displayed
showing
that
the
C-711
is
in
memory
mode.
MEMORY
Press
the
stop
button.

It
is
possible
to
check
what
is
stored
in
|
memory
and
if
necessary
delete
unwanted
i
track(s)
from
memory.
For
more
details
|
regarding
storing
tracks
into
memory,
see
page
10.
MEMORY
CLEAR
CLEAR
4
cj
Press
the
CLEAR
button.
»
The
last
track
programmed
into
memory
is
.
se
cee
«=
Cleared.
.
'
le
of
the
pro-
gram
MEMORY
ees
Press
the
MEMORY
button.
The
contents
of
the
memory
are
completely
cleared.
Remote
Control
only
See
1.
When
the
unit
enters
the
stop
mode
:
during
memory
play,
the
last
program
:
number
stored
in
memory
will
be
.
shown
on
the
display.
_
2.
When
you
press
the
»»
button,
the
we
ee
ue
8
|
display
will
show
each
track
number
.
stored
in
memory,
in
turn.
:
:
11

Useful
functions
REPEAT
RANDOM
e
.
Saas
RANDOM
uw
~
4
DISPLAY
é
:
{
SINGLE
ELAPSED
ie
Sed
J45
7
4
c
ee
ae
na
:
osp.sr
j
SINGLE
‘
24
45
67
a
REMAIN
-
_l
tt
112
S
a
OISPLAY
i
TT
7
TY
2039
4
ag
S
sora.
rewams
tL
Pit
oe
.
DISPLAY
iB
pee
DISPLAY
js
rh
“Th
{
12
9
4
56
6
?
TOTAL
REMAIN
“
1
40612
13 14
«15
16 t?
SINGLE
a
|
no
REMAIN
23
4 5
6
?
SINGLE
}
{
>
il
{
REMAIN
fet
{
WR
Press
the
REPEAT
button
to
enter
repeat
mode.
The
REPEAT
indicator
will
light.
.
Press
the
m
button.
The
CD
player
will
start
playing.
When
the
last
track
on
the
disc
has
fin-
ished,
the
CD
player
will
return
to
the
beginning
of
the
disc
and
play
all
the
tracks
on
the
disc.
Repeat
play
can
be
used
in
conjunction
with
the
normal,
memory,
and
random
play
modes.
You
can
press
this
button
before
playing
begins
or
while
playing.
When
you
want
to
cancel
the
repeat
mode,
press
the
REPEAT
button
once
again.
g
tracks
in
random
order
Press
the
RANDOM
button
to
enter
ran-
dom
mode.
The
CD
player
will
play
the
tracks
in
a
ran-
dom
order.
Checking
the
elapsed
or
remaining
time
Random
mode
will
be
cancelled
when
the
RANDOM
button
or
STOP
@
but-
ton
is
pressed
again,
or
when
all
of
the
tracks
have
been
played
back
and
stopped.
Random
mode
can
be
operated
together
with
MEMORY
mode
and
repeat
mode.
The
CD
player
will
play
a
maximum
of
99
tracks
in
random
play.
The
display
changes
each
time
you
press
the
DISPLAY
button
during
play.
@
e)
‘SINGLE
ELAPSED:
Usually
the
display
shows
the
track
numbers.
When
you
press
the
DIS-
PLAY
button
while
the
unit
is
in
MEM-
ORY
play
mode,
the
program
number
will
be
displayed
in
the
form
P-XX.
Shows
how
long
the
current
track
has
been
playing.
SINGLE
REMAIN:
Shows
how
much
time
is
left
for
the
track
currently
playing.
For
a
track
beyond
the
20th,
the
display
shows
“_:
”.
»
TOTAL
REMAIN:
Shows
how
much
playing
time
is
left
for
the
entire
disc.
During
memory
play,
this
display
shows
the
playing
time
remaining
for
the
entire
sequence
of
tracks
pro-
grammed
into
memory.
The
display
returns
to
normal,
showing
the
track
numbers.
Mode.
When
you
press
the
bP
button,
the
dis-
play
shows
the
playing
time
of
the
next
track,
following
the
order
of
the
tracks
on
the
CD.
If
you
press
the
#4
button,
the
display
returns
to
the
previous
track.

Features
only
available
on
the
remote
control
You
can
operate
functions
using
the
optional
remote
control
or
an
Onkyo
amplifier’s
supplied
remote
control.
Press
the
buttons
on
the
remote
control
which
correspond
to
the
buttons
on
the
main
unit’s
front
panel.
e
remote
control
Remote
control
sensor
When
the
remote
control
supplied
with
the
amplifier
or
receiver
is
used,
operate
the
ae.
A
:
_
remote
contro!
pointing
towards
the
ampli-
peniptecone
pinpiier
’
fier’s
remote
sensor
sensor
wk
a
When
the
optional
remote
control
—~
30°
%%
ve
y
RC-133C
is
used,
operate
the
remote
con-
trol
pointing
towards
the
CD_
players
5m
remote
sensor.
Pausing
playback
1.
Press
the
PAUSE
button
while
the
|
|
:
unit
is
playing.
The
playback
stops
temporarily.
2.
Press
the
PLAY
button
to
resume
play.
The
CD
will
resume
playing
at
the
point
where
the
PAUSE
button
was
pressed.
EE
Search
play
This
button
may
not
be
provided
on
the
remote
control.
Hold
down
the
»»
button
to
fast
forward
the
current
track
during
playback.
Hold
down
the
<<
button
to
fast
reverse
the
current
track
during
playback.
Release
the
»®
or
<4
button
when
you
reach
the
specific
place
on
the
track
you
=
=
a
|
want.
ee
The
CD
player
will
automatically
play
ia
§
eL7
8
when
you
release
the
»®
or
<4
button.
cS
a
If
you
fast
forward
to
the
end
of
the
disc,
the
CD
will
return
to
track
|
and
then
stop.
5
(@)
during
normal
play
(ey
=
CS
aNoom
(b)
during
memory
play
©
during
random
play
<«—
and
—>
indicates
fast
forward
and
fast
reverse.
[>
indicates
the
normal
order
of
playback.
cE
5
:
5
eam
.
oe
:
:
You
can
enter
the
track
number
using
the
:
5
number
button(s)
on
the
remote
control
14>
©
directly
to
start
playing
your
desired
track
or
:
start
the
memory
play.
See
page
9
and
10.
+10
410 +40
0
_
Example
30
Pm
oO
om GS
:
5:
Press
5
on
the
number
buttons
:
14:
Press
+10
then
4
30:
Press
+10
three
times
then
0
13

Connecting
Onkyo
components
for
RI
operation
When
the
C-711
is
connected
to
an
amplifier
or
receiver
with
the
Onkyo
~Qy
mark,
you
can
operate
it
by
pressing
the
CD
operation
buttons
on
the
amplifier
or
receiver's
supplied
remote
control.
:
2
14
Cassette
Tape
Deck
ee
fe
i
:
|
:
=
<=
—
nea
a
ED
Soneser
fs
foc
ONKYO
RI
REMOTE
CONTROL
TRANSMITTER
RC-259S
we
oh
dE
ESR
ERE
MEMORY
CLEAR
papienaiiaiics
ee
NS
r
remote
con-
When
connecting
Onkyo
products,
it
is
necessary
to
attach
the
«RY
cable
to
be
able
to
use
the
remote
control
of
the
ampli-
fier
(or
receiver)
to
control
the
entire
sys-
tem.
|.
To
use
this
CD
player
with
an
amplifier
(or
receiver),
cassette
tape
deck
and
tuner
with
the
gy
mark,
insert
the
remote
control
cable
plugs
into
the
REMOTE
CONTROL
jacks
as
shown.
2.
As
the
exact
connection
sequence
of
the
Al
cable
is
unimportant,
you
can
con-
nect
from
the
amplifier
(or
receiver)
to
either
the
tuner,
the
cassette
tape
deck
or
to
the
compact
disc
player.
3.
To
operate
correctly
the
remote
contro!
must
face
towards
the
remote
control
sensor
of
the
amplifier
or
receiver.
NOTE:
e
The
upper
and
lower
fQy
remote
con-
trol
jacks
have
the
same
function.
e
Remote
control
operation
is
not
possi-
ble
when
only
the
remote
control
cable
is
connected
—
the
audio
connection
cables
must
also
be
connected.
e
An
Rl
remote
control
cable
equipped
with
a
1/8”
(3.5mm)
diameter
miniature
two-conductor
phone
plug
is
included
with
the
C-711
and
with
every
tuner
and
compact
disc
player
with
the
RI
mark.
Using
the
remote
control
You
can
use
the
following
buttons
to
con-
trol
the
C-711
using
the
supplied
remote
control
of
your
amplifier
or
receiver.
i]
:
Stop
button
il
:
Pause
button
~
:
Play
button
<<
:
Down
button
PPI
:
Up
button
Alternatively,
you
can
use
a
remote
control
that
has
been
provided
with
an
Onkyo
unit
such
as
the
A-91].
If
this
is
the
case,
the
following
buttons
can
be
used.
a
:
Open/close
button
“<<
:
Fast
reverse
button
>>
:
Fast
forward
button
1-9,
0,
+10
:
Number
buttons
MEMORY
:
Memory
button
CLEAR
:
Clear
button
The
illustration
on
the
Jeft
shows
the
remote
control
provided
with
the
Onkyo
A-911
amplifier.
The
remote
control
you
use
may
be
different
to
the
one
shown.

Connecting
the
Onkyo
Liverpool
Separate
Collection
Series
If
this
unit,
a
tuner
or
an
auto-reverse
cassette
deck from
the
Onkyo
Liverpool
Separate
Collection
series
is
connected
to
an
amplifier
from
the
same
series,
the
following
functions
are
possible.
One-Touch
R
froma
cD
player
to
an
auto-reverse
cassette
deck
(eg.
from
C-711
to
K-R609)
_
rrtr—CiwsSCC
Using
One-Touch
Recording
to
record
from
CD
to
cassette,
the
following
operations
will
be
performed
with
the
pressing
of
just
one
button:
e@
The
level
will
be
adjusted
@
The
cassette
will
be
rewound
to
the
beginning
e
The
CD
will
start
to
play,
and
the
cassette
will
start
to
record.
Additionally,
the
following
three
modes
are
provided:
Fadeout
Dubbing:
When
recording
from
CD
to
tape,
the
last
song
that
can
be
recorded
on
side
A
of
the
tape
will
fadeout
at
the
end
of
the
tape,
and
that
song
will
be
recorded
again
from
the
beginning
on
side
B.
Album
dubbing:
When
recording
from
CD
to
tape,
as
the
end
of
the
side
of
the
tape
approaches,
the
CD
player
calculates
how
many
songs
will
fit
on
the
side
of
the
tape.
The
songs
not
fitted
on
will
be
recorded
on
the
other
side.
When
calculating,
if
the
current
song does
not
fit
on
the
side
of
the
tape,
the
recording
continues
to
the
end
of
the
side
and
the
tape
will
reverse.
The
remainder
of
the
songs
will
be
recorded
on
the
second
side.
Handling
CD
a
oe
2.
Time
Edit:
While
recording
from
CD
to
tape,
if
the
current
song
will
not
fit
on
side
A,
from
the
remainder
of
the
songs
on
the
CD
the
song
with
the
best
time
that
will
fit
is
chosen
and
recorded.
On
side
B,
the
song
that
could
not
be
recorded
at
the
end
of
side
A
will
be
recorded
first,
followed
by
the
remainder
of
the
songs,
but
missing
out
the
one
that
was
recorded
on
side
A.
If
at
the
end
of
side
B
the
current
song
will
not
fit,
the
song
with
the
best
time
that
will
fit
from
the
remaining
songs
is
recorded.
When
all
the
songs
have
been
recorded,
the
remainder
of
the
tape
will
be
recorded
over
blank.
*&
Please
see
the
instruction
manual
of
the
cassette
tape
deck
(such
as
the
K-R609)
for
detailed
operating
instructions.
Timer
function
Timer
Play
(once):
You
are
able
to
play
from
your
selected
com-
ponent
(CD,
tape.
tuner)
at
the
designated
time.
Timer
Piay
(every
day):
You
are
able
to
play
from
your
selected
component
(CD,
tape,
tuner)
at
the
designated
time
every
day.
Timer
Record:
You
are
able
to
record
your
favorite
programs
from
the
tuner,
starting
at
the
designated
time.
Sleep
Timer:
You
are
able
to
set
the
system
to
automatically
turn
off
after
a
certain
time,
up
to
a
maximum
of
90
minutes.
7
Please
see
the
instruction
manual
of
the
tuner
(such
as
the
T-411RDS
or
T-409)
for
detailed
operating
instructions.
Removing
a
CD
from
its
case
1.
Hold
the
disc
case
in
the
palm
of
one
hand
and
pull
the
lid
up
and
back-
ward.
2.
Push
down
on
the
inside
of
the
disc
case,
through
the
center
hole
of
the
disc.
Important
notes
on
handling
_
e
Carefully
lift
the
disc
from
the
disc
case,
making
sure
to
only
hold
the
disc
by
its
edges
or
the
hole
in
the
middle.
e
A
dry,
soft
cloth
may
be
used
to
wipe
dust
and
fingerprints
off
the
surface
of
CDs.
Do
not
use
volatile
agents
on
dises,
such
as
thinner
or
benzine.
Also,
do
not
use
conventional
record
cleaner
or
antistatic
agents.
e@
Do
not
place
a
CD
in
direct
sunlight
or
locations
subject
to
high
humidity
or
low
temperature.
e
Do
not
store
a
CD
in
the
CD
player
tray
for
long
periods
of
time.
15

Trouble
shooting
guide
e
POWER
button
is
pressed,
but
power
does
not
come
on.
Cause:
Power
cord
plug
is
not
properly
connected
to
AC
outlet.
Remedy:
Insert
plug
firmly.
e
Disc
is
loaded
in
the
dise
tray,
but
playback
will
not
begin.
Cause:
Disc
is
in
the
disc
tray
upside
down.
Remedy:
Load
the
disc
with
the
label
facing
upward.
Cause:
Disc
is
dirty.
Remedy:
Clean
the
disc.
Cause:
Moisture
has
accumulated
inside
the
CD
player.
Remedy:
Remove
the
disc
from
the
disc
tray,
place
the
CD
player
in
a
warm
place
and
leave
the
power
on
for
about
one
hour.
e
No
sound
Cause:
—{ncomplete
or
incorrect
connections.
Remedy:
Check
all
cable
connections
(See
pages
6)
Remedy:
Insert
all
plugs
firmly
into
jacks.
Cause:
Improper
input
selector
switch
setting
on
amplifier.
Remedy:
Set
switch
to
proper
position.
See
your
ampli-
fiers
operating
instructions
for
more
informa-
tion.
e
Disc
skipping
Cause:
Disc
is
dirty.
Remedy:
Clean
the
disc.
Cause:
Disc
ts
scratched.
Remedy:
Replace
the
disc.
Cause:
CD
player
has
been
bumped.
Remedy:
Place
the
CD
player
in
a
more
stable
location.
e
Search
time
(when
moving
to
a
specific
track)
is
extremely
long.
Cause:
Disc
is
dirty.
Remedy:
Clean
the
disc.
Cause:
Disc
is
scratched.
Remedy:
Use
another
disc.
e
Track
numbers
cannot
be
stored
in
the
memory.
Cause:
No
disc
in
the
tray.
Remedy:
Load
a
disc
into
the
tray.
Cause:
A
track
number
not
on
the
disc
is
being
input.
Remedy:
Use
only
the
track
numbers
on
the
disc.
Specifications
Compact
Disc
Player
Model
C-71
1
Signal
readout
system:
Reading
rotation:
Linear
velocity:
Error
correction
system:
D/A
converter:
Sampling
frequency:
Number
of
channels:
Frequency
response:
Total
harmonic
distortion:
Dynamic
range:
Signal
to
noise
ratio:
Channel
separation:
Wow
and
Flutter:
Output
level:
Power
consumption:
Power
supply
rating:
Dimensions
(W
x
H
x
D):
Weight:
Optical
non-contact
About
500
—
200
r.p.m.
(constant
linear
velocity)
1.2
-1.4
m/s
Cross
Interleave
Reed
Solomon
code
1
BIT
D/A
converter
352.8
kHz
(Eight-times
oversampling)
2
(stereo)
5
Hz
—
20
kHz
0.005%
(at
1
kHz)
96
dB
100
dB
90
dB
(at
|
kHz)
Below
threshold
of
measurability
2
volts
r.m.s.
12
watts
U.K.
and
Australian
models:
AC
240V,
SOHz
European
model:
AC
230V,
50Hz
(Except
U.K.)
USA
&
Canadian
models:
AC
120V,
60Hz
Worldwide
model:
AC
120V
and
220V
switchable
50/60Hz
275
x
79
x
308
mm
10-7/8"
x
3-1/8"
x
2-1/8"
3.1
kg,
6.8
Ibs.
Specifications
and
external
appearance
are
subject
to
change
with-
out
notice
because
of
product
improvements.
ONKYO
CORPORATION
SN
293418654
01-57-5K-TMN
Printed
in
Japan
Table of contents
Other Onkyo CD Player manuals