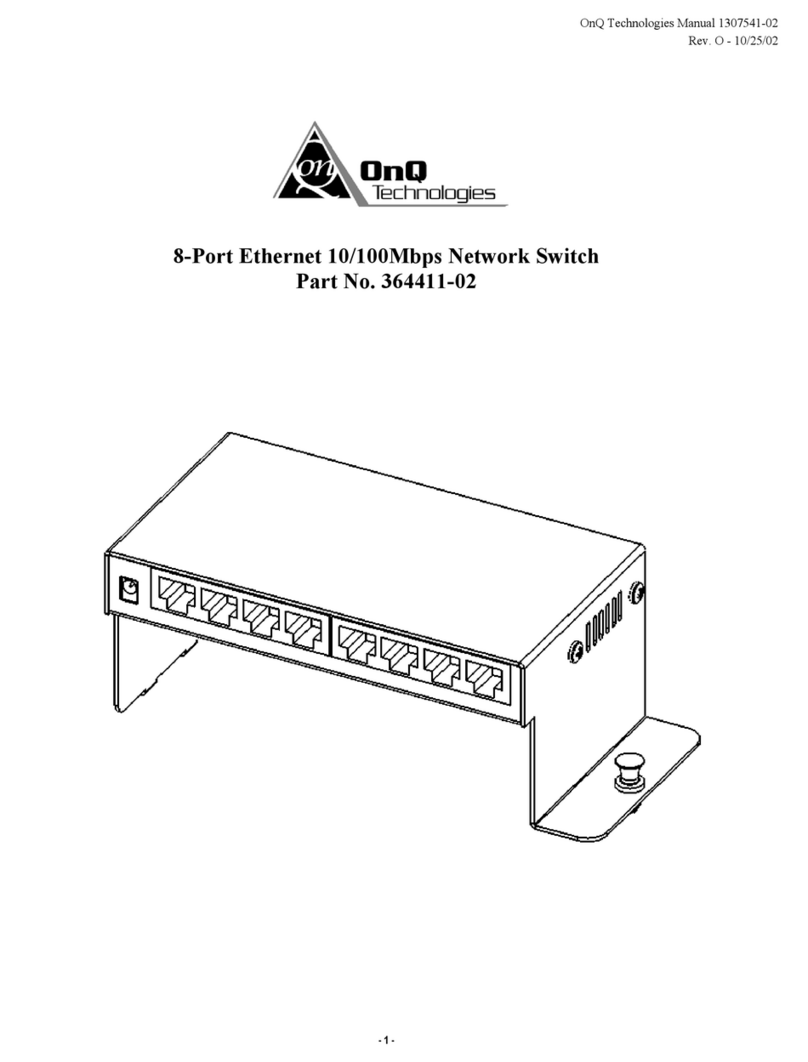
OnQ Technologies 8 Port 10/100 Ethernet Switch Service manual

InstallationLhstruction Manual
8 Port IO/100 Ethernet Switch
OnCJTechnologies, Inc.
P.O.Box 60907
Harrisburg, PA 17106-0907
www.onqtech.com
Manual No. - 1307541-01 Rev. 0

CE Mark Declaration of Conformance
This is to certify that this product complies with ISO/IEC Guide 22
and EN45014. It conforms to the following specifications:
EMC: EN 55022 (1988)/ClSPR-22 (1985)
IEC 1000-4-2 (1995)
IEC 1000-4-3 (1995)
IEC 1000-4-4 (1995)
IEC 1000-4-6 (1995)
class B
4kV CD, 8kV AD
3V/m
1kV - (power line)
0.5kV - (signal line)
3Vrms
This product complies with the requirements of the Low Voltage
Directive 73/23/EEC and the EMC Directive 89/336/EEC.
Do not plug a phone jack connector into any of the RJ-45 ports.
This may damage the switch.

FCC Compliance Statement
This device complies with Part 15 of the FCC Rules. Operation is
subject to the following two conditions: (1) this device may not cause
harmful interference, and (2) this device must accept any interference
received, including interference that may cause undesired operation.
NOTE
This equipment has been tested and found to comply with the limits for
a Class B digital device, pursuant to Part 15 of the FCC rules. These
limits are designed to provide reasonable protection against harmful
interference in a residential installation. This equipment generates, uses
and can radiate radio frequency energy and, if not installed and used in
accordance with the instructions, may cause harmful interference to
radio communications. However, there is no guarantee that interference
will not occur in a particular installation. If this equipment does cause
harmful interference to radio or television reception, which can be deter-
mined by turning the equipment off and on, the user is encouraged to try
to correct the interference by one or more of the following measures:
Reorient or relocate the receiving antenna.
Increase the separation between the equipment and receiver
Connect the equipment into an outlet on a circuit different
from that to which the receiver is connected.
Consult the dealer or an experienced radio/TV technician for
help.
This Class B digital apparatus meets all requirements of the Canadian
Interference-Causing Equipment Regulations.
EN55022 Declaration of Conformance
This is to certify that the OnQ Ethernet Switch is shielded against the
generation of radio interference in accordance with the application of
Council Directive 89/336/EEC, Article 4a. Conformity is declared by the
application of EN55022:1987 Class B (CISPR 22:1985/BS 6527:1988).
~ ii

Table of Contents
CE Compliance Statement i
FCC Statement & Declaration of Conformance ii
Introduction 1
LED Indicators
Uplink Multiple Port
Category 5 Specifications
RJ-45 Pin Assignments
Pre-Installation & Installation
Cascading to another Switch or Hub
Package Contents
Troubleshooting
Product Specifications
...
Ill

Introduction
This manual describes how to install and use the OnQ 8 Port
Ethernet Switch. It features eight (8) lO/lOOMbps Auto-
Negotiation Switch ports and provides flexibility in your networking
environment. The OnQ switch can be used to connect PC’s,
Servers, Hubs, Bridges and other Switches and Routers. It can
also act as a bridge between 1OMbps and 1OOMbps network
segments.
[Figure
Thanks to the switching technology, it supports 1OMbps and
1OOMbps dedicated bandwidths in each port. The device is built
with plug & play, auto-negotiation on all ports, as well as, half and
full-duplex operations, store-and-forward transmission scheme,
IEEE 802.3x flow control and back pressure operation for,easy
installation and smooth transition from legacy 10Mbps to 1OOMbps
Switched-Network. It also contains one (1) MDI port (uplink) to
facilitate your network expansion.
To ensure maximum safety and good function, please read
carefully and follow all directions in this manual to obtain a
successful installation and operation. It is recommended that you
have a basic understanding of Local Area Networking (LAN)
concepts such as bridging, IEEE 802.3, lOBASE-T Ethernet and
IEEE 802.3~ lOOBASE-TX Fast Ethernet.
1

LED Indicators
The OnQ Ethernet Switch provides a variety of informative LED’s
on the front panel. See Figure 2 below.
0 0 0 0 0 0 0 oLNW*CT
a.,zvDC,A 0 0 0 0 0 0 0 OIPD
Imdw1w-N.ho*sNitdl
jxJ
Power
Speed
State
On
On
Off
Link/Activity On
Off Port has established a valid 1 network
Port has not established any network
connection
Flashing Traffic is traversing the port
FDX On
Off Port operates in full-duplex mode
Port operates in half-duplex mode
Indication
Switch is powered
Port has a valid network connection on
1OOM
Port has a valid network connection on
10M
2

Uplink Multiple Port
You can use the uplink port of each 8 Port Switching Hub to
cascade to a hub or a switch for connecting many different work-
groups. The Up-Link port is the same port as port 1, but the pin
assignments have been designed to contain crossover’s This
allows you connect this port to a hub or switch hub without a
crossover cable. The maximum distance between each hub to the
switch is 100 meter (refer to Figure 3 below).
UPLINK “PORl-
CONNECTSTOANOTHER RJ4 Ports
HUB OR MCH I
I + ,
4A4A4A4JRA4A4cl14>I4A
Category 5 Specification:
Four pairs of wiring are required
Cable type: Shield Twisted-Pair (STP) or Unshielded
Twisted Pair (UTP)
Wire gauge: 18 to 26 AWG
Nominal impedance: 100 ohms
Maximum cable length: 300ft (loom)
Nominal attenuation: less than 11.5db
RJ-45 Pin Assignments
Pin No. Uplink Port 1-8
1 RD+ Receive from UTP TD+ Transmit to UTP
2 RD- Receive from UTP TD- Transmit to UTP
3 TD+ Transmit to UTP RD+ Receive from UTP
6 TD- Transmit to UTP RD- Receive from UTP
4, 5, 7, 6 Not Used Not Used
3

Pre-Installation Requirements
Before you connect the Ethernet Switch to the network, make sure
that you have the proper operating environment. To provide the
proper operating condition, make sure the of the following
installation requirements:
Power Requirement: 120VAC @I60Hz
Cable Requirement: CAT5 UTP cable wiring for IOMbps
connection; CAT5 or CAT5E UTP cable wiring for IOOMbps
Installation - Ethernet Hub in OnQ Enclosure
The OnQ 8 Port lo/100 Switch is designed to mount in any OnQ
Service Center.
1.
2.
3.
4.
Align tabs on module with slots
on the rear of the enclosure.
Refer to Figure 4.
Insert tabs by angling module
away from the back of the
enclosure.
Rotate the module and insert
fasteners on module into
corresponding holes on the rear
of the enclosure. (Plunger must
be in pulled position for fastener
to engage hole.)
Push plunger in to lock module in
place. Pull on module to ensure
module is locked properly in
place.
Rotate and lrwm-l
Latch Gmmmet
Insert Tabs In
cut-away vtew hum bQuml
PmasDown
Enclosure PlUngM
Bottom I
Cut-away view from bottom
1Figure 4 1
4

Connecting Power
1. Plug the AC power adapter, supplied with the Ethernet
Switch, into a near by power outlet.
2. Route the power supply wire neatly and securely to the
Ethernet Switch location.
3. Plug the power connector into the power jack on the rear of
the switch.
Connecting to Outlets
1. Plug a straight through OnQ Category 5 jumper, such as
part number 363201-Xx, to the twisted pair jacks on the
rear panel of the hub.
2. Connect the other end to the desired outlet jack on an OnQ
Network Interface Module, such as part number 363486-01.
Repeat connecting
up
to eight (8) outlets to the network.
NOTE: Do not use the uplink jack and Port-l at the same
time.
Cascading to another Switch or Hub
You can cascade the OnQ Ethernet Switch to another Ethernet
Switch or Hub. (When attaching the Switch to a Router or other
device, verify the port type implemented before connecting any
cabling.) Refer to Figure 5 on next page.
1. Prepare straight-through Category twisted-pair cable with
RJ-45 plugs. Make sure the cable does not exceed 100
meters (328 feet).
2. Connect one end of the cable to the switch’s uplink port.
When using the uplink port, be sure not to use Port 1.

3.
Connect the other end of the cable to an MDI-X RJ-45 port
on the other device (not an uplink port.)
Alternatively, you can connect from any MDI-X port
on the Switch to an uplink port on the other device.
You may also attach to MDI-X ports at both ends if
you use crossover cabling.
Verify System Operation
Check each connection by viewing the port
status
indicators
shown in the table on page 2. The Switch monitors the link status
for each port. If the Link indicator fails to light when you connect a
device, follow the trouble-shooting advice detailed on page 8.
6

Package Contents
The package of your dual-speed Ethernet Switch should contain
the following items:
OnQ 8 Port Ethernet Switch for mounting in OnQ Service
Center
External power adapter
User Manual
“Top” View
If any item is missing or damaged, please contact
your dealer for replacement.
mm
AA IMMm.lm
C.-d * * . , * I I
“Front” View
[Q ’ ’ ’ ’ * ’ ’ *
0 0 0 0 0 0 0 ovm 0”.
0 0 0 0 0 0 0 o-
a# 00000000.. *,.,m..---
“Back” View
Figure 6
Top, Front & Back Views of the
OnQ Ethernet 8 Port Switch
7

Troubleshooting
Diagnosing LED Indicators
The operation of the OnQ Ethernet Switch can be easily
monitored through panel indicators to assist the network manager
in identifying problems. This section describes common problems
you may encounter and possible solutions.
Symptom:
Cause:
Solution:
Symptom:
Cause:
Solution:
Link indicator does not light up after making a
connection.
Network interface (i.e. a network adapter card on the
attached device), network cable or switch port is
defective.
Verify that the switch and attached device are
powered. Be sure the cable is correctly plugged into
both the switch and corresponding device. Verify
that the proper cable type is used and its length
does not exceed specified limits. Each twisted-pair
cable should not exceed 100m (328ft). Check the
adapter on the attached device and cable
connections for possible defects. Replace the
defective adapter or cable if necessary.
Power indicator does not light up (green) after power
adapter is attached.
Defective power outlet, power cord or power adapter.
Check the power outlet by plugging in another
device that is functioning properly. Check the power
cord with another device. If these measures fail to
resolve the problem, have the units power adapter
replaced by a qualified distributor.
a

Specifications
Access Method
Standards Conformance
Media Supported
Number of Ports
Switching Method
Transmission Mode
Flow Control
Filtering/Forwarding Rate
Power Requirement
Power Consumption
Operating Temperature
Humidity
Status LEDs
Dimensions
Certification
Emissions
Immunity
CSMA/CD
IEEE 802.3~ 1OOBASE-TX
IEEE 802.3 lOBASE-T
100 ohm CAT5 twisted-pair
8 RJ-45, 1 Uplink port
Store-and-Forward
Auto-negotiation (1O/l OOMbps,
full/half-duplex)
Full duplex - IEEE 802.3x
Half duplex - Back pressure
Line speed
DC 9V/lA
9VCD/0.43A
0 to 40 degree C
10% to 90% non-condensing
Per port LED: Link/Activity, FDX,
SPD. Per Unit LED: Power
6.5 x 3 x 3.5 inches
FCC Class B, CE Mark,
CISPR Class B
IEC l OOO-4-2/3/4/6
9

6
ci gg
C
ccb0
cou
a0-i
‘2kg’u
9cIa’
ggg
Gm -c
B
‘,$ gs
54
6 ‘E
I E
Table of contents
Other OnQ Technologies Switch manuals