Opel Rocks-E 2021 User manual

In brief

3
Introduction
This Owner's Manual provides you
with all the necessary information to
enable you to drive your vehicle
safely and efficiently.
Some functions are only operational
when the ignition is switched on or
when the electric motor is ready.
Make sure your passenger is aware
of the possible risk of accident and
injury which may result from improper
use of the vehicle.
You must always comply with the
specific laws and regulations of the
country that you are in. These laws
may differ from the information in this
Owner's Manual.
Disregarding the description given in
this manual may affect your warranty.
When this Owner's Manual refers to a
workshop visit, we recommend your
Opel Service Partner.
All Opel Service Partners provide
first-class service at reasonable
prices. Experienced mechanics
trained by Opel work according to
specific Opel instructions.
Danger, Warnings and
Cautions
9Danger
Text marked 9 Danger provides
information on risk of fatal injury.
Disregarding this information may
endanger life.
9Warning
Text marked 9 Warning provides
information on risk of accident or
injury. Disregarding this
information may lead to injury.
Caution
Text marked Caution provides
information on possible damage to
the vehicle. Disregarding this
information may lead to vehicle
damage.
Symbols
Page references are indicated with 3.
3 means "see page".
We wish you many hours of
pleasurable driving.
Your Opel Team
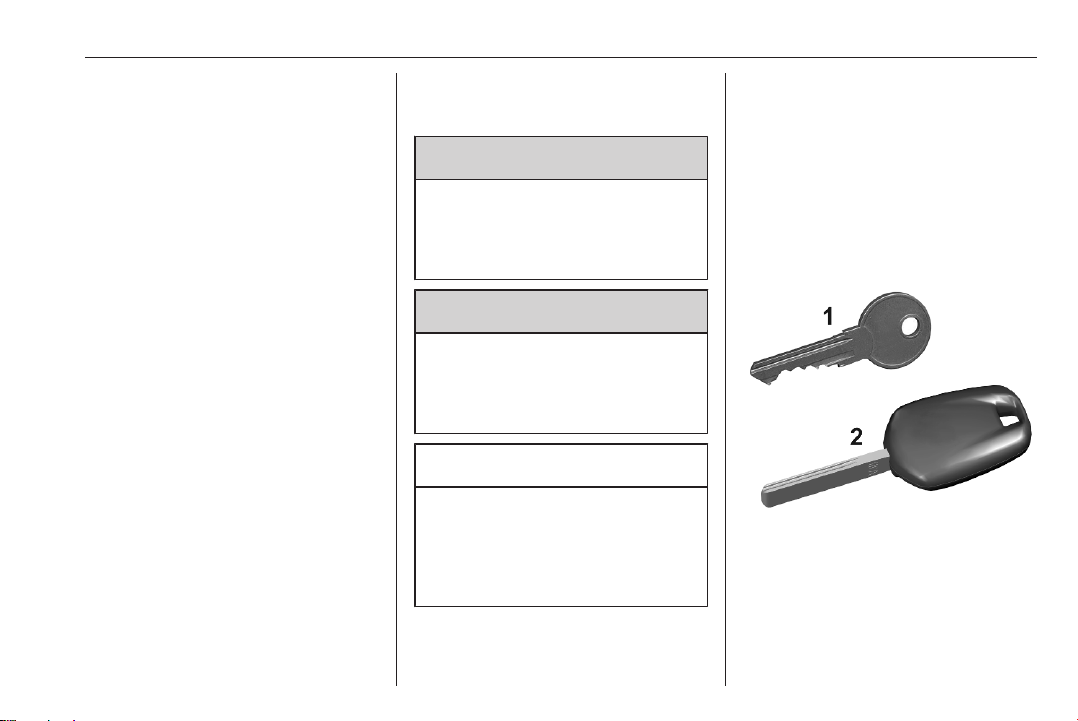
Keys
1 : Key to lock / unlock doors
2 : Key to switch motor on / off
4
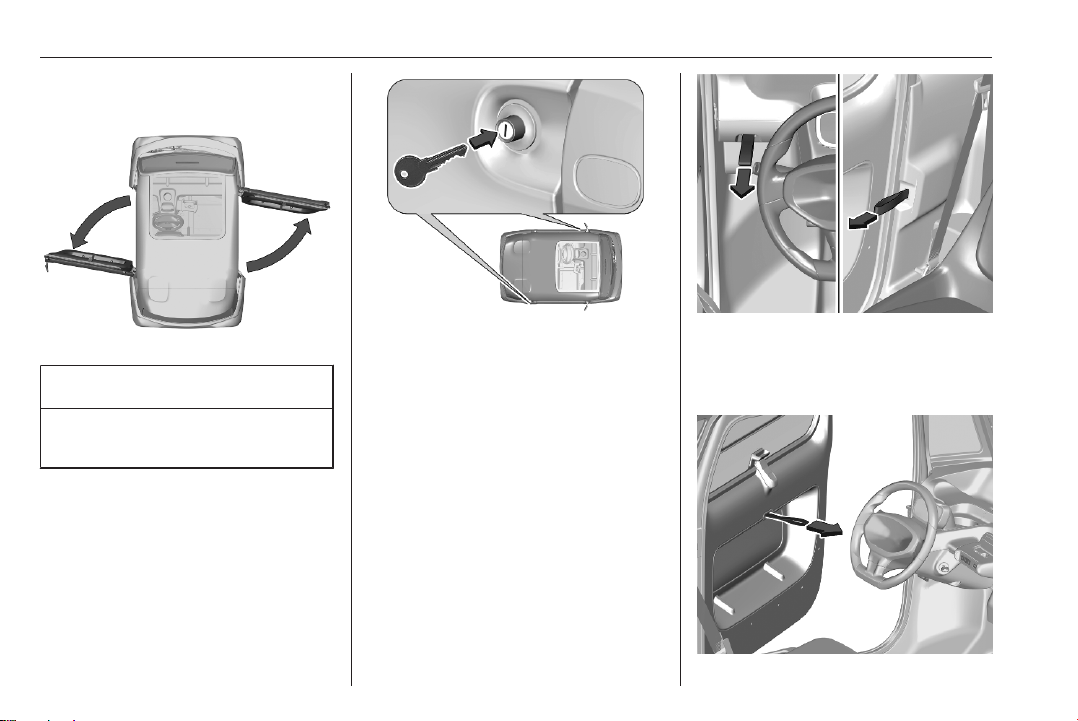
Front doors
Caution
Do not open the door when
moving.
Unlock / lock
To unlock / lock the vehicle, insert the
key into the lock and turn it clockwise /
anticlockwise.
Note
The vehicle can only be unlocked or
locked from the outside.
Opening
After unlocking, press the door lock to
open the door.
To open the door from the inside, pull
the opening strap.
Closing

5
To close the doors from the inside,
pull the closing strap of the respective
door.
Mirrors
The door mirrors are adjusted and
folded manually.
Move the door mirrors in several
directions in order to obtain the best
visibility.
Windows
The windows consist of a fixed upper
part and a moveable lower part.
Opening
Caution
When opening the window, ensure
that it is properly locked before
driving off, as it may unlock or
lower while driving.
At first, press the locking handle to
release the window.
Then, lift the window as far as
possible to keep it fully open.
Closing
Caution
Keep a close watch on the
windows when closing them.
Ensure that nothing becomes
trapped in them as they move.
To unlock the window, pull the
window from the outside, then lower
it until it locks in place.
Press against the window to check if
it is locked.
6
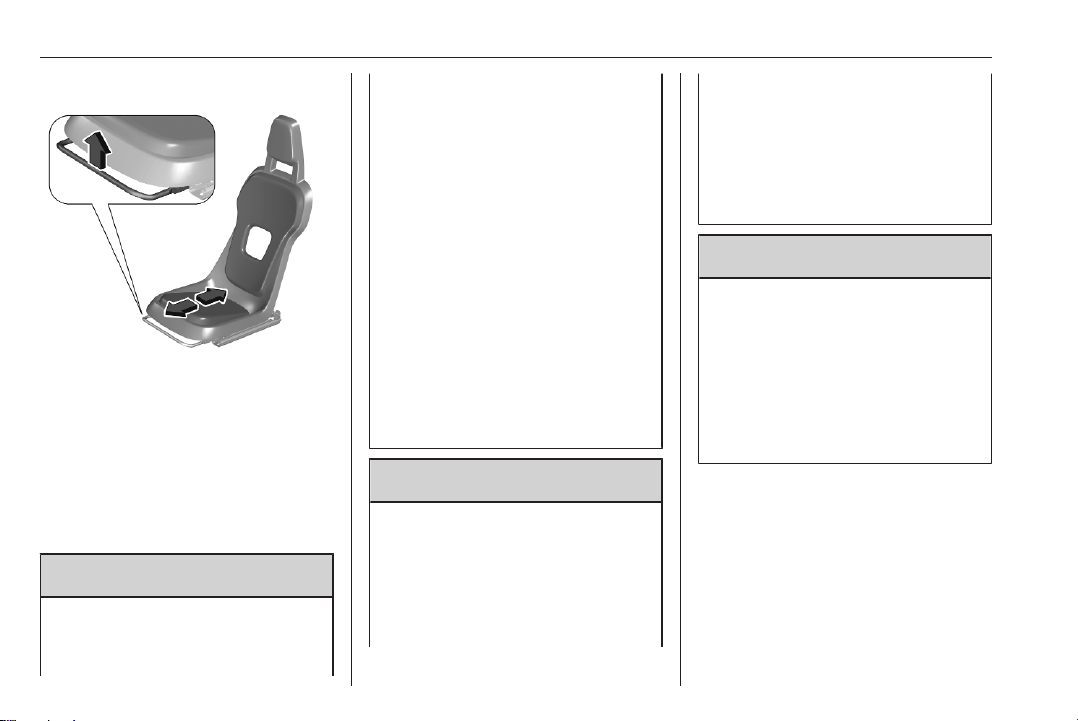
Seat adjustment
Note
Only the driver's seat is adjustable.
Pull handle, slide seat, release
handle. Try to move the seat back and
forth to ensure that the seat is locked
in place.
Seat belts
9Warning
The lower part of the strap must be
positioned as low as possible on
the pelvis.
The upper part must be positioned
in the hollow of the shoulder.
In order to be effective, a seat belt
must:
● be tightened as close to the
body as possible.
● be pulled in front of you with a
smooth movement, checking
that it is not twisted.
● only be used to secure one
person.
● not show signs of tearing or
fraying.
● not be changed or modified, in
order to avoid affecting its
performance.
9Warning
Use a suitable child restraint
system if the passenger is less
than 12 years old or shorter than
one and a half metres.
Make sure that the seat belt is
correctly positioned and tightened.
Never use the same seat belt to
secure more than one child.
Never carry a child on your lap.
For more information on restraint
systems, refer to the
corresponding section.
9Warning
Have the seat belts checked
regularly by a qualified workshop,
particularly if the straps show
signs of damage.
Clean the seat belt straps with
soapy water or a textile cleaning
product, sold by dealers or
qualified workshops.
The seat belts are equipped with an
inertia reel which allows the strap
length adjust to your shape
automatically.
The seat belt returns to its storage
automatically when it is not used.
Before and after use, ensure that the
seat belt is reeled in correctly.
7
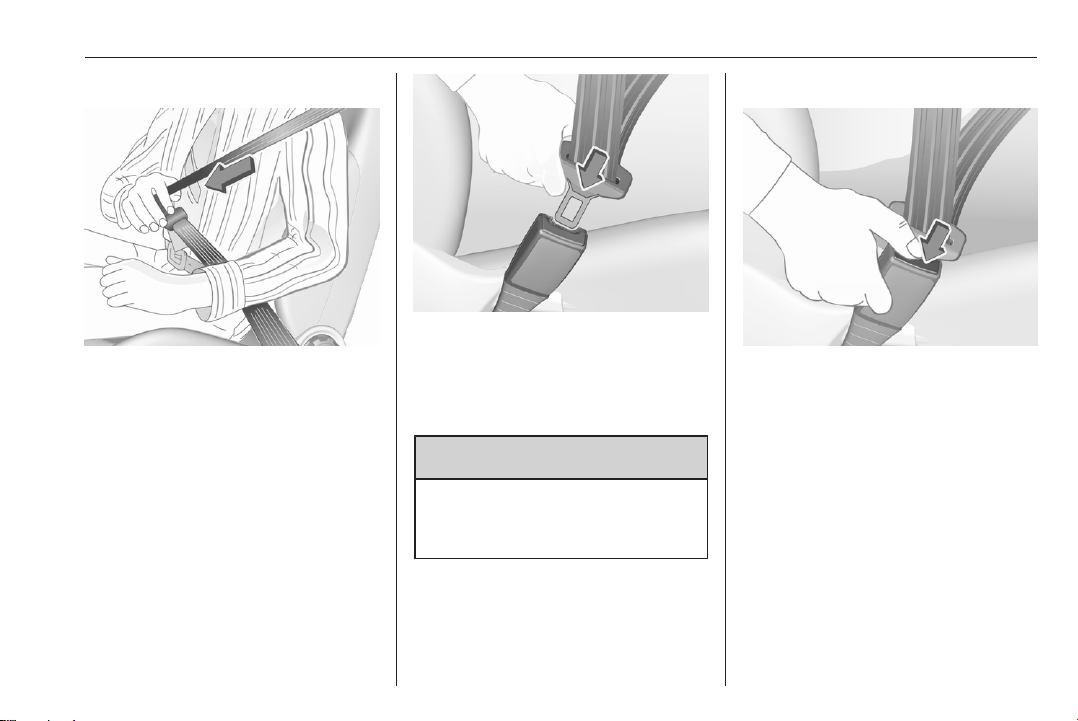
Fasten
Withdraw the belt from the retractor,
guide it untwisted across the body
and insert the latch plate into the
buckle. Make sure the belt fits tightly
to the body while driving.
Loose or bulky clothing prevents the
belt from fitting snugly. Do not place
objects such as handbags or mobile
phones between the belt and your
body.
9Warning
The belt must not rest against hard
or fragile objects in the pockets of
your clothing.
Unfasten
To release the belt, press the red
button on the belt buckle.
Guide the seat belt as it is reeled in.
8
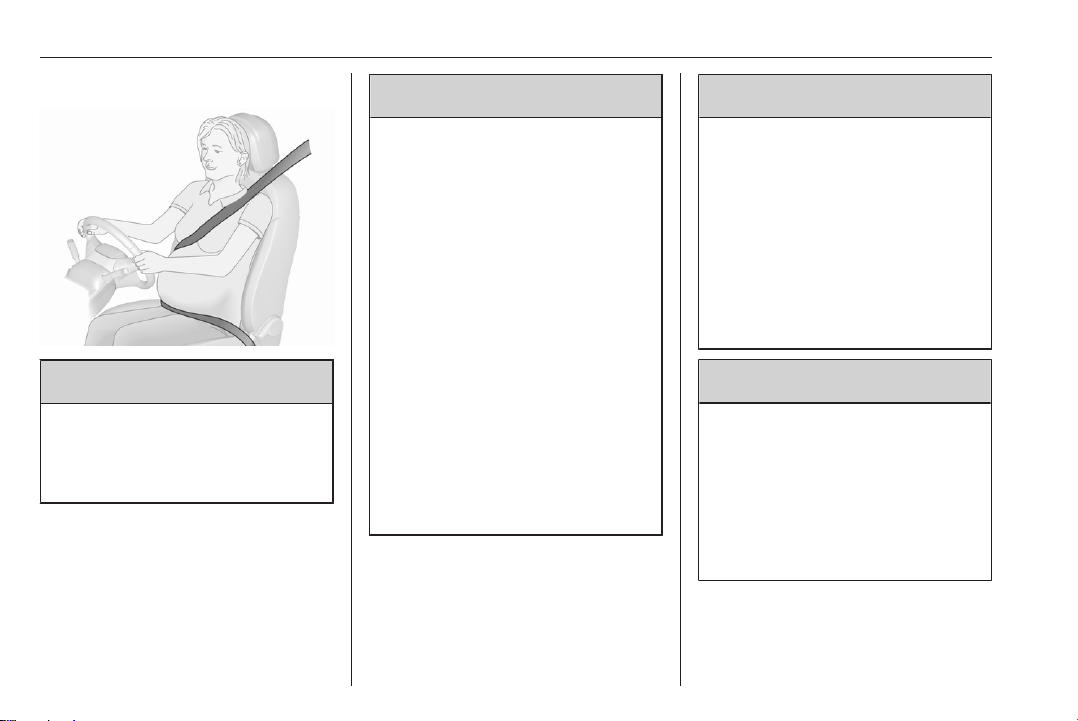
Using seat belts while pregnant
9Warning
The lap belt must be positioned as
low as possible across the pelvis
to prevent pressure on the
abdomen.
Child restraint systems
Note
The regulations on carrying children
are specific to each country. Refer to
the legislation in force in your
country.
9Warning
An incorrectly installed child seat
in a vehicle compromises the
child's safety in the event of an
accident.
Ensure that there is no seat belt or
seat belt buckle under the child
seat, as this could destabilise it.
Remember to fasten the seat belts
or the child seat harness keeping
the slack relative to the child's
body to a minimum, even for short
journeys.
Check that the seat belt is properly
tightened over the child seat and
that it holds the child seat firmly
against the vehicle seat. For child
seats with a support leg, ensure
that the support leg is in firm and
steady contact with the floor.
9Warning
The chest part of the seat belt
must be positioned on the child's
shoulder without touching the
neck.
Ensure that the lap part of the seat
belt passes correctly over the
child's thighs.
Use a booster seat with a
backrest, equipped with a belt
guide at shoulder level.
9Warning
As a safety measure, do not leave:
● A child alone and unsupervised
inside the vehicle.
● A child or an animal in a vehicle
exposed to the sun with the
windows closed.
● The keys inside the vehicle.

9
For maximum safety, please observe
the following recommendations:
● In accordance with European
regulations, all children under the
age of 12 or less than 1.5 m tall
must travel in approved child
seats appropriate for their weight,
on seats fitted with a seat belt.
● Do not use forward facing child
restraint systems when the
child's weight is below 13 kg.

10
Child restraint installation locations
In accordance with European regulations, this table indicates the options for installing child restraint systems secured
using the seat belt and universally approved in relation to the weight of the child.
Weight of the child / indicative age
Child restraint system
categories
Under 13 kg (groups 01) and 0+):
Up to about 1 year old
From 9 to 18 kg
(group 1): From
about 1 to 3
years old
From 15 to 25 kg
(group 2): From
about 3 to 6
years old
From 22 to 36 kg
(group 3): From
about 6 to 10
years old
Universal belted child restraint
system2)
U UF UF UF
1) Group 0: birth to 10 kg. Carrycots and infant carriers cannot be installed on the front passenger seat.
2) Universal child seat: chiId seat that can be installed in all vehicles using the seat belt.
U : Seat position suitable for installing a child restraint system secured using the seat belt and universally approved for
rearward facing and / or forward facing use.
UF : Seat position suitable for installing a child restraint system secured using the seat belt and universally approved for
forward facing use.
This manual suits for next models
1
Table of contents
Other Opel Automobile manuals

Opel
Opel 2015 Mokka User manual

Opel
Opel 2012 Corsa User manual

Opel
Opel CORSA 2020 User manual

Opel
Opel INSIGNIA 2017 User manual

Opel
Opel OPEL ADAM User manual

Opel
Opel CASCADA User manual

Opel
Opel Antara Operation User manual

Opel
Opel 2015 Combo User manual

Opel
Opel Automobile User manual

Opel
Opel VIVARO User manual

Opel
Opel Antara Operation User manual

Opel
Opel Automobile User manual

Opel
Opel 1991 Astra Instruction manual

Opel
Opel Astra K 2020 User manual

Opel
Opel Meriva User manual

Opel
Opel 2013 Corsa User manual

Opel
Opel MOKKA User manual

Opel
Opel Combo 2011 User manual

Opel
Opel CORSA 1.0 2019 User manual

Opel
Opel Automobile User manual


