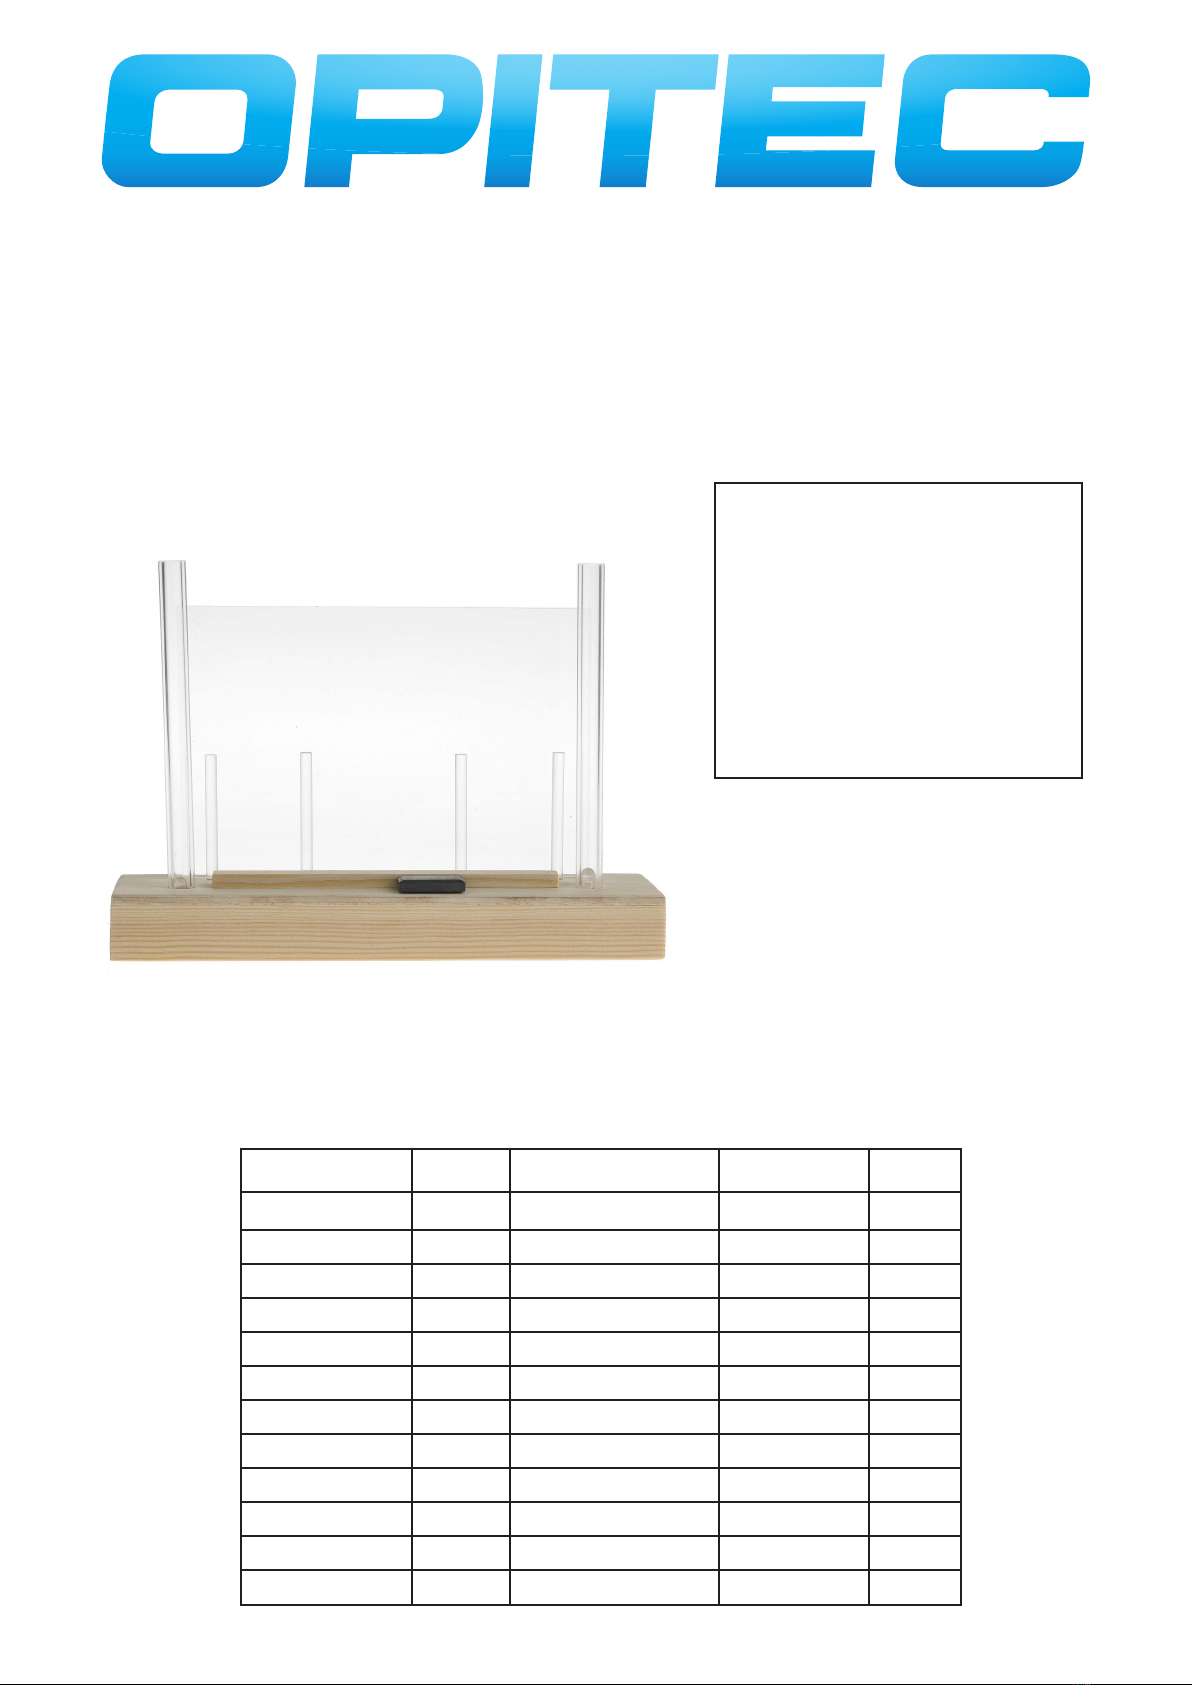
manuals.online logo
Brands
  1. Home
  2. •
  3. Brands
  4. •
  5. Opitec
  6. •
  7. Digital Photo Frame
  8. •
  9. Opitec 111.161 User manual

Opitec 111.161 User manual

Popular Digital Photo Frame manuals by other brands

Alpina FlipUp FF-RP instructions

Alpina

Alpina FlipUp FF-RP instructions

Audiovox DPF701 owner's manual

Audiovox

Audiovox DPF701 owner's manual

LENCO DF-830 user manual

LENCO

LENCO DF-830 user manual

texet DPF-830 Instructions for use & care

texet

texet DPF-830 Instructions for use & care

Philips SPF2017 Specifications

Philips

Philips SPF2017 Specifications

Philips SPF1327 Specifications

Philips

Philips SPF1327 Specifications

Philips SPF7010/10 quick guide

Philips

Philips SPF7010/10 quick guide

Digital Spectrum MemoryVue MV-1500 user manual

Digital Spectrum

Digital Spectrum MemoryVue MV-1500 user manual

ViewSonic VFM1042-52 Specifications

ViewSonic

ViewSonic VFM1042-52 Specifications

YURAKU YUR.PHOTO 7B4C brochure

YURAKU

YURAKU YUR.PHOTO 7B4C brochure

Denver PFF-710WHITE MK2 user manual

Denver

Denver PFF-710WHITE MK2 user manual

Pandigital PAN8000DWPCF1 user guide

Pandigital

Pandigital PAN8000DWPCF1 user guide

Nokia SU-4 user guide

Nokia

Nokia SU-4 user guide

Philips 10FF3CDW null

Philips

Philips 10FF3CDW null

Rekam Deja View HD-850 user manual

Rekam

Rekam Deja View HD-850 user manual

Majestic DF 918HD MP3 user manual

Majestic

Majestic DF 918HD MP3 user manual

Digital Foci Image Moments IMT-063 user guide

Digital Foci

Digital Foci Image Moments IMT-063 user guide

Kodak W1020 - GUIA COMPLETO DO USUÁRIO FOR FIRMWARE VERSIONS EARLIER THAN... manual

Kodak

Kodak W1020 - GUIA COMPLETO DO USUÁRIO FOR FIRMWARE VERSIONS EARLIER THAN... manual

manuals.online logo
manuals.online logoBrands
  • About & Mission
  • Contact us
  • Privacy Policy
  • Terms and Conditions

Copyright 2025 Manuals.Online. All Rights Reserved.

1
E111161#1
111.161
PARTS LIST
Quantity SIZE (mm) Description Part no.
Wood strip 1 150x10x5 Frame 1
Wood strip 2 250x20x10 Frame 2
Plywood sheet 1 200x55x4 or 200x55x5 Cover 3
Acrylic sheet 1 100x150x2 Picture holder 4
Acrylic rod 1 245xø4 Picture holder 5
Acrylic tube 1 245xø10/6 Light tube 6
LED -super bright 2 ø5 Light 7
Battery clip 9V 1 100mm Connection 8
Reed contact 1 0,6x2,5x20 Switch 9
Magnet 1 24x13,5 or Ø15x6 Switch 10
Cable 1 500 Connection 11
Necessary tools:
File and glasspaper
Drills 4&10mm diameter
Fretsaw
Wood glue
Soldering iron
Drawing pins
Magic Picture Frame
COOL. UITGEVERIJ PELCKMANS.
Please Note
The OPITEC range of projects is not in-
tended as play toys for young children.
They are teaching aids for young people
learning the skills of Craft, Design and
Technolo- gy.These projects should only
be undertaken and tested with the
guidance of a fully qualified adult. The fi-
nished projects are not suitable to give
to children under 3 years old. Some
parts can be swallowed. Dan- ger of suf-
focation!
2E111161#1
3
E111161#1
Ø 4
Ø 4 Ø 4
Ø 4
Ø 10
Ø 10
8
60
200
17
35
130
150
55
15
245
50
50
50
50
45
245
50
50
50
50
45
1. Mark out and saw from each wood strip (2) 35mm. Sand the saw cuts.
Take two wood strips (2) saw them to 200mm long and sand the ends.
Lay out the strips into a frame as shown .
INSTRUCTIONS
(1)
(1)
(2)
(2)
2. Mark out the holes on the plywood (3) using the plan ( page 5). Drill the holes to
the correct size and sand the sheet to nish
4mm-hole
10mm-hole
3. Glue the driled plywood sheet (3) on
the wood strip frame and leave to dry.
4. Take the wood strip (1) and saw it to
130mm-see the plan on page 5.Glue it
on the drilled lid.
Glue the plywood
sheet (3) Glue wood
strip (1)
5. From the acrylic rod (5) saw 4 pieces
50mm long.Carefully
sand the sawn ends. Insert the 4 rods
in the lid. Glue them in place if neces-
sary.
Tubes etc inser-
ted as shown
6. Take the acrylic tube (6) and saw
them in half so that each piec is
125mm long, sand the sawn ends.
Insert the tubes in the 10mm holes
and glue them in place.
7. Insert a LED (7) in each of the acrylic
tubes Ensure that the cathode of
one LED (7) and the annode of the
other lay opposite each other
Glue the acrylic
tube
Insert the LED
from under-
neath
4E111161#1
INSTRUCTIONS
Anode
Anode
Cathode
Cathode
cathode
Anode
Anode
Kathode
LED LED
Reed contact
Battery clip
8. Join the LED (7) with the reed contact (9) and the battery clip (8) according to the wiring diagram. The cable can
be joined by winding the wire ends around the components or and held the drawing pins or it can be soldered in
position (see diagram!)
11. The block magnet (10) is the switch. Moving
it back and forth activates the reed switch
to turn the light diode on/ o .
Tip (Parking the magnet )
Insert a drawing pin in the end of the stand
to hold the magnet
Blockmagnet
Black cable
black cable
red cable
9. Join on the 9 V Block battery. Hold the batte-
ry inside the frame
using double sided tape
10. PLace a photo between the acrylic sheets
(4) place the sheets beween the the two
acrylic tubes (6)
Acrylic sheet 2x
black cable
5
E111161#1
Ø 4
Ø 4 Ø 4
Ø 4
Ø 10
Ø 10
8
60
200
17
35
130
150
55
15
INSTRUCTIONS
Drilling plan
Drilling plan for pine strip
Scale 1:1
Glue area