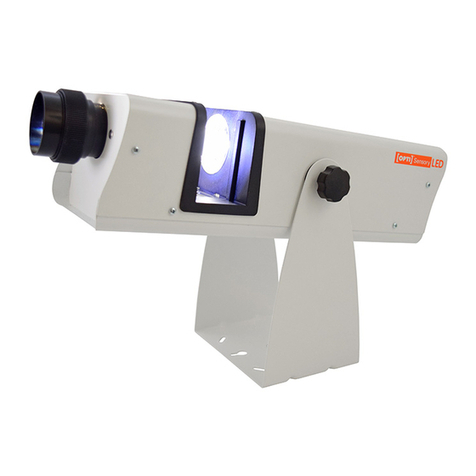
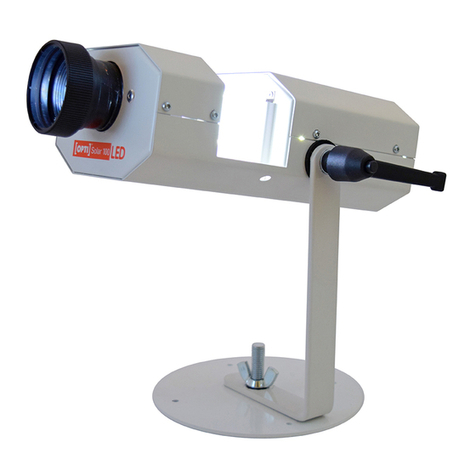
OPTI Kinetics Solar 250 LED User manual

Solar 250 LED
1. Read and understand all instructions before using the equipment.
2. This equipment is for indoor use in moderate climates only. Never use the equipment in damp or wet
conditions. Avoid excessive heat, humidity, dust & vibration.
3. To reduce risk of electric shock, do not use where the projector may be subjected to dripping or splashing
liquids. Never immerse products in any liquids.
4. Connect only to a power supply with a voltage corresponding to that printed on the projector.
5. This projector must always be connected to a grounded (earthed) electricity supply.
6. Always use the mains lead supplied suitable for your country.
7. Do not operate appliance with a damaged cord, or if the appliance has been dropped, or damaged, until it
has been examined by a qualified service person.
8. If an extension cord is necessary, a cord with a current rating at least equal to that of the appliance must
be used. Cords rated for less amperage than the appliance may overheat.
9. To avoid the possibility inadvertent resetting of the thermal cutout, this appliance must not be supplied via
an external switching device, such as a timer, or connected to a circuit that is regularly switched on and off
10. Ensure all cables are routed safely to avoid tripping or pulling: also avoid sharp bends, pinches and
contact with hot surfaces.
11. The appliance power switch has the symbols ‘O‘ indicating ‘OFF’ and ‘l‘ indicating ‘ON‘.
12. Do not obstruct any ventilation openings. To avoid thermal ‘cut out’ or heat damage make sure all air
inlets and outlets are clear of obstruction before and during use.
13. Children over 8 years old and persons with reduced physical, sensory or mental capabilities or lack
of experience and knowledge can use the appliance if under close supervision or given instructions
how to use the appliance safely and they understand the hazards involved. Do not leave unattended or
allow children to play with the appliance or allow them to clean or carry out any maintainance work.
14. The use of an accessory attachment not recommended by the manufacturer may cause a risk of fire,
electric shock, or injury.
15. DO NOT USE THE PROJECTOR AT AN ANGLE OF MORE THAN 90° FROM HORIZONTAL as this
may cause an effect or effect accessory to separate from the projector, fall and break which may also cause
injury.
16. During focusing beware of rotating the projection lens too far out, as this can cause the lens to separate
from the projector, and may drop and break which could cause injury.
17. Always disconnect appliance from electrical outlet when not in use or moving. Never yank cord to
pull plug from outlet. Grasp plug and pull gently to disconnect.
18. To reduce the risk of electric shock - do not dismantle this appliance. Take it to a qualified repairer
when servicing is required.
19. Always unplug appliance from electrical outlet and allow to cool before any cleaning and/or servicing.
20. After any maintenance or cleaning all parts must be absolutely dry before refitting.
21. All procedures, described in the maintenance section, must be carried out by qualified service
personnel under the authority of the manufacturers recognised agent.
Instructions
Important Safety Instructions and Warnings
Designed and Manufactured in the UK by [OPTI] Kinetics 1
SAVE THESE INSTRUCTIONS
When using your projection equipment always observe the following safety precautions:

PACKED BOX CONTENTS
OPTI Solar 250 LED Projector with 85mm Lens fitted. 2 metre IEC Lead.
Carefully unpack and keep packaging for the return of equipment for servicing. Ensure all items specified are in the box. If not,
contact your sales outlet or us at the address on this document. If the equipment appears damaged in any way, return it to sales
outlet in its original packaging. No responsibility for damage arising from the use of non-approved packaging will be accepted.
POWER RATING 62W MAX
OPERATING VOLTAGE 220-240V~ 50-60Hz
FUSE
Mains: T1AH/250V ceramic (20mm x 5mmØ)
Before replacing a fuse, DISCONNECT PROJECTOR FROM THE MAINS SUPPLY.
MOUNTING THE PROJECTOR
Ensure that the projector is secured to a surface or structure, able to bear the weight of the projector and accessories, via the
bracket fitted using suitable central bolt (minimum: 14mm M10 x 20mm), washers and attachments. For added strength in a
fixed position on a flat surface, use the bracket as a marking template for drilling fastening holes. Use a minimum of 2 fasteners
such as 2 x 40mm No 10 wood screws.
There are four options:
Designed and Manufactured in the UK by [OPTI] Kinetics 2
OPERATING INSTRUCTIONS (220-240V~ Model)
ADJUSTING THE BRACKET
Adjust the angle and position of the effects projector using the
knobs, which connect the bracket to the unit.
1. Loosen the two knobs.
2. Rotate the bracket or the projector.
3. Tighten the knobs.
Hanging Wall Mounted Bracket Under Standing
Solar 250 LED

Designed and Manufactured in the UK by [OPTI] Kinetics 3
OPERATION
This Effects Projector is designed exclusively for use with the
OPTI Solar Range of Effects Accessories and OPTI Effects.
Ask your dealer for a demonstration and always follow
instructions.
Installation of the Active Gate Wheel Rotator and
Effects:
1. Select the Effect and appropriate Active Gate Wheel Rotator and fit the
Effect onto the Active Gate Wheel Rotator.
2. Place the Effect and the Active Gate Wheel Rotator into the gate of the
Projector by sliding into the rear gate runners. The main effect should be
fitted into the rear gate runners for maximum life and object illumination.
Image altering effects like Distortion Wheels can be fitted into the front
gate runners.
3. Once in place they should start working instantly as they are powered
by the Active Gate.
MAINS CONNECTION
Plug in the IEC lead into the IEC socket on the rear panel. Then turn the
Effects Projector on by the main switch to the ‘l’ (ON) position.
FOCUSSING THE IMAGE
Focus the effect by twisting the lens in and out until desired focus is
achieved.
CLEANING THE FOCUSSING LENS
Use a soft tissue or lens cloth with a little methylated spirit or pure alcohol.
CHANGING THE FUSE
Before replacing a fuse, DISCONNECT THE
PROJECTOR FROM THE MAINS SUPPLY.
The fuse must only be replaced with a fuse of the type and rating marked
on the rear panel. If a fuse fails immediately, contact your local service
agent. DO NOT replace with a higher value. The main fuse is fitted into the
rear IEC panel.
To change:
1. Prise out the fuse holder with a flat ended screwdriver.
2. Remove old fuse and replace with a T1AH/250V Ceramic (20mm x
5mm) fuse.
3. Refit the fuse holder and push in until it is flush with the surface of the
IEC socket panel.
Solar 250 LED

Designed and Manufactured in the UK by [OPTI] Kinetics 4
TECHNICAL INFORMATION
[OPTI] Solar 250 LED
367mm long (without lens) x 133mm wide x 102mmdeep (228mm deep with hanging bracket).
3.2kg.
3 Element 85mm f2.8 42.5mm Helical Focus Groove.
220 - 240V~ or 110 - 120V~ 50/60Hz.
62 Watts maximum.
T1AH/250V ceramic (20mm x 5mmØ)
500mA maximum.
40W LED Module.
Average 100,000+ hours useful life.
850 lumens (on screen)
4000° K
Tubeaxial fan.
Ambient temperature 10 to 35°C
Relative humidity 80%rH max
NAME:
Overall size:
Weight:
Standard lens:
Mains voltage:
Power consumption:
Mains Fuse:
12V~ output current:
Light source:
LED module life:
Total light output:
Colour temperature:
Cooling:
Operating:
38 Cromwell Road Luton LU3 1DN England
Solar 250 LED
Table of contents
Other OPTI Kinetics Projector manuals

OPTI Kinetics
OPTI Kinetics OPTI User manual

OPTI Kinetics
OPTI Kinetics Solar 250 User manual

OPTI Kinetics
OPTI Kinetics Kino User manual

OPTI Kinetics
OPTI Kinetics GOBO 40 User manual

OPTI Kinetics
OPTI Kinetics Opti Aura User manual

OPTI Kinetics
OPTI Kinetics Solar 100 LED User manual

OPTI Kinetics
OPTI Kinetics OPTI Solar Sensory LED User manual