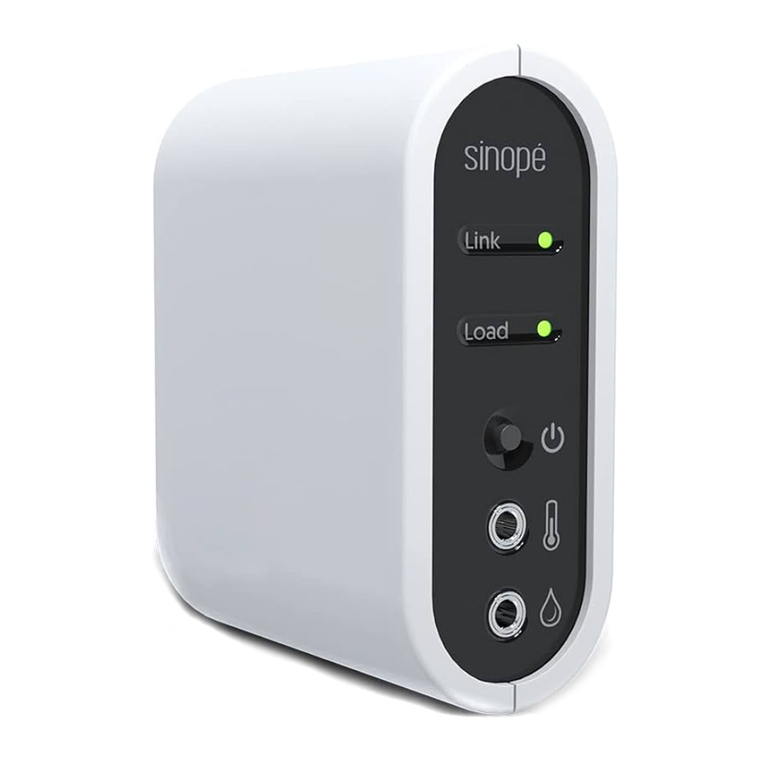
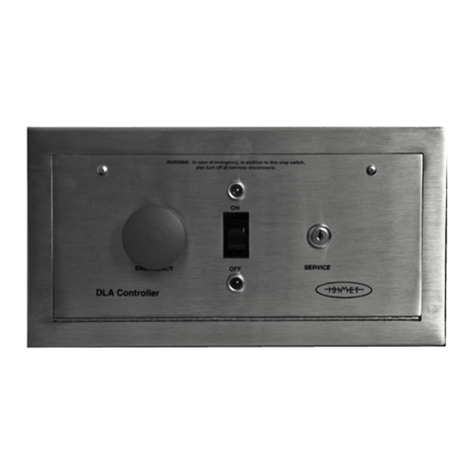
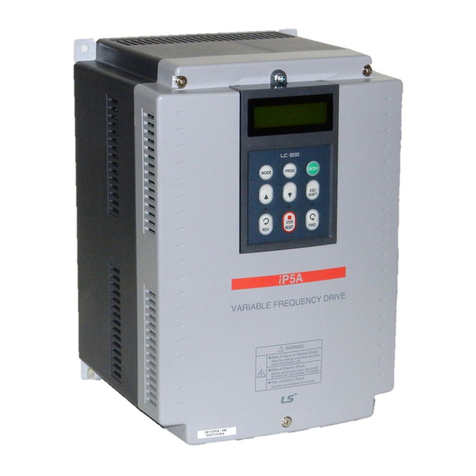
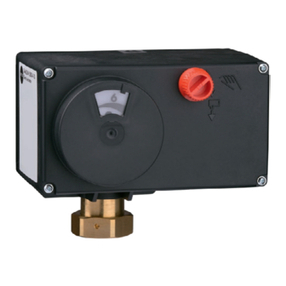
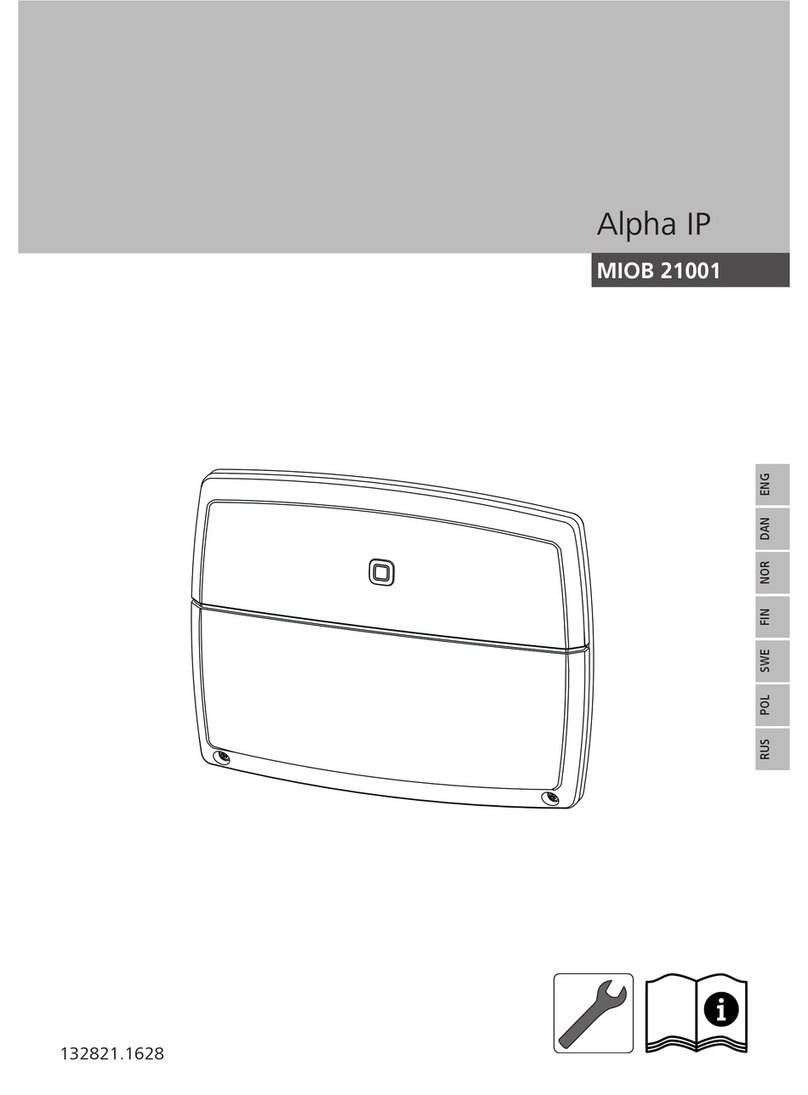
OptiSense PaintChecker industrial User manual

Operation manual
PaintChecker industrial
PaintChecker industrial n-gauge
EN Version 3.1

2 | PaintChecker Industrial
1. Introduction................................................................................................................................................................................................4
1.1 Brief description .............................................................................................................................................................................4
1.2 Scope of Delivery...........................................................................................................................................................................4
1.3 General information on the operation manual..................................................................................................................4
1.4 Copyright ..........................................................................................................................................................................................4
1.5 Customer service ...........................................................................................................................................................................5
2. Safety Instructions ...................................................................................................................................................................................6
2.1 Symbol explanation of pictograms and signal words .....................................................................................................6
2.2 Proper use ........................................................................................................................................................................................6
2.3 Safety markings..............................................................................................................................................................................6
2.4 Risks caused by electricity..........................................................................................................................................................7
2.5 Dangers due to invisible light radiation from the sensor..............................................................................................7
2.6 Fire hazards......................................................................................................................................................................................8
2.7 Responsibility of the operator ..................................................................................................................................................9
2.8 Requirements for personnel......................................................................................................................................................9
3. Product Description ............................................................................................................................................................................. 10
3.1 Operating principle of photothermal coating thickness measurement................................................................10
3.2 LARES® – safety redefined.....................................................................................................................................................10
3.3 Features and area of application..........................................................................................................................................10
3.4 Model overview sensors ..........................................................................................................................................................11
3.5 Controller model overview......................................................................................................................................................13
3.6 Connections of the controller................................................................................................................................................14
3.7 Communication interfaces......................................................................................................................................................15
3.8 Accessories....................................................................................................................................................................................15
4. Installation ............................................................................................................................................................................................... 16
4.1 General notes on installation and set-up of the system .............................................................................................16
4.2 Mounting the controller...........................................................................................................................................................16
4.3 Mounting the sensor.................................................................................................................................................................17
5. Commissioning ...................................................................................................................................................................................... 18
5.1 General notes on commissioning.........................................................................................................................................18
5.2 Switching on the measuring system ...................................................................................................................................18
5.3 Aligning the sensor....................................................................................................................................................................18
5.4 Establishing Communication..................................................................................................................................................18
6. Calibration................................................................................................................................................................................................ 19
6.1 Introduction..................................................................................................................................................................................19
6.2 Included calibrations ................................................................................................................................................................. 19
6.3 User calibration ...........................................................................................................................................................................19
6.4 Reference samples and reference masters .......................................................................................................................19
7. Operation ................................................................................................................................................................................................. 21
7.1 Measuring procedure................................................................................................................................................................21
7.2 Self-test...........................................................................................................................................................................................21
8. Communication Protocols................................................................................................................................................................. 23
8.1 Introduction..................................................................................................................................................................................23
8.2 Modbus RTU.................................................................................................................................................................................23
8.3 Profinet ...........................................................................................................................................................................................23
8.4 OptiSense ASCII protokoll.......................................................................................................................................................23
8.5 Error codes ....................................................................................................................................................................................24
9. Maintenance ........................................................................................................................................................................................... 25
9.1 Spare parts ....................................................................................................................................................................................25
9.2 Replacing the sensor cable ..................................................................................................................................................... 25
Table of Content

PaintChecker Industrial | 3
9.3 Replacement of Controller......................................................................................................................................................25
9.4 Replacing a Sensor.....................................................................................................................................................................26
9.5 Transport and storage...............................................................................................................................................................26
9.6 Cleaning and maintenance .....................................................................................................................................................26
9.7 Transport and storage...............................................................................................................................................................26
10. Technical Data ...................................................................................................................................................................................... 27
10.1 System specifications..............................................................................................................................................................27
10.2 Measurement system control protocol ........................................................................................................................... 32
Fig. 1: PaintChecker industrial n-gauge with various laser and LED sensors 4
Fig. 2: Operating principle of photothermal coating thickness measurement 10
Fig. 3: Tube LLP3.5, LHP3.5, LHP10 11
Fig. 4: Dimensional drawing Industrial Angle sensors LLP1.6, LHP1.66 12
Fig. 5: Dimensional drawing Industrial Cube sensors LEDB3.3, LEDR3.3 12
Fig. 6: Description of the controller 13
Fig. 7: Dimensions | Controller industrial 14
Fig. 8: Controller industrial n-gauge HP 14
Fig. 9: Power supply industrial n-gauge HP 14
Fig. 10: Installation dimensions 16
Fig. 11: Connector assignment 16
Fig. 12: Incorrect distance to the measured part 17
Fig. 13: Correct distance to the measured part 17
Fig. 14: Correct distance to the measured part 18
Fig. 15: Reference Master 20
Fig. 16: Dimensional drawing of a reference sample 20
Fig. 17: Dimensional drawing of a reference sample 20
Fig. 18: Typical application of a Reference Master 20
Fig. 19: Typical measurement sequence 21
Fig. 20: System configuration 25
Fig. 21: Disposal 26
Fig. 22: Circuit diagram 29
Fig. 23: Connector locations 31
Table of Figures
Table of Tables
Table 1: Application examples ASCII protocol................................................................................................................................ 23
Table 2: Error bits........................................................................................................................................................................................ 24
Table 3: Sensor cable connector........................................................................................................................................................... 25
Table 4: Sensor specifications................................................................................................................................................................ 27
Table 5: Controller specifications ......................................................................................................................................................... 28
Table 6: Pin assignment X14 .................................................................................................................................................................. 30
Table 7: Pin assignment X15 / X15.1................................................................................................................................................... 30
Table 8: Pin assignment X16 / X16.1................................................................................................................................................... 30
Table 9: Pin assignment X17 .................................................................................................................................................................. 30
Table 10: Input signals.............................................................................................................................................................................. 32
Table 11: Output signals.......................................................................................................................................................................... 35

4 | PaintChecker Industrial
1. Introduction
1.1 Brief description
The PaintChecker industrial systems are photo-
thermal measuring systems according to DIN EN
15042-2:2006. They are used for non-contact and
non-destructive coating thickness measurement.
They are suitable for moist and dry organic coatings
such as solvent-based and water-soluble paints and
varnishes, powder paints and varnishes on various
substrates, metals, extruded rubber and ceramics.
A PaintChecker industrial measuring system consists
of a controller and sensor(s). Depending on the con-
troller, it can be equipped with up to eight sensors.
The sensors are connected to the controller via
cables. These in turn can be connected to a higher-
level PLC controller via various interfaces.
The OS Manager software provided with the system
can be used to perform measurements and statistic-
ally evaluate the measured values.
1.2 Scope of Delivery
The scope of delivery of the measuring system is spe-
cified in the documents Data Sheet Controller indus-
trial and Data Sheet Sensors industrial.
1.3 General information on the operation manual
This operation manual enables the safe and efficient
use of the measuring system. The manual is part of
the delivery, must be kept near the measuring system
at all times and must be accessible to the staff.
The staff must have carefully read and understood
this manual before using the system. A basic pre-
requisite for safe working with the system is compli-
ance with all safety and work instructions given in this
operation manual. In addition, the local safety re-
quirements as well as the general safety regulations
in the area of application of the measuring system
also apply.
Illustrations in this operation manual are for general
understanding only and may differ from the actual
design.
1.4 Copyright
This operation manual is protected by copyright.
Passing on the operation manual to third parties, all
types of duplication, including excerpts, and the use
and/or passing on of its contents are prohibited
without the written permission of OptiSense GmbH &
Co. KG (hereinafter referred to as the "manufac-
turer"), except for internal purposes.
Fig. 1: PaintChecker industrial n-gauge with various laser and LED sensors

PaintChecker Industrial | 5
Violations will result in liability for damages. The
manufacturer reserves the right to assert further
rights. The manufacturer retains the copyright.
© OptiSense GmbH & Co. KG | Annabergstraße 120 |
45721 Haltern am See | GERMANY©
1.5 Customer service
The OptiSense customer service is available for tech-
nical questions::
OptiSense GmbH & Co. KG
Annabergstraße 120
45721 Haltern am See
GERMANY
Tel. +49 (0)2364 50882-0
www.optisense.com

6 | PaintChecker Industrial
2. Safety Instructions
2.1 Symbol explanation of pictograms and
signal words
Safety instructions are indicated by hazard picto-
grams in this operation manual. These pictograms
convey information about the type of danger. The
signal words indicate the extent of the danger. A dis-
tinction is made between two levels of danger:
Danger is the signal word for the serious danger cat-
egories and Caution is the signal word for the less
serious danger categories.
DANGER! This combination of symbol and
signal word indicates a serious
danger. The symbol shows the dan-
ger in case of incorrect use
DANGER! The combination of symbol and
signal word indicates a serious
danger category. This symbol in-
dicates a fire hazard.
DANGER! The combination of symbol and
signal word indicates a serious
danger category. The symbol stands
for risks caused by electricity.
CAUTION! The combination of symbol and
signal word indicates a less serious
danger category. The symbol indi-
cates the corresponding hazard.
TIPS AND RECOMMENDATIONS
This symbol highlights tips and re-
commendations as well as informa-
tion for efficient and error-free op-
eration.
DANGER! The combination of symbol and
signal word indicates a serious
danger category. The symbol shows
the danger in case of laser radi-
ation.
2.2 Proper use
The PaintChecker industrial photothermal measuring
system is used to determine the thickness of wet and
dry organic coatings for quality assurance and pro-
duction-related testing. Proper use includes ob-
serving all information contained in this manual. Any
use outside or beyond proper use is considered im-
proper use.
Danger in case of improper use
• The light beam of the sensor must never be
directed at easily flammable materials.
• The sensor must never be used in explosive areas.
• The sensor must never be used to illuminate,
or dry other objects.
• The sensor must never be used for medical
purposes.
• The sensor must never be immersed in liquids.
• The light beam of the sensor must never be
directed at people.
• Incorrect measurement parameters may result in
damage to the object being measured
2.3 Safety markings
2.3.1 Safety labelling in the working area
The following symbols and information signs are loc-
ated in the working area. They refer to the immediate
environment in which they are placed.
• All safety, warning and operating instructions
must be kept in a legible condition at all times.
• Damaged signs or stickers must be replaced
immediately.
Danger!
Improper use of the PaintChecker indus-
trial system can lead to dangerous situ-
ations.
Caution!
Danger with illegible signage! Over time,
stickers and signs can become dirty or
otherwise unrecognisable, so that haz-
ards cannot be recognised and neces-
sary operating instructions cannot be
followed. This creates a risk of injury

PaintChecker Industrial | 7
2.3.2 Safety marking on the measuring system
Depending on the type and current level of the laser
power supply used and the working distance of the
sensor, the laser safety class varies.
Warning sign 7
Danger group 3
Position: over status LEDs of
the controller
Warning sign 6
Hazard group 1
Position: over status LEDs of
the controller
Warning sign 5
Laser class 3R
Position: over status LEDs of
the controller
Warning sign 4
Laser class 1M
Position: over status LEDs of
the controller
Warning sign 3
Position: Near the light source (lens of the
sensor)
Warning sign 2
Position: Near the light source (lens of the
sensor)
Warning sign 1
Position: Near the light source (lens of the
sensor)
2.4 Risks caused by electricity
Danger to life due to electric current
• Work on the electronics of the measuring system
may only be carried out by OptiSense or by
personnel trained by OptiSense.
• If the insulation is damaged, the power supply
must be switched off immediately and the repair
must be arranged.
• Fuses must never be bypassed or deactivated.
When replacing a fuse, attention must be paid to
the correct rating.
• Voltage-carrying parts must be protected from
moisture. Otherwise a short circuit may occur.
• Protective covers must never be opened by the
user except for installation. In the event of faults,
the system must be returned immediately to
OptiSense GmbH & Co. KG.
• The main plug must be disconnected before
cleaning or maintenance work or when
troubleshooting.
• The mains cable must be laid in such a way that it
cannot be run over, kinked or pinched, come into
contact with liquids, heat or the laser itself, or be
damaged in any other way.
• The mains socket must always be easily access-
ible.
2.5 Dangers due to invisible light radiation
from the sensor
The description of the dangers of the radiation used
here depends on the equipment. The risk class ap-
plicable to the PaintChecker is indicated on the warn-
ing label of the controller. The limits for radiation
Danger!
When touching live parts, there is an im-
mediate risk of death due to electric
shock. Damage to the insulation or indi-
vidual components can be life-threaten-
ing.
Electrical information sign
Position: Right on controller housing
Caution!
The accident prevention regulations of
DGUV regulation 11 as well as the regula-
tions of the occupational health and
safety ordinance on artificial optical radi-
ation (OStrV) must be observed.

8 | PaintChecker Industrial
duration given here have been determined in part by
an expert in laser technology and are not generally
applicable to other devices of this safety class.
Incoherent radiation of risk group 1 (RG1)
Radiation in the IR-A range. There is a low risk here.
Damage to the retina can be largely ruled out. Even
prolonged but time-limited exposure to the light
source does not cause any damage.
Irradiation of the skin near the exit aperture of the
sensor can cause damage to the skin in the focus. The
laser radiation itself is not visible.
Source: LED (Cube-LEDR)
Mode: pulsed
λ: 950 nm +- 19 nm
Eₑ: 20.1 kW/m²
Incoherent radiation of risk group 3 (RG3)
Radiation in the UV-B range. Poses a risk in case of
short exposure within the safety distance. Protective
measures are essential here. When an individual
threshold dose (minimum erythema dose) is ex-
ceeded, so-called sunburn (UV erythema) occurs. The
maximum permissible irradiation of the skin is 64
seconds per day.
If the cornea is irradiated for more than 120 seconds
within a period of 1000 seconds, impairment accord-
ing to the criteria of EN 62471:2008 is to be expected.
Source: LED (Cube-LEDB)
Mode: pulsed
λ: 365 nm +- 9 nm
Eₑ: 5.4 kW/m²
LARES
A health hazard due to invisible light radi-
ation of class 1 can be excluded when used
correctly (see LARES®). The radiation is
accessible in this system, but so weak that
any damage can be excluded. This is important be-
cause the light radiation is in the non-visible wave-
length range.
Coherent radiation of class 1M
Radiation in the IR-B spectrum. Radiation of this class
can be dangerous if an optical instrument (magnify-
ing glass, microscope, etc.) is in front of the eye.
Glasses are not regarded as an optical instrument in
this case.
Irradiation of the skin near the exit aperture of the
sensor can cause burns in the focus. The laser radi-
ation itself is not visible.
Source: Laser diode (Tube LLP, Angle LLP)
Mode: pulsed
λ: 1480 nm
Pmax: < 5 mW (Laser 16 mm)
Pmax: < 7 mW (Laser 35 mm)
Coherent radiation of class 3R
Radiation in the IR-B spectrum. Radiation of this class
can be dangerous to the eye when looking directly
into the laser beam. Therefore, direct irradiation of
the eye should be avoided. The risk of injury increases
with the duration of exposure.
Class 3R lasers should only be used when direct view-
ing into the beam is unlikely.
• The laser beam must never be directed at the
eyes or skin.
• The light beam must never be viewed with optical
instruments such as magnifying glasses or
microscopes.
• The system may only be switched on after the
light beam exit aperture of the measuring head
has been inspected for external damage.
• The system must be switched off immediately
after the measurement and secured against being
switched on again.
• If the sensor is damaged, the system must no
longer be used. The sensor must be returned
immediately to OptiSense GmbH & Co. KG
2.6 Fire hazards
• The sensor must not be used in a potentially ex-
plosive atmosphere.
• The light beam of the sensor must not be direc-
ted onto easily flammable materials.
• Suitable extinguishing equipment (fire blanket,
fire extinguisher) must be kept available.
• In the event of fire, work with the system must be
Danger!
Irradiation of the skin near the exit aper-
ture on the measuring head can cause
burns in the focus. The laser radiation it-
self is not visible.
Danger!
The light beam can easily set fire to
flammable materials, liquids or gases,
causing serious or even fatal injuries.

PaintChecker Industrial | 9
stopped immediately. The danger zone must be
left until the all-clear signal is given and the fire
department must be alerted.
2.7 Responsibility of the operator
The operator is the person who operates the measur-
ing system for commercial or business purposes or
who allows a third party to use the system and who
takes legal responsibility for the product and the pro-
tection of users, personnel or third parties.
The system is intended to be used for commercial
purposes. The operator of the system is therefore
subject to the legal requirements for occupational
health and safety.
In addition to the safety instructions in this manual,
the regulations for occupational health and safety
and environmental protection that apply to the sys-
tem's area of use must be observed. In particular, the
following applies:
• The operator must inform himself about the
applicable occupational safety regulations and
carry out a hazard analysis in order to determine
additional risks resulting from the special working
conditions at the place of use of the measuring
system. These must be implemented in the form
of work instructions for the users of the
measurement system.
• Throughout the period of use of the measuring
system, the operator shall verify that his work
instructions are up to date with the current
harmonised regulations and shall adapt them if
necessary.
• The operator must clearly define and specify who
is responsible for commissioning, operation and
cleaning.
• The operator must ensure that all employees
who handle the measuring system have read and
understood this manual.
The operator remains responsible for ensuring that
the measuring system is free from technical faults at
all times. The operator must have all safety devices
checked regularly for functionality and completeness.
2.8 Requirements for personnel
• There is a risk of injury if the personnel is not suf-
ficiently qualified.
• All tasks must be carried out by qualified person-
nel only.
• Keep unqualified personnel away from the danger
zone.
Danger!
If unqualified personnel carry out work
with the measuring system or are in the
danger zone of the measuring system,
risks arise which can lead to serious in-
juries and considerable damage to
property.

10 | PaintChecker Industrial
3. Product Description
3.1 Operating principle of photothermal coating
thickness measurement
Non-contact, fast and efficient: Photothermal coating
thickness measurement is a contactless method for
lacquers, powder coatings and glazes on metallic and
non-metallic substrates. The different thermal prop-
erties of the coating and the substrate are used to
determine the coating thickness.
The surface of the coating is heated up by a few de-
grees with a short, intense light pulse and then cools
down again by dissipating the heat into deeper areas.
The thinner the coating, the faster the temperature
drops. The temperature curve over time is recorded
with a highly sensitive infrared sensor and converted
into the coating thickness.
The light pulse can be generated in different ways.
Compared to xenon flash lamps, LEDs and diode
lasers offer all the advantages of semiconductor
technology here, such as long service life, high effi-
ciency and absolute vibration resistance.
Fig. 2: Operating principle of photothermal coating
thickness measurement
Due to the tiny measuring spot, the method is also
suitable for the smallest components. The coating
thickness can even be determined at bending edges,
corners and curved surfaces where conventional
measurement technology reaches its limits. Disturb-
ances caused by rough surfaces or material grain are
compensated by optical averaging, so that even
pastes and powders can be checked before curing.
The measurement is carried out without contact from
a distance of several centimetres. This means that wet
and sticky layers can be measured just as easily as
soft and sensitive surfaces. Contamination of the
component or carry-over of coating material is ex-
cluded in principle.
3.2 LARES® – safety redefined
LARES® stands for LAser Radiation Eye
Safety technology and is the intelligent
answer to the continuously increasing re-
quirements in the area of personal and
eye protection. Especially when working directly with
lasers, these safety requirements always have the
highest priority. By using the new LARES® techno-
logy in the manufacturing and process industry,
people, machines and the environment are reliably
protected. The handling and application of the
devices can be carried out without the user having to
be trained and instructed in a way that requires doc-
umentation. Thanks to LARES® technology, the
devices can be used directly and without any restric-
tions in almost all areas of application.
The LARES® logo on the corresponding
OptiSense products make the safe laser
technology immediately recognisable. All
devices with the LARES® logo are safe for
the eye – even during prolonged irradiation.
3.3 Features and area of application
The PaintChecker industrial is a photothermal coating
thickness measurement system for automated oper-
ation in production. It builds on OptiSense's many
years of experience in the manufacture of reliable
and durable coating thickness measurement systems
for production-accompanying component testing as
well as the production of small and thus flexibly ap-
plicable sensors.
The underlying photothermal measuring method is
standardised according to DIN EN 15042-2 and is
suitable for the examination of moist, powdery and
dry coatings on various substrates such as metal, rub-
ber and ceramics. The PaintChecker industrial meas-
uring system is designed for customer integration
into automatic coating systems and consists of the
following components:
• 1-8 sensors (depending on controller variant)
• controller
The PaintChecker industrial systems can be flexibly
integrated into the production line. There, they de-
tect process deviations immediately after coating and
thus help to avoid returns and unnecessary material
waste. The measurements can be carried out both in
stop-and-go operation on the stationary object and
directly on the moving part when using active motion
compensation.
PaintChecker Industrial | 11
Optimized for the specific tasks, OptiSense offers
measuring systems with different optics for different
measuring spot sizes and distances. For example,
rough surfaces can be inspected with a large measur-
ing spot, while a tightly focussed measuring spot is
suitable for small structures.
With the PaintChecker industrial systems, a wide vari-
ety of coatings can be measured non-destructively in
wet or dry condition, regardless of the geometry. Ex-
amples of coating combinations are e.g. rubber coat-
ings wet/dry, powder coatings on metal, coated glass
and coated ceramics. Further combinations can be
found in the industrial Sensors data sheet.
Fig. 3: Tube LLP3.5, LHP3.5, LHP10
30
LHP10: 99,50
LLP3.5 & LHP3.5: 34,50
102
67,25
minimum cable bending radius: 70mm
3.4 Model overview sensors
The sensor is the heart of the measuring system. It
contains a high-power diode light source with fold-
ing optics and a fast infrared detector with data ac-
quisition controller and communication interface to
the controller. The geometry of the sensor as well as
the measuring distance and spot size vary according
to the respective measuring requirements.
A special feature of all PaintChecker industrial sys-
tems are the extremely light sensors, which weigh
only 150, 180 or 280 grams, depending on the ver-
sion.
In the PaintChecker industrial product range, some
laser-based sensors use the LARES® technology de-
veloped by OptiSense. These kind of sensors provide
an eye-safe, laser-optical measuring system which
can be operated without protective technical meas-
ures.

12 | PaintChecker Industrial
3.4.1 PaintChecker industrial Laser-sensors
Angle und Tube
The OptiSense laser sensors Angle and
Tube use a diode laser as the light source
− with all the advantages of semicon-
ductor technology, such as long service
life, high efficiency and absolute vibration resistance.
There are Tube versions with a tiny measuring spot
for micromechanical applications and special Angle
sensors with folded optics and a particularly small
measuring distance, which can be used even in the
tightest spaces. The models equipped with eye-safe
LARES® technology (see LARES®) can be operated
without further protective measures.
Fig. 4: Dimensional drawing Industrial Angle
sensors LLP1.6, LHP1.66
3.4.2 PaintChecker industrial LED-sensors Cube
The LED sensors called Cube have a larger
measuring spot than the laser versions
and are particularly suitable for the rough
and grainy surfaces of powders and
pastes. Depending on the coating material, a choice
can be made between models with infrared and UV
excitation. Of course, measurements on non-metallic
87
56,50
41
35
14
28
4
13
18
38
43
4 x M3
5
2 x
2 H7/m6
5
28
4
13
18
38
43
4 x M3
5
2 x
2 H7/m6
5
substrates are also possible. The compact sensors in
the cube-shaped housing can be mounted particu-
larly flexibly due to the freely selectable orientation
of the cable connection while their large contact sur-
face ensures optimum heat dissipation.
Fig. 5: Dimensional drawing Industrial Cube sensors
LEDB3.3, LEDR3.3
3.4.3 High-power versions of the PaintChecker
industrial sensors
Photothermal measurements on thick lay-
ers with a high glass or metal content re-
quire a stronger light output. In addition,
the power requirement increases with the
distance between the sensor and the component. For
these applications, high-power versions of the
sensors are available with the same external dimen-
sions but with higher output power. The 10.0 version
also has a larger measuring distance as well as a
higher energy density, so that in many cases a precise
part positioning during measurement is no longer re-
quired.

PaintChecker Industrial | 13
3.5 Controller model overview
The controller is the central element of the measuring
system. It generates the necessary energy for the
light pulses of the measuring sensor, but also pro-
cesses the signals, stores the measuring configura-
tion and controls the data flow to the production line
PLC.
Fig. 6: Description of the controller
There are three different models of the controller:
3.5.1 PaintChecker Industrial
The PaintChecker industrial controller is
the basic version for measurements with
one sensor. The controller in a robust,
dust-protected aluminium housing is
available in different versions for laser and LED
sensors. It is connected to the sensor via a flexible
cable and can also be mounted remotely. A serial in-
terface and a Profinet IO connection are integrated
for communication with the PC and plant PLC.
3.5.2 PaintChecker industrial n-gauge
The PaintChecker industrial n-gauge
models support multi-point measure-
ments with up to 8 sensors. They record all
measuring points simultaneously and
evaluate them at the same time. Measurements on
several components or different component posi-
tions are carried out in a fraction of the time without
the need for cost-intensive automatic movement sys-
tems. Combined with easy integration, this results in
significantly shorter throughput times, improved
data quality and quality control, a reduction in cost-
intensive automatic motion machines and increased
efficiency. All sensors of the laser, LED or high-power
series can be combined with the respective
PaintChecker industrial n-gauge model.
3.5.3 PaintChecker Highpower models
For measurements on thick layers with a
high glass or ceramic content, the high-
power versions of the controllers are re-
commended. The otherwise functionally
identical high-power controllers from OptiSense
have a reinforced power supply, which is housed in a
separate enclosure for the PaintChecker industrial n-
gauge HP. In addition to the higher excitation power,
the associated high-power sensors have a larger
measuring distance and a higher energy density, thus
simplifying the positioning of the component during
the measurement.

14 | PaintChecker Industrial
Fig. 7: Dimensions | Controller industrial
Fig. 8: Controller industrial Multi
3.6 Connections of the controller
For information on the pin assignment of the control
and supply cables, see section Pin Assignments.
Network connection RJ45
Connection to external network-based communica-
tion software
Power supply 110 - 230 V
Power supply for the entire measuring system
D-SUB DE-9 (F)
Service interface for Anybus
USB B 2.0
Service interface for maintenance and calibration
based on the internal OptiSense protocol (to be
used by OS Manager)
Safety circuit
connection for laser enable (2x2 line channels) and
reset control (2 lines)
Power indicator (yellow)
Power supply 110 - 230 V switched on
System safe indicator (green)
The laser is disconnected by the relay contact and
the system is "safe". No measurements are possible
Pulse indicator (red)
Indicates pulsing of the laser or an error in the meas-
urement process when permanently lit.
3.7 Communication interfaces
Depending on the equipment, the PaintChecker in-
dustrial models have various communication inter-
faces and protocols for system control:
Each PaintChecker controller is equipped with a USB
interface. The controller can be operated via the OS-
Manager software or alternatively accessed and con-
trolled via ASCII commands as described in chapter
Control commands.
Baudrate: 115200
Data bits: 8
Stop bits: 1
Parity: None
In addition, each PaintChecker is delivered with a fur-
ther interface. This must be specified when ordering.
The corresponding signals are available at connector
X14. If the customer does not specify an interface, the

PaintChecker Industrial | 15
controller is equipped with Profinet IO as standard.
Alternatively, the following interfaces can be ordered:
• Profinet IO
• DeviceNet
• EthernetIP
Other interfaces are possible on request.
The PaintChecker is basically controlled via input and
output registers. Their structure is described in
chapter Control commands and Output signals. For
the Profinet IO connection a Gdsml file as well as a
TIA V14/V15 module is available from OptiSense..
3.8 Accessories
The optional accessories of the measuring system are
listed in the Data Sheet Controller industrial and Data
Sheet Sensors industrial.

16 | PaintChecker Industrial
4. Installation
4.1 General notes on installation and set-up
of the system
The measuring system consists of two components
plus a ROBOFLEX® cable:
• sensor(s)
• controller
Only cables and connections that comply with local
safety regulations may be used.
Fig. 9: Installation dimensions
4.2 Mounting the controller
The location of the controller must be chosen so that
it is within reach of the connection cables of the
sensors to be attached.
Fig. 10: Connector assignment
Access to the system should be easy and safe for
maintenance work. Power is supplied via connector
X16 on the controller.
Loosen the four screws on top of the controller to
open the cover. Secure the controller to a wall or in a
controller cabinet using the four holes on the back.
Make sure you can reach all sensors with the fixed
sensor cable length of 3 m or 5 m.
Connect the controller to:
• the safety circuit and reset lines via Harting con-
nector (X15)
• the Ethernet RJ45 connector (X14) / Profinet IO or
alternative interface
• the mains power via Harting connector (X16)
4.2.1 Connecting the controller to the
safety circuit
If the control signals (see connector X15) are discon-
nected, the sensor’s light source (LED or laser) is
turned off by immediately switching off the power
supply. The green safety indicator turns on. After the
control signals have been closed to enable the light
source, the two reset leads must be shorted to re-en-
able the power for the light source. If the reset line is
closed while the control signals are closed, the safety
circuit goes into a fault state and can only be activ-
ated again after the controller has been switched off.

PaintChecker Industrial | 17
Danger due to uncontrolled restart
• Before the system is switched on again, it must
be made sure that the cause of the emergency
shutdown has been removed and that all safety
devices are fitted and functional.
• When there is no longer any danger, the control
signals can be unlocked and operation can be
resumed using the reset leads.
4.2.2 Connecting the communication module
Depending on the version, the PaintChecker indus-
trial system is equipped with one or more communic-
ation interfaces via which the controller can be con-
nected to an up-stream control unit.
The interface is provided via an internal module, the
so-called Anybus converter. Depending on the inter-
face, this module can be configured via the associ-
ated connector X14 using a PC and the IPConfig soft-
ware from HMS.
With other interfaces, the configuration may have to
be performed directly on the Anybus module. To do
this, the PaintChecker controller needs to be opened
and the settings made manually on the module.
The measuring system is connected to the up-stream
control unit via the respective interface using a suit-
able cable.
4.3 Mounting the sensor
Tube sensors should be mounted with a clamp of Ø =
30 mm, this ensures optimal heat conduction to the
rest of the mounting fixture. This is especially neces-
sary for applications with high measurement rates.
The Angel and Cube sensors should be mounted via
the screw connection in such a way that a maximum
contact surface to a heat sink is ensured. (The mount-
ing plate of the sensors is usually sufficient).
The sensor is to be mounted at a suitable location in
the production line or on a motion unit. It must be
ensured that the sensor reliably maintains the specific
measuring distance to the part to measure.
Caution!
Danger due to uncontrolled restart: Un-
controlled restarting of the system can
lead to serious injuries.
Fig. 11: Incorrect distance to the measured part
Fig. 12: Correct distance to the measured part
The sensor must be installed in such a way that it can-
not slip or be damaged during movements.
The sensor cable is connected to the controller. The
cable must not exert tensile stress on the sensor at
any time. This is especially important with moving
sensors.
The sequence in which the sensors are connected
should be noted to simplify later identification of the
sensors.
Proper heat dissipation must be ensured!
When operating at high measurement rates or in en-
vironments with high ambient temperature, the
sensor may overheat under certain conditions be-
cause excess heat cannot be dissipated (sensor tem-
perature >40°C).
Water or other liquids must never be used to cool the
sensor!!

18 | PaintChecker Industrial
5. Commissioning
5.1 General notes on commissioning
• The PaintChecker industrial Controller may only
be operated with the housing closed!
• The PaintChecker industrial system can only be
operated with the safety circuit closed.
• It must be ensured that the safety circuit is
functioning properly and is closed!
5.2 Switching on the measuring system
5.2.1 Prerequisites
• The general instructions for commissioning have
been read and understood.
• The PaintChecker industrial system has been
properly installed.
The PaintChecker industrial measuring system per-
forms the following when it is switched on:
• Load the last used measurement settings.
• Activate the installed communication interfaces.
• Establishing communication with the sensor con-
nected to port 1.
The connector X16 of the PaintChecker industrial sys-
tem has to be connected to the mains power.
5.3 Aligning the sensor
As photothermal measurement is non-contact, it is
important to align the sensor at the correct distance
from the part to measure. Depending on the sensor
model, the distance as well as the allowed distance
tolerances to the part varies.
In order to precisely maintain the working distance to
the part, the mounting of the sensor should be de-
signed in such a way that it always maintain the same
distance − even if the mounting or the part is vibrat-
ing. When aligning the distance, the sighting LEDs
built into the sensor can be used to determine the
correct working distance to the part.
Danger!
If a PaintChecker industrial system is op-
erated with an open enclosure, live parts
are accessible. Electric, magnetic and
electromagnetic fields emanating from
live parts can interfere with the environ-
ment.
Fig. 13: Correct distance to the measured part
5.4 Establishing Communication
5.4.1 Prerequisites
• The general instructions for commissioning have
been read and understood.
• The PaintChecker industrial Controller is switched
on.
• The PaintChecker industrial Controller is
connected to the up-stream control unit via a
suitable interface.
• The up-stream control unit is set up for operation
with the PaintChecker industrial system.
5.4.2 Profinet and Devicenet
(user-defined interfaces)
For connection of the communication module, see
Pin assignments. The measuring system has the slave
address "1". The Lifebit register (table Output signals,
0.0 ) changes its value between 0 and 1 every second.
Cyclical reading can be used to determine whether
the measuring system is properly registered in the
network.
5.4.3 OptiSense ASCII-Protokoll
The user connects to the measuring system via its
USBUART interface. The measuring system is recog-
nised as a COM port in the device manager of the op-
erating system.
A terminal program (e.g. TeraTerm) should be used to
establish communication with the measuring system.
The following parameters should be used for the
serial interface:
Baud rate: 115200
Data bits: 8
Stop bits: 1
Parity: None
To check whether the measuring system is properly
registered in the network, an sd command is cyclic-
ally sent to the system and the response string is
checked for the lifebit abbreviation (table Output sig-
nals, 0.0). Its value changes between 0 and 1 every
second.

PaintChecker Industrial | 19
6. Calibration
6.1 Introduction
The PaintChecker systems use the photothermal
measuring method to determine the thickness of
coatings on a wide variety of substrates. This non-
contact, non-destructive method is ideal for measur-
ing paints, powder coatings and glazes on metallic
and non-metallic substrates.
The photothermal measurement method does not
measure coating thickness values directly, but derives
them indirectly from the evaluation of the photo-
thermal measurement signal. Therefore, the indi-
vidual thermal properties of the coating material and
substrate must be taken into account.
Thick, heavy layers need more energy to heat up and
cool down more slowly than thin, light layers. During
the measurement process, it is therefore important,
similar to photography, to optimally adjust the
strength of the light source and the measurement
time to the respective situation in order to obtain ac-
curate and reproducible measurement results.
In the case of powder coatings and paints, there is
also the fact that the user often does not want to
know the thickness of the powder or wet film that has
just been applied, but the later, final thickness after
curing or drying. For this purpose, the device includes
the expected shrinkage of the coating material dur-
ing curing in the calculation.
For this purpose, it is necessary to calibrate the meas-
uring system against reference coating thickness val-
ues using samples with a known coating thickness.
Such calibrations contain information about the cor-
rect laser power, measurement duration, evaluation
models and calibration coefficients for the specific
material combination. These calibrations can be used
directly for measurements on produced parts.
6.2 Included calibrations
Calibrations that are specifically relevant to the par-
ticular customer are stored by OptiSense on each in-
strument in the form of system calibrations. The
scope of delivery may include calibrations for stand-
ard situations, which already cover a large part of the
typical applications.
In addition, each customer receives a system calibra-
tion tailored specifically to his application. This is cre-
ated by OptiSense using coating samples provided.
Additional system calibrations can be ordered from
OptiSense as a calibration service and can be per-
manently stored in the instrument.
The calibration to be used can be activated by the
up-stream control unit. The coating thickness is then
calculated based on the currently active calibration.
6.3 User calibration
Process-related deviations from the system calibra-
tion lead to a discrepancy between the displayed
measured value and the actual layer thickness. The
user can compensate for this deviation with a user
calibration so that the actual layer thickness is dis-
played again.
For this purpose, a variant of the system calibration is
generated, which can be modified and saved by the
user without changing the underlying system calibra-
tion. User calibrations can then be selected as the
basis for measurements in the same way as system
calibrations.
6.4 Reference samples and reference masters
6.4.1 Reference samples
Since the measurement system operates on the
thermal properties of the coating of the sample, it is
essential that the reference sample has the same ma-
terial properties as the parts to be measured later.
Furthermore, it is necessary that the coating thick-
nesses of the reference samples are distributed as
evenly as possible over the coating thickness range
to be measured in the application. Layer thicknesses
outside the calibrated measuring range may deviate
significantly from the actual thicknesses under cer-
tain conditions.
6.4.2 Reference Master
For all users who require a particularly high level of
safety, accuracy and reliability from their coating
thickness measurement, the reference masters from
OptiSense, certified by a DAkkS laboratory, are the
ideal solution. The reference masters are used for
regular checking of the measuring system and the
calibration. Reference masters are not part of the
measuring system, but may be ordered as an option.
Reference masters are paint samples with a well
defined coating thickness that are attached to a test
specimen. They are custom-made and are provided
with exactly the same coating that will later be used
in production.
TIPP!
Calibration is performed using OptiS-
ense's OS Manager software. Please refer
to the OS Manager Software manual for
full details of the various calibration op-
tions

20 | PaintChecker Industrial
The reference master is therefore often made directly
from an original part.
Fig. 14: Reference Master
Our reference masters are certified by a DAkkS labor-
atory and are regarded as a high standard in terms of
accuracy and traceability
Fig. 15: Dimensional drawing of a reference sample
M3
4
12
9,60
4,50
6
8,50
Fig. 16: Dimensional drawing of a reference sample
In addition to the standard M3 thread, other sizes are
also available.
Fig. 17: Typical application of a Reference Master
M3
4
12
9,60
4,50
6
8,50
This manual suits for next models
6
Table of contents