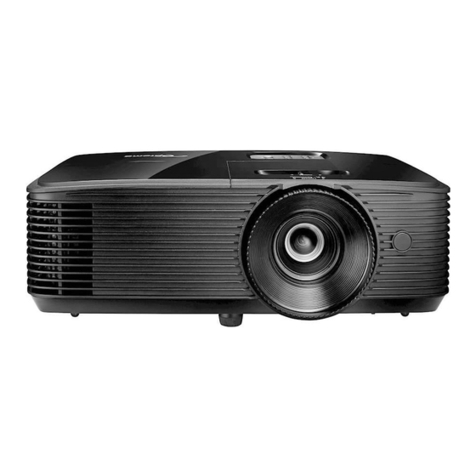
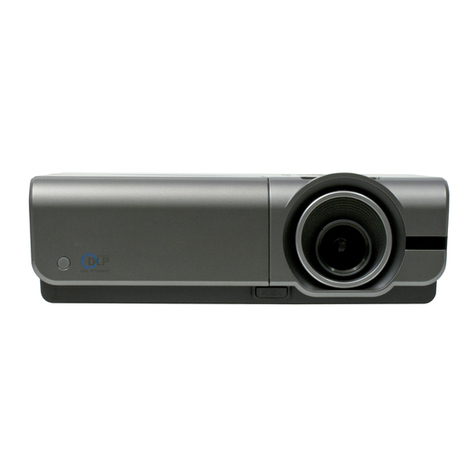
Optoma GT750 User manual

SERVICE MANUAL
Prepare : Check: Approve:
Date Revise Version Description
2011.08.01 V1.0 Initial Issue
Mina Amy
GT750

GT750 Condential I
Preface
This manual is applied to GT750 projection system. The manual gives you a brief
description of basic technical information to help in service and maintain the product.
Your customers will appreciate the quick response time when you immediately identify
problems that occur with our products. We expect your customers will appreciate the
service that you offer them.
This manual is for technicians and people who have an electronic background. Please
send the product back to the distributor for repairing and do not attempt to do anything that
is complex or not mentioned in the troubleshooting.
Notice: The information found in this manual is subject to change without prior notice. Any
subsequent changes made to the data herein will be incorporated in future edition.
GT750 Service Manual
Copyright Aug. 2011
All Rights Reserved
Manual Version 1.0

GT750 Condential
II
Table of Content
Chapter 1 Introduction
Highlight 1-1
Compatible Mode 1-2
Chapter 2 Disassembly Process
Equipment Needed & Product Overview 2-1
Repair notice 2-2
Rod Adjustment 2-3
Re-write Lamp Usage Hour 2-4
Repair Action 2-5
Chapter 3 Troubleshooting
LED Lighting Message For Projector 3-1
Main Procedure 3-2
Chapter 4 Function Test & Alignment Procedure
Test Equipment Needed 4-1
Test Condition 4-1
I/O Port Test 4-2
Run In Test 4-8
Test Inspection Procedure 4-9
ADC Calibration 4-10
Restore Blower Speed 4-11
Chapter 5 Firmware Upgrade
Section 1: System Firmware Upgrade 5-1

GT750 Condential
III
Equipment Needed 5-1
Get into FW mode 5-2
Check FW version 5-2
Section 2: 8051 FW Upgrade (USB) 5-3
Equipment Needed 5-3
8051 Firmware Upgrade Procedure 5-4
Check 8051 FW version 5-5
Section 3: MST8535 Firmware FW Upgrade Procedure 5-6
Equipment Needed 5-6
USB Driver Upgrade Procedure 5-7
MST8535 Firmware Upgrade Procedure 5-9
Chapter 6 EDID Upgrade
EDID Upgrade Procedure 6-1
Appendix A Exploded Image I
Appendix B
Serial Number Denition I
PCBA Code Denition II

GT750 1-1
Chapter 1
Introduction
No
1
2
5
7
10
11
12
15
1-1 Highlight

GT750 1-2
No
17
V
1-2 Compatible Mode
Computer Compatibility (Analog/Digital)
Compatibility Resolution V-Sync [Hz] H-Sync [KHz]
70
70
75
75
120
75

GT750
Compatibility Resolution V-Sync [Hz] H-Sync [KHz]
75
120
75
120
75
50
25
50
50
50
50
Note: If the Computer Compatibility supportive signal is different from User's Manual, please refer
to User's Manual.

GT750 Condential 2-1
Chapter 2
Disassembly Process
2-1 Equipment Needed & Product Overview
1. Screw Bit (+): 105
2. Screw Bit (+): 107
3. Screw Bit (-): 107
4. Hex Sleeves: 5 mm
5. Tweezers
6. Projector
* Before you start: This process is protective level II. Operators should wear electrostatic chains.
* Note: - If you need to replace the main board, you have to record the lamp usage hour.
- Some related contents please refer to common SM chapter 2.

GT750 Condential 2-2
2-2 Repair notice
Item Male Connector
on Main Board The key feature Figure
A & G Speaker Compose of Red/Black Wire and
Black wire tube (2 pin)
B Lamp Driver Black wire tube (5 pin)
CSystem Fan Compose of Red/Yellow/Black
Wire (3 pin)
D Photo Sensor Compose of Red/Black/White
Wire and Black wire tube (3 pin)
EBlower Compose of Black/Yellow/Red
Wire and Blue wire tube (3 pin)
FIR Compose of Black/Yellow/Red
Wire and Gray wire tube (3 pin)
Disassemble Main Board
Please refer to the below table details of
each connector on Main Board.
AG F E D C B

GT750 Condential 2-3
2-3 Rod Adjustment
1. Environment Adjustment
- The distance between the engine and
the screen is 93 CM.
- This process should be done at a dark
environment (under 10 Lux).
2. Procedure Adjustment
- Change the screen to "white screen".
- Adjust the screws on the engine module
to readjust the image.
("screw 1" should be adjusted rst, and
then "screw 2". Adjust until the yellowish
or bluish parts disappeared.)
3. Abnormal image inspection
- It should not have any abnormal color
at the rim of the image by estimating
through the eyes.
Note: - To avoid over adjusting the rod.
- After the operation, please use the glue
to x the screws.
Screw 1
Screw 2

GT750 Condential 2-4
2-4 Re-write Lamp Usage
Hour
1. Get into Service Mode
- Press "Power", "Left", "Left" and "Menu"
buttons sequentially to get into Service
Mode.
2. Re-write Lamp Hours (Normal)
- Use "up" or "down" buttons to select
"Lamp Hours (Normal)", then use "left"
or "right" buttons to re-write the Lamp
Hours.
3. Re-write Lamp Hours (ECO)
- The way of re-write "Lamp Hours (ECO)"
is the same as "Lamp Hours (Normal)".
4. Exit Service Mode
- Use "up" or "down" buttons to select
"Exit", then press "Enter" to exit the
Service Mode.
Note: left key = decrease lamp hour
right key =increase lamp hour

GT750 Condential 2-5
2-5 Repair Action
Repair action Change parts Software Description
page
Main
Board
Lamp
Module
Engine
Module
Lamp
Driver
Blower Color
Wheel
I/O
Board
Firmware EDID
System Firmware
Update
v v v chapter
5-section 1
Color Wheel
Index
v v Chapter
4-3-1.7
OSD Reset v v v Chapter
4-5.2
Video
Calibration
v v v v Chapter
4-6
VGA
Calibration
v v v v Chapter
4-6
EDID v Chapter 6
Re-write Lamp
Hours Usage
v Chapter 2-4
Video
Performance
v v v chapter4-3-3
Restore Blower
Speed
v v v v Chapter 4-7
Optical
Performance
Measure
v Chapter
4-3-1

GT750 Condential 3-1
Chapter 3
Trobleshooting
Message ON/STANDBY LED
(Red/Green)
Temp LED
(Red)
Lamp LED
(Red)
Standby State
(Input power cord) (Red)
Power on (Warming) Flashing
(Green)
Power on and Lamp
lighting (Green)
Power off (Cooling) Flashing
(Green)
Error
(Lamp failed)
Flashing
(Red) (Red)
Error
(Fan failed)
Flashing
(Red)
Flashing
(Red)
Error
(Over Temp.)
Flashing
(Red) (Red)
Note:
3-1 LED Lighting Message
No light
Steady light

GT750 Condential 3-2
3-2 Main Procedure
No Symptom Procedure
1Auto Shut Down
- Check LED status
a. Lamp Fail: ON/STANDBY LED (ashes red);
Lamp LED (lights red)
- Check Lamp
- Check Lamp Driver
- Check Main Board
- Check Color Wheel
- Check Photo Sensor
b. Over Temp: ON/STANDBY LED (ashes red);
Temp LED (lights red)
- Check Thermal Switch
- Check Fan
- Check Main Board
c. Fan Fail: ON/STANDBY LED (ashes red);
Temp LED (Flashes red)
- Check Fan
- Check Main Board
23D Image Abnormal
- Ensure the using 3D glasses is good and you must face the
projection.
- Ensure the CD in DVD is HQFS format or the graphic card from
PC can support 3D format.
- Ensure your standing distance is less than 6m from screen.
- Ensure the 3D function is on and execute “3D sync invert” in OSD
menu.
- Check main board.

GT750 Condential 4-1
Chapter 4
Function Test & Alignment Procedure
4-1 Test Equipment Needed
- IBM PC with HDTV resolution
- DVD player with Multi-system, equipped “Component”, “Composite”, “S-Video” and “HDMI”.
- HDTV Source (720P,1080P,1080i)
- Minolta CL-100
- Quantum Data 802B or CHROMA2327 (Color Video Signal & Pattern Generator)
4-2 Test Condition
- Circumstance brightness: Dark room less than 2 lux.
- Product must be warmed up for 3 minutes.
- Screen size: 60 inches diagonal.
Zone Denition
< Figure: Zone A(as green line) Denition >

Condential 4-2
GT750
4-3 I/O Port Test
4-3-1 VGA Port Test
Note:GT750 the native resolution of test signal is 1280x800@60HZ.
1. Frequency and tracking boundary
Procedure - Test equipment: video generator.
- Test signal: analog 1280x800�60Hz1280x800�60Hz�60Hz
- Test Pattern: general-1 or master
- Check and see if the image sharpness is well
performed.
- If not, re-adjust by the following steps:
(1) Select “Frequency” function to adjust the total
pixel number of pixel clock in one line period.
(2) Select “Tracking” function and use right or left
arrow key to adjust the value to minimize video
icker.
- Adjust Resync or Frequency/Tracking/H. Position/V.
Position to the inner screen.
Inspection item - Eliminate visual wavy noise by Resync,
Frequency or Tracking selection.
- Check if there is noise on the screen.
- Horizontal and vertical position of the video should
be adjustable to the screen frame.
Criteria - If there is noise on the screen, the product is con-
sidered as failure product.
- If there is noise on the screen, use auto or manual
“frequency” function or “tracking” function to adjust
the screen.
- The PC mode functionally sure be workable include
support format with frequency and auto detected
functional will be workable.
Master
General-1

Condential 4-3
GT750
2. Bright Pixel
Procedure - Test equipment: video generator.
- Test signal: analog 1280x800�60Hz
- Test Pattern: gray 10
Inspection item - Bright pixel check.
Criteria - Bright pixel is unacceptable in the active zone; 1
pixel is allowed on the frame.
- Ref. Defect specication table
3. Dark Pixel
Procedure - Test equipment: video generator.
- Test signal: analog 1280x800�60Hz
- Test Pattern: full white
Inspection item - Dead pixels check.
- White pattern (IRE=100)
Criteria - The dark blemish should be no more than 7
under white pattern.
- Adjacent pixels are unacceptable.
- Ref. Defect specication table
4. Bright Blemish
Procedure - Test equipment: video generator.
- Test signal: analog 1280x800�60Hz
- Test Pattern: gray 10
Inspection item - Bright blemish check.
Criteria - The bright blemish should be no more than 4
under gray 10 pattern.
- Ref. Defect specication table
5. Dark Blemish
Procedure - Test equipment: video generator.
- Test signal: analog 1280x800�60Hz
- Test Pattern: blue 60
Inspection item - Dark blemish check
Criteria - The bright blemish should be no more than 4
under blue 60 pattern. -
Full white
Gray 10
Gray 10
Blue 60

Condential 4-4
GT750
Pixel specication
Order Symptom Pattern Criteria
1Bright pixel ( dots) Gray 10 pattern A=0
2 Dark pixel(dots) White pattern A≤7
3 Unstable pixel (dots) Any pattern A=0
4Adjacent pixel (dots) Any pattern A=0
5Bright blemish (Dirty) Gray 10 pattern A≤4
(diameter<1 inch)
6 Dark Blemish(Dirty) Blue 60 pattern A≤4
(diameter<1 inch)
7Bright pixel on frame Gray 10 pattern ≤1
6. Focus Test
Procedure - Test equipment: video generator.
- Test signal: analog 1280 x 800�60Hz1280 x 800�60Hz�60Hz
- Test Pattern: full screen
Inspection item - Focus check
Criteria - From screen 0.65 M via visual to check the focus,
look at the entire screen, focus shall be clear, crisp,
and sharp over the entire surface of the display pat-
tern. (Blur word on one of the corner after adjust-
ment is acceptable. However, the word should at
least be recognizable.)
7. Color Performance
Procedure - Test equipment: video generator.
- Test signal: 1280 x 800�60Hz, 1080i1280 x 800�60Hz, 1080i�60Hz, 1080i
- Test Pattern: Master, 64 gray RGBW
Please get into service mode.Use
720p & 1080p signal, master pattern to do HDTV
test. Color cannot discolor to purple and blue.
Inspection item - Check if each color level is well-functioned.
- Color saturation
Criteria - Screen appears normal. It should not have any
abnormal condition, such as lines appear on the
screen and so on.
- Color appears normal.
Full screen
Master

Condential 4-5
GT750
- It is unacceptable to have few lines ashing.
- RGBW should all appear normal on the screen
and sort from R -G-B-W.
- Color levels should be sufcient and normal. (The
unidentied color levels on both left and right
sides should not over 4 color levels.)
- Gray level should not have abnormal color or
heavy lines.
- If color appears abnormal, please get into service
mode to do color wheel index adjustment.
8. Optical Performance
Inspection Condition
- Environment luminance: 2 Lux
- Product must be warmed up for 5 minutes
- Distances from the screen: 0.8M
- Screen Size: 60 inches diagonal
a. Measure setting
Procedure - Please get into OSD menu, select “Lamp Setting”
under “Options”, press “Enter” button, then select
“Bright” of “Bright mode”.
- Press “Power→ Left→ Left→ Menu” to get into
service mode.
- Test equipment:Select “Spoke Test”
b. Brightness
Procedure - Full white pattern
- Use CL100 to measure brightness values of
P1~P9.
- Follow the brightness formula to calculate
brightness values.
☼ Brightness Formula
Avg. (P1~P9)*1.1m2
Full white pattern
64 gray RGBW

Condential 4-6
GT750
Criteria • 1300 ANSI lumen
c. Full On/Full Off Contrast
Procedure - Full white pattern & Full black pattern
- Use CL100 to measure brightness values of full
white pattern P5 & full black pattern B5 ( see
image: full white)
- Follow Contrast formula to calculate contrast
values.
☼ Contrast Formula
P5/B5
Note: P5 = Lux of center in full white pattern
B5 = Lux of center in full black pattern
Criteria • 1750:1
d. Uniformity
Procedure - Full white pattern
- Use CL100 to measure brightness values of
P1~P9 (see image: full white).
- Follow the Uniformity formula to calculate
average values.
☼ Uniformity Formula
JBMA Uniformity = Avg. (P1, P3, P7, P9) /
P5 *100%
Criteria • 70%
4-3-2 Composite Port and Audio Test
Procedure - Test equipment: DVD Player
- Test signal: CVBS
Inspection item - Audio performance test
Inspection Distance - 0.46M ~0.56M
Criteria - Check the sound from speaker
- Plug Audio cable into Audio in port, check
whether “Volume” is normal.
- Adjust the volume to “0→ 9” by using the
remote controller.
Full white pattern
Full black pattern
Motion video
Other manuals for GT750
1
Table of contents
Other Optoma Projector manuals

Optoma
Optoma TX635-3D User manual

Optoma
Optoma H50 User manual

Optoma
Optoma HD7100 User manual

Optoma
Optoma W307UST Owner's manual

Optoma
Optoma TX-330 Installation and operation manual

Optoma
Optoma ML500 User manual

Optoma
Optoma EP 732H User manual

Optoma
Optoma EP729 User manual

Optoma
Optoma HD83 User manual

Optoma
Optoma EH1020 User manual

Optoma
Optoma TW610STi+ User manual

Optoma
Optoma X304M User manual

Optoma
Optoma H76 User manual

Optoma
Optoma EX665UTis User manual

Optoma
Optoma PK100 User manual

Optoma
Optoma ML1000CA User manual

Optoma
Optoma TX763 User manual

Optoma
Optoma UHD65 User manual

Optoma
Optoma Optoma PRO150S User manual

Optoma
Optoma W401 User manual