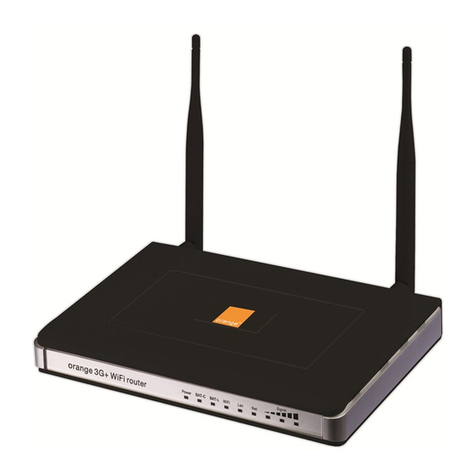
ORANGE Surf & Pay User manual

Surf & Pay
Quick start guide

contents
contents
Welcome
1. Check and install the hardware
step 1 : Contents of the box.
step 2 : Check the hardware.
step 3 : Install Wi-Fi & 3G antennas, insert SIM into SIM slot.
step 4 : Plug your Surf & Pay to the main socket to recharge the embedded battery.
step 5 : Connect PC and switch on Surf & Pay.
step 6 : Discover your Surf & Pay : check LED status.
step 7 : Surf & Pay main functions. Broadband internet access.
step 8 : Where should you locate your Surf & Pay ?
2. Software set-up
step 1 : Launch your web browser.
step 2 : Login in at 192.168.8.1
step 3 : Check 3G status.
step 4 : Clock settings.
3. Owner’s customer charging
step 1 : Create a new pricing.
step 2 : Create an end user account.
2

contents
Thank you for choosing Orange and Surf & Pay. Your Surf & Pay is equipped with
the best mobile technology to provide you with high speed broadband services.
To install Surf & Pay service, you need a data SIM card, a computer equipped with an
Ethernet or Wi-Fi connection and an internet browser.
Installation instructions are for Windows XP, Vista ans Windows 7 users, but your Surf
& Pay is compatible with most computers like Apple and Linux.
In order to fully exploit all your Surf & Pay features, please follow the instructions
carefully when :
Connecting your Surf & Pay to a mobile network.
Conguring your computer and settings up a wired (Ethernet) or wireless (Wi-Fi)
connection to your Surf & Pay.
It will only take a few minutes to connect your computers to the mobile network after
which you’ll be able to access to the available services.
Welcome !
3
1

contents
Step 1 : Contents of the box
1. Check and install the hardware
4
1

contents
Step 2 : Check the hardware.
Install the battery : for security reasons, the battery is installed in Surf & Pay
but the cable isn’t connect, so you need to remove the battery rst, then
connect the cable and install the battery back like below :
Open the cover and remove the battery.
Connect the battery cable to device’s slot and put back the battery.
5
1

contents
Step 3 : Install Wi-Fi & 3G antennas, insert SIM into SIM slot.
Connect 3G and Wi-Fi antennas, then insert SIM card into the SIM slot
provided.
See diagram below :
Step 4 : Plug your Surf & Pay to the main socket to recharge the
embedded battery.
Connect main supply by power adapter
(also could be powered by embedded
battery) then the embedded battery will
start charging. Please use power
adapter provided by Orange only to
avoid problems.
6
1

contents
Step 5 : Connect PC and switch on Surf & Pay.
Connect one end of the Ethernet cable to your PC’s LAN port, connect
another end to LAN port of Wi-Fi router. Then switch on the Wi-Fi router.
See diagram below :
7
1

contents
Step 6 : Discover your Surf & Pay : check LED status.
After switch on the Surf & Pay, please check the LED status.
1-Power : light means you connected the power adapter correctly.
2-BAT-C : light means the battery is charging now.
3-BAT-L : orange shows low power, green means sufcient power.
4-Wi-Fi : light means Wi-Fi is working.
5-LAN : light means Ethernet cable connect correctly.
6-Net : ash means connect 2.5G network, light means Ethernet cable is
connecting correctly.
7-Signal : number of ash LED shows signal strength. 3 LED light means
signal is strong.
1 2 3 4 5 6 7
8
1

contents
Step 7 : Surf & Pay main functions.
Broadband internet access.
9
1

contents
Step 8 : Where should you locate your Surf & Pay ?
Your Surf & Pay service will provide you with broadband access via a
powerful 3G network.
In order to fully exploit all your Surf & Pay’s advanced features, please
follow these recommendations :
Locate your Surf & Pay where the mobile network signal is strongest
such as, for example, near a window.
Use the “Signal” indicators (7) to assess the strength of the signal.
For further information refer to “indicator status” (page 8).
Ensure it is located near power supply. If your Surf & Pay is located
near your computer, it is best to use a wired network (Ethernet).
10
1

contents
3
2. Software set-up
Step 1 : Launch your web browser.
Launch your web browser like IE8 : , and input 192.168.8.1 in address
bar as below.
11
2

contents
Connections 4
Step 2 : Login in at 192.168.8.1
Default login with reseller account (username super, default password super).
Note : In “Advanced >System Tools” menu. Reseller could edit the
password of reseller account.
Please change your password for security reason.
12
2

contents
Step 3 : Check 3G status.
It’s showing the strength of the network speed. 3 types : Low,
Medium and Strong.
It’s appear green when the SIM card working.
It’s appear red when the SIM card not working.
It’s showing the type of connection you have 3G or 2G.
13
2

contents
Step 4 : Clock settings.
Go to ‘‘Advanced tab >System tool >Clock’’ in submenu.
You could set the clock Manual :
Manual : Input the real clock manually and click “Save”. clock
Note : Clock is very important for the use of Surf & Pay service. Please
make sure the Wi-Fi router clock appears correctly in the right top
corner of the interface.
14
2

contents
3. Owner’s customer charging.
Step 1 : Create a new pricing (1/3).
Go to ‘‘Pricing’’. Add new price to dene your prices that you will charge
to your customers before you start using Surf & Pay billing service.
Note : Click ‘‘Add’’ to add new price.
15
3

contents
Time : you use it when the customer would like to be charged on time
base (for example 1 euro/hour).
Volume : you use it when the customer would like to use the internet on
volume base (for example 1 euro/MB).
Step 1 : Create a new pricing (2/3).
It’s available with 2 optional pricing methods.
16
3

contents
Each Price has a name and the maximum number of prices you can
create is 10.
Name : give a name to the service (no space authorized and numbers
and characters between 6-12).
Fee type : select the fee type in the drop down list.
Unit cost :choose currency that you would like to use (for example 2
euros/hour)
Step 1 : Create a new pricing (3/3).
Note : Save by clicking on “save” button.
17
3

contents
Step 2 : Create an end user account (1/4).
To create an end user account after get prepaid, go to ‘‘Billing tab >User
management’’ to create user name and password that you will gave to your
customer when he/she will use the internet access service in your cyber cafe
or hotel.
Click ‘‘Add’’ to Add new users.
18
3

contents
To create a new end user, please ll in the following info :
User name and Password (the sofware will propose random user
name and password, you can change it if you want).
Money amount : please ll the amount that your customer gave you,
based on his choice time or volume.
Expired date : choose the expired date for the customer account.
Pricing : choose the correct price that you created in step 1.
Band Rule : choose the level of the download bandwidth. It’s optionnal.
Step 2 : Create an end user account (2/4).
Save by clicking on “Save” button.
19
3

contents
Note :
You can create up to 20 user names and passwords.
The length of user name should be 6 to 12 characters, includes letters
and numbers, capital or small letter are distinguished.
You will see account list as below :
Step 2 : Create an end user account (3/4).
20
3
Other manuals for Surf & Pay
1
Table of contents
Other ORANGE Network Router manuals