5
extension (1 x 1" and 1 x 2"). Larger 2" eyepieces may only
require two inches of extension.
Focusing the Telescope
One of the exciting new features of the Orion Ritchey-
Chrétien optical tubes is the inclusion of the new linear bear-
ing Crayford focuser. Instead of the traditional Crayford-style
focuser — which uses a roller tensioned against the drawtube
— the new linear bearing focuser has a track on the draw-
tube with beveled edges and rollers within “grooves” along the
edges. This allows you to more effectively lock down the fo-
cuser with heavy payloads such as a large eyepiece, a DSLR,
or a large CCD Imager. Image shift is reduced by stabilizing
the drawtube within the focuser housing.
For astronomical viewing, out-of-focus star images are very
diffuse, making them difficult to see. If you turn the focus knob
too quickly, you can go right through focus without seeing the
image. To avoid this problem, your first astronomical target
should be a bright object (like the Moon or a planet) so that
the image is visible even when out of focus. There is also a
10:1 fine focus adjustment. Every 10 turns of the small knob
equals a single turn of the large knob to enable the micro-
adjustment necessary for the sharpest images possible. Use
the coarse focus knob to adjust the telescope until your object
is as close to focus as possible, then make fine adjustments
with the black outside knob
Attaching a Finder Scope
A finder scope is a small, wide-field instrument used to help
locate and center objects in the main field of your telescope. A
finder scope usually has a built-in crosshair reticle that shows
the optical center of the finder’s field of view. On some models
the center is indicated with an LED display.
A finder scope dovetail base has been pre-installed on your
Ritchey-Chrétien optical tube assembly making it easy to use
any Orion finder and many others using a similar bracket.
Installing a finder scope is very simple:
1. Loosen the metal thumbscrew on the side of the dovetail
base.
2. Insert the bracket into the dovetail from the back of the
telescope, until it stops.
3. When the finder bracket is securely in place retighten the
metal thumbscrew.
Inserting a Star Diagonal
A star diagonal is a prism that diverts the light at a right angle
to the light path of the telescope. This allows you to observe
in positions that are physically more comfortable than if you
looked straight through the scope. Your telescope is equipped
with a 2" focuser and includes a 1.25" adapter, allowing
maximum versatility when choosing accessories. To insert an
optional diagonal simply loosen the knurled thumbscrew on
the side of the focuser drawtube and insert the chrome barrel
of the diagonal, then re-tighten the thumbscrew. The built-in
brass compression ring will provide uniform tension on the
diagonal and prevent marring of the chrome surface.
Inserting an Eyepiece
An eyepiece magnifies the image focused by the telescope.
The eyepiece fits into either the focuser directly or a star diag-
onal. Eyepieces are commonly referred to by focal length and
barrel diameter. The focal length of each eyepiece is printed
on the eyepiece body. The longer the focal length (i.e., the
larger the number) the lower the eyepiece magnification, the
shorter the focal length (i.e., the smaller the number) the high-
er the magnification. Generally, you will use low to moderate
powers when viewing. Use the following formula to calculate
magnification:
Focal Length of Telescope (mm)
Magnification = Focal Length of Eyepiece (mm)
To install an optional eyepiece:
1. Loosen the setscrew on the star diagonal until the tip no
longer extends into the inner diameter of the eyepiece
end of the diagonal.
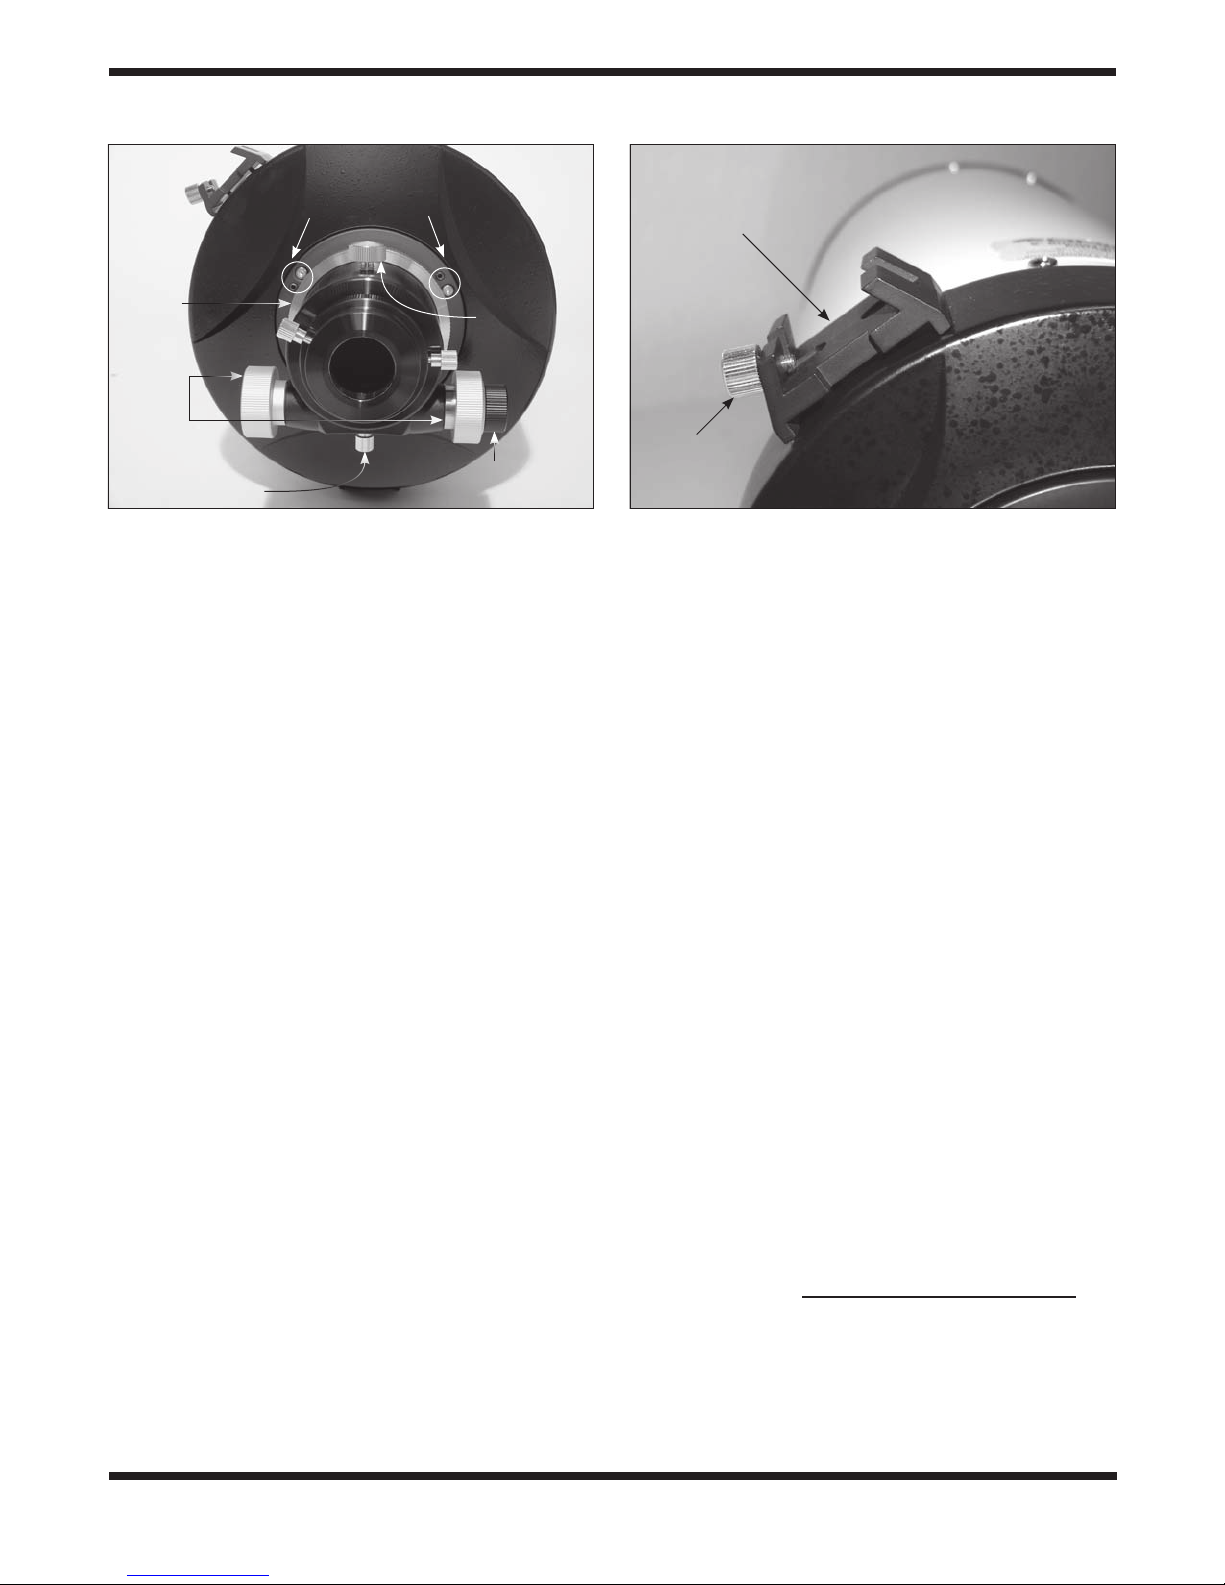
Figure 6: Finder scope dovetail base.
Finder scope
dovetail holder
Metal
thumbscrew
Figure 5: Details of the linear bearing Crayford focuser.
Knurled
silver
grip-ring
Coarse
focus
knobs
10:1 Fine
focus knob
Focus
tension knob
Focus
lock
knob
Collimation
adjustment
push-pull screws