manuals.online logo
Brands
  1. Home
  2. •
  3. Brands
  4. •
  5. Orlight
  6. •
  7. Thermostat
  8. •
  9. Orlight Orcomm ORC-HC2-24D-RS485-WHF User manual

Orlight Orcomm ORC-HC2-24D-RS485-WHF User manual

Welcome
Thank you for your purchase.
Thermostat
Screws
Installation/programming manual
Wall plate
Contents
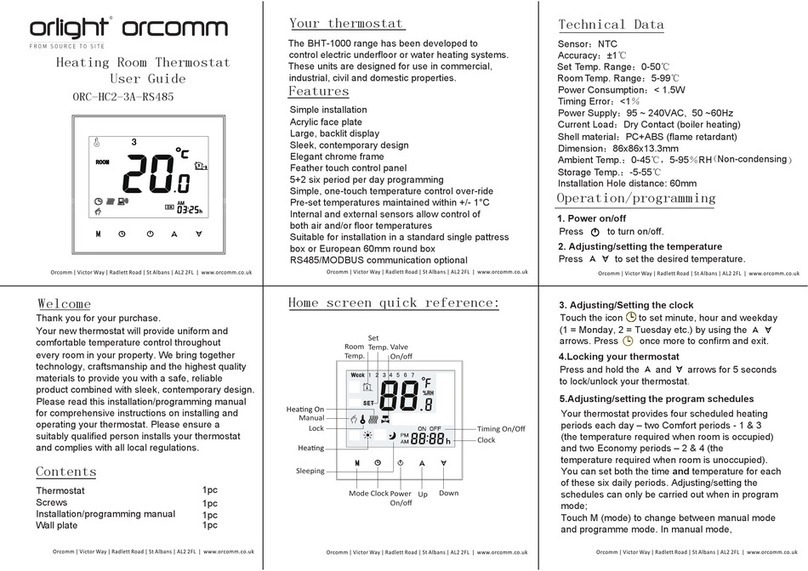
Your thermostat
Features
Simple installation
Acrylic face plate
Large, backlit display
Sleek, contemporary design
Elegant chrome frame
Feather touch control panel
5+2 six period per day programming
Simple, one-touch temperature control over-ride.
Pre-set temperatures maintained within +/- 1°C
Internal and external sensors allow control of
both air and/or floor temperatures
Suitable for installation in a standard single pattress
box or European 60mm round box
RS485/MODBUS communication optional
ce
Operation/programming
Technical Data
Your new thermostat will provide uniform and
comfortable temperature control throughout
every room in your property. We bring together
technology, craftsmanship and the highest quality
materials to provide you with a safe, reliable
product combined with sleek, contemporary design.
Please read this installation/programming manual
for comprehensive instructions on installing and
operating your thermostat. Please ensure a
suitably qualified person installs your thermostat
and complies with all local regulations.
1pc
1pc
1pc
1pc
Fan Coil Room Thermostat
User Guide
ORC-HC2-24D-RS485-WHF
Home screen quick reference:
Power
On/off
Up
Fan
Mode
Clock
Auto Fan
Timing On/Off
Cooling
Room
Temp.
Fan
Speed
Lock
Valve
On/off
Down
Set Temp.
These units are designed for use in commercial,industrial,
civil and domestic properties.
ORC-HC2-24D series Modern Touch Screen room
thermostat are designed to on/off control the fans and
valves in air conditioner applications. Sensor:NTC
Accuracy:±0.5℃
Temp. Range:5 -35℃
Power Consumption :<1.5W
Timing error :<1%
Power Supply:24 V, 50 ~60Hz
Current Load:5A for fan and 3A for valve
Shell Material:PC (Fireproof)
Dimension:
86x86x13.3mm
Installation box:86*86mm or European 60mm
Ambient Temp.:0 ~ 45℃,5 ~ 95%RH(Non condensing)
StorageTemp:-5~55℃
1. Setting Lock (optional function)
Press and hold for 3 sec. to lock the screen.
The icon will display on the screen.
Press and hold again for 3 sec. to unlock the
screen.
2. Setting the fan
Press to select the fan speed AUTO, HIGH,
MED, LOW, No Show Fan.
3.Selecting the clock
Press and hold M , minutes will flash,
Press to set minutes of the time;
Press to set the relatve values.
M
M
Press to set hours of the time;
Your thermostat carries an 24 months warranty from
date of purchase. Service outwith the warranty
period may incur a charge.
Warranty
Wiring your thermostat
Please note:
Do not over-tighten the terminals in your thermostat
as damage may occur.
Installing your thermostat
Your thermostat is suitable for installation within
a standard 86mm pattress box or European 60mm
round pattress box.
Step 1. Keep power off. See Fig 1.
Fig 1
Step 2. Remove the mounting Plate. See Fig 2.
Fig 2
Fig 3
Step 3. Connect power supply, load and external (floor) sensor
into the appropriate terminals if there is external sensor.
(see “Wiring your thermostat” for details and Fig 3).
Step 4. Fix the mounting plate into the wall with screws in
the box. See Fig 4
Fig 4
Step 5. Fasten body of thermostat and the mounting plate
through the groove. See Fig 5.
Fig 5
Step 6. Installation complete. See Fig 6.
Fig 6
RISK OF ELECTRICAL SHOCK. Disconnect/isolate
power supply prior to making electrical connections.
Contact with high voltage components can cause electrical
shock, severe injury or death.
N
o. Function Settings & Options D
e
fau
lt
1
T
em
p
.
Calibration
-2
3Lock
00: All the buttons are
l
o
cke
d except
P
OWE
R
01: All the buttons are
l
o
cke
d
01
4 01
5
Min. Set T
em
p
. 5
-
15°C 18
6
Max. Set T
em
p
. 5
-
35°C 32
7
00: Display both set temp. and
room
tem
p
.
01: Display set temp. on
ly
9
10
11
Modbus IP address
0X00-0XFF
01
-9 to 9
12/24 Hour clock 00:12h 01:24h
8Display Mode 00
01
Baudrate 1:9600;2:19200;3:38400;4:56000;5:115200 1
4. Setting functions and options
During power off, press and hold at the same
time for 5 sec. to system functions. Then press M
to change the different items.
All the settings will confirm automatically when
M
Press or to set the relative values.
power is on.
AC/DC 24±10%V 50~60Hz
+
_
42
moc_42
No available
No available
No available
00
1
The room temperature is provided by the built-in sensor on the thermostat.
An external 10k NTC sensor can be connected to the thermostat to provide
additional temperature input. Externally sensed temperature is only readable
on the Modbus.
A/+ B/-
10k NTC*
ORC-HC2-24D-RS485-WHF
8003/5331
ORCOMM
10k NTC* - Compatible sensors
tested and approved by Orcomm
10K NTC* - Compatible sensors tested and approved
by Orcomm
External sensor
Temp. Calibra�on -9 to 9
°C
°C 0
12

Other Orlight Thermostat manuals

Orlight orcomm ORC-HC2-3A-RS485 User manual

Orlight

Orlight orcomm ORC-HC2-3A-RS485 User manual

Popular Thermostat manuals by other brands

Olympia HT 430-23A instruction manual

Olympia

Olympia HT 430-23A instruction manual

Jung BT 1791 Series operating instructions

Jung

Jung BT 1791 Series operating instructions

Herschel T-MKS Installation and operating instructions

Herschel

Herschel T-MKS Installation and operating instructions

Atag WIZE user manual

Atag

Atag WIZE user manual

Vive Comfort TP-S-855i installation manual

Vive Comfort

Vive Comfort TP-S-855i installation manual

Comfort Sync A80DS2V Installer's guide

Comfort Sync

Comfort Sync A80DS2V Installer's guide

Johnson Controls T-3102 Installation and Calibration Manual

Johnson Controls

Johnson Controls T-3102 Installation and Calibration Manual

Honeywell FocusPRO TH6320WF02 user guide

Honeywell

Honeywell FocusPRO TH6320WF02 user guide

Elsner KNX eTR 101 Installation and adjustment

Elsner

Elsner KNX eTR 101 Installation and adjustment

homexpert THR870CUK user manual

homexpert

homexpert THR870CUK user manual

nest Thermostat E installation guide

nest

nest Thermostat E installation guide

LUX SMART TEMP TX500b Series installation guide

LUX

LUX SMART TEMP TX500b Series installation guide

Viconics VT7600A installation guide

Viconics

Viconics VT7600A installation guide

Salus ST620 programming

Salus

Salus ST620 programming

Honeywell ST9500C user guide

Honeywell

Honeywell ST9500C user guide

Yokis Thermarp Installation, Programming and Use Instruction Manual

Yokis

Yokis Thermarp Installation, Programming and Use Instruction Manual

Sangamo Rstat8 Quick reference guide

Sangamo

Sangamo Rstat8 Quick reference guide

Honeywell RTH2310 operating manual

Honeywell

Honeywell RTH2310 operating manual

manuals.online logo
manuals.online logoBrands
  • About & Mission
  • Contact us
  • Privacy Policy
  • Terms and Conditions

Copyright 2025 Manuals.Online. All Rights Reserved.