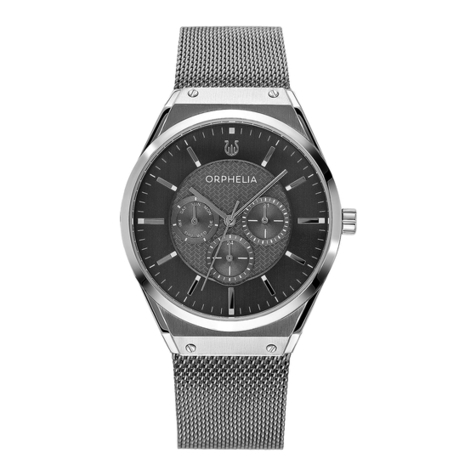
ORPHELIA Sunray Rose Gold User manual

Chrono watches

ORPHELIA WATCHES
Orphelia watches reflect the expertise in the industry. Orphelia watches are dis-
tinguished by the quality of their manufacture and their beautiful style.
This product should not be disposed with normal household
waste. Disposing of this product correctly will help save valuable
resources and prevent any potential negative effects on human
health and the environment, which could otherwise arise from
inappropriate waste handling. Please contact your local autho-
rity for further details of your nearest designated collection
point.
ORPHELIA WATCHES
Orphelia horloges weerspiegelen de expertise in de branche. Orphelia horloges
onderscheiden zich door de kwaliteit van hun fabricage en hun mooie stijl.
Dit product mag niet worden weggegooid met het normale
huisvuil. Door dit product op de juiste manier af te voeren, be-
spaart u waardevolle hulpbronnen en voorkomt u mogelijke ne-
gatieve effecten op de menselijke gezondheid en het milieu, die
anders zouden kunnen ontstaan door onjuiste afvalverwerking.
Neem contact op met uw lokale overheid voor meer informatie
over de dichtstbijzijnde aangewezen inzameling punt.

ORPHELIA WATCHES
Les montres Orphelia reflètent l’expertise de l’industrie. Les montres Orphelia se
distinguent par la qualité de leur fabrication et leur beau style.
Ce produit ne doit pas être jeté avec les ordures ménagères
normales. La mise au rebut de ce produit correctement aidera
à économiser des ressources précieuses et à prévenir tout effet
négatif potentiel sur la santé humaine et l’environnement, qui
pourrait autrement résulter d’une manipulation inappropriée
des déchets. Veuillez contacter votre autorité locale pour plus
de détails sur votre collection désignée la plus proche point.
ORPHELIA WATCHES
Orphelia Uhren spiegeln das Know-how der Branche wider. Orphelia Uhren zeich-
nen sich durch die Qualität ihrer Herstellung und ihren schönen Stil aus.
Dieses Produkt darf nicht mit normalem Hausmüll entsorgt
werden. Eine ordnungsgemäße Entsorgung dieses Produkts
hilft, wertvolle Ressourcen zu sparen und mögliche negative
Auswirkungen auf die menschliche Gesundheit und die Umwelt
zu vermeiden, die andernfalls durch unangemessenen Umgang
mit Abfällen entstehen könnten. Bitte wenden Sie sich an Ihre
örtliche Behörde, um weitere Informationen zur nächstgelege-
nen Sammlung zu erhalten

WATER RESISTANCE
rain, hand-
washing, spray shower swimming diving
3 ATM
5 ATM
10 ATM
20 ATM
3m/3bar
50m/5bar
100m/10bar
200m/20bar
YES
YES
YES
YES
YES
YES
YES YES
YES
YES
NO NO
NO
NO
NO
NO
WATERBESTENDIGHEID
regen, handen
wassen, sproeien douchen zwemmen duiken
3 ATM
5 ATM
10 ATM
20 ATM
3m/3bar
50m/5bar
100m/10bar
200m/20bar
JA NEE NEE
NEE
NEE
NEE
NEE
JA JA
JA JA
JA
JA
JA JA JA

RÉSISTANCE À L’EAU
pluie, lavage des
mains, spray douche natation plongée
3 ATM
5 ATM
10 ATM
20 ATM
3m/3bar
50m/5bar
100m/10bar
200m/20bar
OUI NON
WASSERBESTÄNDIGKEIT
Regen, Hände
waschen, sprühen Dusche Baden Tauchen
3 ATM
5 ATM
10 ATM
20 ATM
3m/3bar
50m/5bar
100m/10bar
200m/20bar
JA NEIN
JA JA
JA JA
JA
JA
JA JA JA
OUI
OUI
OUI
OUI
OUI OUI OUI
OUI
OUI
NON
NON
NON
NON
NON
NEIN
NEIN
NEIN
NEIN
NEIN

WATER RESISTANCE
The term water resistant or waterproof only applies to brand new watches. Wa-
terproofing is tested in accordance with DIN 8310. ATM (or BAR) is the definition
of the test pressure and should not be confused with diving depth. When swim-
ming or diving into water, higher pressures may occur than the test pressure gua-
rantee for your watch. When in doubt, remove the watch first.
WATERBESTENDIG
De term waterbestendig of waterdicht is alleen van toepassing op gloednieu-
we horloges. De waterdichtheid wordt getest volgens DIN 8310. ATM (of BAR) is
de definitie van de testdruk en mag niet worden verward met duikdiepte. Bij het
zwemmen of duiken in water kunnen er hogere drukken optreden dan de testdruk
die voor uw horloge wordt gegarandeerd. Verwijder bij twijfel eerst het horloge.
1. 2. 3.
unscrew crown
align thread carefully & rescrew
crown fully but slowly
1. 2. 3.
draai de kroon los
lijn de draad zorgvuldig uit en schroef
de kroon volledig maar langzaam
weer vast

RÉSISTANCE À L’EAU
Le terme résistant à l’eau ou étanche ne s’applique qu’aux montres neuves.
L’étanchéité est testée conformément à la norme DIN 8310. ATM (ou BAR) est la
définition de la pression d’essai et ne doit pas être confondue avec la profondeur
de plongée. Lorsque vous nagez ou plongez dans l’eau, des pressions plus élevées
peuvent se produire que la pression de test garantie pour votre montre. En cas de
doute, retirez d’abord la montre.
WASSERBESTÄNDIGKEIT
Der Begriff wasserdicht gilt nur für brandneue Uhren. Die Abdichtung wird nach
DIN 8310 geprüft. ATM (oder BAR) ist die Definition des Prüfdrucks und darf nicht
mit der Tauchtiefe verwechselt werden. Beim Schwimmen oder Tauchen ins Was-
ser können höhere Drücke auftreten als die Testdruckgarantie für Ihre Uhr. Entfer-
nen Sie im Zweifelsfall zuerst die Uhr.
1. 2. 3.
dévisser la couronne
enfilez soigneusement le fil et
revissez le corwn complètement
mais lentement
1. 2. 3.
Krone abschrauben
Den Faden vorsichtig ausrichten und
die Krone vollständig, aber langsam
wieder herausziehen

14 15
JS05/15/25 DISPLAYS AND BUTTONS VX9J SETTINGS
second hand
stopwatch minute hand
24h hour hand
stopwatch second hand
stopwatch minute hand
second hand
stopwatch second hand
second hand
stopwatch second hand
24h hour hand
stopwatch minute hand
calendar
button B
hour hand
second click position
normal position
Button A
SETTING THE TIME
1. Pull the crown out to the 2nd Click Position.
2. Turn the crown to set hour and minute hands.
3. After the time has been set, push the crown back to the Normal position.
SETTING THE DATE
1. Pull the crown out to the 1st Click Position.
2. Turn the crown clockwise to set the date.
If the date is set between the hours of
around 9:00 PM and 1:00 AM, the date may not change on the following day.
3. After the date has been set, push the crown back to the Normal position.
first click position

16 17
VX9J SETTINGS
USING THE STOPWATCH
This stopwatch is able to measure and display time in 1/1 second united up to maximum of 30
minutes. Stopwatch will stop automatically after running continuously for 30 minutes.
[Measuring time with the stopwatch]
1. Press button “A” to start the stopwatch.
2. The stop watch can be started and stopped each time button “A” is pressed.
3. Pressing button “B” resets the stopwatch and stopwatch minute and second hands re-
turn to their Zero positions
reset time measurement stop
SETTINGS
E) STOPWATCH RESET (INCL. AFTER REPLACING BATTERY)
This procedure should be performed when the stopwatch second & minute hand does not re-
turn to the Zero position.
1. Pull the crown out to the 2nd Click Position.
2. Press the button “A” to set the stopwatch second hand forward.
3. Press the button “B” to set the stopwatch second hand back.
4. Once the both hands been zeroed, reset the time and return the crown to its normal
position.
* The stopwatch minute hand is synchronized with stopwatch second hand.
* The stopwatch second hand can be advanced rapidly by continuously pressing button “A” or
“B”.
VX9J

18 19
JS05/15/25 DISPLAYS EN KNOPPEN VX9J INSTELLINGEN
secondewijzer
stopwatch minutenwijzer
24u uurwijzer
stopwatch secondewijzer
stopwatch minutenwijzer
secondewijzer
stopwatch secondewijzer
secondewijzer
stopwatch secondewijzer
24u uurwijzer
stopwatch minutenwijzer
kalender
knop B
uurwijzer
tweede klik positie
normale positie
Knop A
DE TIJD INSTELLEN
1. Trek de kroon uit naar de 2e klikpositie.
2. Draai de kroon om de uren- en minutenwijzers in te stellen.
3. Nadat de tijd is ingesteld, duwt u de kroon terug naar de normale positie.
DE DATUM INSTELLEN
1. Trek de kroon uit tot de eerste klikpositie.
2. Draai de kroon rechtsom om de datum in te stellen.
Als de datum is ingesteld tussen
ongeveer 21.00 uur en 01.00 uur, is het mogelijk dat de datum de volgende dag niet
verandert.
3. Nadat de datum is ingesteld, duwt u de kroon terug naar de normale positie.
eerste klik positie

20 21
VX9J INSTELLINGEN
DE STOPWATCH GEBRUIKEN
Deze stopwatch kan de tijd meten en weergeven in 1/1 seconde verenigd tot maximaal 30 minu-
ten. De stopwatch stopt automatisch nadat hij 30 minuten continu heeft gelopen.
[Tijd meten met de stopwatch]
1. Druk op knop “A” om de stopwatch te starten.
2. De stopwatch kan worden gestart en gestopt elke keer dat knop “A” wordt ingedrukt.
3. Door op knop “B” te drukken, worden de stopwatch en stopwatch minuten- en seconde-
wijzers teruggezet naar hun nulposities
reset tijdmeting stop
INSTELLINGEN
STOPWATCH RESET (INCL. NA VERVANGEN BATTERIJ)
Deze procedure moet worden uitgevoerd als de seconde- en minutenwijzer van de stopwatch
niet terugkeert naar de nulstand.
1. Trek de kroon uit naar de 2e klikpositie.
2. Druk op de knop “A” om de secondewijzer van de stopwatch vooruit te zetten.
3. Druk op de knop “B” om de secondewijzer van de stopwatch terug te zetten.
4. Zodra beide wijzers op nul zijn gezet, stelt u de tijd opnieuw in en zet u de kroon weer in
de normale stand.
* De minutenwijzer van de stopwatch wordt gesynchroniseerd met de secondewijzer van de
stopwatch.
* De secondewijzer van de stopwatch kan snel vooruit worden gezet door continu op knop “A”
of “B” te drukken.
VX9J

22 23
JS05/15/25 INDICATIONS ET BOUTONS VX9J RÉGLAGE
trotteuse
aiguille desminutes du
chronomètre
aiguille des 24 heures
trotteuse du chronomètre
aiguille des minutes
du chronomètre
trotteuse
trotteuse du chronomètre
trotteuse
trotteuse du chronomètre
aiguille des 24 heures
aiguille desminutes
duc hronomètre
calendrier
bouton B
aiguille des 24 heures
2è clic
position normale
bouton A
RÉGLAGE DE L’HEURE
1. Tirez la couronne jusqu’au 2è clic.
2. Tournez la couronne pour régler les aiguilles des heures et des minutes.
3. Une fois l’heure réglée, replacez la couronne en position normale.
C) RÉGLAGE DE LA DATE
1. Tirez la couronne jusqu’au 1er clic.
2. Tournez la couronne dans le sens horaire pour régler la date.
Si vous réglez la date
entre 9 h 00 PM et 1 h 00 AM, la date risque de ne pas basculer le jour suivant.
3. Une fois la date réglée, replacez la couronne en position normale.
1er clic

24 25
VX9J RÉGLAGE
UTILISATION DU CHRONOMÈTRE
Ce chronomètre est capable de mesurer et d’afficher le temps par unité d’une seconde jusqu’à
30 minutes maximum. Le chronomètre s’arrête automatiquement après avoir fonctionné en
continu pendant 30 minutes.
[Mesure du temps avec le chronomètre]
1. Appuyez sur le bouton « A » pour démarrer le chronomètre.
2. Le chronomètre peut être démarré et arrêté en appuyant sur le bouton « A ».
3. Lorsque vous appuyez sur le bouton « B », le chronomètre est réinitialisé et l’aiguille des
minutes et la trotteuse du chronomètreretournent à ZÉRO.
remise a zéro mesure du temps arrêt
RÉGLAGE
RÉINITIALISATION DU CHRONOMÈTRE (ÉGALEMENT APRÈS REMPLACEMENT DE LA
PILE)
Effectuez cette procédure lorsque la trotteuse et l’aiguille des minutes du chronomètre ne re-
viennent pas à zéro.
1. Tirez la couronne jusqu’au 2è clic.
2. Appuyez sur le bouton « A » pour faire avancer la trotteuse du chronomètre.
3. Appuyez sur le bouton « B » pour faire reculer la trotteuse du chronomètre.
4. Une fois les aiguilles placées sur zéro, réinitialisez le temps et ramenez la couronne en
position normale.
* L’aiguille des minutes du chronomètre est synchronisée avec la trotteuse du chronomètre.
* La trotteuse du chronomètre peut être avancée rapidement en appuyant continuellement sur
le bouton « A » ou « B ».
VX9J

26 27
JS05/15/25 DISPLAYS UND KNÖPFE VX9J EINSTELLUNG
Sekundenzeiger
Minutenzeiger
der Stoppuhr
24-Stunden-Zeiger
Sekundenzeiger
der Stoppuhr
Minutenzeiger
der Stoppuhr
Sekundenzeiger
Sekundenzeiger der Stoppuhr
Sekundenzeiger
Sekundenzeiger der
Stoppuhr
24-Stunden-Zeiger
Minutenzeiger
der Stoppuhr
Kalender
Knopf B
24-Stunden-Zeiger
Zweite Klickposition
Normalposition
Knopf A EINSTELLUNG DER ZEIT
1. Ziehen Sie die Krone in die zweite Klickposition heraus.
2. Drehen Sie die Krone, um den Stunden- und den Minutenzeiger einzustellen.
3. Nachdem Sie die Zeit eingestellt haben, drücken Sie die Krone zurück in die Normalposition.
EINSTELLUNG DES DATUMS
1. Ziehen Sie die Krone in die erste Klickposition heraus.
2. Drehen Sie die Krone im Uhrzeigersinn, um das Datum einzustellen.
Falls Sie das Datum
zwischen den Stunden um ca. 9:00 p.m. (abends) bis 1:00 a.m. (morgens) einstellen,
wechselt das Datum (der Kalendertag) am nächsten Tag vielleicht nicht.
3. Nachdem Sie das Datum (den Kalendertag) eingestellt haben, drücken Sie die Krone
zurück in die Normalposition.
Erste Klickposition

28 29
VX9J EINSTELLUNG
VERWENDUNG DER STOPPUHR
Diese Stoppuhr kann die Zeit in 1-Sekunden-Einheiten messen und anzeigen, und zwar bis zu 30
Minuten. Die Stoppuhr stoppt automatisch, nachdem sie kontinuierlich 30 Minuten gelaufen ist.
[Messen der Zeit mit der Stoppuhr]
1. Drücken Sie Knopf “A”, um die Stoppuhr zu starten.
2. Mit jedem Drücken von Knopf “A” wird die Stoppuhr gestartet oder gestoppt.
3. Durch Drücken von Knopf “B” wird die Stoppuhr zurückgestellt, und Minuten- sowie Sekun-
denzeiger der Stoppuhr kehren auf ihre NULL-Positionen zurück.
zurücksetzen zeitmessung stopp
EINSTELLUNG
RÜCKSTELLUNG DER STOPPUHR (EINSCHLIESSLICH NACH DEM AUSTAUSCHEN DER
BATTERIE)
Dieses Verfahren sollte ausgeführt werden, wenn der Minuten- und der Sekundenzeiger der
Stoppuhr nicht auf die Null-Sekunden-Position zurückkehren.
1. Ziehen Sie die Krone in die zweite Klickposition heraus.
2. Drücken Sie den Knopf “A”, um den Sekundenzeiger der Stoppuhr vor zu stellen.
3. Drücken Sie den Knopf “B”, um den Sekundenzeiger der Stoppuhr zurück zu stellen.
4. Sobald Sie die Zeiger auf Null zurückgestellt haben, setzen Sie die Zeit zurück, und drüc-
ken Sie die Krone in die Normalposition zurück.
* Der Minutenzeiger der Stoppuhr wird mit dem Sekundenzeiger der Stoppuhr synchronisiert.
* Sie können den Sekundenzeiger der Stoppuhr schnell vorstellen, indem Sie Knopf “A” oder “B”
gedrückt halten.
VX9J

30 31
MANUAL
VD53 MANUAL
VD53

32 33
MANUAL
VD53
Setting the normal time hand
Carefully pull the winder out fully and then set to the exact time by turning the winder. Press
the winder back into the casing again. Please make sure to set the 24-h display correctly (a.m.
or p.m.).
Setting the date
Pull the winder out to the first notch and turn it clockwise until the correct date appears. Then
press the winder back into its initial position again.
Using the stop-watch facility
By pressing button A, the time you wish to stop commences. By pressing button A again, the
time is halted and then you canread the time stopped. By pressing button B the hand is brought
to the 0 position again.
MANUAL
VD53
Intermediate time reading
By pressing button A, the time you wish to stop starts running – by pressing button B the time
is halted and the time interval can be read. By repressing button B, the hand moves on to the
time that has meanwhile expired.
Adjusting the stop-watch hands
Should the stop-watch hands not move to the 0 position after the stopping procedure has
finished, they have to be adjusted. To do this, carefully pull the winder out fully. By pressing A+B
again the hands can be brought to the 0 position.
Changing the battery
Please ask your specialist to change the battery for you, in order to avoid any damage to the
clockwork.

34 35
HANDLEIDING
VD53
Tijd zetten
Trek het opwindknopje voorzichtig vollediguit en zet de wijzers op de juiste tijd door de knop
te draaien. Druk daarna het knopje terug in de kast. Let u hierbij a.u.b. op de instelling van de
24-uur-indicatie (voor- of namiddag).
Datum zetten
Trek het opwindknopje uit tot de eerste standen draai het met de klok mee tot de juiste datum
verschijnt. Druk dan het knopje terug in zijn initiele positie.
Gebruiksaanwijzing van de chronograaf
Door een druk op knop A begint de chronograaf de tijd op te nemen. Door nogmaals op knop A
te drukken wordt de tijd stopgezet en u kunt de opgenomen tijd aflezen. Met behulp van knop
B zet u de wijzer weer terug in de positie 0.
HANDLEIDING
VD53
Lezen van tussentijd
De tijd begint te lopen zodra knop A is ingedrukt – druk op knop B en de tijd stopt zodat de
tussentijd gelezen kan worden. Door nogmaals op knop B te drukken loopt de tijd door en gaat
de wijzer naar de tijd die inmiddels verstreken is.
Aanpassen van de stop-watch wijzers
Mochten de stop-watch wijzers niet teruggaan naar de 0 stand nadat de stop procedure vol-
tooid is, dan zullen de wijzers aangepast moeten worden. Trek het opwind knopje voorzichtig
volledig uit en druk zowel knop A als B in, zodat de wijzers naar de 0 stand terug gebracht
worden.
Batterij vervangen
Om schade te voorkomen adviseren wij om de batterij te laten vervangen door uw specialist.

36 37
MANUEL D’INSTRUCTIONS
VD53
Réglage de l’heure normale
Retirez doucement la couronne jusqu’à la butée; pour régler l’heure exacte, tournez la couronne
et enfoncez-la dans le botier. Vérifiez le réglage de l’affichage 24 h (matin ou après-midi).
Réglage de la date
Retirez la couronne jusqu’à la première butée – tournez-la dans le sens des aiguilles d’une mont-
re jusqu’à ce que la date actuelle apparaisse. Enfoncez-la ensuite à nouveau dans la position
initiale.
Utilisation du chronomètre
Appuyez sur le bouton A, la fonction chronomètre commence. Appuyer à nouveau sur le bouton
A pour arr^eter la fonction chronomètre. Vous pouvez alors lire le temps chronométré. Pour re-
mettre l’aiguille à zéro, appuyez sur le bouton B.
MANUEL D’INSTRUCTIONS
VD53
Mesure du temps intermédiaire
Appuyez sur le bouton A pour débuter la fonction chronomètre – appuyez sur le bouton B pour
arrêter le temps chronométré; le temps intermédiaire est alors affiché. Appuyez à nouveau sur
le bouton B, l’aiguille indique le temps chronométré qui continue de s’écouler.
Ajustage de l’aiguille chronomètre
Si l’aiguille chronomètre ne se remet pas à la position zéro à la fin du chronométrage, vous devez
l’ajuster. Pour cela, retirez doucement la couronne jusqu’à la butée –appuyez à plusieurs reprises
sur les boutons A + B pour remettre l’aiguille à la position zéro.
Changement de la pile
Pour éviter d’endommager le rouage, faites échanger la pile par un spécialiste.

38 39
BEDIENUNGSANLEITUNG
VD53
Einstellung der normalen Zeitanzeige
Ziehen Sie die Krone vorsichtig bis zum Anschlag heraus, stellen Sie dann durch Drehen der Krone
die genaue Zeit ein und drücken die Krone wieder in das Gehäuse. Achten Sie bitte dabei auf die
Einstellung der 24 h Anzeige (Vor- oder Nachmittag).
Einstellung des Datum
Ziehen Sie die Krone bis zum ersten Anschlag heraus – drehen Sie die Krone im Uhrzeigersinn bis
das aktuelle Datum erscheint. Drücken Sie die Krone danach wieder in die Ausgangsposition zurück.
Gebrauch der Stoppeinrichtung
Drücken Sie den Knopf A, die Stoppzeit beginnt – bei nochmaligem Druck auf Knopf A wird die
Stoppzeit angehalten. Sie können die gestoppte Zeit dann ablesen. Mit Druck auf Knopf B stell Sie
die Zeiger wieder in die 0 Position.
BEDIENUNGSANLEITUNG
VD53
Zwischenzeitmessung
Mit Druck auf Knopf A beginnen Sie die Stoppzeit – mit Druck auf Knopf B halten Sie die Stop-
pzeit an und können die Zwischenzeit ablesen. Nach einem weiteren Druck auf den Knopf B
springt der Zeiger in die bereits abgelaufene Stoppzeit weiter.
Justieren der Stoppzeiger
Falls die Stoppzeiger nach Beendigung des Stoppvorganges nicht in die Position 0 sprin-
gen,müssen diese justiert werden.Ziehen Sie dazu die Krone vorsichtig bis zum Anschlag heraus
– durch wiederholtes Drücken der Knöpfe A+B stellen Sie die Zeiger wieder in die 0 Position.
Batteriewechsel
Den Batteriewechsel lassen Sie bitte durch einen Fachmann vornehmen, um Beschädigungen
des Uhrwerkes zu vermeiden.
This manual suits for next models
12
Table of contents
Languages:
Other ORPHELIA Watch manuals