OSANG Healthcare GluNEO Lite Smart User manual


Dear GluNEO Lite Smart Blood Glucose Monitoring
System
Owner
,
Thank
you for
choosing
the
GluNEO Lite Smart Blood Glucose Monitoring System.
This
manual contains everything
you need to know
about
your new
glucometer
and how it
works.
Please
take a
moment
to read the
instructions carefully.
We
understand
that
self-testing
of
blood glucose
level
provides
a way to
control your
diabetes
and may give you
peace
of mind by
testing regularly. GluNEO Lite Smart
has
been developed
to
provide
you with a fast and
accurate reading
in a
convenient
and
simple process.
Our goal for the
GluNEO Lite Smart Blood Glucose Monitoring System
is to
provide you
with the best
quality healthcare products coupled
with
superior customer
service. Always consult
with your
healthcare professional, before making
any
changes
to
your
diabetes management.
The
GluNEO Lite Smart Blood Glucose Monitoring System
is for
in-vitro diagnostic
use
only.
Customer Service
is
available
24
hours
a day, 7 days a
week,
and 365 days a
year.
Please
call
customer support center
in your local
area.
Important Inf
ormation
The
GluNEO Lite Smart
Blood Glucose Monitoring System
is
intended
for use
outside
the
body (in-vitro diagnostic
use
only).
It
should
be used only for
testing blood glucose
with
fresh whole blood samples(Capillary and/or venous).
It
should
not be used for the
diagnosis of diabetes. Consult
with your
physician
or
diabetic healthcare professional about
daily management
of your
diabetes
and
proper
use of the
glucometer. Please
pay close
attention when handling blood. Improper procedures
may
cause serious hazards
to your
health. The GluNEO Lite Smart
Blood Glucose Monitoring System contains
small
parts,
which could
be
a choking hazard
for
children
if
swallowed.

Test
Principle
GluNEO Lite Smart
blood glucose
test strip is the
bio-sensor which
is
composed
of
the FAD-dependent glucose dehydrogenase(enzyme). FAD-GDH(enzyme)
quantitatively reacts
with the
glucose
in the
whole blood
and the
mediator. Glucose
in the
whole blood sample reacts
with the
reagent
of the test strip and
generates
an
electrical.
The
amount of current, which
is
related
with
glucose concentration,
is
measured
by the
current,
for
which
the
method
is
called amperometry.
W
ARNING
1. All parts of the kit are
considered bio-hazardous
and can
potentially transmit
infectious diseases,
even after you have
taken cleaning
and
disinfection measures.
2.
Always
use a new,
sterile lancet. Lancets
are for
single
use
only.
3.
Avoid getting
hand
lotions,
oil, dirt or
debris
in
and/or
on the
lancets
and
reusable
lancing device.
4.
Please
refer to page 33 for
cleaning
and
disinfecting GluNEO Lite Smart
Blood
Glucose
Monitoring System.
5. Do not
change
your
medication based
on the
GluNEO Lite Smart meter
test
results
without contacting
your
physician
or
healthcare professional first.
6. Do not
assemble
or
disassemble
the
blood glucose
test
meter.
7. Keep out of
direct sunlight.
CA
UTION
1.
Please
keep your
monitoring system
out of
reach
of
children.
2.
Make
sure it does not
come
in
contact
with
water
and
moisture.
3.
Avoid getting
dirt and
moisture.
4.
Close supervision
is
necessary when equipment
is used by, on, or near
children,
handicapped persons
or
invalids.
5. Do not
place
the
equipment
in
liquid,
nor put it
where
it
could
fall into
liquid.
If
the
equipment becomes
wet,
unplug
it
before touching it.
6. Do not use
accessories which
are not
supplied
or
recommended
by the
manufacturer.
7. Do not
place anything
on top of the
equipment.
NOTE:
1.
Blood Glucose Monitoring System
may also be
called
as
Blood Glucose
Test
Meter,
the
Meter,
Test
Meter
in this
manual,
for
which
they have
equal meaning
to
each
other.
2.
Blood Glucose
Test Strip may also be
called
as the Test Strip, Strip, for
which they
equal meaning
to each
other.

Table of
Contents
1. Learning the
System
Intended use
of
blood glucose test meter
--------------------------------------------------- 6
GluNEO Lite Smart
kit
contents ---------------------------------------------------------------- 7
GluNEO Lite Smart
meter ------------------------------------------------------------------------ 8
GluNEO Lite Smart
meter Display ------------------------------------------------------------- 9
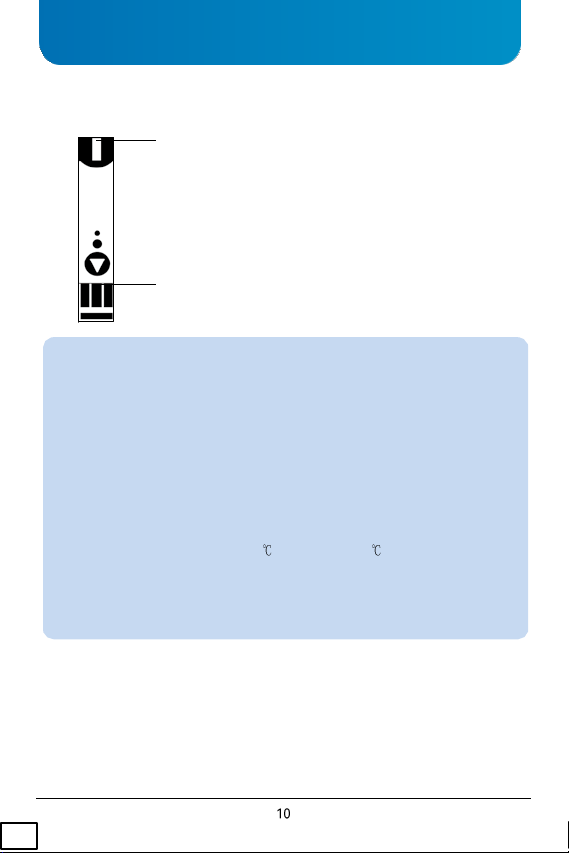
GluNEO Lite Smart
test strip ---------------------------------------------------------------------10
2.
Before
Testing:
Setting your meter ------------------------------------------------------------------------------12
Auto-coding function ----------------------------------------------------------------------------14
Performing
a
Glucose Control Solution Test------------------------------------------ 15-18
3. Performing your
test:
Testing Blood
-
preparation -------------------------------------------------------------- 19-20
Performing
a
blood test with your finger
tip
------------------------------------------ 21-25
Test Strip ejector function ---------------------------------------------------------------------26
4.
Re
viewing
Your
Results:
Reviewing your blood sugar ------------------------------------------------------------------27
Reviewing your averages ----------------------------------------------------------------------27
Reviewing your results with activated user
ID
--------------------------------------------28
Deleting test results -----------------------------------------------------------------------------28
5. Alternate
Site
Test:
Lancing and sampling from
an
alternate
site
area --------------------------------- 29-31
Lancing device clear
tip is
used
for
alternate
site
testing-------------------------- 31-32
6. Caring f
or
Your GluNEO Lite Smart
System:
Cleaning your meter and maintenance ---------------------------------------------------33
Storage
of
your GluNEO Lite Smart
system ------------------------------------------ 34-35
Bluetooth function
---------------------------------------------------------------------------------- 36
7.
T
ransferring
Your Result Data
----------------------------------------------------------------37
8. Battery Installation
-------------------------------------------------------------------------------38
9. Disposal
---------------------------------------------------------------------------------------------39
10.
T
r
oub
le-shooting
---------------------------------------------------------------------------- 40-42
11. Inconsistent or
Unexpected
Test Results
------------------------------------------------43
12.
Connection between mHealthGate and GluNEO Lite Smart
------------------------------44
13.
Warranty
-------------------------------------------------------------------------------------------48
14. Declaration of Conformity
---------------------------------------------------------------------49
14. Specifications
------------------------------------------------------------------------------------50
15. Symbol
Ref
erence
-------------------------------------------------------------------------------51

Learning the
System
Intended
use
The
GluNEO Lite Smart
test meter is used with
GluNEO Lite Smart
test strip for the
measurement of
glucose
in fresh whole blood
samples(Capillary
and/or
venous).
It should not be used for the
diagnosis
or
screening
of
diabetes
or for the testing of new
born
babies.
GluNEO Lite Smart
Blood
Glucose Monitoring
System is
intended
for use outside the body
only
(in-vitro
diagnostic use).
GluNEO Lite Smart
Blood
Glucose Monitoring
System is for
self-testing
by people with
diabetes
and by
healthcare professionals.
Recorded
results make it easier for your doctor to access your
metabolic control.
However,
the
self-testing
should not take the place of overall
diabetes management
assessment
from your
doctor.
CAUTION
- Do not use system for any other
purpose
than blood
glucose test.
-
Cholesterol concentrations
> 510 mg/dL or
triglyceride concentrations
> 3,400
mg/dL
may
produce elevated reading.
-
Icodextrin
does not
interfere
with
GluNEO Lite Smart
test
strips.
- Do not use during or soon after xylose
absorption
testing. Xylose in the blood will
cause
interference.
- Before using any
product,
please read all
instructions.
-
Consult
with your
physician
or
diabetic healthcare professional
about daily
manage-
ment
of your
diabetes
and proper use of the
glucometer.
If you have any
questions
about the
GluNEO Lite Smart product,
please contact your local
representative.
W
ARNING
- Before using
GluNEO Lite Smart system,
read all
instructions
in this
manual,
and
practice
for
accurate
and safe test. You should have
commentary recommendation
from
your
diabetes
care
professional
for the proper use of the meter and daily
management of
your
diabetes.
- If you think your blood
glucose
results are too low or too high, or if the results
are
doubtful,
please contact your
doctor.
- If your blood
glucose
result is
unusually
low or high, or you do not feel the result
is
correct,
repeat the test again with a new test
strip.
- If the results are still
inconsistent,
please consult with your
physician
before making
any
decision
in
controlling
your
diabetes.

Carrying
GluNEO Lite Smart Kit
Contents
Meter
Case
Battery
Lancing Device
Lancets
1.
GluNEO Lite Smart
Meter
2.
GluNEO Lite Smart
Test
strip
3.
Reusable Lancing Device
4.
Lancets
5.
Instructions
for
use
6.
Warranty Registration Card
7.
Carrying Case
8.
Patient Logbook
9. 3V Coin
(1EA) Battery (CR2032)
Your
GluNEO Lite Smart
Blood
Glucose Monitoring
System has been sealed to protect
the contents.
If you find your seal has been broken, please return it to the place of
purchase.

GluNEO Lite Smart
Meter
Test Strip
P
or
t:
Insert
the
GluNEO Lite Smart
test
strip
Display Screen:
Displays
your test
results, symbols,
and
messages.
Power/Enter Button:
Power
the
meter on/off, prompts memory
data and acts
as
an
“Enter” button during setup
and after
tests.
Up/Down Arrow Buttons:
Scroll
up or
down
to
adjust settings
or
retrieve memory.
Test Strip
Ejector:
Releases
and
discards
test
strip.
Serial Number
Battery
Co
ver
CA
UTION
1. Do not use
GluNEO Lite Smart
glucose
test
meter
in a dry
environment,
especially If
synthetic materials
are
present. Synthetic clothes, carpets,
etc.,
may
cause damaging
static
discharge
in a dry
environment.
2. Do not use
GluNEO Lite Smart
glucose
test
meter
near
cellular
or
cordless
telephones,
walkie-talkies, garage
door
openers,
radio
transmitters,
or other
electrical
equipment
that are
sources
of
electromagnetic radiation,
as
these
may
interfere
with
the
proper operation
of the
glucose
test
meter.

GluNEO Lite Smart Meter
Display
Low
Battery Warning Symbol
Alarm
Symbol
Troubleshooting Symbol
DATE
Delete Results
Average
Test
Result System
Before Having
a
Meal
After
Having
a
Meal
After Taking Medication
After Sport
Activity
Control Solution Symbol
Blood Drop
Symbol
for
Test
User ID
Symbol
Test Strip Code
Symbol
Test
Result
Unit
Symbol
Temperature
/
Date
Time

GluNEO Lite Smart
Test
Strip
Test Strip
Port
Contact Bar
Caution
1.
Store
the
GluNEO Lite Smart
test strip vials in a cool, dry
place.
Keep out of
direct
sunlight.
Do not
freeze.
2.
Store
test
strips
in their
original
vial only. Do not mix the test
strips
in new vials or
in
any other
container.
3.
Immediately replace
the vial cap and close
tightly
after
removing
any test
strips from
the
vial.
4.
Make
a note of the
expiry
date,
which
is six
months
from the date you first open a
new
vial of test
strips. Throw GluNEO Lite Smart
test
strips
and vial away after the
expiry
date.
5. Do not use the test
strips
after the
expiration
date
printed
on the
package
or vial,
since
it may
cause inaccurate results.
6.
GluNEO Lite Smart
test
strips should
be
single
use only. DO NOT
RE-USE.
7. Do not test at
temperatures below 10 (50°F)
or
above 40 (104°F).
8. Do not test in the
condition
that
humidity
is
below
10% or
above 90%.
9. Do not
bend,
cut, or alter the test
strip.
10.
Avoid getting
dirt, food, and
water
on the test strip with wet
hands.
11.
Avoid getting
dirt, food, and
water
on the
color-coding
label
(backside
of test
strip)
12.
Refer
to
additional information
in the
GluNEO Lite Smart
test strip
package.

Bef
ore
T
esting
W
ARNING
To
reduce
the
chance
of
infection:
1.
Lancing device
and
lancets should
NOT be
shared
with
others.
2.
Always
use a new
lancet
and a new
blood glucose
test
strip.
3.
Practice using
the
lancing device
and
become accustomed
with its
use.
4.
Lancets
and
blood glucose
test
strips should
be
single
use
only.
5.
Wash
your
hands
in
warm clean running water using
soap
before testing.
6.
Avoid getting
hand
lotion,
oils, dirt or
debris
on the
lancets
or on the
lancing device.
7. Dry your
hands completely before testing.

Setting
Your
Meter
The
GluNEO Lite Smart
Meter
has a wide
variety
of
functions
to
choose.
From the
setup
mode
you can turn
activity/meal flags,
set the
date/time, designate
three
unique averages,
and
set up to five daily
alarms.
Power On
Press
for 3
seconds at
least.
Y
ear
After
pressing and
releasing either
▲or ▼
buttons
to set the
year,
push
button.
User Activity
Option
After
pressing and
releasing either
▲or ▼
buttons
to turn the
User
Activity Option on/off,
push
button.
Date
/
Time
After
pressing and
releasing either
▲or ▼
buttons
to set the
date
and time,
respectively
push
button.
User ID Option
After
pressing
and
releasing
either
▲or ▼
buttons
to
turn the User
ID
option on/off, push
button.
Test Unit
After
pressing and
releasing either
▲or ▼
buttons
to set the
test
unit(mg/dL
or
mmol/L),
push
button.

Temperature Unit
After
pressing
and
releasing
either
▲or ▼
buttons to
set or and
push
button.
Number of days f
or
a
vera
g
e
After
pressing
and
releasing
either
▲or ▼
buttons
to
set
the
number
of days
for
average calculation (3
different settings possible),
push
button.
Alarm
on/off
After
pressing and
releasing either
▲or ▼
buttons
to turn the
alarm
on/off,
push
button.
Alarm
time
After
pressing
and
releasing
either
▲or ▼
buttons
to
set
the
alarm
hour and
minute,
push
button.
Alarm
After
programming the
number
of
desired alarms
(5
alarms possible),push
button.
CA
UTION
1.
VERY IMPORTANT:
Set the right test
unit.
Your
GluNEO Lite Smart Meter
is
pre-set
to
mg/dL
as test unit. A
wrong
test unit will
lead
to
wrong
test
result display. Please consult
your
healthcare professional
if
you’re
not
sure
which
test unit to use.
Without setting
the date
properly,
the
average
glucose
level and the
results
in
memory
will not show
proper values.
It is
recommended to
set the
glucose
test
meter before
use and also
when
new
batteries
are
installed.
2. You
cannot
test your
blood glucose
in the
setting mode.
3. To turn the
meter
off
during
the
setup, press
for at least 3
seconds.

Auto-coding Function
1.
GluNEO Lite Smart
has
automatic
code
recognition
function
(e.g.
CODE 125)
125
2. It
recognizes
the code
number automatically.
This is
a
very
convenient function preventing
the
inconve-
nience
of
setting
the code
number
on the
glucose test
meter every
time.
Check
the code on the vial to see
if
the
codes match
each
other
CA
UTION
1. Do not bend the
glucose
test strip to
prevent
the
automatic
code
recognition failure.
2. If the code
recognition
label is
damaged,
code
recognition
may fail.
Please check the
code
number
on the LCD
window together
with the code
number
on the
glucose test
strip vial to see if code
numbers match
each
other.

Performing a Glucose Control Solution
Test
GluNEO Lite Smart
control solution contains
a
known amount
of
glucose
that
reacts
with GluNEO Lite Smart
test strip. By
comparing
your
control solution
test
results
with the
expected range printed
on the test strip vial, you are able to
check
that the
meter
and test
strips are working properly,
and that you are
performing
the test
correctly.
It is very
important
that
you perform routine checking
to
ensure accurate results.
The
Glucose control solution should
be
used
-
Before using
a new box of test
strips.
-
Whenever
you
suspect
the
blood glucose
test
meter
or
blood glucose
test strip is
not
functioning properly.
- If your
blood glucose
test
results
are not
consistent
with your
symptoms,
or if you
think
results
are not
accurate.
- If you have
dropped
the
blood glucose
test
meter.
- For
quality control
in the point of care
usage.
- For
teaching
or
learning
the
system.
-
When using
the
meter
for
blood glucose
tests after any
disinfection procedure.
Firmly insert
the test strip into the
meter
test port.
Insert
deeply
in
direction
of
arrow
on test strip
(arrow
up).
Please
do not
insert
the
glucose
test strip
upside down.
125
When
you
insert
the
glucose
test strip into the
glucose test
meter,
the
power automatically adjusts
the
meter
accordingly.
Press
and
release either
the ▲or ▼
button,
then,
Control
Solution bottle
icon will
appear. Then, press
(
).

1.Check
the
expiration
date
before performing
a
control
solution
test. Do not use if
expired. Please
note
the
expiration
date
marked
on the
control solution bottle.
2.Gently shake
the
control solution before use.
3.Discard
the 1st drop of
control solution.
This will
eliminate
any
residue.
Place
a drop of
control solution
liquid on a
clean,
dry
surface
(e.g. the lid of the test strip
vial)
4.Dip the test strip into the
control solution liquid.
Results
will
appear
in 5
seconds.
Compare
the
result
to the
range printed
on the test
strip
vial.
Result should
fall
within
that
range.
CA
UTION
1.
Control solution
is for
in-vitro diagnostic
use only. This
means
that it is only used
for
testing outside
the
body.
2.
Control solution
is
exclusively made
for the
GluNEO Lite Smart Blood Glucose Monito-
ring
System.
Do not use other
brand control solutions made
by other
manufacturers.
3.
Check
the
expiration
date on the vial. Do not use, if
expired.
4.
Once opened,
use it for the next three
months
only.
Record
the
discard
date on
the
control solution bottle. Discard
after three
months.
5. Do not
swallow.
This is NOT for
human
or
animal consumption.
6. The
control solution bottle
icon
contains
letter ‘C,’ so as not to be
confused
with
the
medication bottle.
This will allow you to
understand differences between
a
control
solution
test and an
actual blood test.

For example
only
If you are
using
the
normal control solution, according
to this
particular
vial of
strips, your
meter should
show a
number between
80 and
120.
Please
note that the
control values shown
in the
picture
are not
control ranges.
NO
TE
- It is
recommended
that
glucose control solution
is
stored
at room
temperature 20~25
(68~77 )
before testing.
-
Check
the
expiration
date
before performing
a
glucose control solution test.
- Do not use
beyond expiration
date. Once
opened,
the
control solution expires
after 3
months.
If your
control solution
test falls out of
range, please follow
the next
steps before
contacting customer support:
-
Check
the
expiration dates
on all the
products
you are
using.
Be sure you are
using
GluNEO Lite Smart Control Solution.
- Try
another control solution test.
If this test falls out of
range,
try
another control solution
test with a new
unopened
bottle
of test
strips.
If you
continue
to get
control soulution
test
results
that fall
outside
the
range,
do
not
perform
a
glucose
test.
Please
call
customer support
in your local
area.

Follow-up
Action
1.
Check
your
meter
and test
strips
with the
glucose control solution.
2.
Perform
your test
again.
CA
UTION
1. If your
glucose control solution
falls out of
range,
do not
perform
a
glucose
test
and
please contact
your local
representative.
2. The
glucose control solution’s measurement range
has
nothing
to do with
individual’s
blood glucose
level, as its own
purpose
is to
check
the
status
of test strip and
meter.
Discard
the used
control solution
and test
strips carefully, according
to the
local
regulation.

P
erf
orming
Y
our
Test
Testing Blood
-
Preparation
Lancing device
is a
convenient medical
tool for
collecting capillary blood samples for
glucose monitoring
or other tests
which require
one or two
drops
of
blood.
Being
a more
advanced lancing device,
it
provides ultimate safety
and
comfort
for
obtaining
blood samples.
An
adjustable
tip
offers
5
different strength levels
of skin
penetration for
individual user’s comfort,
while a
lancet ejector enables
the safe
disposal
of the used
lancet.
As
an
added bonus,
this also
comes
with a
transparent
tip for AST
(Alternative
Site
Testing).
CA
UTION
1.
Never
use a
lancet
that has been used by
someone
else.
Sharing lancet could lead
to
contamination.
2. If the
lancing device
is to be used by
another person,
the unit must be
properly
disinfected
3. Do not
leave
the
lancet
in the
device
after
use.
4. A new
lancet
must only be
placed
into the
lancing device directly before testing.
5. This
device
has
many
small parts and
could
be a
choking hazard
for
children if
swallowed.
6. In the case of
hospital
use,
hospitals
need to
observe
their own
infection control
protocols
in order to
avoid
any
contamination.
7.
Always dispose
of the used
lancet
in a
biohazard garbage container.

COMPONENTS
Clear
Tip
Ejection
System Sliding
Barrel
Depth
Indicator/Adjustable
Tip Lancet
Holder
Release Button
USING
THE
CLEAR
TIP
(AST)
1.
Place
the
lancing device
and
lancet
on the skin in the
chosen
area,
press
and hold
it
continuously
for a few
seconds,
then push the
release button
to take a
blood sample.
2.
Watch through
the clear tip until a
sufficient blood sample
is
taken.
If there is not
enough
blood, gently massage
the area until a
sufficient sample
is
collected.
STORAGE
Products
must be
stored
at room
temperature protected
from
sunlight
or
moisture.
CLEANING AND DISINFECTION
-Clean
and wipe the outer part of
lancing device
once a week at the
minimum
with a
soft
cloth
dampened
with mild soap and
water. Wash
the
adjustable
tip and clear tip, once
a
week with mild
soap.
-DO NOT
immerse
the
lancing device
in
water
or
liquid.
WARRANTY
Lancing device
has a
2-year warranty
from the date of
purchase.
A
malfunctioning device should
be
returned
to the
following address:
put
address:
Table of contents
Other OSANG Healthcare Blood Glucose Meter manuals
Popular Blood Glucose Meter manuals by other brands

Roche
Roche Accu-Chek Mobile quick start guide

Glucofast
Glucofast DUO owner's manual

Lifescan
Lifescan OneTouch Select Plus Simple owner's guide

Polymap Wireless
Polymap Wireless Polytel GMA2 PWR-09-02 user manual

Animas
Animas OneTouch Ping owner's booklet

Ascensia Diabetes Care
Ascensia Diabetes Care Eversense Take Home Instructions