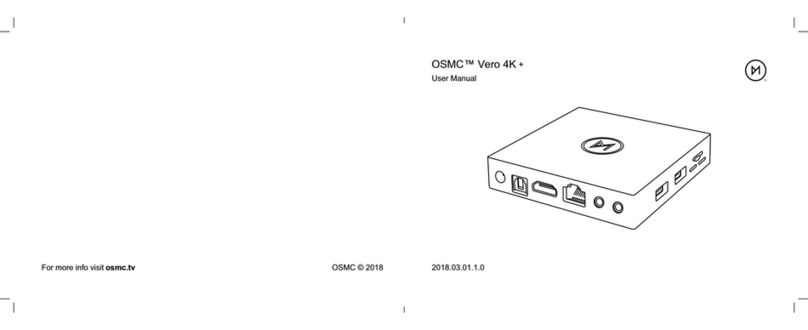
OSMC Vero V User manual

OSMC™ Vero V
2022.09.26.1.0
User Manual
Your Vero will take a few moments to boot for the very first time. You can
follow the on-screen instructions to get set up.
You may wish to manually configure your audio settings. This can be done
by going to Settings System Audio.
Staying updated
Pairing remote
OSMC releases regular software updates which will continually improve
and enhance the OSMC experience. It’s possible that there are new
updates for your Vero which will improve system performance; deliver
new functionality and resolve any teething issues.
You need to pair your remote controller with your device. You can do
this by holding the Home and OK keys for a few seconds
You can update your Vero by going to My OSMC Updates. We
recommend that you do this to ensure that you are running the latest
version of OSMC.
Your Vero will prompt you automatically when future updates are
available for installation.
You may experience some difficulty in operating your Vero or getting it
set up. We have assembled a list of common issues. Do not attempt to
repair the device yourself, and do not open the unit as there is a risk
of electric shock.
Troubleshooting
Problem Solution
The device is not
turning on
Check that the device is plugged in to the
mains. You should see the on screen display
when the device is booting
There is no picture on
the screen
Ensure that the HDMI cable is connected to
your receiver correctly; and that the TV is on
the correct source. Try another TV to rule out
a localised issue
There is no sound Ensure that you have configured your audio
settings correctly
The remote controller
does not work
The plastic tab should be removed from the
battery lid. A LED is visible during operation.
If no LED is visible, change the battery. If the
LED is visible but the remote does not work,
re-pair the remote.
You may need some further help with using your new Vero. You can
usually get help and advice from the OSMC Website (https://osmc.tv).
The following resources are available:
• The OSMC Wiki
• The OSMC Community Forums
•Contact information to talk to the OSMC customer service team.
Getting further help and supportQuick Start Guide
In your Vero package, you should find:
• This manual
• The Vero device
• The Vero remote controller
To get set up:
1. Hold the Home and OK buttons on the OSMC Remote to activate the
remote
2. Connect one end of the supplied HDMI cable to your AV receiver or TV
and the other end to the Vero
3. Connect the power supply to the device first, ensuring it is not yet
plugged in at the mains
4. Optional: if you are using optical audio, connect a cable to the device
and your receiver
5. Turn on your TV and ensure the correct source is set for the new Vero
6. Plug the Vero power supply in to the mains.
• A power supply
• An HDMI cable
Congratulations on your purchase of a Vero V. We hope that you enjoy
this product and it serves you well for many years.
Product information
Name: OSMC Vero
Model: Vero V
Rating: Input 5.0V 2A

FCC and CE Compliance Statement
OSMC offers a one year warranty for this product. This OSMC limited
• Connect the equipment into an outlet on a circuit different from that to
and can radiate radio frequency energy and, if not installed and used in
accordance with the instructions, may cause harmful interference to radio
communications. However, there is no guarantee that interference will
not occur in a particular installation. If this equipment does cause harmful
interference to radio or television reception, which can be determined by
turning the equipment off and on, the user is encouraged to try to correct
the interference by one or more of the following measures: Reorient or
limits are designed to provide reasonable protection against harmful
This equipment has been tested and found to comply with the limits
for a Class B digital device, pursuant to part 15 of the FCC Rules. These
interference in a residential installation. This equipment generates, uses
relocate the receiving antenna.
• Increase the separation between the equipment and receiver.
which the receiver is connected.
This equipment has been tested and found to comply with the EMC
• Consult the dealer or an experienced radio/TV technician for help.
Directive 2004/108/EC and Low Voltage Directive 2006/95/EC.
Safety Information
warranty covers your Vero hardware product, along with any accessories
received with the hardware product, (“Warranted Product”) under normal
use conditions for manufacturing defects or hardware component failures
in your Warranted Product that is still within warranty. Accessories sold
separately are covered by the applicable warranty accompanying the
accessory. This warranty is for the original owner only and cannot be
transferred to another party (including a buyer of a used Warranted
Product). If you give or sell the Warranted Product, this Limited Warranty
will end although this does not affect any rights that the new owner has
under applicable consumer laws.
OSMC will repair, or if repair is not reasonably possible, replace your
defective Warranted Product. Replacement parts and/or products may
include new or refurbished parts or products and are warranted only until
the expiration of the original Warranty Period.
This does not affect any rights that you have under applicable consumer
laws including the right to claim a refund.
OSMC is not responsible for any interoperability or compatibility issues
that may arise when (a) products, software, or options not supplied or
supported by OSMC are used; (b) configurations not supported, provided
or approved by OSMC are used; (c) parts intended for one system are
installed in another system of a different make or model.
Warranty Information OSMC will have no obligations under this warranty with respect to
the following: (a) Warranted Product hardware that has no defects in
materials or workmanship, (b) cosmetic damage; (c) normal wear and
tear; (f) expendable or consumable parts [unless provided by OSMC and
under warranty]; (e) defects or damage to the Warranted Product arising
from or related to: (1) any modifications, alterations, tampering, repair, or
servicing by any party other than OSMC or its authorized representatives;
(2) handling, transit, storage, installation, testing, maintenance, or use
not in accordance with the Warranted Product documentation; (3) abuse,
negligence, neglect, accidents, or misuse; (4) third party software or
viruses; or software loss or data loss that may occur during repair or
replacement; (5) fire or spillage of food or liquid, external electrical fault,
or any acts of God (such as, but not limited to, lightning), or any other
external factor beyond our reasonable control.
OSMC IS NOT RESPONSIBLE FOR DAMAGE TO OR LOSS OF ANY
PROGRAMS, DATA, OR REMOVABLE STORAGE MEDIA. OSMC IS NOT
RESPONSIBLE FOR THE RESTORATION OR REINSTALLATION OF
ANY PROGRAMS OR DATA OTHER THAN SOFTWARE INSTALLED BY OSMC
WHEN THE PRODUCT IS MANUFACTURED.
Before returning any Warranted Product for service, it is recommended
that you back up data and remove any confidential, proprietary, or
personal information.
If you are experiencing a problem, or if you believe that your product is
defective, please contact the OSMC Customer Care team via our Website.
This limited warranty applies only to the original purchases of the
Warranted Products from a retailer, mail order operation, or on-line
retail store; this warranty will not extend to any person that acquires a
Warranted Product on a used basis.
Although OSMC agrees to the repair or replacement of any defective
Warranted Product as described in this warranty, OSMC does not
guarantee that the operation of the Warranted Product will be
uninterrupted or error free. OSMC may, at its sole discretion, use new or
refurbished parts or units to meet the conditions of this warranty.
OSMC © 2022For more info visit osmc.tv
Thisdevicecomplieswithpart15oftheFCCRules.Operationissubjecttothefollowingtwoconditions:(1)
Thisdevicemaynotcauseharmfulinterference,and(2)thisdevicemustacceptanyinterference
received,includinginterferencethatmaycauseundesiredoperation.
AnyChangesormodificationsnotexpresslyapprovedbythepartyresponsibleforcompliancecould
voidtheuser'sauthoritytooperatetheequipment.
ThisequipmentcomplieswithFCCradiationexposurelimitssetforthforanuncontrolledenviro
nment.
Thisequipmentshouldbeinstalledandoperatedwithminimumdistance20cmbetweentheradiator
&yourbody.
Table of contents
Other OSMC Media Player manuals
