OSO ECO-100 User manual
OSO ECO-100
WWW.OSOCYCLES.COM
IMPORTANT ─ Please make certain that persons who use this
equipment thoroughly read and understand this User’s Manual
before operation

2022-5-10 (REV:01)
INTRODUCTION
Thank you for purchasing Your OSO ECO-100 PowerPac. Before attempting to use this
product, please read this manual thoroughly and follow the instructions carefully. In
doing so you will ensure the safety of yourself and that of others around you, and you
can look forward to years of reliable service.
CONTENTS:
SAFETY INFORMATION
...................................................................................................................... 2
CONTROL FUNCTION
...................................................................................................................... 4
PRE-OPERATION CHECK
...................................................................................................................... 7
OPERATION
……………… .............................................................................................. 8
PERIODIC MAINTENANCE
……………………………….. .................................................................. 12
TROUBLESHOOTING
..................................................................................................................... 15
STORAGE
…………... ..................................................................................................16
SPECIFICATIONS
..................................................................................................................... 17
WIRING DIAGRAM
..................................................................................................................... 18
! WARNING!

PLEASE READ AND UNDERSTAND THIS MANUAL COMPLETELY BEFORE
OPERATING YOUR POWERPAC.
SAFETY INFORMATION
EXHAUST FUMES ARE POISONOUS
⚫Never operate an engine in a closed area or it may cause unconsciousness and death.
Operate the engine only in a well-ventilated area.
FUEL IS HIGHLY FLAMMABLE AND DANGEROUS
⚫Always turn off the engine when refueling.
⚫Never refuel while smoking or in the vicinity of an open flame.
⚫Be careful not to spill any fuel on the engine or muffler when refueling.
⚫If you ingest any fuel, inhale fuel vapor, or allow any fuel to get in your eyes, see
your doctor immediately. If any fuel spills on your skin or clothing, immediately wash
with soap and water and change your clothes.
⚫When operating or transporting your PowerPac, be sure it is kept upright. If it tilts,
fuel may leak from the carburetor or fuel tank.
THE ENGINE AND MUFFLER MAY BE HOT
⚫Place the PowerPac in a place where pedestrians or children are not likely to touch
the PowerPac.
⚫Avoid placing any flammable materials near the exhaust outlet during operation.
⚫Keep the PowerPac at least 1 m (3 ft) from buildings or other equipment, or the
engine may overheat.
⚫Never operate the engine with a dust cover on.
⚫Be sure to carry the OSO ECO-100 only by its carrying handle.
⚫Put the PowerPac on flat ground, to allow the PowerPac to eliminate heat freely.
ELECTRIC SHOCK PREVENTION
⚫Never operate the engine exposed to rain or snow.
⚫Never touch the PowerPac with wet hands or an electrical shock will occur.
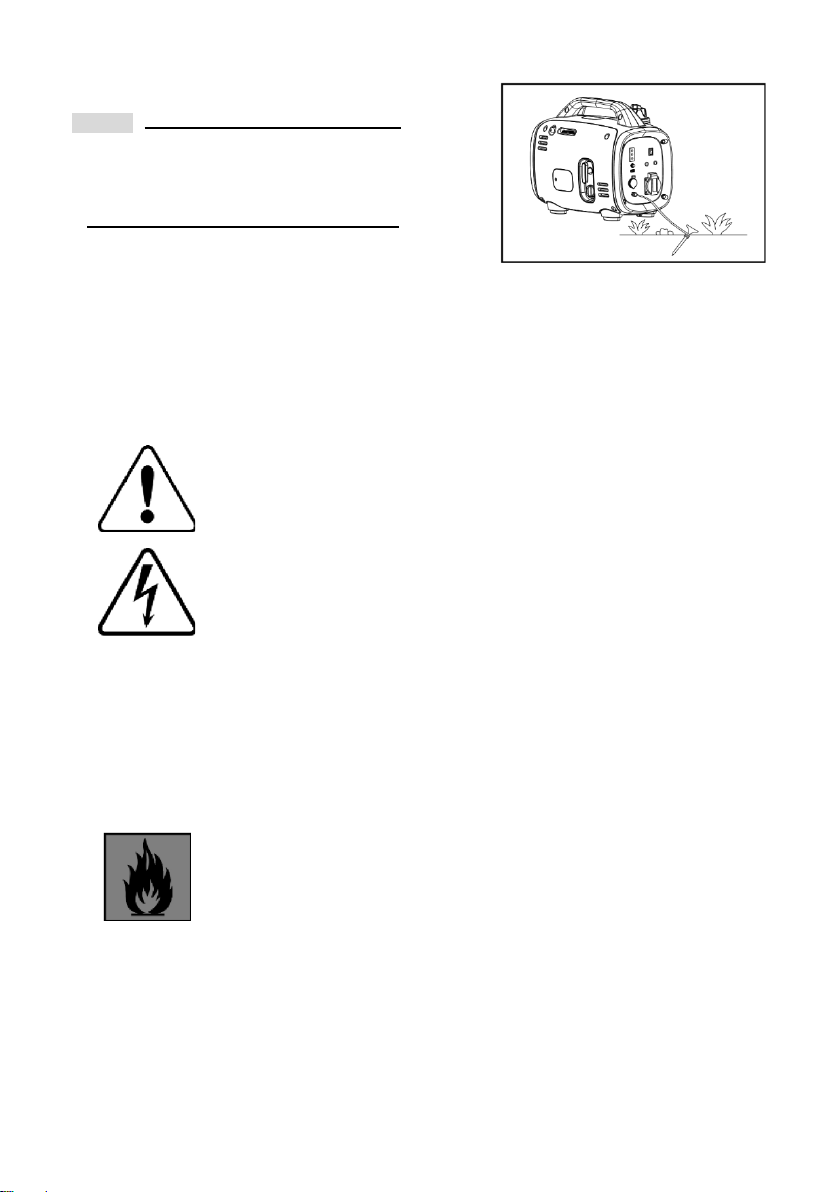
⚫Be sure to ground (earth) the OSO ECO-100.
NOTE:
Use ground (earth) lead of sufficient current
capacity.
Diameter: 0.12mm (0.005 in)/ampere EX:
10 Ampere --1.2mm (0.055 in)
CONNECTION NOTES
⚫Avoid connecting the OSO ECO-100 to a commercial power outlet.
⚫Avoid connecting the OSO ECO-100 in parallel with any other OSO ECO-100.
SAFETY SYMBOLS
Caution - The user should be aware of a general shock hazard.
Dangerous Voltage.
Flammable.

Hot Surface -
Do not touch.
CONTROL FUNCTION
OSO ECO-100 OVERVIEW
(1) Fuel tank
(2) Spark plug
(3) Muffler
(4) Fuel pump
(5) Choke lever
(6) Carrying handle
(7) Air filter
(8) Recoil starter
(9) Fuel cock
(10) Oil filler cap
(11) Fuel tank cap
(12) Fuel filter
(13) AC pilot light
(14) Overload
indicator light
(15) Oil warning light
(16) DC protector
(17) USB output
(Option)
(18) DC 12V output
(19) Ground (earth)
terminal
(20) AC receptacle
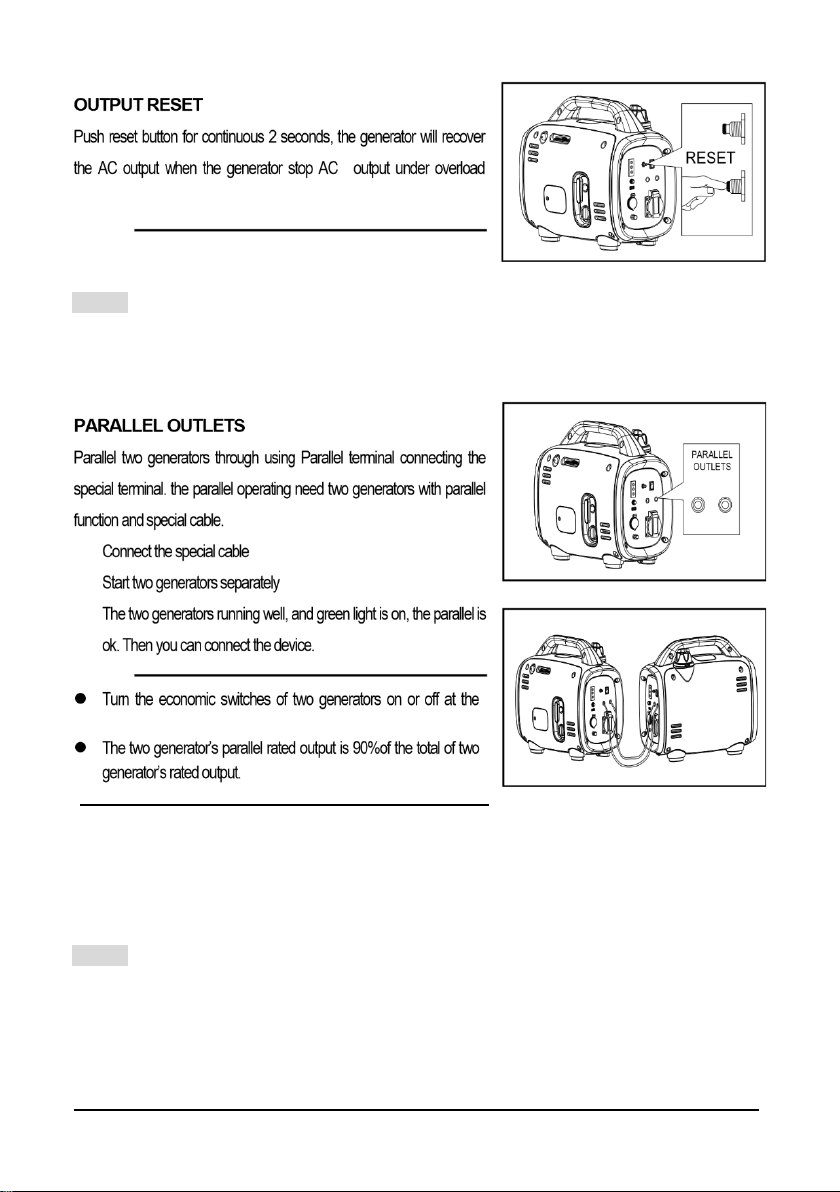
(21) Parallel outlets
(Option)
(22) Economy control
switch
(23) Output reset
(24) Frequency Transfer
Switch


NOTE:
Please reduce the load of the OSO ECO-100 to ensure
that the total load is within the rated power.
NOTE:
⚫Shut down in order. Disconnect the electric device first, and stop the two OSO ECO-
100s, disconnect the special cable at the end.
⚫Don’t connect or disconnect the special cable when the OSO ECO-100s are running.
⚫Parallel running is only applied to the same model with a parallel function.

NOTE:


WARNING:
CAUTION:
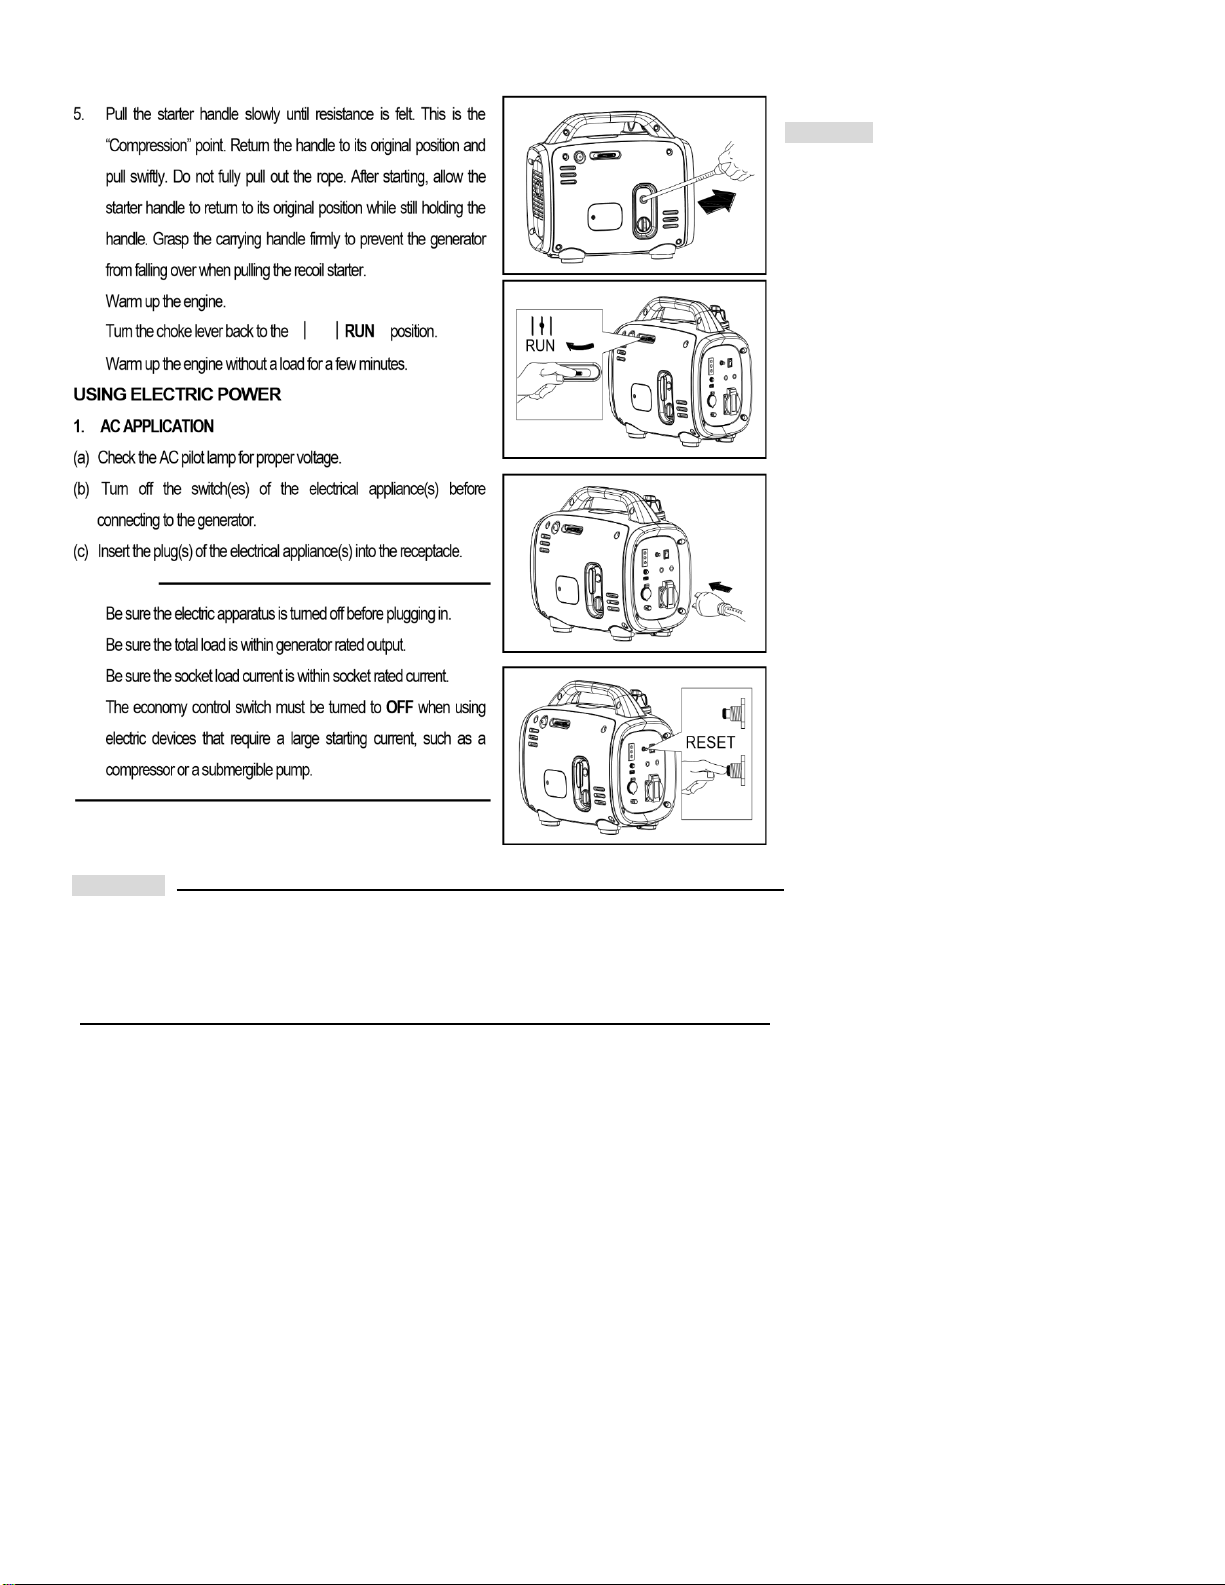
2.OVERLOAD INDICATOR LIGHT
The overload indicator light flickers when an
overload of connected electrical devices is
detected. Don’t allow this situation to
continue for a long time, decrease the loads
to its normal range and the overload indicator
light will go off.
When a load is detected that exceeds the
maximum power or the AC output voltage is
reduced, the overload indicator light will
come on and the electronic breaker will then
activate, stopping power to the generator to
protect your OSO ECO-100 and any
connected electric devices. The output pilot
light (Green) will be off, the overload indicator
light will turn RED. If necessary, follow the
following process:
(a) Turn off any connected electric
devices
(b) Reduce the total wattage of
connected electricity.
(c) Check for blockages in the cooling
air inlet, muffler air exhaust pipe opening, and
the control unit.
(d) After inspection, press the
reset button to restore power to your
OSO ECO-100.
CAUTION:
⚫The OSO ECO-100 AC output automatically resets when the engine is stopped and then restarted.
⚫The overload indicator light may come on for a few seconds at first when using electric devices that require a large starting current,
such as a compressor or a submersible pump. However, this is not a malfunction.
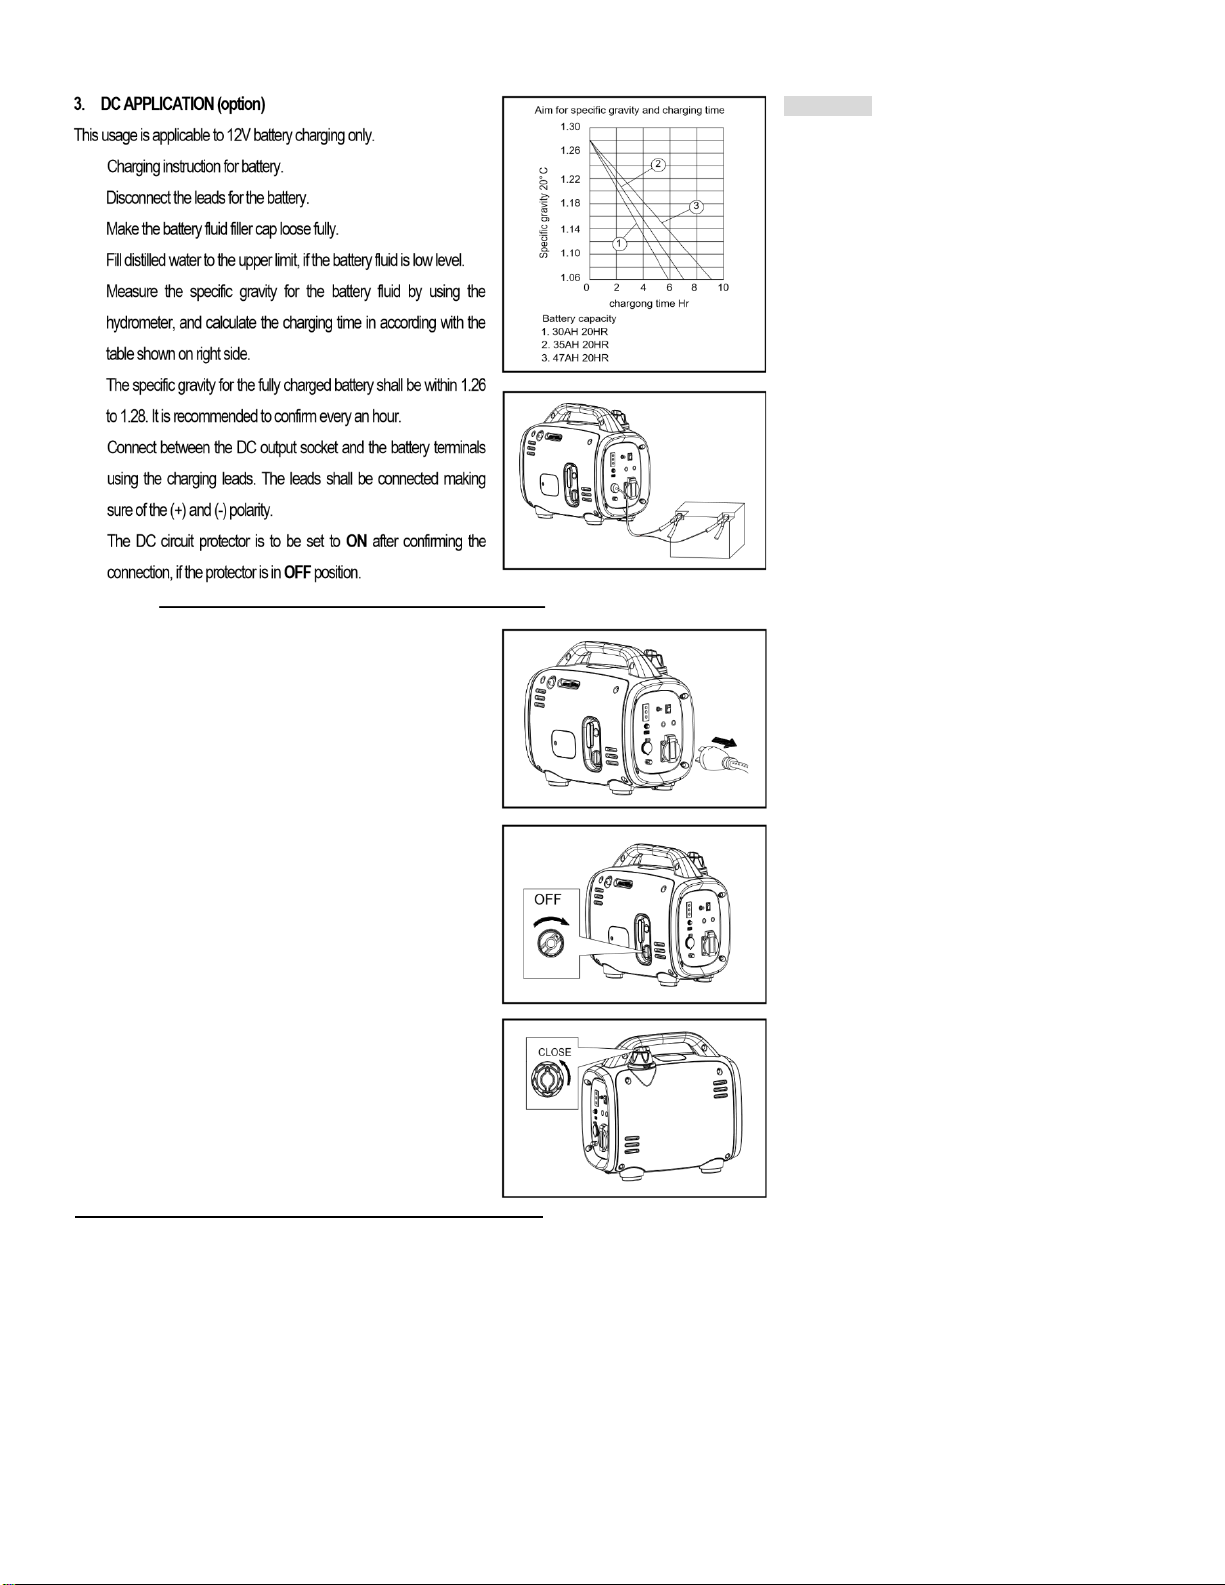
CAUTION:
⚫Be sure the economy control switch
is turned OFF while charging the battery.
STOPPING THE ENGINE
1. Turn off the power switch of the electric apparatus or disconnect any electric devices.
2. Turn the fuel cock lever to OFF.
3. Turn the fuel tank cap air vent knob counterclockwise to the CLOSE position.
.

PERIODIC MAINTENANCE
CHART
Item
Remarks
Pre-
operation
check
(daily)
Initial
1
months
or 20
Hours
Every
3
months
or 50
Hours
Every 6
months
or every
100Hours
Every
12
months
or 300
Hours
Spark
Plug
Check the
condition adjust the
gap and clean.
Replace if
necessary.
⚫
Engine
Oil
Check oil level
⚫
Replace
⚫
⚫
Oil filter
Clean oil filter
⚫
Air Filter
Clean. Replace if
necessary.
⚫
Fuel Filter
Clean fuel cock
filter. Replace if
necessary
⚫
Choke
Check choke
operation
⚫
Valve
Clearance
Check and adjust
when the engine is
cold.
⚫
Fuel Line
Check fuel hose for
crack or damage.
Replace if
necessary.
⚫
Exhaust
System
Check for leakage.
Retighten or
replace the gasket if
necessary
⚫
Check muffler
screen.
Clean / replace if
necessary.
⚫
Carburetor
Check choke
operation
⚫
Cooling
system
Check fan damage.
⚫
Starting
system
Check recoil starter
operation.
⚫
Idle speed
Check and adjust
engine idle speed
⚫
Fittings /
Fasteners
Check all fittings
and fasteners
correct if
necessary.
⚫
Crankcase
breather
Check the breather
hose for cracks or
⚫

damage. Replace if
necessary
OSO ECO-
100
Check that the pilot
light comes on
⚫
Regular maintenance is critical for best performance and safe operation.
API Service “SJ”
CAUTION:

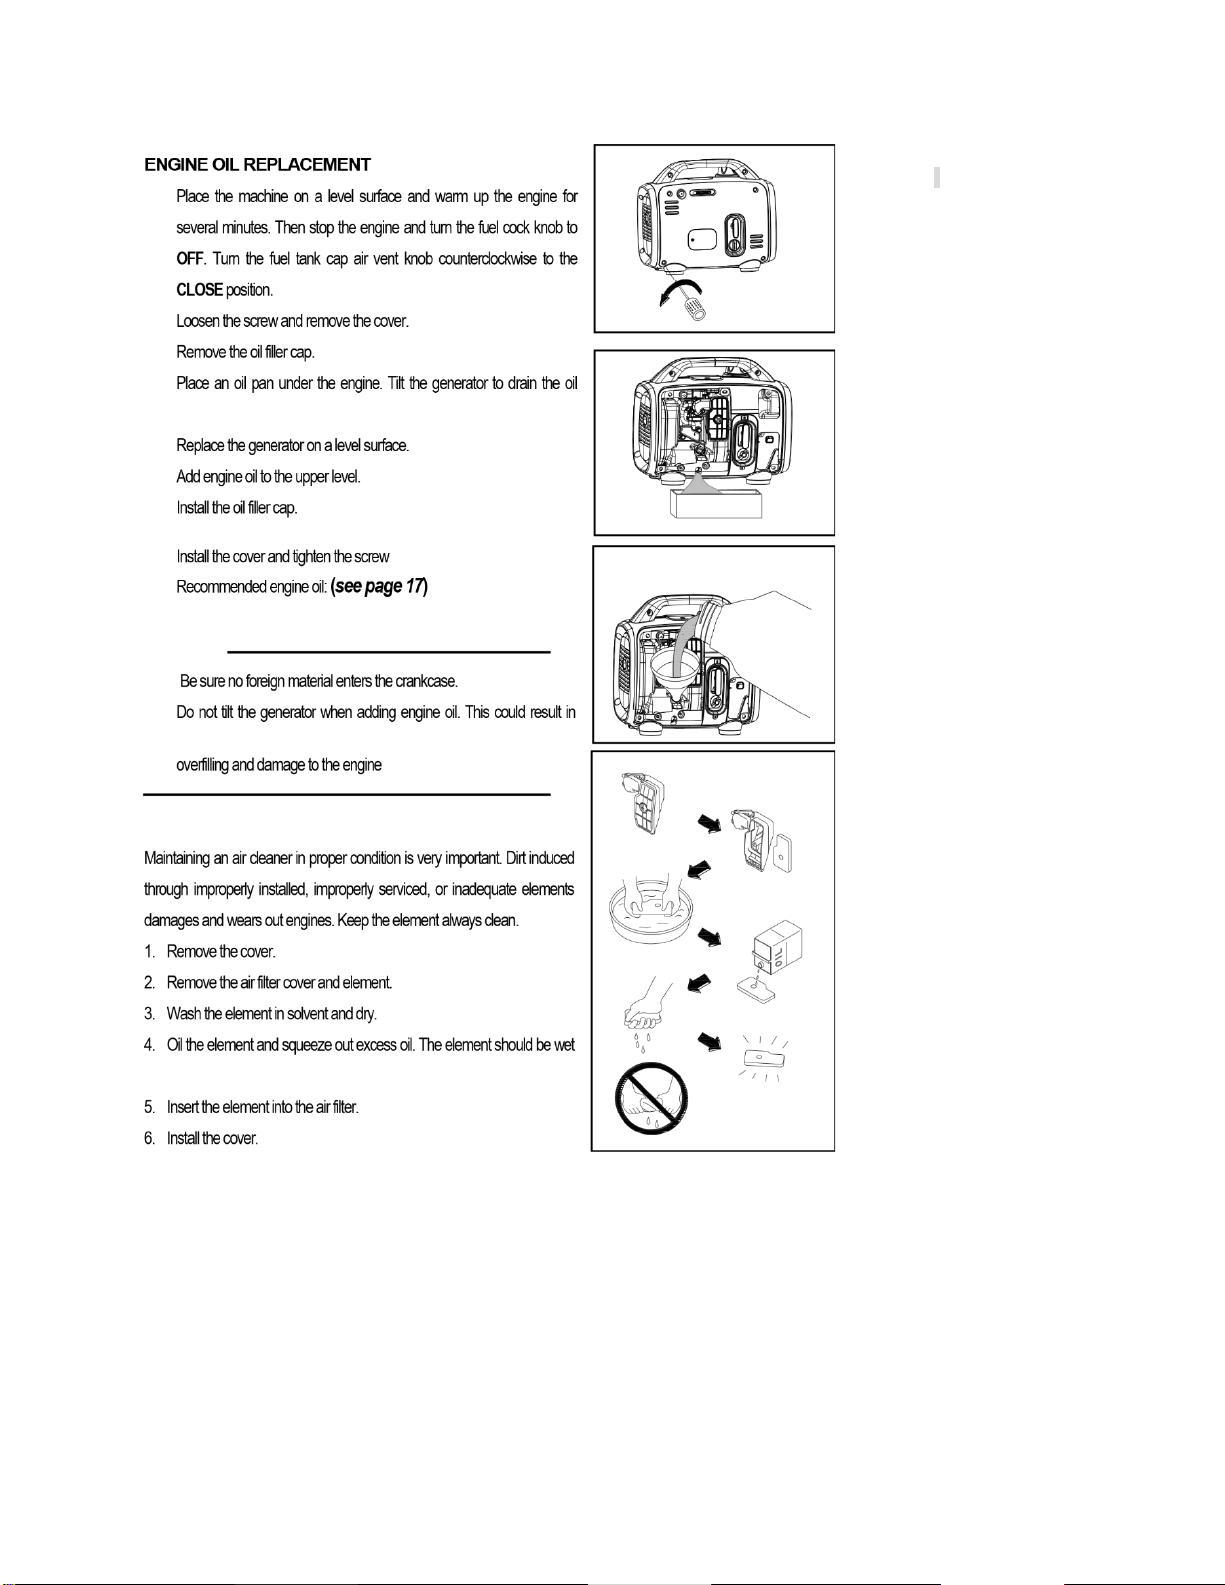
AIR FILTER

1. Remove the cover.
2. Remove the muffler screen.
3. Use a flathead screwdriver to pry the spark arrester out from the muffler.
4. Remove the carbon deposits on the muffler screen and spark arrester
using a wire brush.
5. Install the muffler screen.
6. Install the cover.
TROUBLESHOOTING
The engine won’t start
1. Fuel systems
No fuel is supplied to the combustion chamber.
⚫No fuel in the tank…. Supply fuel.
⚫Fuel in tank…. Fuel tank cap air vent knob to OPEN, fuel cock knob to ON.
⚫Clogged fuel line…. Clean the fuel line.
⚫Clogged carburetor…. Clean the carburetor.
2.Engine oil system
Insufficient Oil:
⚫The oil level is low…. Add engine oil.
3. Electrical systems
Poor spark
⚫Spark plug dirty with carbon or wet…. Remove carbon or wipe the spark plug dry.
⚫Faulty ignition system…. Consult OSO Cycles.
4. Compression insufficient
⚫Worn out piston and cylinder…. Consult OSO Cycles.
The OSO ECO-100 won’t produce power
Safety device (AC) to “OFF” …Stop the engine, then restart.
Safety device (DC) to “OFF” …Press to reset the DC protector
STORAGE
Long-term storage of your PowerPac will require some preventive procedures to guard against deterioration.
DRAIN THE FUEL
Remove the fuel tank cap, drain the fuel from the fuel tank
ENGINE
1. Remove the spark plug, pour about one tablespoon of SAE 10W30 or 20W40 motor oil into the spark plug hole and
reinstall the spark plug.
2. Use the recoil starter to turn the engine over several times (with the ignition off).
3. Pull the recoil starter until you feel compression.

4. Stop pulling.
5. Clean the exterior of the OSO ECO-100 and apply a rust inhibitor.
6. Store the OSO ECO-100 in a dry, well-ventilated place, with a cover placed over it.
7. The OSO ECO-100 must remain in a vertical position at all times.
SPECIFICATION
MODEL
OSO ECO-100
Type
Inverter OSO ECO-
100
AC
Voltage
50Hz
100V, 220V, 230V,
240V
60Hz
100V, 110V, 120V,
220V
Max. Output
0.80 kW
Rated Output
0.70 kW
Power Factor
1.0
DC Output
12V / 4.0A (Option)
5V/1A2.1A(Option)
Model
XY139F-6
Type
Air-cooled, 4 cycle,
OHV, Gasoline
Engine
Bore ×Stroke
mm ×mm
39×33.5
Displacement
40 cc
Max. Output
0.9KW / 5500rpm
Fuel
Regular Automobile
Gasoline
Fuel tank
Capacity
2.1 liters
Rated
Continuous
Operation
4.1 hours
Lubricating oil
SAE 10W30
Lubricating oil
Capacity
0.25 liter
Starting System
Recoil Starter
O
S
O
E
C
O-
1
0
0
E
N
G
I
N
E
Table of contents
Popular Portable Generator manuals by other brands


MEGAGEN
MEGAGEN Z100 Operator's manual

Hot Max
Hot Max HM2000 Operator's manual

Matsusada Precision
Matsusada Precision R4GT Series instruction manual

Champion Power Equipment
Champion Power Equipment CSA40025 Owner's Manual and Operating Instructions

Weber Rescue Systems
Weber Rescue Systems E 50 T-SAH 20 operating instructions

Champion Power Equipment
Champion Power Equipment 41153 Owner's Manual and Operating Instructions

Champion Global Power Equipment
Champion Global Power Equipment 200970 quick start guide

Winco
Winco 700-11 owner's manual

CGOLDENWALL
CGOLDENWALL CC-300 user manual

Firman
Firman R-P03501 owner's manual

Generac Power Systems
Generac Power Systems GP17500E specification

unicraft
unicraft PG-E Series operating instructions