OTG M70T02 User manual

1
M70T02 User Manual
Content
Content..............................................................................................................................................1
1. Introduction...................................................................................................................................1
1.1
Acknowledgement……………………………………………………………………...…1
1.2 Announcements...................................................................................................................1
1.3 Safety Instruction................................................................................................................2
1.4 Abbreviation/Terminology..................................................................................................3
2MID Introduction......................................................................................................................3
2.1 MID Accessories Introduction ............................................................................................3
2.2 MID Usage and Preparation................................................................................................4
2.3 MID Status and Reminder...................................................................................................4
3Quick Start Guide......................................................................................................................5
3.1 Keys Function.....................................................................................................................5
3.2 Startup and Shutdown.........................................................................................................5
3.3 Open and Close the Screen .................................................................................................6
3.4 Usage of Touch Screen........................................................................................................7
3.5 Main Interface.....................................................................................................................8
3.6 Visit Application Procedures.............................................................................................11
3.7 USB Connection ...............................................................................................................12
3.8 Input words .......................................................................................................................13
3.9 Application Technique.......................................................................................................14
4.1 Voice and display ..............................................................................................................14
4.2 Basic setting......................................................................................................................15
4.3 SD card and MID memory................................................................................................16
4.4 Date and Time...................................................................................................................17
4.5 Setting Language...............................................................................................................17
4.6 About Tablet......................................................................................................................18
5 Multi-Media.................................................................................................................................18
5.1 Music.................................................................................................................................18
5.2 Music.................................................................................................................................19
5.3 Video.................................................................................................................................20
5.4 HDMI…………………………………………………………………………………..21
5.5Photo gallery......................................................................................................................21

2
5.6 Camera..............................................................................................................................22
6 Connection Establishment............................................................................................................25
6.2 WIFI connection................................................................................................................25
6.3 Email.................................................................................................................................25
7 Internet.........................................................................................................................................28
7.1 Browser.............................................................................................................................28
8.GPS Navigation ...........................................................................................................................30
8.1Installation..........................................................................................................................30
8.2 Update...............................................................................................................................31
8.3 Uninstallation....................................................................................................................31
9.Usage of Mobile TV ....................................................................................................................31
10. Other Applications ....................................................................................................................35
10.1 Clock.......................................................................................................................................35
10.2 Calculator........................................................................................................................36
10.3 File Management.............................................................................................................36
9 Installation of Application Procedures.........................................................................................39
9.1 Installation.........................................................................................................................39
9.2 Uninstall............................................................................................................................39
9.3 Update Path.......................................................................................................................40
10 System Upgrade.........................................................................................................................40
10.1 Preparation for System upgrade......................................................................................40
10.2 Restore Factory Setting...................................................................................................40
10.3 System Upgrade..............................................................................................................41
11. Troubles Shooting .....................................................................................................................43
appendix 1.......................................................................................................................44

1
1. Introduction
1.1 Acknowledgement
Thanks for your purchase of our product. The product is MID (Mobile Internet
Device), it is a high end product, with with a touch screen which resolution of
800x480 pixel. It is designed with TTC8925high speed processor and 512RAM,
and 4GB flah. The operating system is Android 4.0.
The product is built in WIFI module, front and rear camera, it is easy to
complish internet function, it can be viewed high definition video and photos, it can
also support camera shooting and video shooting function. Besides, it is available
for many office and entertnaimnet applications. Brand new operation interface will
provide you with diferent enjoyment.
The manual systemically introduces the functions, use techniques and
announcements, please read this manual carefully before your operation.
1.2 Announcements
Preventive maintainance
zPlease always keep the MID dry. To avoid the device short trouble, corrosion fault and
electric short, please prevent the device, battery and charger from water and moisture,
and don’t operate the device or charger by wet hand.
zTo avoid failure of device, battery and charger, please prevent the device, battery,
charger from violent shock or shake.
zTo avoid failure of device, battery and charger, please prevent the device, battery,
charger of all over heating or too cold circumstance
zNever shock, throw, prod the MID, or drop, extrude, bend the MID.
zNever disassemble the device and accessories arbitrarily, otherwise the device and
accessories are not in our company warranty scope.

2
1.3 Safety Instruction
Before the operation of the MID, please read this chapter and teach your kids about these
information. For further details, please refer to the safety instructions and announcement.
zNever use the MID when driving car, in order to ensure safe driving.
zIn the medical area, please abide by related rules and regulations. Please shut
down the MID when it is near to the medical area.
zTo avoid the wireless signal to interrupt the plane- controlled signal, please shut
down the MID or using airplane mode when you are boarding a flight,
zTo avoid electronic equipment failure, please shut down the MID in the vicinage
of high-accuracy electronic equipments.
zPlease don’t disassemble the MID and accessories. Only authorized agent has
access to service the MID.
zPlease keep the MID far away from magnetic equipments, the radiation of MID
may erase the data stored in the magnetic equipments.
zNever use the MID in the vicinage of high temperature, inflammable gas (gas
station).
zProtect the MID and accessories from kids reach scope, and avoid the kids to use
the MID without parents’ supervision.
zPlease comply with related rules and regulations, and respect others’ privacy and
legal rights while using the MID.
zPlease strictly adhere to related instructions in the manual when using USB cable
to ensure the safety of the MID or PC.
zNever use the MID in bathroom or other humid environment, and please protect
the MID from liquid wash or wet.

3
1.4 Abbreviation/Terminology
Abbreviation/Terminology Full Name Description
MID Mobile Internet
Device mobile internet terminal
WIFI Wireless Fidelity Base on IEEE 802.11b
standard wireless LAN
TF TransFlash Alternative name is Micro
SD ,super miniature
memory card
HDMI High Definition
Multimedia
Interface
HDMI: High Definition
Multimedia Interface
2MID Introduction
2.1 MID Accessories Introduction
Package:
Below items are included in your MID package, please confirm:
zMID complete device
zpower adptor
zUSB cable
zLeather case
zUser’s manual
zWarranty Card
zQualification certificate of product

4
2.2 MID Usage and Preparation
Battery Charging
If this device is first used, please use AV adaptor to fully charge it.
1. Apply the power adptor to charge for MID.
2.3 MID Status and Reminder
Reminder icons:
When some remind message appears in your reminder window, please click column and slip
the screen to open the reminder list. Choose the menu you need, and confirm the information.
Then you can close the reminder window through clicking the column to slide up. Please
refer to below status icons.
New email airplane mode
USB is connected USB adjustment is connected
Home key
downloading
display recently used applications Home key
Battery volume mark WIFI service has been connected,
available to internet
No SD card Alarm on
General Notice Mute
Reminder board
Reminder icons will work while receiving emails, alarm is set, and connect WIFI, you can
open the reminder board to view the detailed information.

5
Open the reminder board
When the reminder column shows new reminder icon, please hold the column and slip
down your finger, then the reminder board is opened.
3Quick Start Guide
3.1 Keys Function
keys function description:
Power key(power)Short press to dormant/awake function, long press to
turn in/off.
Volume +(up)increase volume
Volume-(down)decrease volume
HOME key(home)Click it in any interface to return main menu
interface.
Menu key this key will appear in menu application
display recently-used
applications
record user’s recently browse history
Back key(back)Click it in any interface to return previous menu.
Search(search)Click it to enter into Google search.
3.2 Startup and Shutdown
Startup
Long press Power key for three keys, you can enter into startup picture. The system
enters into screen locked status, please unlock it to enter into main interface to operate.
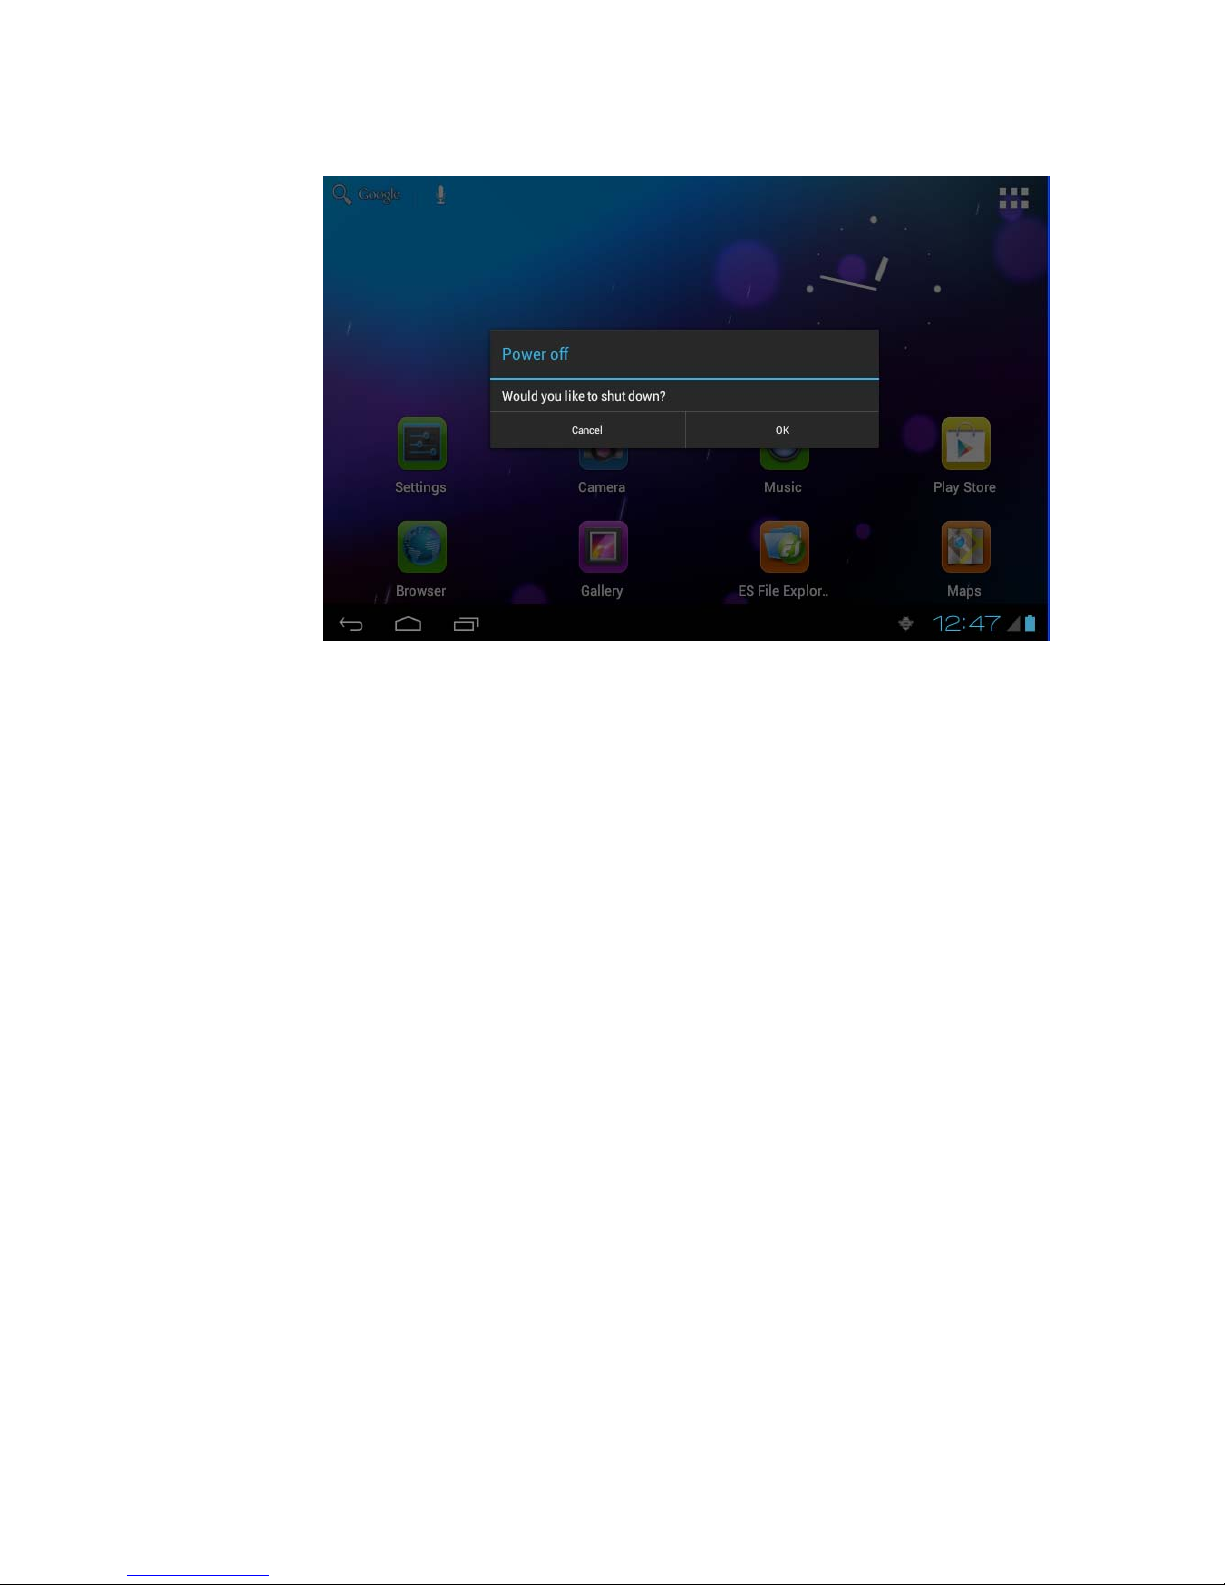
Shutdown
1. Long press Power, it will popup shutdown window.
2. The setting includes mute mode and shutdown, as Picture 3-11.
6
3. Clicking Shutdown is the last step.
Picture 3-1
3.3 Open and Close the Screen
Screen will be closed on its own when no operation happens.
1. Screen will be closed on its own if no operation happens for some time to save
battery power.
2. When screen is open, press Power key, the screen will be closed immediately.
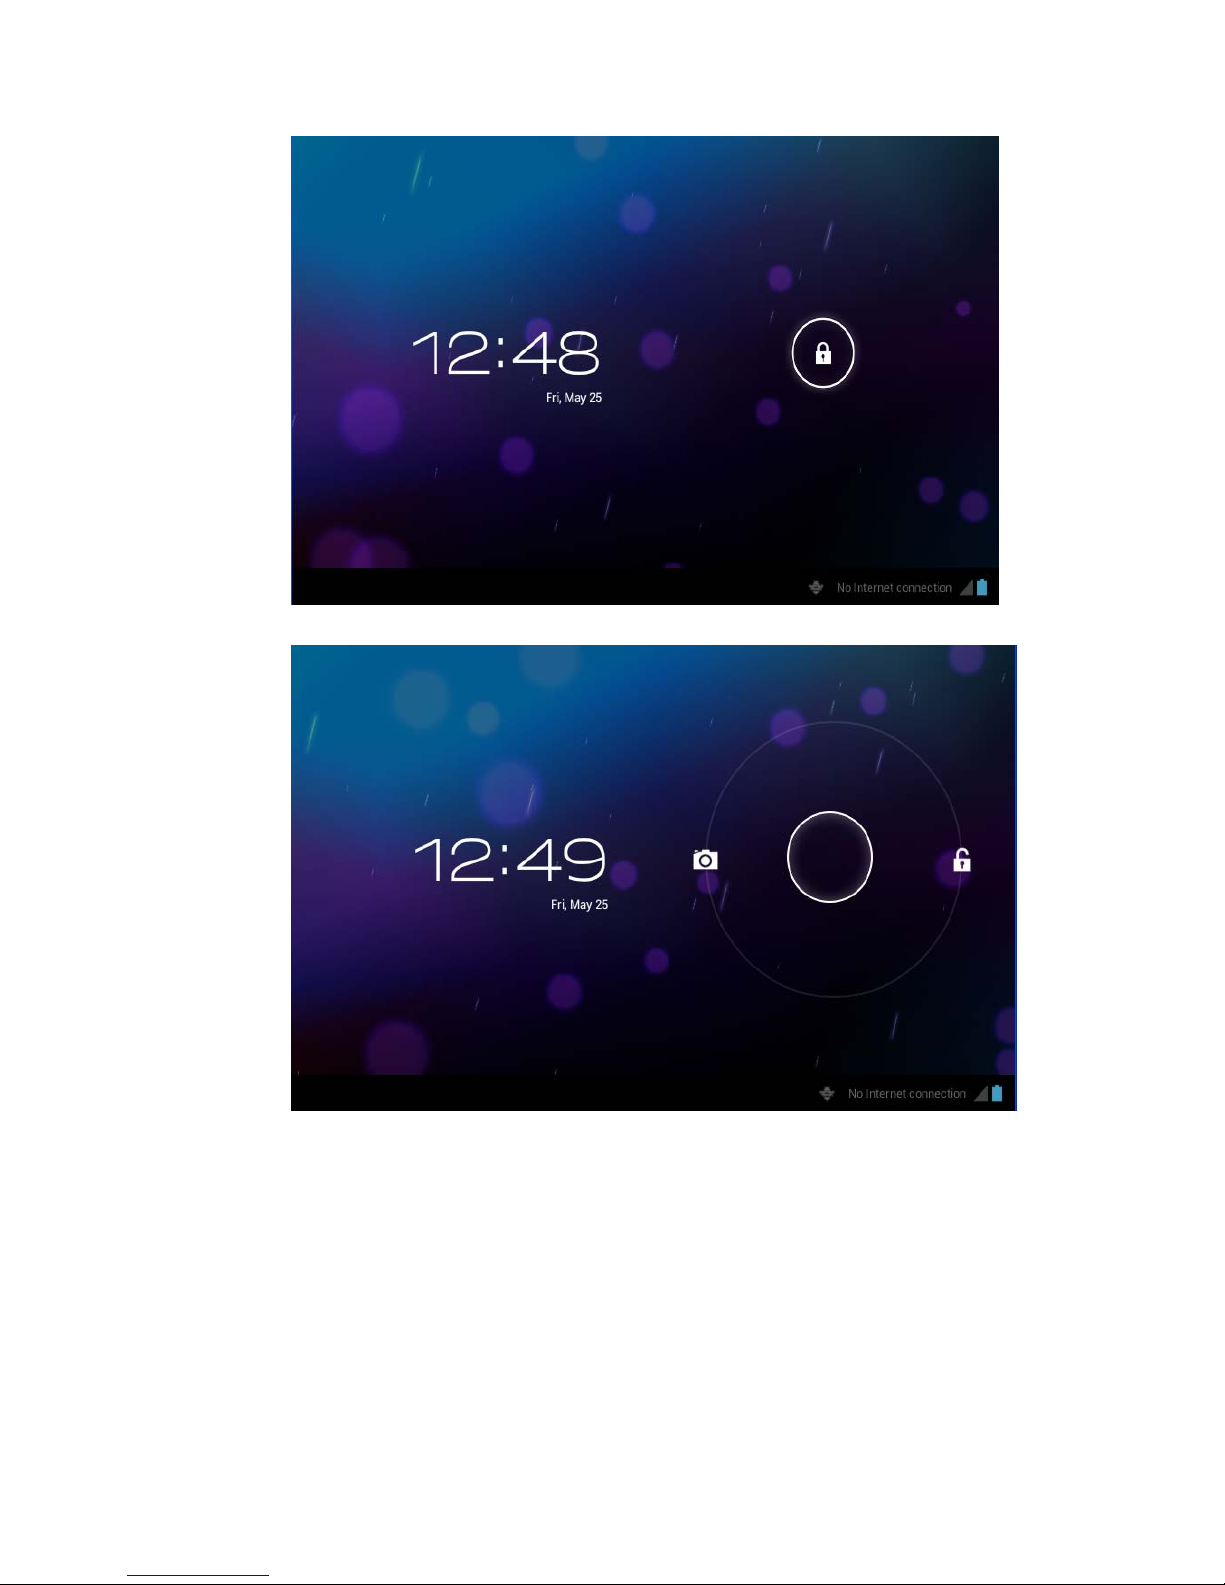
Open the screen when it is closed.
If the screen is closed, short press Power to open the screen. The screen will be locked as
Picture 3-2 after opening it, hold “lock” icon via finger or touch pens and slid up it to camera,
as Picture 3-3.
7
Picture 3-2
Picture 3-3
3.4 Usage of Touch Screen
MID operating methods
There are many methods to view the main screen, menu and applications of your MID.
Click
When you want to use the screen keyboard input or choose application in the main
8
interface, you only need to touch it by finger.
Press on
If you want to open some item( textbox or the link in the webpage), or shortcut and main
procedure move, you can press on this item.
Quickly slide or slide
Quickly slide or slide indicates make quick vertical or horizoncial movement via finger or
touch pen.
Pull
Before you pull, you need to hold it with strenghth until you pull it into the position you
want.
Rotate
For most pictures, you only need to rotate the MID sidewise to change the screen direction
from horizoncial to vertical. For instance, when you are inputing wods, and listening MP3.
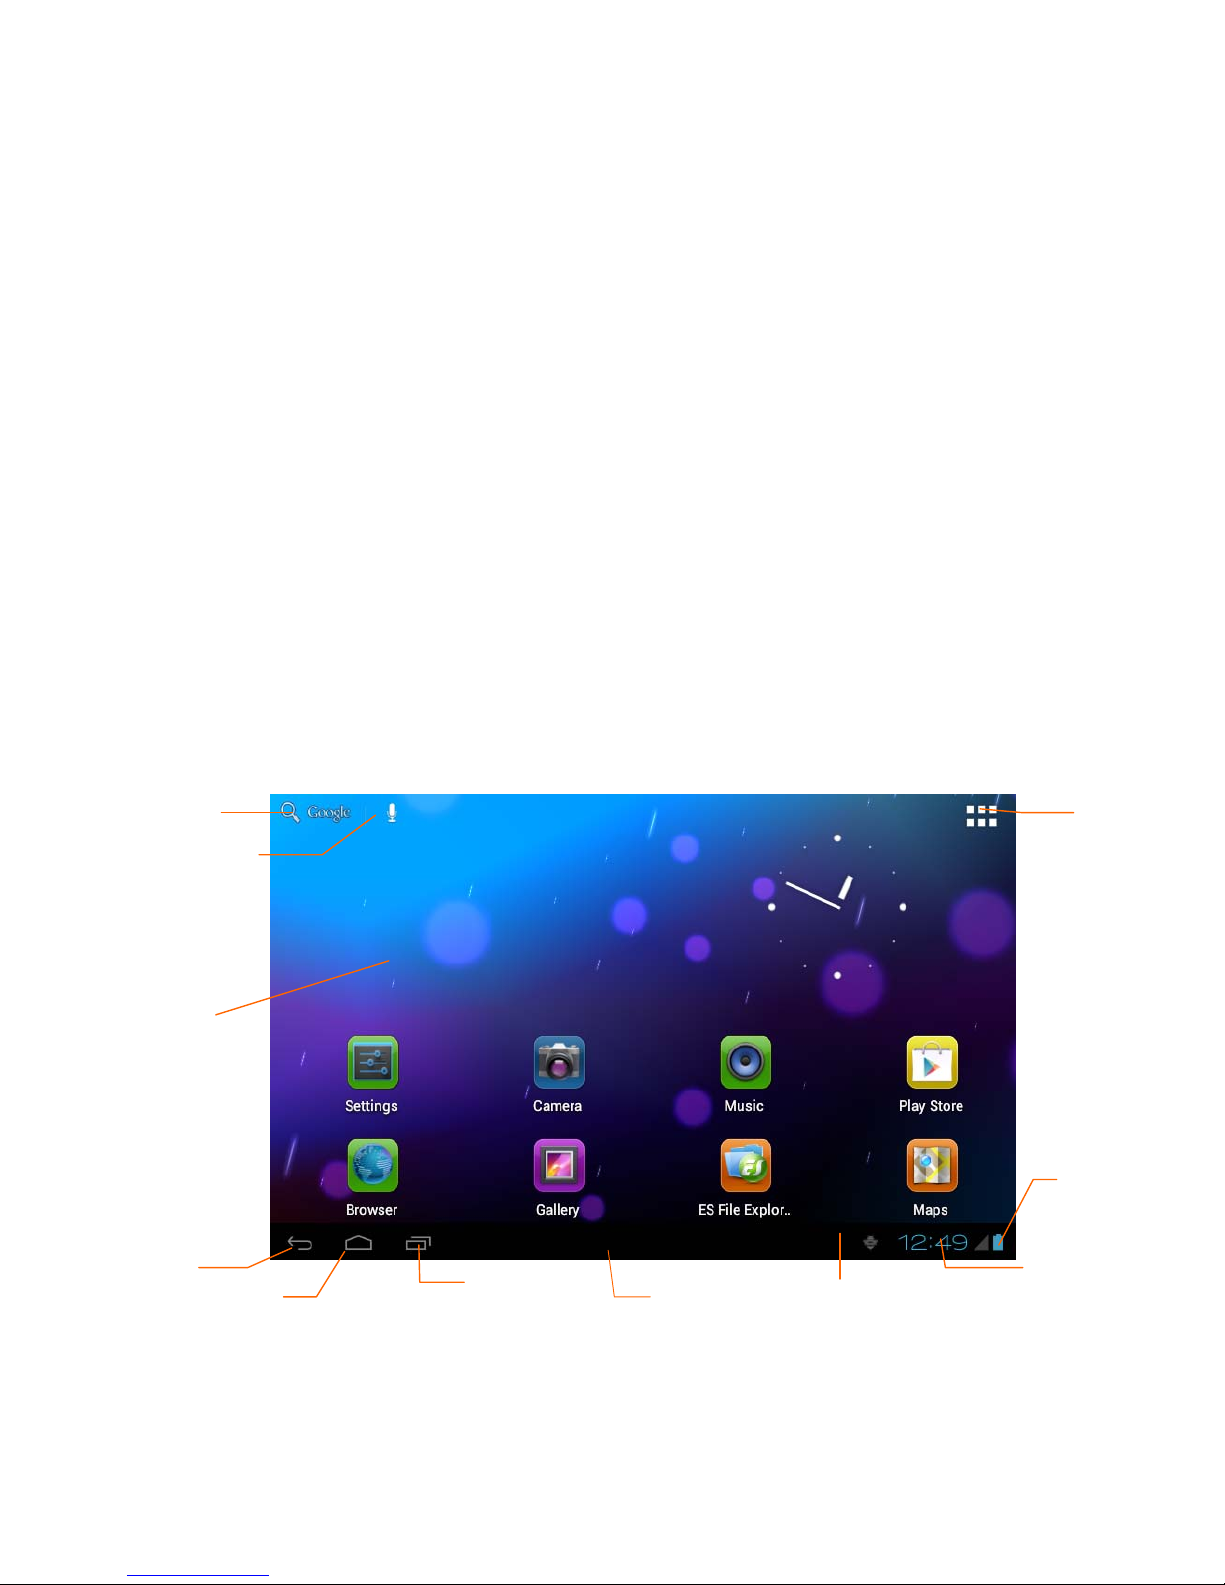
3.5 Main Interface
Main menu screen will show all the applications as below Picture 3-4. You can use
applications, shortcut and define your main interface wallpapers.
Picture 3-4
Extensible homepage interface
Homepage will extend to exceed the screen to offer more space, you can place newly
increased shortcuts, widgets. Click the blank space in the homepage, then slide right and left
Remind
information
Notice column
Home
Search
column
Dynamic
wallpaper
Return
key
Time
Applicati
on
Battery
volume
Menu key
Voice search

9
to move to the right and left of the screen. There ar two extended pictures as Picture 3-5 in
the homepage.
Picture 3-5
Shortcut icons management of desktop applications
System below Android 2.3has the function of creating folder in the desktop, and put the
icons in the folder. Android 4.0 systemmake the folder creation more simple. The steps
are as below:
1. Draw all the icons together, as Picture 3-6 shown.
2. Then click the composited icons to open all the applications as Picture 3-7.
3. Click unnamed folder below black frame, it will popup hidden keyboard, and
you can rename this folder(it is silimar with IOS system.)

10
Picture 3-6
Picture 3-7
Delete the icons in the desktop
1. Click and hold the icon needs to delete, the top left will show the icon.
2. Draw the icon to the upper of the DELETE icon till the icon turns to red, then
move your ginger to delete.
Change the destop wallpaper
1. Click and hold the blank space in main screen, it will popup the window to
11
change the wallpaper.
2. Click the photo gallary or wallpapers gallary to choose photo.
Voice search
1. Touch the Microphone icon 。
2. You can choose according to your need in the google selection.
3. You can sest the language according to your need in the voice search frame,
click OK to confirm.
4. Keep your mouth direct to the microphone, and speak out the content you need
to search, the broswer will open the search result list.
Note: Please make sure the internet is welll connected before voice search.
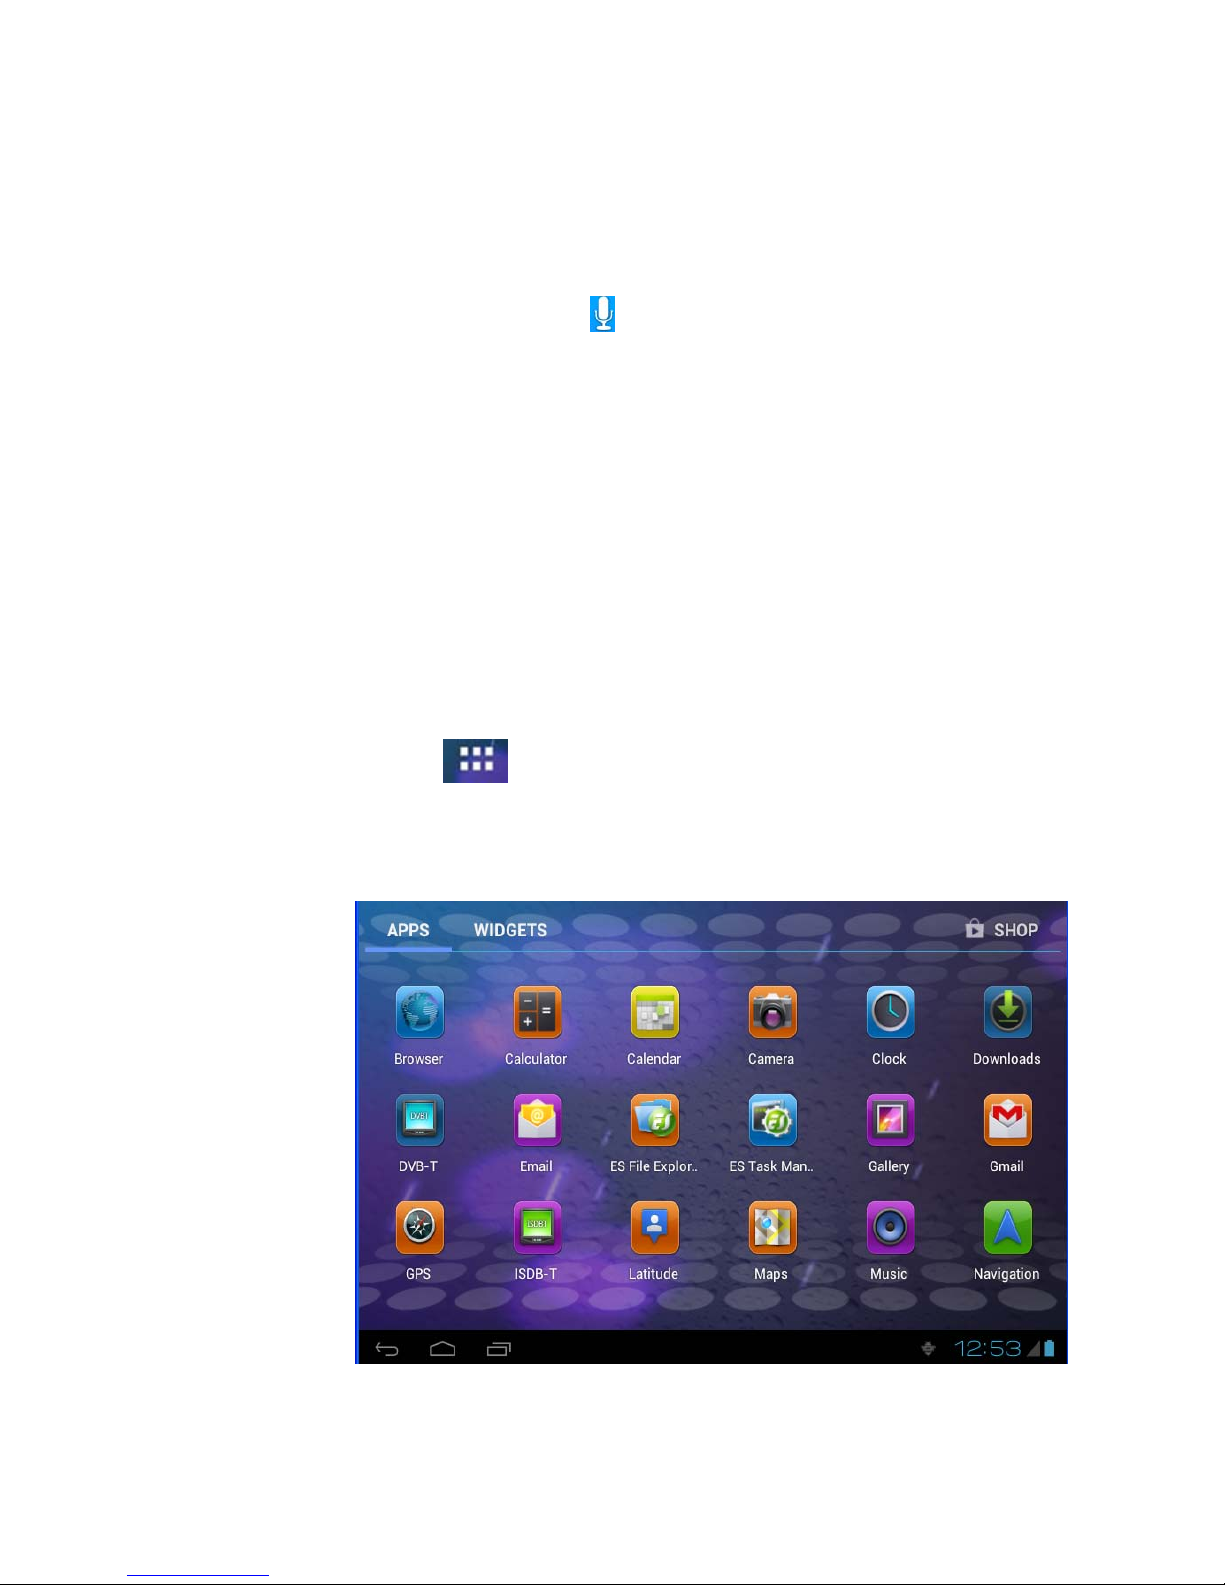
3.6 VisitApplication Procedures
How to visit the application procedure of MID:
1. Click button in Picture 3-6, enter into application procedures, as
Picture 3-8:
2. Choose the application procedure you want to visit.
Picture 3-8

12
3.7 USB Connection
MID storage configuration
Before transmitting documents, you have to conduct storage configuration for your MID:
Connect MID and PC via USB connection, the reminder column will show the remind
information.
1. Open the reminder board; please view the Chapter 2.3 MID status and
reminder to learn how to open the board.
2. In the remind board, click USB is connected, then touch to open USB
memory device, as Picture 3-9.
3. Now USB is well connected.
Picture 3-9
Copy the file into memory card
1. Connect MID and PC via USB connector.
2. Operate as the MID memory setting to connect the MID and PC.
3. Open “My computer” to view Mobile disk(x).
4. Copy the file you need to copy into “Mobile disk(x)”.
5. After copying, click “close USB memory” in your computer to uninstall.
Note: When you MID is connected in USB cable, if you open the USB memory
device, you can’t visit the memory card through MID. If you hope to visit the
memory card, you need to disconnect the USB cable.

13
3.8 Input words
Use screen keyboard
When you start application or choose the typying word or number edit box, it will
popup screen keyboard. The keyboard has below input methods:
1. Android keyboard
2. Google pinyin input methods
Choose the input method you want
According to the preset, MID will display Android keyboard
1. According to the preset, MID will display Android keyboard In the main
interface, touch setting application, click language and input method.
2. In the text setting area, it will list all the input methods you MID has installed.
3. Choose the input method you want.
Use Android keyboard
3-8
1 switch the input capitilization
2 switch words input mode and symbol mode/number mode.
3 click to insert space.
①
② ③
⑤
④

14
4 click to enter.
5 delete the word next to cursor, click and hold to delete all the charactics.
3.9 Application Technique
Enter into the widgets interface window
Click the window wigdet on the top of the screen in the application interface or left
slide the screen, it will turn to the window widgets interface. Long click any
component to turn to shortcut, and you can enter into application through the shortcut.
Creat the application shortcut icons in the desktop
In the application system and widgets interface, long click any icon to switch into
desktop, draw and hold the icon to put in any place in the desktop.
Remind: System will provide you with more choice and activate this widget, if no
space in the target position, the widget will not be added into the main screen.
Switch the screen
Android 4.0 applies to the multi-screen display, touch the screen via your finger and
slide right or left the screen to switch the screen.
4 Basic setting
4.1 Voice and display
Multi-media volume setting
1. Click setting application in the main interface.
2. Click Voice.
3. Click volume to adjust the volume for music and video.
4. When popup volume setting board, left or right progress bar to control.
5. click confirm.

15
Display setting
Adjust the bightness of screen
1. Click Setting application procedure in main interface.
2. Click display.
3. Click brightness when the menu popup.
4. It will popup setting board, left and right slide the brightness bar to
adjust the brightness.
5. Click OK.
zAdjust screen standby time
1. Click Setting application procedure in the main interface.
2. Click display.
i. Slide down the screen, and click dormant.
ii. It will popup screen standby time setting, choose the standby
time you want.
4.2 Basic setting
Setting screen lock.
You can unlock the picture or passord to lock the touch screen to protect your MID
privacy.
Note: After setting the screen locked, you need to enter the password when you start the
MID.
Setting unlock picture
1. Click setting application in the main interface.
2. Click safty.
3. Click screen lock.
4. Choose picture in the text setting area.
5. Move to next step according to remind.
6. There are nine touch points in the picture, when it popup unlock picture board,
connect the four points from vertical and horizontal direction. As Picture 4-1,
move your finger when finish. System will record the picture you set.
7. Click continue.
8. When you see the remind information, click the screen locked picture, click
OK.
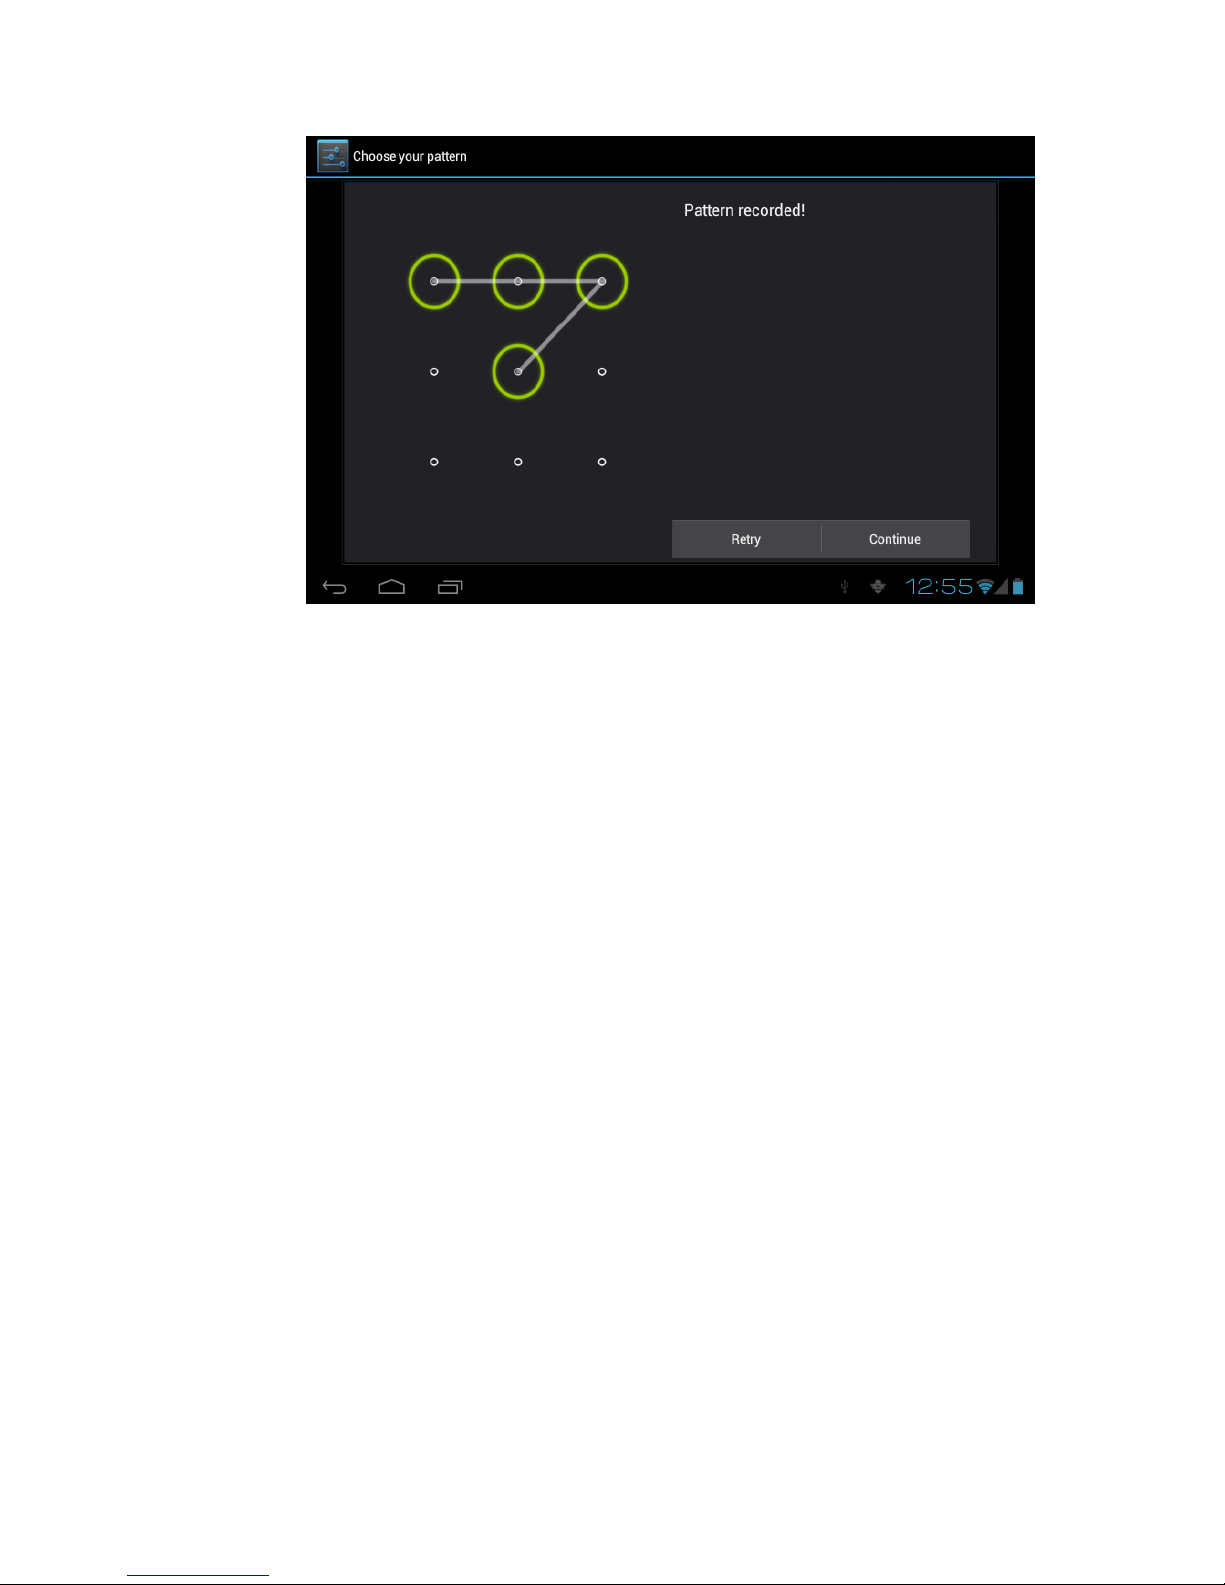
16
Picture 4-1
Set unlock PIN code
1. Click setting application in the main interface.
2. Click confirm.
3. Click screen locked.
4. Choose PIN when it popup text setting area.
5. Enter new PIN code and click continue.
6. Enter new PIN code again and choose OK.
Setting unlock password
1. Click setting application in main interface.
2. Click safe.
3. Click screen locked.
4. Click password in the text setting area.
5. Set new password(letters and number) and click continue.
6. Enter password again and click confrim.
4.3 SD card and MID memory
View SD card and MID memory available space
1. Click setting application in the main interface.

17
2. Click memory.
3. View the available spce in SD card.
4. View MID internal memory space.
Remove SD card safely
Remove the SD card safely can prevent the SD card and extend the SD lifetime.
1. Click setting application in main interface.
2. Click memory.
3. Click remove SD card.
4. Pull out SD card.
4.4 Date and Time
Manual adjust date, time and zone
1. Click Setting application procedure.
2Slide down screen, and click date and time.
3Click select time zone, and coose the zone in the list. Slide down to view
more zone information.
4Click setting date and then click up and down button or slide up and down
to set area to adjut date, month and year, click setting when finish.
5. Click setting time and click up and down or slide up and down to setting
area to adjust hour and minute, click AM or PM to change the morning and
aftfernoon(there is no such selection when you choose 24 hour format), click
setting.
6. Click to choose 24 hour format, you can switch between 12 hour format and
24 hour format, the selected time format will be used on the alarm.
7. Click choose date formats, and click the date formats in MID.
4.5 Setting Language
1. Click setting application in main interface.
2. Click langauge and input method.
3. Click language, and select the language you want, slide down to search
more language.

18
4.6 About Tablet
View the MID Status
1. Click Seting application procesure.
2. Click About Tablet, you can view the electric volume, status messages and so on.
System update
1. Click Setting application procedure in main interface.
2. Click About tablet.
3. Click System update, update as steps.
4. click Install system update if there is new veersion. (Please confirm there
is new version TF card in device before installation.
View system version
1. Click Setting application procedure.
2. Click About Tablet.
3. You can view model NO., Android version, firmwave version and internal version.
5Multi-Media
5.1 Music
Your MID support below formats
Music file formats
MP3
AAC
OGG
WAV
APE
FLAC
AMR
WMA
Table of contents


