manuals.online logo
Brands
  1. Home
  2. •
  3. Brands
  4. •
  5. Oxford Instruments
  6. •
  7. Measuring Instrument
  8. •
  9. Oxford Instruments Andor Kymera 193i User manual

Oxford Instruments Andor Kymera 193i User manual

Kymera 193i Quick Start Guide
Unpacking the Boxes
2
Installing Software (Solis or SDK)
You must have administrator access on your PC to perform this installation.
The same instructions cover the installation procedure for Andor’s Solis or SDK software, which is used in
conjunction with third party software. If you are planning to run your camera through a third party interface you will
require the Andor Drivers, called SDK.
Switch on the PC, insert CD and run the Solis (or SDK) setup .exe le on the CD or download location.
• Conrm the version of software (and 32 or 64-bit as required).
• Follow the on screen prompts.
• Select the installation directory when prompted.
• If prompted for camera type select the required camera from the list.
• On the nal window click on “Install”. During the installation a number of
other windows will appear as various drivers are installed.
• To complete the installation:
• USB cameras, click the Finish button.
• For non-USB cameras, when prompted select “Yes, restart the
computer now” and then click on the Finish button.
3
For more information visit: http://www.andor.com/scientic-software
Please turn over
Power Supply with
Country Specic
Power Cord
Software or Driver
CD and User
Manual on CD
I2C Cable
Refer to the user manual for further information.
USB 2.0 Cable
Kymera 193i
Spectrograph
Camera
Grating(s) Accessory Slits
and Coupling
Interfaces
Output Port
Adaptor(s)
* The Kymera 193i may be supplied with a range of standard and optional accessories as specied at the time of
ordering.
Hex Key
Set
Filter
Insertion/
removal tool
Preparing Your Facility
Handle the spectrograph and accessories with
care. The 193i weighs 7.5 kg [16 lb 5 oz].
Observe anti-static precautions when
installing the spectrograph, camera and
accessories.
Ensure sufcient clearance around
cameras and power supply vents (Do not
block vents when operating on benchtop).
Operation of the spectrograph and
camera close to intense pulsed sources
(e.g. plasma and X-ray sources) may
compromise performance.
Keep dry, <70% humidity non-condensing.
Use correct power supply and cables.
Operate at a constant temperature between 0°C
and 30°C (temperature uctuation during operation
may result in calibration drift).
Store between -25°C and 50°C.
1
Accessories*Kymera
193i
1. The 193i should be either connected to the camera by either:
• I2C cable (supplied, if applicable), or
• USB cable (provided).
2. If your spectrograph has a shutter, then this is controlled through the I2C cable (if used for the connection), or
through the BNC connection via a cable from the camera (supplied), or for simple open/close operation no
connection is required.
3. The 193i accessories - motorised slits, lter wheel, shutter - are all ‘plug and play’ and do not require any setup.
Connecting your Camera and Accessories
4
Refer also to your camera and Kymera 193i user manuals
Setting up Solis for the Kymera 193i Spectrograph
5
1. Insert the power cable from the power supply into the power
connector at the rear of the camera. Secure in position using
the screwlock (where applicable).
2. Insert the mains cable into the camera power supply unit.
3. Connect the USB cable to the camera and an available USB
port on the PC.
4. Switch on power to the camera (Note that the iStar also has a
power switch on the rear connections panel).
5. Power up the Kymera 193i followed by the PC.
6. Start your software e.g. Solis.
7. Review and adjust the acquisition as required.
8. Start acquiring data.
Troubleshooting
Camera is not recognised by PC
• Check that the camera power and USB cable are connected securely and the mains power cable is inserted.
• Check that the drivers have been installed properly
(Control Panel /System/Hardware /Device Manager /Imaging Devices).
Spectrograph is not recognised by Solis
• Ensure that the Kymera 193i has nished its system checks before attempting to connect with it.
• Check the connections between the camera, PC and spectrograph.
Shutter is not opening
• The shutter should always be controllable open/closed in the Solis GUI (when shutter is present). When the I2C
cable or the BNC input is used, the ‘BNC’ option should be selected in the software to enable operation of all shutter
modes.
Turret lid difcult to open
• Rotate the lid lock from the locked to the unlocked position.
• The turret lid can then be lifted up using the handle of the turret lid.
Communication error when selecting side port
• When shipping, a locking screw is used to secure the ipper mirror in dual exit systems (KYMERA193i-Bx). This needs
to be loosened fully/removed before use.
Connecting your Camera and Switching it on
Ensure that the camera AND your PC are switched OFF.
6
MAN-09416
SR193QSG 1217 R1
For additional troubleshooting information please refer to the user manual
For further technical information about the Kymera 328i go to andor.com/kymera
You can nd the latest user manuals on MyAndor (http://my.andor.com/login.aspx)
?
Refer also to your Solis software guide
1. Power on the Kymera 193i and wait until the
short start-up tone signals it has nished
system checks.
2. Start Solis.
Conguring Solis for the Kymera 193i
Camera Rear Panel Connections
Above: Rear panel shown for Newton camera.
Refer to camera User Guide. Connections may
vary with camera model.
I2CUSB
Shutter (BNC)
Accessory
Connector
(e.g. lter
wheel)
Left: Connection Panel of
the Kymera193i
Note: If your 193i is a dual exit system (model KYMERA193i-Bx), then you must loosen fully or remove the locking
grub-screw used during shipping to hold the ipper mirror in place.
Above Accessories are automatically detected and displayed in the
Solis software.
Power
Input
Power Switch
Flipper
mirror
locking
screw

Other Oxford Instruments Measuring Instrument manuals

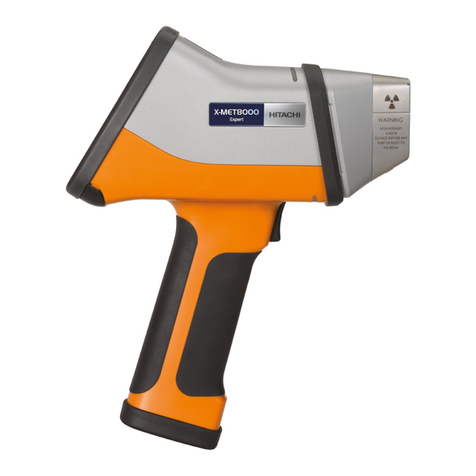
Oxford Instruments X-MET8000 Series User manual

Oxford Instruments

Oxford Instruments X-MET8000 Series User manual

Oxford Instruments ILM200 Service manual

Oxford Instruments

Oxford Instruments ILM200 Service manual

Popular Measuring Instrument manuals by other brands

Hanna Instruments HI 96769C instruction manual

Hanna Instruments

Hanna Instruments HI 96769C instruction manual

Rohde & Schwarz RT-ZS10L user manual

Rohde & Schwarz

Rohde & Schwarz RT-ZS10L user manual

ABB COPA-XM 3000 Series instruction manual

ABB

ABB COPA-XM 3000 Series instruction manual

PCB Piezotronics 3713B1230G Installation and operating manual

PCB Piezotronics

PCB Piezotronics 3713B1230G Installation and operating manual

Metria C602 Operation manual

Metria

Metria C602 Operation manual

GPI 01N31GM owner's manual

GPI

GPI 01N31GM owner's manual

Honeywell Sensepoint XCD RTD Technical manual

Honeywell

Honeywell Sensepoint XCD RTD Technical manual

LOVATO ELECTRIC DME D305T2 instruction manual

LOVATO ELECTRIC

LOVATO ELECTRIC DME D305T2 instruction manual

Viavi OneExpert CATV 630 Extended Quick Start Guide

Viavi

Viavi OneExpert CATV 630 Extended Quick Start Guide

Dynisco LMI5000 installation guide

Dynisco

Dynisco LMI5000 installation guide

Fluke 353 Specifications

Fluke

Fluke 353 Specifications

Phabrix PHABRIX Rx Operation manual

Phabrix

Phabrix PHABRIX Rx Operation manual

PCB Piezotronics IMI SENSORS ICP 607A01 Installation and operating manual

PCB Piezotronics

PCB Piezotronics IMI SENSORS ICP 607A01 Installation and operating manual

Ditel MICRA-NE Quick installation guide

Ditel

Ditel MICRA-NE Quick installation guide

Endress+Hauser SpectraSensors SS2100r Hardware manual

Endress+Hauser

Endress+Hauser SpectraSensors SS2100r Hardware manual

TOA-DKK HM-30P instruction manual

TOA-DKK

TOA-DKK HM-30P instruction manual

Delsy MG Digitalarcmeter quick start

Delsy

Delsy MG Digitalarcmeter quick start

Fluke 374 FC user manual

Fluke

Fluke 374 FC user manual

manuals.online logo
manuals.online logoBrands
  • About & Mission
  • Contact us
  • Privacy Policy
  • Terms and Conditions

Copyright 2025 Manuals.Online. All Rights Reserved.