Pacific Casual 5LGZ1159-NN User manual

USE AND CARE GUIDE
12ft. x10ft. Cabin Style Garden House
Questions, problems, missing parts? Before returning to the store,
call Pacic Casual Customer Service
7.30 a.m. - 4.30 p.m., PST, Monday - Friday
888-445-7757
Model #5LGZ1159-NN

2
Table of Contents
Safety Information
Warranty
Table of Contents........................................................2
Safety Information.......................................................2
Warranty ...................................................................... 2
One Year Frame and Fabric Limited Warranty............................ 2
Pre-Assembly ............................................................3
Planning Assembly... ................................................................3
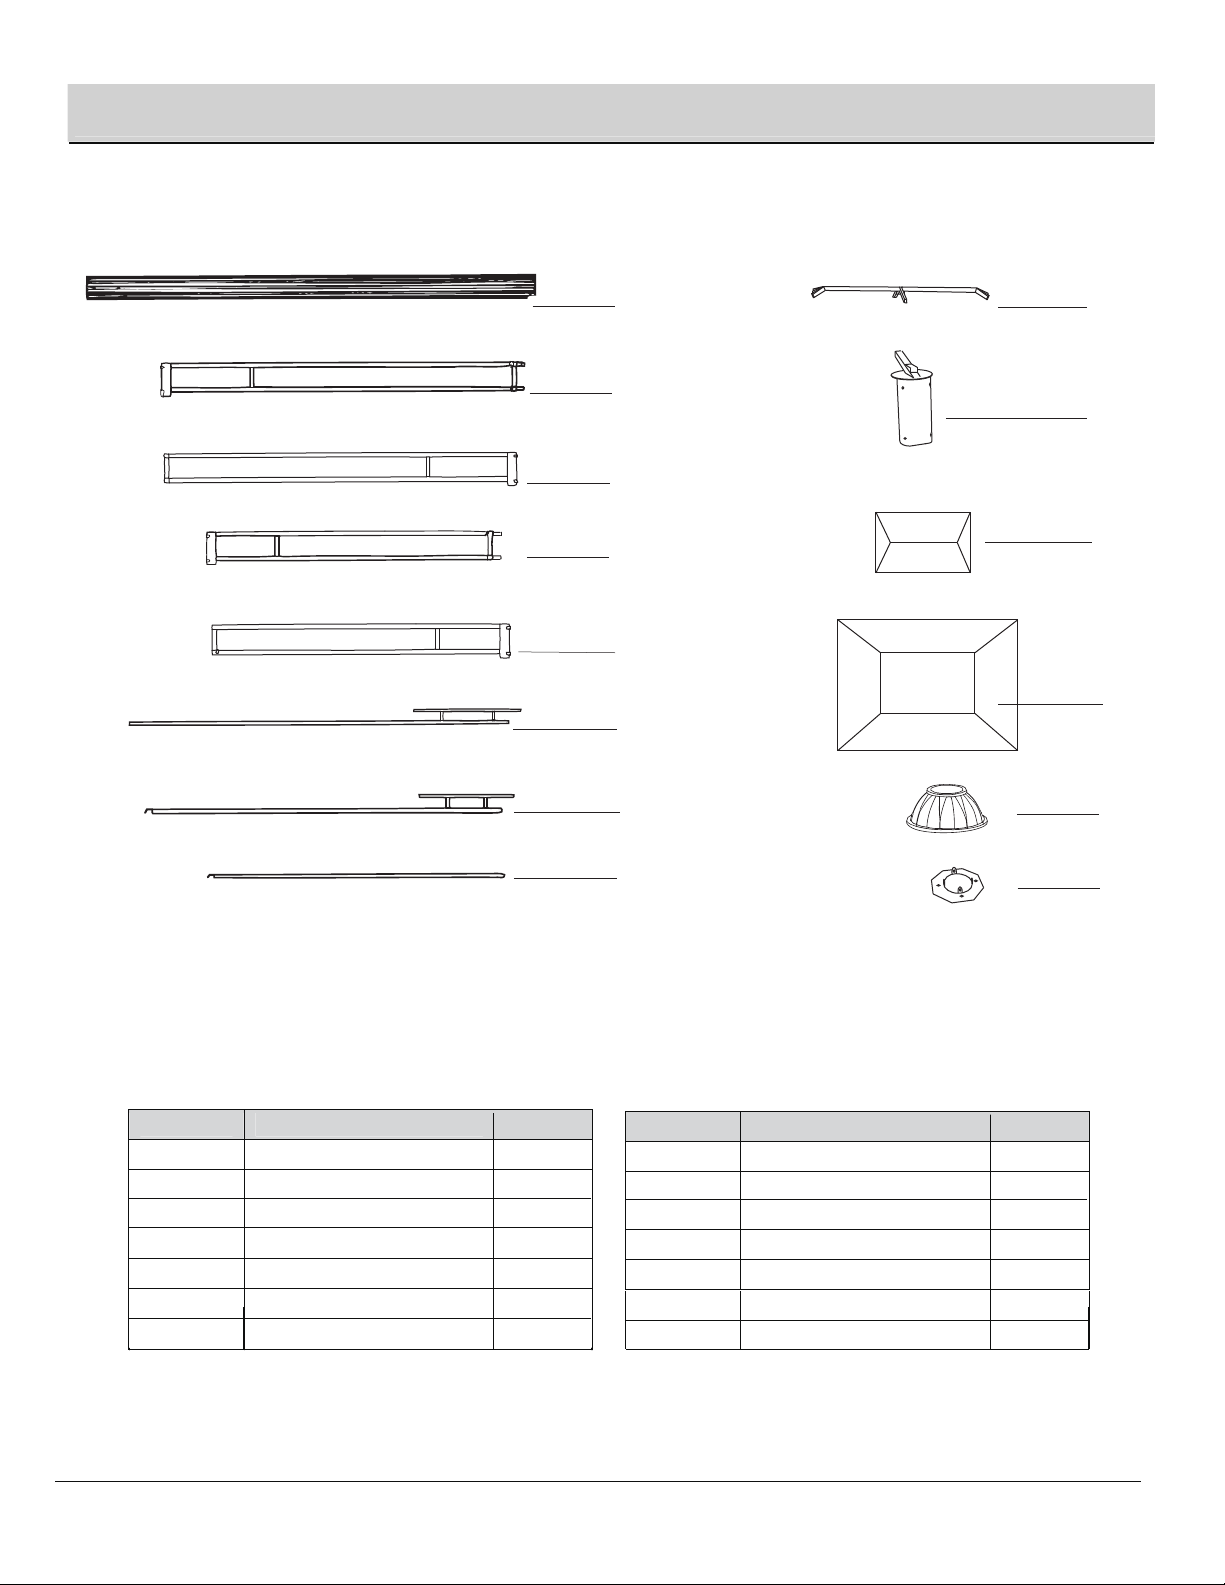
Hardware Included.................................................................. 3
Package Contents ....................................................................4
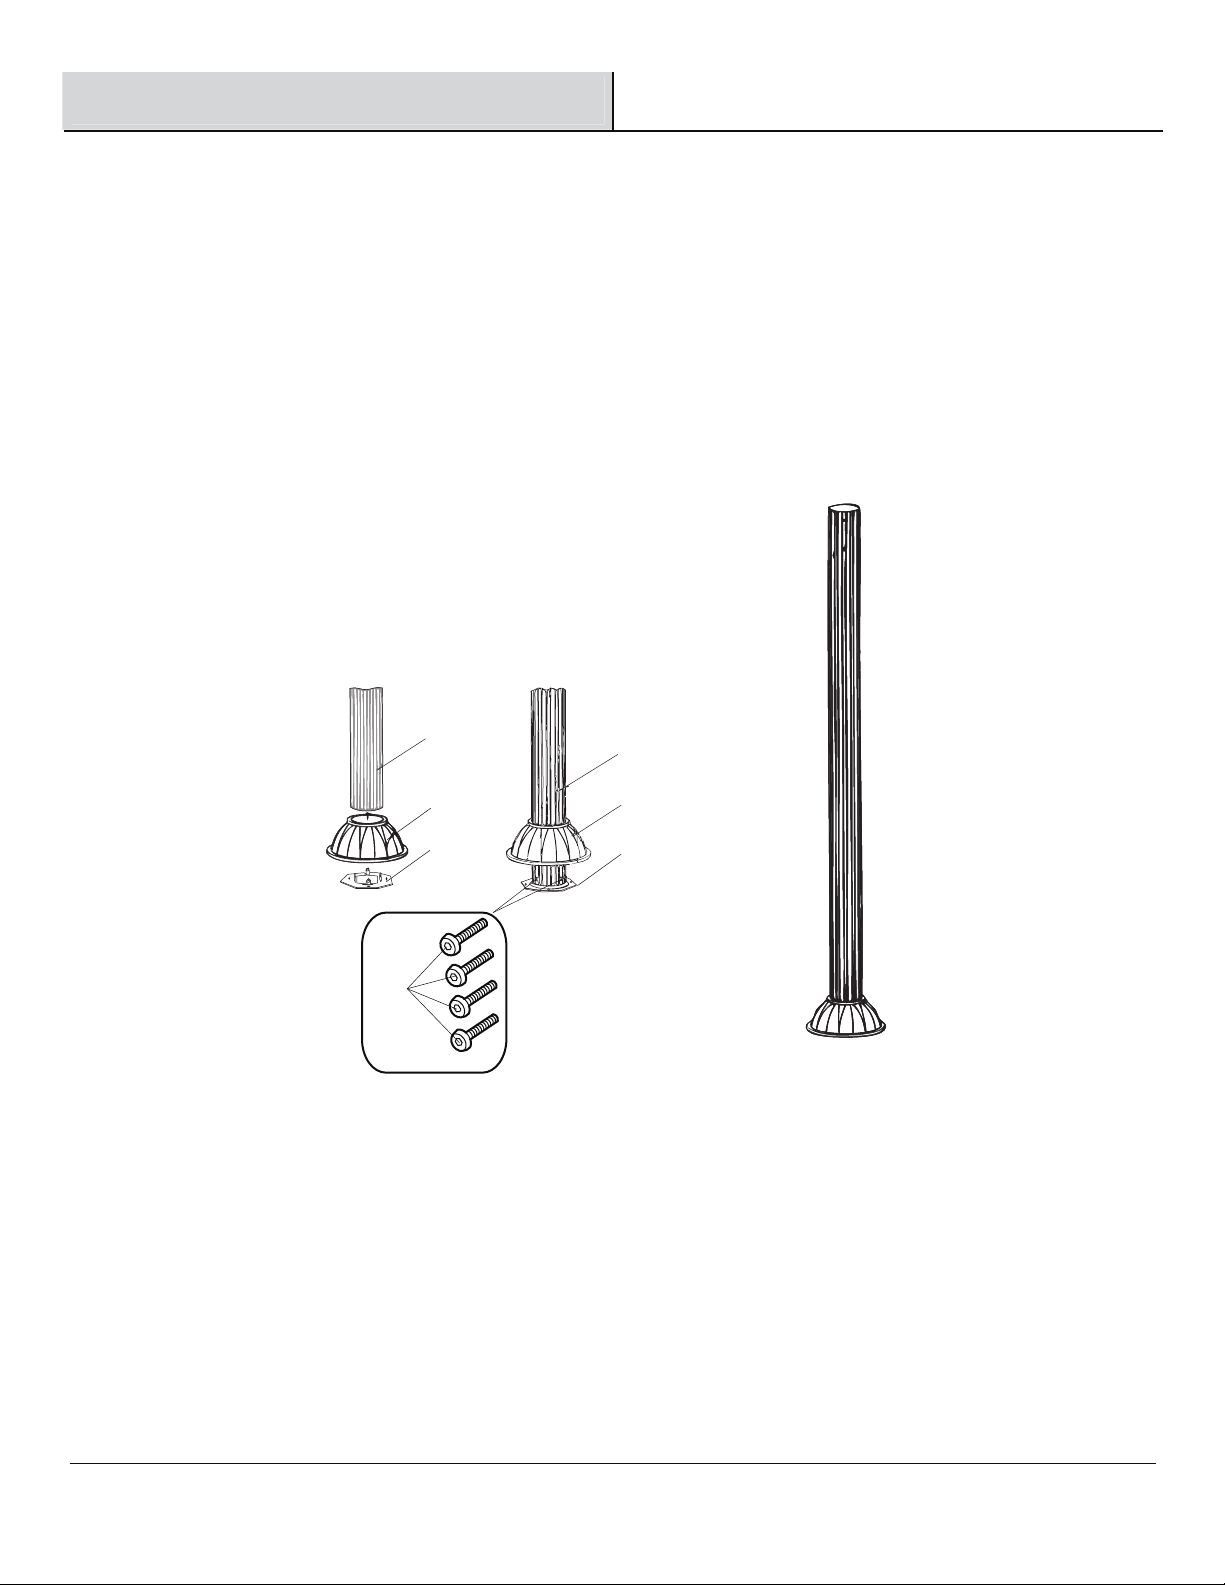
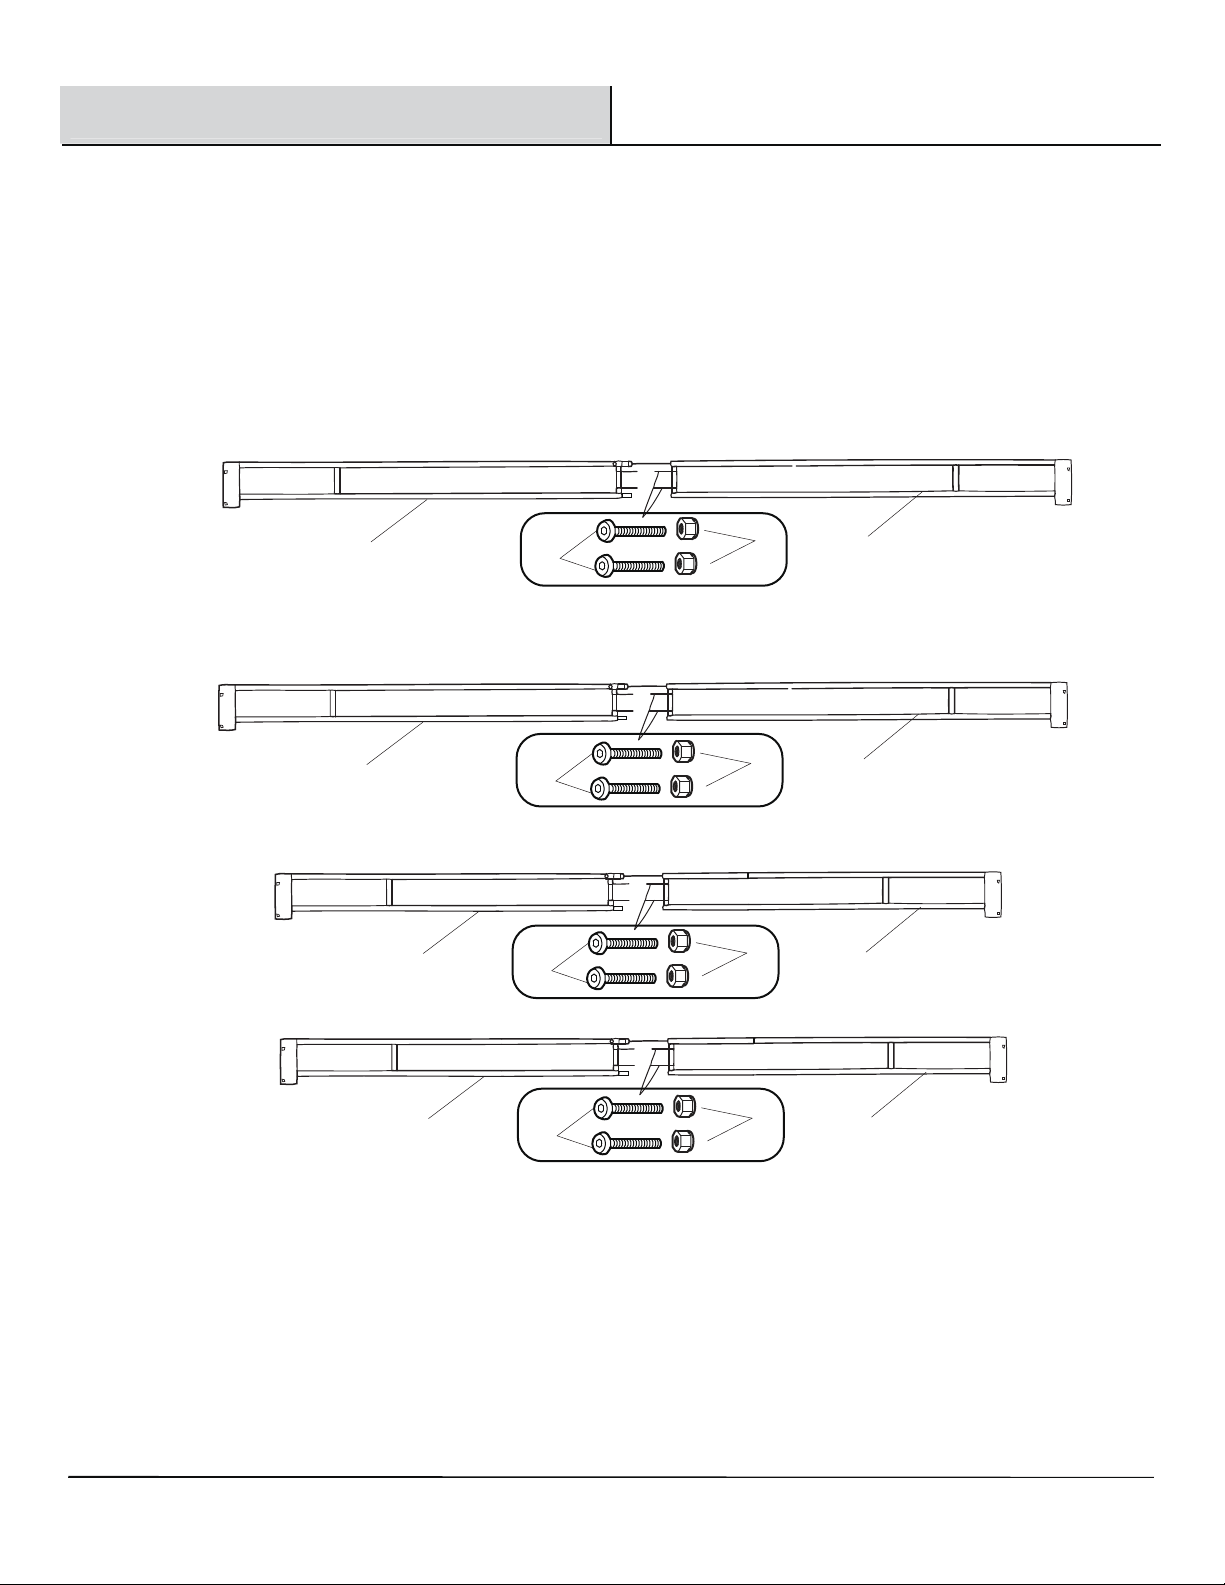
Assembly ....................................................................5
................................................................ 2
What Is Covered
What Is Not Covered ................................................................ 2..
.... ..
ONE YEAR FRAME AND FABRIC LIMITED WARRANTY
WHAT IS COVERED
WHAT IS NOT COVERED
It remains the customer’s responsibility for freight and packaging charges to and from our service center.
This warranty excludes the following: general frame rust, acts of nature (i.e. wind, rain, re or freeze);damage caused by improper assembly,
accident, disaster, misuse, abuse, negligence and commercial use; discolor on or fading of the nish or fabric as a result of exposure to the
elements.
You may contact our customer service department with any questions by phone at 888-445-7757 or email: CustomerService@PacicCasual.com.
Care Instructions
Before using, wipe with a clean, dry cloth. Do not use bleach or solvents. Treat the frame with one-step liquid wax for maximum protection
against UV light and salty, damp air. Wash the canopy with a mild solution of soap and water, rinse thoroughly, air dry completely.
Please properly tighten all hardware and perform periodic inspections during usage for cracked welds or loose nuts or bolts.
Care Instructions... ................................................................ 2..
WARNING: Keep all ame and heat sources away from this tent fabric. This tent is made with fabric that meets CPAI-84 specication for
ame resistance. It is not re proof. The fabric will burn if left in continuous contact with any ame source. The application of any foreign
substance to the tent fabric may render the ame-resistance properties ineffective.
WARNING: This garden house Gazebo is NOT a permanent structure and is designed for sunshade and privacy and must be used under
normal weather conditions. We recommend removal of the fabric canopy in windy conditions as gazebos catch wind similar to umbrellas. You
must however completely disassemble the unit prior to any severe weather conditions such as thunderstorm, hurricane, and/or heavy wind and
rain. Failure to remove the fabric canopy or disassemble the unit will cause the gazebo to have structure damage or even structural collapse.
CAUTION: Always install on level ground utilizing tie down cords and ground stakes. Do not permanently stake the garden house to concrete
concrete oor or wood deck.
CAUTION:Garden house fabrics are water resistant but not water proof and may leak during precipitation. Fabrics will fade from direct
exposure to sunlight.
CAUTION: Keep all children and pets away from assembly area.
Begin assembly not less than 6 feet from any obstruction such as fence, garage, house, overhanging branches, clothes line or electrical wires.
Some parts may contain sharp edges, wear protective gloves if necessary. At least two or more people are recommended for safe assembly.
Steel frames are warranted to be free from defects in material or workmanship for a period of one (1) year.
General rusting of steel products and frames as a result of exposure to the elements are not covered in this warranty.

3
Please contact 888-445-7757 for further assistance.
Pre-Assembly
PLANNING ASSEMBLY
HARDWARE INCLUDED
NOTE: Hardware not shown to actual size.
Part Description Quantity
AA Bolt (M6x16) 36
BB Bolt (M6x50) 8
CC 44
DD 8
1
HH
FF GG
Bolt cap
FF
Nut
EE
8
HH
Hex wrench
It will take two people about 30 minutes to complete the assembly process.
AA BB CC DD
EE
GG 4
Anchor 4
Guy rope
Ground stake
TOOLS REQUIRED (not included)
Adjustable wrench

4
Pre-Assembly(continued)
PACKAGE CONTENTS
Part Description Quantity
A
Right long beam
4
Post
2
C
4
D
Right short beam 2
E
Corner roof tube
2
F
Left short beam
2
Left long beam
G
2
Long midde roof tube 2
H
B
A
C
E
F
G
H
I
J
K
L
M
N
Part Description Quantity
I
Vent cover
1
Vent hub
1
K
4
L
Elephant foot 4
M
Post base
N
Main canopy
4
Corner bracket
1
J
Middle roof tube
B
D

5
Please contact 888-445-7757 for further assistance.
Assembly
1 Attaching the post bases and the elephant feet
□Slide the bottom of one post (A) into one elephant foot (M).
□Attach one post base (N) to the bottom of each post (A) with four bolts (AA) using hex wrench (FF). Drop the elephant foot (M) to cover
the post base (N).
□Repeat this for the remaining posts (A), elephant feet (M) and post bases (N).
A
M
N
A
M
N
AA

Assembly (continued)
6
2 Assembling beams
□Connect one left long beam (B) into one right long beam (C) and secure them with two bolts (BB) and two nuts (DD) using hex wrench (FF)
and adjustable wrench.
□Repeat this for the remaining long beams (B,C).
□Follow these same procedures for the short beams (D,E).
BB DD
BC
BB DD
BC
BB DD
DE
BB DD
DE

Assembly (continued)
7
3 Setting up the main frame
□Please have a free standing ladder ready for ease of assembly.
Please contact 888-445-7757 for further assistance.
□Use two bolts (AA) to attach the C side of the assembled long beams to the outside right corner post (A) and two bolts (AA) to attach the
B side of the assembled long beams to the outside left corner post (A). (See illustration below)
□Use two bolts (AA) to attach the E side of the assembled short beams to the outside right corner post (A) and two bolts (AA) to attach the
D side of the assembled short beams to the outside left corner post (A). (See illustration below)
□Repeat the above procedures until the frame is up. Fully tighten all bolts (AA) once frame is up.
BC
B
C
AA
A
A
JJ
J
AA
J
J
□Insert one bracket (J) into the top of each post (A), making sure that the four holes are properly aligned.
D
ED
E
A
A
IMPORTANT:
Do not completely tighten bolts (AA) until
the end of this step.

Assembly (continued)
8
4 Assembling the roof frame
□Snap four corner roof tubes (F) into the receivers F of the vent hub (I).
Snap two middle roof tubes (G) into the receivers G of the vent hub (I).
□Snap two middle roof tubes (H) into the receivers H of the vent hub (I).
G
G
F
F
H
F
F
H
G
F
F
F
F
H
H
□

Assembly (continued)
5 Attaching the roof frame
□With a person on the ladder inside the main frame, place the roof fame onto the main frame.
9
□Snap the bottom of corner roof tubes (F) into the brackets (J).
Please contact 888-445-7757
for
further assistance.
IMPORTANT:
Do not use bolts to x middle roof tubes (G) and (H) until the end of Step 6.
JF
FGF
BC
HH

6 Attaching the main canopy and the vent cover
□Identify the long side and the short side of the main canopy (L), cover the roof frame with the main canopy (L).
□Fully extend each corner of the main canopy (L) to cover the four corners of the frame.
Assembly (continued)
10
K
L
□Allow middle roof tubes (G,H) go through the holes in the middle of each side of the main canopy (L) using 4 bolts (AA) to attach
the middle roof tubes (G,H) onto the middle of completed side beams .
□Hook each corner of the canopy onto the corner posts (A). Cover the completed cross beams with valances of the main canopy
for a clean look.
□From inside of the frame place the vent cover (K) over the roof frame. Fully extend each corner of the vent cover (K) and insert the end
of each roof tube ( F& G) into each pocket.
AA
G
Hook the canopy
to the post
from inside.

Assembly (continued)
7 Anchoring the garden house
□Adjust the location of each post until all posts are standing comletely upright on level ground. Hammer two ground stakes (FF)
through the holes on each post base (N) into soft ground.
11
□Measure out from post to the longest possible distance to best use the length of the guy rope (GG) and secure anchor (HH) to ground
at 45 degress.
□Cover all boltss (AA and BB) with bolt cover (CC).
Please contact 888-445-7757 for further assistance.
M
FF
HH
45。
GG
N
GG CC

Questions, problems, missing parts? Before returning to the store,
callPacic Casual Customer Service
7.30 a.m. – 4.30 p.m., PST, Monday-Friday
888-445-7757
Retain this manual for future use.
Table of contents
Other Pacific Casual Garden House manuals
Popular Garden House manuals by other brands

X-METAL
X-METAL PLUS 13m2 Assembly instructions

HUTTON
HUTTON 8' x 6' - Security Shed Assembly instructions

Outdoor living today
Outdoor living today CB128-METAL Assembly manual

Rowlinson Garden Products
Rowlinson Garden Products BALTIC CHALET FRG28-4032-1FSC installation manual

Best Barns
Best Barns Hampton Assembly Book

Mercia Garden Products
Mercia Garden Products 01DTOVRA1006SDFW-V1 manual