palmOne 3207NA User manual

Taking Your First Trip with
GPS Navigator by palmOne
Lindbergh.book Page i Thursday, May 20, 2004 10:28 AM

ii GPS navigator by palmOne
Copyright and Trademark
© 2004 palmOne, Inc. All rights reserved.
palmOne, the palmOne logo, Zire, the Zire logo, Tungsten, the Tungsten logo,
HotSync, and Palm are among the trademarks or registered trademarks
owned by or licensed to palmOne, Inc. palmOne, Inc. uses the Bluetooth
wireless technology trademark under express license from Bluetooth SIG, Inc.
All other brand and product names are or may be trademarks of, and are used
to identify products or services of their respective owners.
Disclaimer and Limitation of Liability
palmOne, Inc. assumes no responsibility for any damage or loss resulting
from the use of this guide.
palmOne, Inc. assumes no responsibility for any loss or claims by third
parties which may arise through the use of this software. palmOne, Inc.
assumes no responsibility for any damage or loss caused by deletion of data
as a result of malfunction, dead battery, or repairs. Be sure to make backup
copies of all important data on other media to protect against data loss.
Please read the End User Software License Agreement
with this product before using the accompanying software program(s). Using
any part of the software indicates that you accept the terms of the End User
Software License Agreement.
IMPORTANT
PN: 406-10135-00
AN: 185-10056-00
Lindbergh.book Page ii Thursday, May 20, 2004 10:28 AM

GPS navigator by palmOne iii
Table of Contents
Introduction ...................................................................... 1
Setting Up the Hardware................................................. 2
Connecting the car charger ................................................................6
GPS receiver status lights and features .............................................8
Starting Navigator............................................................ 9
Using Navigator.............................................................. 11
Using the menu................................................................................ 12
Planning a route to a specific address .............................................. 13
The route summary ......................................................................... 19
Deviating from the planned route .................................................... 20
Points of interest .............................................................................. 20
Selecting which POI categories appear on maps .............................21
Showing or hiding points of interest ................................................22
Creating a list of favorites................................................................. 22
Turning the sound on and off ...........................................................23
Switching between day and night colors .........................................24
Requesting an alternative route .......................................................25
Browsing a map ...............................................................................26
Lindbergh.book Page iii Thursday, May 20, 2004 10:28 AM

iv GPS navigator by palmOne
Common Questions ....................................................... 29
Product Regulatory Information ................................... 33
Lindbergh.book Page iv Thursday, May 20, 2004 10:28 AM

Introduction
GPS navigator by palmOne 1
Introduction
Your GPS navigator by palmOne is a global positioning system that
provides detailed maps, route planning, and voice navigation to any
destination within the United States or Canada.
The GPS navigator by palmOne uses TomTom Navigator software
and maps. This guide tells you how to set up the hardware in your
car and get started using navigator.
Before you begin, make sure that you have
installed the TomTom Navigator software and maps on an expansion
card and activated the software so that it is ready to use. Refer to
Read This First for instructions.
For more detailed instructions on all functions, refer to the User
Guide provided on CD #1.
IMPORTANT
[!]
Lindbergh.book Page 1 Thursday, May 20, 2004 10:28 AM

Setting Up the Hardware
2 GPS navigator by palmOne
Setting Up the Hardware
After you install the TomTom Navigator software and maps onto an
expansion card and activate the software, follow these steps to set up
the device cradle and GPS receiver in your car.
For information on installing the software and maps, refer
to Read This First.
0
1 Snap the cradle firmly onto the cradle arm.
Continued
NOTE
Cradle arm
Cradle
Lindbergh.book Page 2 Thursday, May 20, 2004 10:28 AM
Setting Up the Hardware
Setting Up the Hardware
GPS navigator by palmOne 3
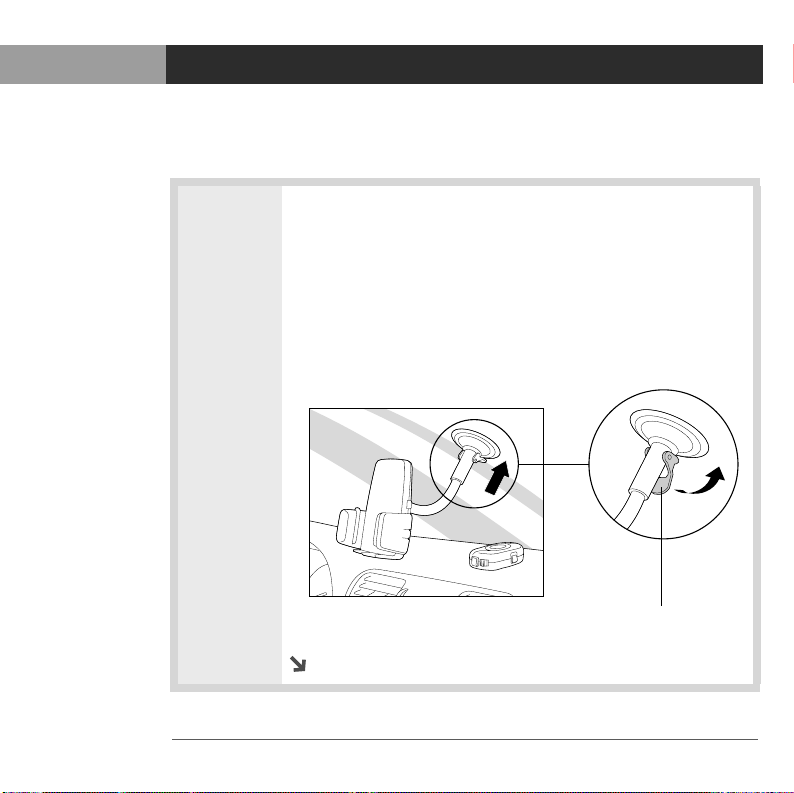
2 Attach the cradle arm to the windshield or dashboard.
Windshield attachment:
a. Moisten the suction cup and press it onto the
windshield.
b. Press down on the cradle arm lever to secure the
suction cup.
Continued
Press lever
Lindbergh.book Page 3 Thursday, May 20, 2004 10:28 AM
Setting Up the Hardware
Setting Up the Hardware
4 GPS navigator by palmOne
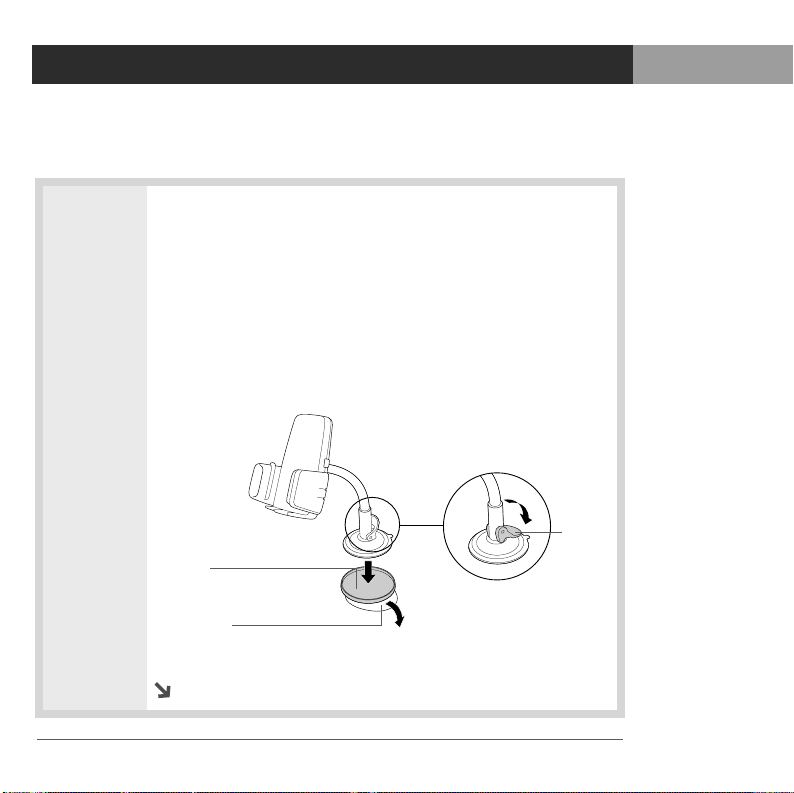
Cont’d Dashboard attachment:
a. Peel the backing off the pad and attach the pad to the
dashboard.
b. Moisten the suction cup and press it onto the
dashboard pad.
c. Press down on the cradle arm lever to secure the
suction cup.
Continued
Pad
Backing
Press
lever
Lindbergh.book Page 4 Thursday, May 20, 2004 10:28 AM
Setting Up the Hardware
Setting Up the Hardware
GPS navigator by palmOne 5
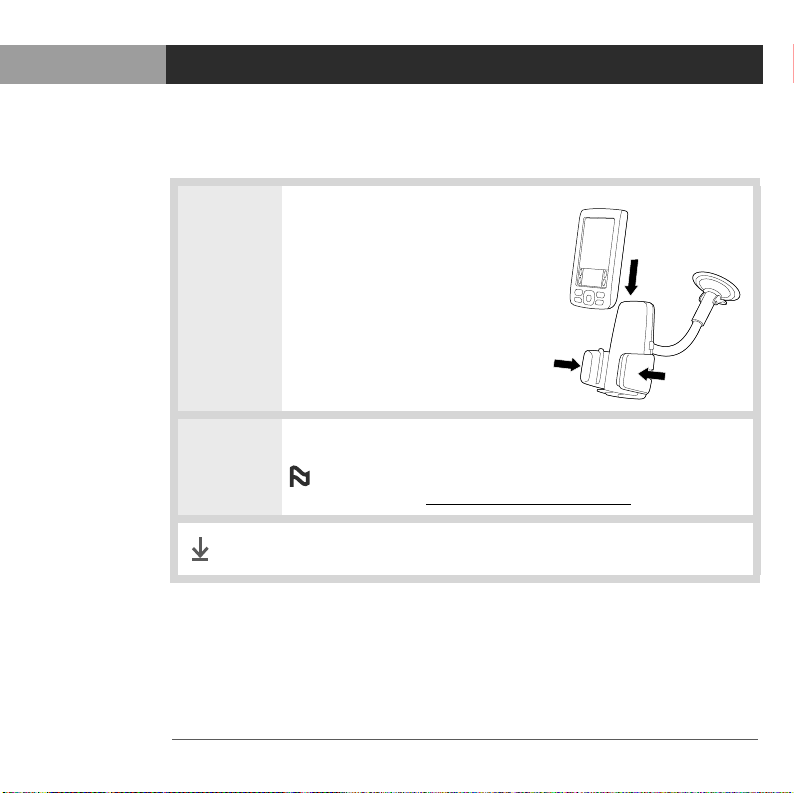
3 Place your device in the cradle
and adjust the cradle to
secure it.
4 Place the GPS receiver on the dashboard.
To charge the batteries in your device and the
GPS receiver, see Connecting the car charger.
Done That’s it. You are ready to start navigator.
NOTE
Lindbergh.book Page 5 Thursday, May 20, 2004 10:28 AM
Connecting the car charger
6 GPS navigator by palmOne
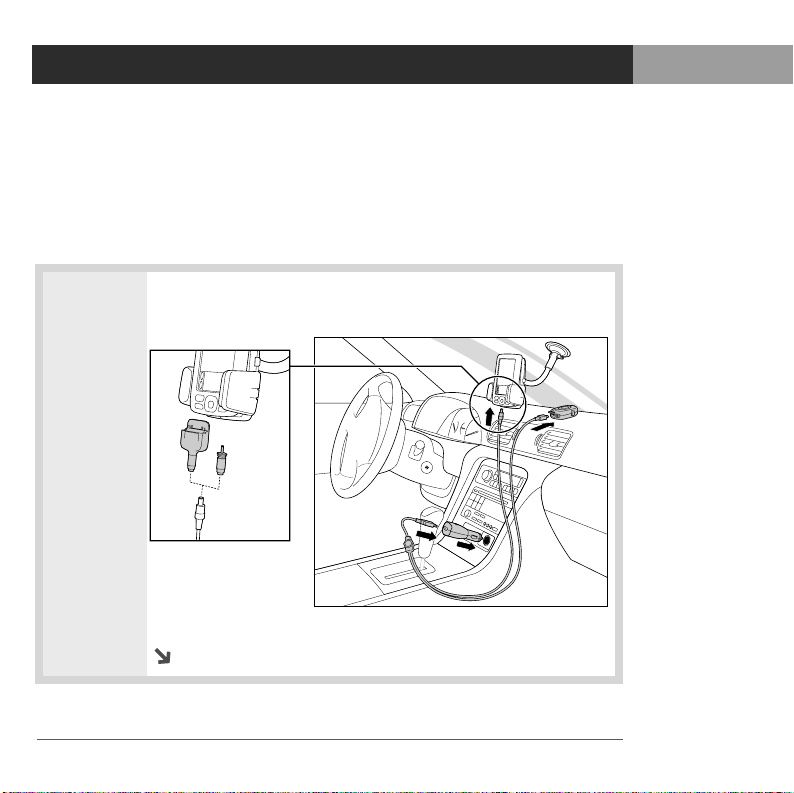
Connecting the car charger
It’s a good idea to connect the GPS receiver and your device to the
car charger. When batteries are low, the GPS receiver and device
cannot maintain a Bluetooth®connection.
0
1 Connect the appropriate cable adapter to your device.
Continued
Lindbergh.book Page 6 Thursday, May 20, 2004 10:28 AM
This manual suits for next models
2
Table of contents


