manuals.online logo
Brands
  1. Home
  2. •
  3. Brands
  4. •
  5. Panasonic
  6. •
  7. Camcorder
  8. •
  9. Panasonic AG-DVX100B User manual

Panasonic AG-DVX100B User manual

Other manuals for AG-DVX100B

4

Other Panasonic Camcorder manuals

Panasonic NV-RZ10B User manual

Panasonic

Panasonic NV-RZ10B User manual

Panasonic HC-V100M User manual

Panasonic

Panasonic HC-V100M User manual

Panasonic HX-WA2P Building instructions

Panasonic

Panasonic HX-WA2P Building instructions

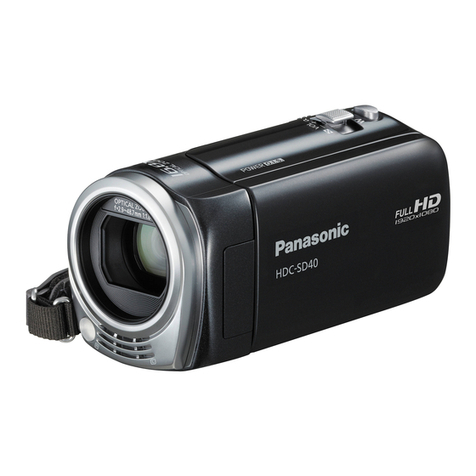
Panasonic HDC-SD40 User manual

Panasonic

Panasonic HDC-SD40 User manual

Panasonic NV-GS35GN User manual

Panasonic

Panasonic NV-GS35GN User manual

Panasonic VDR-D300GC User manual

Panasonic

Panasonic VDR-D300GC User manual

Panasonic NV-DS11EN User manual

Panasonic

Panasonic NV-DS11EN User manual

Panasonic SDR-H200P User manual

Panasonic

Panasonic SDR-H200P User manual

Panasonic PV-GS9PL User manual

Panasonic

Panasonic PV-GS9PL User manual

Panasonic AJ-HPX3000 User manual

Panasonic

Panasonic AJ-HPX3000 User manual

Panasonic NV-VS7B User manual

Panasonic

Panasonic NV-VS7B User manual

Panasonic AJD210 - DVCPRO(DIGITAL CAM R User manual

Panasonic

Panasonic AJD210 - DVCPRO(DIGITAL CAM R User manual

Panasonic AG-HMC71E User manual

Panasonic

Panasonic AG-HMC71E User manual

Panasonic NV-DX100EN User manual

Panasonic

Panasonic NV-DX100EN User manual

Panasonic HC-V160 User manual

Panasonic

Panasonic HC-V160 User manual

Panasonic AG-DVC7P User manual

Panasonic

Panasonic AG-DVC7P User manual

Panasonic AJHDC27H - DVCPRO HD CAMERA User manual

Panasonic

Panasonic AJHDC27H - DVCPRO HD CAMERA User manual

Panasonic HC-VX870 User manual

Panasonic

Panasonic HC-VX870 User manual

Panasonic AG-HPX371E User manual

Panasonic

Panasonic AG-HPX371E User manual

Panasonic NV VX 27 User manual

Panasonic

Panasonic NV VX 27 User manual

Panasonic HDC-TM700 User manual

Panasonic

Panasonic HDC-TM700 User manual

Panasonic NV-GS75EP User manual

Panasonic

Panasonic NV-GS75EP User manual

Panasonic NV-VX77A User manual

Panasonic

Panasonic NV-VX77A User manual

Panasonic HC-MDH2 Technical specifications

Panasonic

Panasonic HC-MDH2 Technical specifications

Popular Camcorder manuals by other brands

Vivitar DVR 830XHD owner's manual

Vivitar

Vivitar DVR 830XHD owner's manual

Sony HDR-AS10 operating guide

Sony

Sony HDR-AS10 operating guide

Canon FS1 instruction manual

Canon

Canon FS1 instruction manual

Sharp VL-H400S Operation manual

Sharp

Sharp VL-H400S Operation manual

Samsung VP-D6550 Owner's instruction book

Samsung

Samsung VP-D6550 Owner's instruction book

Sony Handycam HDR-FX1E operating instructions

Sony

Sony Handycam HDR-FX1E operating instructions

Sony Handycam HDR-FX1000 Specifications

Sony

Sony Handycam HDR-FX1000 Specifications

Naxa NDC-402 instruction manual

Naxa

Naxa NDC-402 instruction manual

LG L320-BN owner's manual

LG

LG L320-BN owner's manual

Vivitar DVR 865HD user manual

Vivitar

Vivitar DVR 865HD user manual

Toshiba CAMILEO Z100 user guide

Toshiba

Toshiba CAMILEO Z100 user guide

Canon RC 260 instructions

Canon

Canon RC 260 instructions

Sony Handycam DCR-DVD7E operating guide

Sony

Sony Handycam DCR-DVD7E operating guide

Brinno TimeLapse TLC200 user manual

Brinno

Brinno TimeLapse TLC200 user manual

JVC GR-SXM68AC Schematic diagram

JVC

JVC GR-SXM68AC Schematic diagram

MYDLINK DCS-6100LH Quick installation guide

MYDLINK

MYDLINK DCS-6100LH Quick installation guide

Sony video Hi8 Handycam CCD-TR555 operating instructions

Sony

Sony video Hi8 Handycam CCD-TR555 operating instructions

SECURECOM V-5014B installation guide

SECURECOM

SECURECOM V-5014B installation guide

manuals.online logo
manuals.online logoBrands
  • About & Mission
  • Contact us
  • Privacy Policy
  • Terms and Conditions

Copyright 2025 Manuals.Online. All Rights Reserved.

PANASONIC
AG-DVX100B
|b a s i c |
HOW TO
shoot like
a PRO
Is this thing on?
Easy-to-follow chart for successful sound
4
steps for
avoiding
overexposure
RULES
what’s
allowed,
what’s not
CLASS CURRICULUM FREE
Northwest Community Television
763.533.8196
www.nwct.org
over
Your best shoot ever!
A pre-production checklist
HELP!
7 common
problems
solved
CONTRIBUTOR
“In the DVX100B, you have
a tool respected by profes-
sional lmmakers around
the world. My hope is that
this manual enables you to
get past the buttons and
dials and focus on what
really matters—your story!”
Ben Watne, holding per-
haps the shortest stint as
studio manager in NWCT
history— seven months in
2006—put together this
curriculum as one of his
last assignments. We only
hope that his quick de-
parture from our hallowed
halls was not caused by this
strenuous exercise!
design Tamisha Touray
2
Policies
What’s allowed,
what’s not.
3
Checkout form
Lose it. Break it.
Buy it.
4
Power
DC or AC? You can’t
shoot without it!
5
Tape
Choosing, loading,
and recording on
the right tape.
15
Pre-production
checklist
Be prepared for
anything on shoot
day!
16
Talent release
Just in case—no one
likes being sued.
17
Default settings
Resetting default
menu settings just
might solve your
technical problems.
HELP!
Need to troubleshoot? Walk
through seven typical prob-
lems and their solutions.
SOUND
Everything you need to
know about selecting sound
inputs and setting and
monitoring audio levels.
Consult the easy-to-follow
chart for successful setup—
you’ll never have to ask “Is
this thing on?” again!
VIDEO IMAGE
Know how to determine
your dominant light source
and set the neutral density
lter, white balance, and
iris level. Then nd out
what zebras have to do
with video—zoos aren’t the
only place to nd them!
BETTER SHOOTING
Wonder how the pros do it?
All the basics and more are
covered.
MICROPHONES
NWCT has a variety of
microphones available for
checkout—all of which are
shown here. You’ll know
exactly which mic to use for
your taping situation.
on the cover
How to shoot like a pro
12
Is this thing on? Easy-to-
follow chart for successful
sound
7
4 steps for avoiding overex-
posure
10
Rules: what’s allowed, what’s
not
2
Your best shoot ever! A pre-
production checklist
15
Help! 7 common problems
solved
18
contents
6
10
12 18
8
¹
Portable camera policies
The purpose of these policies is to manage NWCT equipment in
a fair and equitable manner. Follow these rules and you’ll never
have to worry about losing your membership privileges!
1.
Only certied members are permitted to operate equipment
.
2. Members must be on time for appointments. You must call if you
are going to be more than 30 minutes late—if you are more than
60 minutes late, we will consider you a “no show” and give away
your equipment.
3. Cameras may be checked out for up to 48 hours.
4. Members may schedule cameras only two weekends per month.
5. Members may reserve only one camera at a time per event. If a
second camera is available at the time of checkout for the length
of time desired, it can be checked out.
6. Equipment may be reserved up to two months in advance.
7. NWCT staff must conrm all equipment is in proper working order
at the time of return. This takes approximately ten minutes—
members must be present.
8. Members must be 18 years of age to sign out equipment. A
parent or guardian must sign for equipment checked out to those
under age 18.
9. Members are responsible for the equipment and will be liable for
any loss or damage, normal wear and tear excepted.
10. All members using equipment and facilities will be expected to
produce a program for cablecast within six months.
x
Producing programs for
hire, advertisements,
commercials, obscene or
indecent programming,
lotteries, or personal and
family programs will not
be tolerated.
If you need to cancel your
appointment, please notify
the studio manager at least
24 hours in advance; un-
foreseen emergencies and
illnesses will be taken into
consideration. Please do not
rely on leaving a voicemail
message. Talk to a studio
manager whenever possible.
If cancellations are not made
24 hours in advance of your
scheduled time, become ex-
cessive, or if you are more
than 30 minutes late for your
appointment, you may be
subject to disciplinary ac-
tion as follows: rst offense,
verbal warning; second of-
fense, written warning; third
offense, suspension.
763.533.8196
CALL
NOW!
2
Equipment inventory and cost Portable camera 1 2 3 4 5 6 7
Name _______________________________ Drivers license # _____________________
Address _____________________________ City __________________ Zip _________
Phone (H) ____________________________ Cell _______________________________
Project description _______________________________________________________
________________________________________________________________________
____ AG-DVX100B camcorder $3995.00
____ Tripod mount and screw $40.00
____ AC power, adapter and cord $160.00
____ Lens cap $25.00
____ Operations manual (quick/full) $10.00
____ Portabrace camcorder case $275.00
Camcorder accessories
____ Panasonic CGA-D54 batteries $190.00
____ 25’ AC extension cord $10.00
____ XLR microphone cables $25.00
____ Headphones $10.00
Microphones
____ Electrovoice RE-10 HH mic $197.00
____ Sony lavalier microphone, clip, case $195.00
____ Wireless mic #____ (handheld/lav) $3000.00
____ Shotgun mic ($500)/boom ($800) $1300.00
____ Manfrotto 745B/501 tripod $385.00
____ Manfrotto tripod bag $65.00
____ Bogen 3254 dolly $245.00
Other:
__________________________________________
__________________________________________
__________________________________________
__________________________________________
__________________________________________
I assume full responsibility for this equipment and will be liable for damage or loss incurred while the equipment
is checked out to me. I understand the equipment must be returned at the agreed upon time and the equipment
cannot be used for commercial, money-making or personal use. I may be subject to suspension of community
television privileges or assessed a rental charge if the preceding rules are not followed.
White copy: Studio Yellow copy: CTV Manager Pink copy: Producer
Signature ______________________________________________________
NORTHWEST COMMUNITY TELEVISION PORTABLE CAMERA CHECKOUT FORM
____ Lowel light kit #____ $1225.00
Includes 3 Omni lights, 3 barndoors and screens,
3-16’ power cords, 3 Omni light stands, light case
____ Umbrella $40.00
____ Lampak $14.50
____ EKB spare bulbs $30.00
____ Rifa light kit #____ $950.00
Includes 1 Rifa Lite 55 with diffuser panel and bag,
1 Pro-light with barndoor and gel frame, 2-16’ power
cords, 2 light stands, light case
____ Lampaks (DP/ViP) $14.50
____ DP spare bulbs $20.00
____ ViP spare bulbs $ 28.00
Extras
____ Accessory bag $ 25.00
____ Tri-RCA cable $ 15.00
____ Monitor $ 100.00
____ Mic stands (desktop/oor) $ 25.00
____ Power strip $7.00
__________________________________________
__________________________________________
__________________________________________
__________________________________________
__________________________________________
Checkout date/time: ___________________ Check in date/time: __________________
Staff initials:
Call 763.533.8196 x293 if you’re going to be late.
Su 12:30-6:30pm | M-Th 8:30am-11pm | F-Sa 8:30am-5:30pm
Staff initials:
— VOLUNTEERS COMPLETE THE SHADED AREA — VOLUNTEERS COMPLETE THE SHADED AREA —
763.533.8196
Portable camera checkout form
3
Battery life
The battery should
last approximately
200–300 minutes.
Remaining battery
life can be read on
the LCD viewnder.
Power DC AND AC
DC POWER
12
3
ò
1
2
3
õ
Removing the battery
To remove the battery, FIRST TURN OFF THE CAMERA.
Then lift up the viewnder, push in the battery release but-
ton, and pull up on the battery.
AC POWER
To use AC power,

plug the AC cable into the AC adapter.

Plug the DC cable
into the AC adapter and

attach the at end of the DC adapter to the back of
the camera in the same way the battery is attached.
Attaching the battery
To attach the battery,

lift up the viewnder,

place the top of the battery
just under the battery release button, and

push down—the battery will click
into place.
4
Recharging
batteries
The battery can be
recharged using
the AC power unit
provided with the
camera. The DC
cable must be dis-
connected in order
for the battery to
charge.
Fully recharging
the battery takes
approximately 300
minutes.
321
Tape CHOOSING, LOADING, RECORDING
Choosing the right tape
Use only miniDV tapes bearing this logo in the camera. Avoid Maxell and
TDK brand tapes as they can clog the heads of our camcorders and VCRs.
Record inhibit
switch
Before recording,
check that the
record inhibit switch
is set to the record
position. If the
switch is set to the
save position, re-
cording on the tape
will be impossible.
NOTE: Use the
record inhibit switch
after recording to
prevent careless
tape errors.
Loading the tape
Press the blue eject
switch on the top of the
camera to open the cas-
sette cover.
Recording to tape
Record at least 15 seconds on your tape before recording anything important.
Record an additional 15-30 seconds after you’ve recorded your last scene. Do-
ing this will help you capture your video with a nonlinear editor.
Avoid removing the tape in the middle of a shoot as
this can create timecode breaks in the tape. If you
must remove a tape in the middle of shooting, do
the following when you reinsert it:
  Switch the camera to VCR mode.

  Press the END SEARCH button. The camera will
locate the end of the last scene recorded.
  Switch back to CAMERA mode and continue
shooting.
IMPORTANT: Press PUSH on the cassette holder to close it. Do not close the
cassette cover without closing the cassette holder rst! Doing so will
damage the camera. Once the cassette holder has nished moving, close the
cassette cover. To remove the tape, follow the same procedure.
When the cassette cover
is fully open, the cas-
sette holder will open
automatically.
Insert the tape as
shown.
1
cassette cover
2
3
2
3
1
cassette holder
5
Sound IS THIS THING ON?
Selecting sound inputs
Two sources of audio can be recorded to the camera simultaneously.
Sound can be gathered from the camera’s internal microphone, an
external microphone, a line level source such as an audio mixing
board or CD player, or any combi-
nation of two of those sources.
Routing audio signals is controlled
by two switches behind the LCD
panel and two switches on the
front of the camera.
Setting the audio level
To set an appropriate audio level, use the AUDIO dials on the side of
the camera. The CH 1 dial controls the level for the source selected
with the CH 1 SELECT switch and the CH 2 dial controls the level for
the source selected with the CH 2 SELECT switch.
Two switches behind LCD panel Two switches on front of camera
Monitoring the audio level
Use the audio meter on the viewnder to monitor the audio levels.
Adjust the AUDIO dials so that the loudest sounds register just below
the red zone. If you’re seeing a lot of red in the meters, adjust the
AUDIO dials to lower the input level.
To monitor audio quality, plug headphones into the headphone jack
on the back of the camera. You can control the headphone volume
by pushing the - AUDIO MON\VAR + buttons. NOTE: Changing your
headphone volume will not change the audio levels going to tape.
Always use the audio meter to judge appropriate levels.
Easy-to-follow audio setup chart on next page
6
Audio setup chart
INPUT jacks and CH 1 SELECT and CH 2
Audio source INPUT settings SELECT settings Audio records on
Internal microphone
External microphone
External line level source
Two external sources
One external source and
built in microphone on
camera
N/A
INPUT 2 jack
INPUT 2: MIC
INPUT 2 jack
INPUT 2: LINE
INPUT 1 and INPUT 2 jacks
INPUT 1: LINE or MIC
INPUT 2: LINE or MIC
INPUT 1 jack
INPUT 1: LINE or MIC
CH 1 SELECT: INT(L)
CH 2 SELECT: INT(R)
CH 1 SELECT: INPUT 2
CH 2 SELECT: INPUT 2
CH 1 SELECT: INPUT 2
CH 2 SELECT: INPUT 2
CH 1 SELECT: INPUT 1
CH 2 SELECT: INPUT 2
CH 1 SELECT: INPUT 1
CH 2 SELECT: INT(R)
CH 1: Built in mic
CH 2: Built in mic
CH 1: External mic
CH 2: External mic
CH 1: Line level source
CH 2: Line level source
CH 1: Input 1
CH 2: Input 2
CH 1: Input 1
CH 2: Built in mic
7
Microphone selection
Northwest Community Television has several different types of mics available.
Desktop and oor mic stands are available for checkout.
OTHER MICS
Electro-Voice 635A
handheld
Omnidirectional, good
for inexperienced inter-
viewers, ne for music
and ambient sound
gathering
Shure SM58 handheld
Unidirectional vocal mi-
crophone
Lectrosonics M185
wireless
Fixed frequency VHF
receiver works with ei-
ther lavalier or handheld
transmitter, range of
50+ feet, good for pro-
ductions requiring free-
dom of movement
Realistic PZM
(Pressure Zone Mic)
Surface mount mic,
omnidirectional, very
low prole, excellent for
pianos, drums, large
vocal or instrumental
groups, or stage perfor-
mances
Shotgun
Directional, great for
capturing sound at a
distance, also available
with boom pole and
Zeppelin
STANDARD ISSUE
These two microphones come standard with every
portable camera.
Electro-Voice RE10 handheld
Unidirectional, excellent for music or interviews,
slightly better bass response than 635A
Sony ECM 44 or Sony ECM 30 lavalier or lapel
Directional, excellent for interviews when clipped
directly to clothing, small enough to easily hide on
location
P
I
C
K
U
P
P
A
T
T
E
R
N
S
8
OMNI-
UNI-
9
Notes