2
Contents
Information
for
Your
Safety
.........ccconcccccnncccnnonaccncnonacononanacinonaraconanicinnonos
PESC
AUT
He
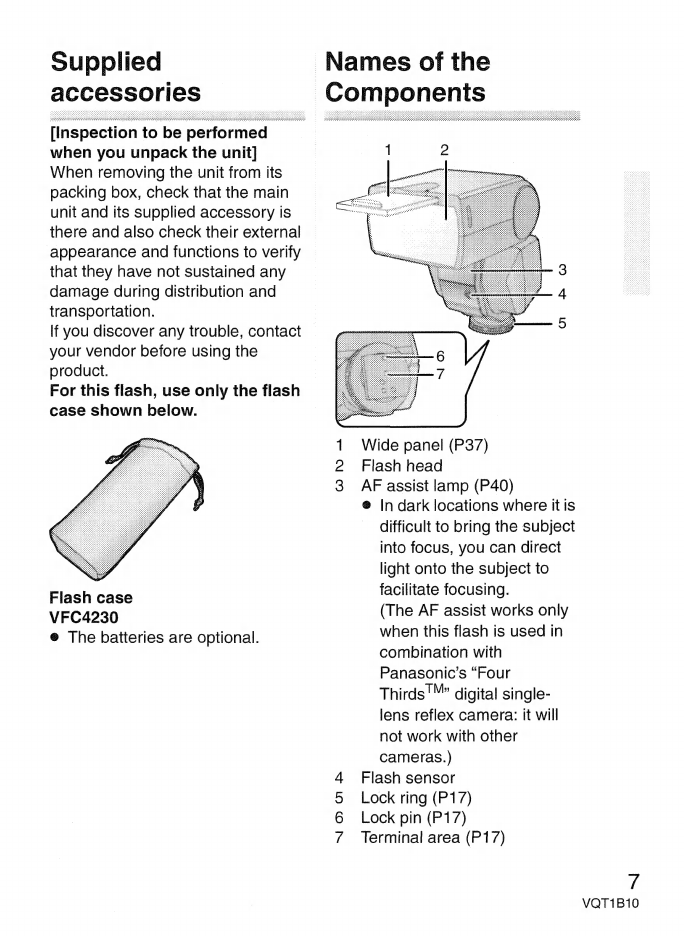
SUPDNEd:ACCESSONES:
as
Names
of
the
Components
..................
essen
enne
nnns
Displays
Appearing
on
the
Display
Panel
..........................
eee
Concerning
the
batteries
1...
etre
ie
dieere
dua
rana
ME
e
vn
ae
Inserting
and
Removing
the
Unit's
Batteries
(optional)
.........................
Checking
the
Flash's
Remaining
Battery
Charge
...........................
Mounting
the
Unit
onto
the
Digital
Camera,
and
Removing
it
...............
Taking
Pictures
using
a
Digital
Camera
with
Communication
FUNCIONS
A
A
ETS
Cee
ee
ee
Se
ee
How
to
select
the
flash
mode
........ooccccoccccccnooconccnorocoonaronnanancnnnancnnnns
PAU
TO):
TERR
D
O
MA
ic
T
MANUAL
cr
Eee
PN
Oi
ceca
cm
IFP-MANDALI
a
E
Mod
ated
a
mated
bus
ura
ON
T
RO
UIN
ME
Taking
Pictures
using
a
Digital
Camera
without
Communication
FUNCION
oeae
T
ia
eens
How
to
select
the
flash
mode
.......ooccoocconcccoccnoncnonononnnononinnorccnananonnono
AUTO
adiens
tbituin
A
MU
LU
VUE
MANUAL
a
ea
OIRer
ABDIICalOnS:
ea
laica
Taking
pictures
with
bounce
lighting
.................ccccoocccncnonaconononccnonanos
Taking
pictures
at
close
range
......cooccccoccnconcnnconconenaconnorinnonononnaronanoss
Selecting
the
lighting
angle
manually
...............................
eee
How
to
use
the
Wide
Panel
.......................
eese
Many
choices
for
different
flash
photography
applications
..............
FUNCIONS
PER
Concerning
Continuous
Firing
...................
ees
oe:
.
Table
of
Guide
Numbers
(GN)
................
essen
nnns
Troubleshooting
dea
Cauttóns-for
USO
siria
Specifications
idas
O
Limited
Warranty
a
a
Spanish
Quick
Use
Guide/Guía
rápida
en
español
...............................
VQT1B10