If the workgroup of the destination PC has been changed from
the standard setting, you also need to change the setting of this
unit in [PC Connection].
Select [Via Network].
Install “PHOTOfunSTUDIO” to the PC.
For details on hardware requirements and installation,refer to
“Owner’s Manual for advanced features” (PDF).
Create a folder that receives images with “PHOTOfunSTUDIO”.
To create the folder automatically, select [Auto-create]. To
specify a folder, create a new folder, or set a password to the
folder, select [Create manually].
For details, refer to the operating instructions of
“PHOTOfunSTUDIO” (PDF).
Select [Properties], then enable sharing of the folder.
For details, refer to the operating instructions of your PC or Help
on the operating system.
Select a folder you intend to use for receiving, then right-click.
Enable sharing of the folder.
For details, refer to the operating instructions of your PC or Help
on the operating system.
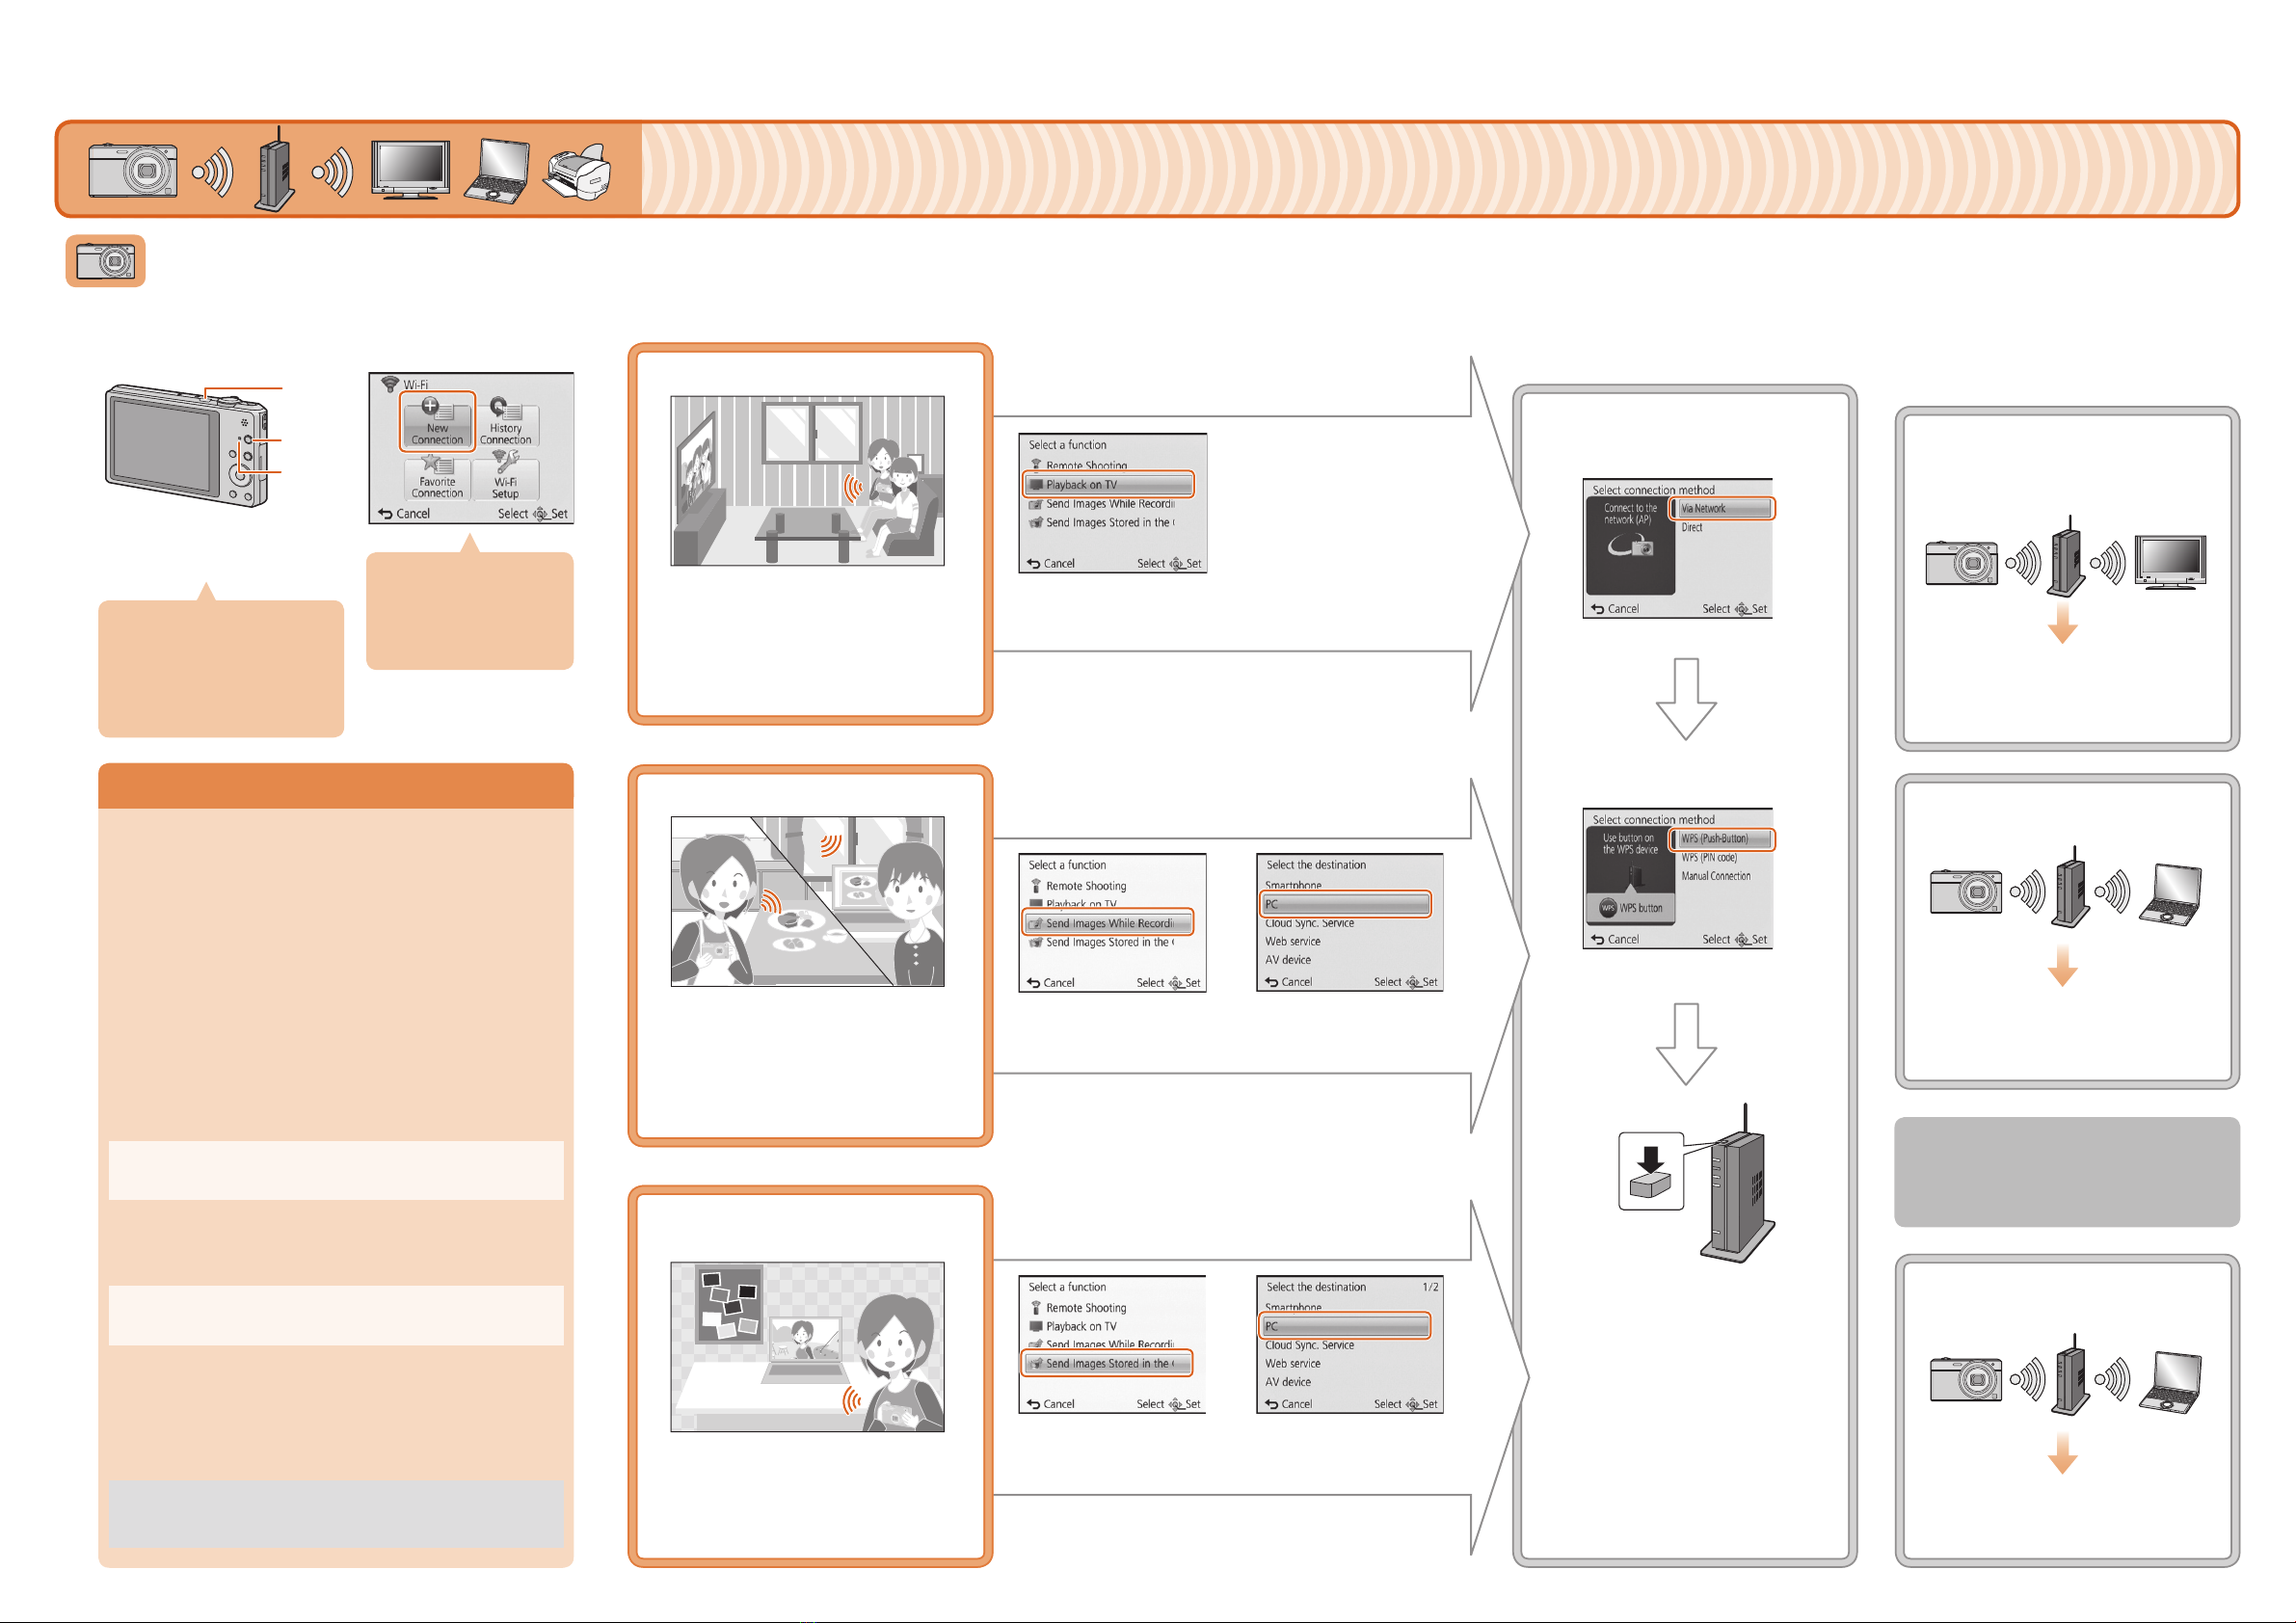
Operation on the camera
Connecting via a wireless
access point
You can also connect your device
to the camera directly without using
a wireless access point.
Please refer to “Owner’s Manual
for advanced features” (PDF) for
details.
Operate the camera
(according to the intended
purpose).
Select the connection
method.
Select the desired option.Select [New
Connection].
Turn on the
Wi-Fi function.
54321
You can display recorded pictures on
a DLNA-compatible TV.
For details, refer to the operating
instructions of your TV.
Every time you take a picture, the
picture can be automatically sent to a
smartphone/tablet or PC.
Prepare folders for receiving images
on the PC before sending a picture
to the PC.
You can select and send recorded
images to a smartphone/tablet or PC.
Prepare folders for receiving images
on the PC before sending a picture
to the PC.
Select the device you want to
connect to.
When the connection is established,
the screen is displayed.
Take or play back pictures on the
camera.
Motion pictures cannot be displayed
on the TV.
Playback on TV
Send Images While Recording
Send Images Stored in the
Camera
Select [Playback on TV].
Select [WPS (Push-Button)].
Press and hold the
wireless access point
WPS button until it
switches to WPS Mode.
Select [Send Images
While Recording].
Select [Send Images
Stored in the Camera].
Connecting the camera to a TV or PC etc. via a wireless access point
One of the connection methods is shown as an example.
Please refer to “Owner’s Manual for advanced features”
(PDF) for details.
Select [PC].
Select [PC].
Example:
Select the PC you want to connect
to and the destination folder.
Take pictures on the camera.
The pictures are sent automatically
after taking them.
Folders sorted by the sent date are created in the
specified folder, and pictures are saved in those
folders.
If the screen for a user account and password
entry appears, enter the one you set on your PC.
Preparing folders for receiving images
Prepare folders for receiving images on the PC before sending a
picture to the PC.
Create a PC user account [account name (up to 254 characters)
and password (up to 32 characters)] consisting of alphanumeric
characters. An attempt to create a receive folder may fail if the
account includes non-alphanumeric characters.
When using “PHOTOfunSTUDIO”
When not using “PHOTOfunSTUDIO”
(For Windows)
Supported OS: Windows XP/Windows Vista/Windows 7/Windows 8
Example: Windows 7
(For Mac)
Supported OS: OS X v10.4 to v10.8
Example: OS X v10.8
Select a folder you intend to use for receiving, then click on the
items in the following order.
[File] →[Get Info]
Example: Connecting to the TV
Example: Sending to the PC
Example: Sending to the PC
You can select the setting
you used before from [History
Connection].
Please refer to “Owner’s
Manual for advanced
features” (PDF) for details.
1
1
1
2
2
2
Press camera [ON/OFF]
button.
Press [Wi-Fi].
Make sure the Wi-Fi connection
lamp is lit blue.
Lit blue:
The Wi-Fi connection is on standby
Blinking blue:
Sending/receiving data through the
Wi-Fi connection
Select the PC you want to connect
to and the destination folder.
Select [SINGLE] or [MULTI], and
then select and send images.
Example: Connecting with [WPS
(Push-Button)].
DMC-SZ9VQC9260WiFiGuideeng.indd2DMC-SZ9VQC9260WiFiGuideeng.indd2 2012/12/1215:32:472012/12/1215:32:47


