manuals.online logo
Brands
  1. Home
  2. •
  3. Brands
  4. •
  5. Panasonic
  6. •
  7. Drill
  8. •
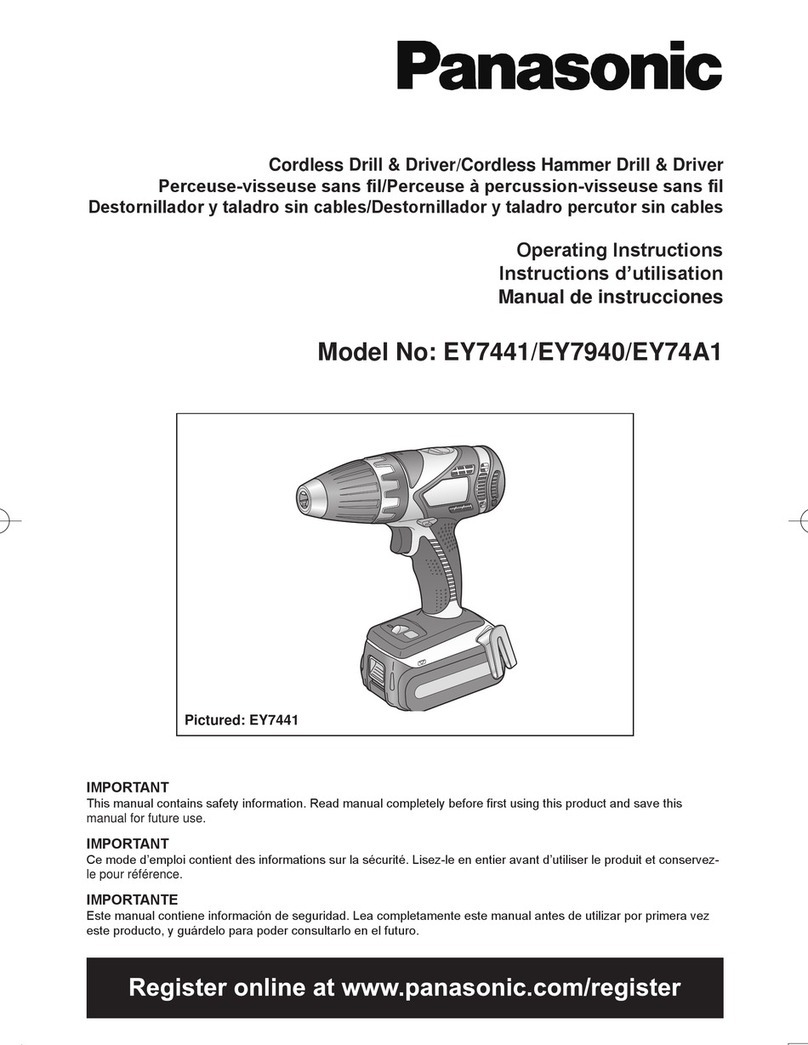
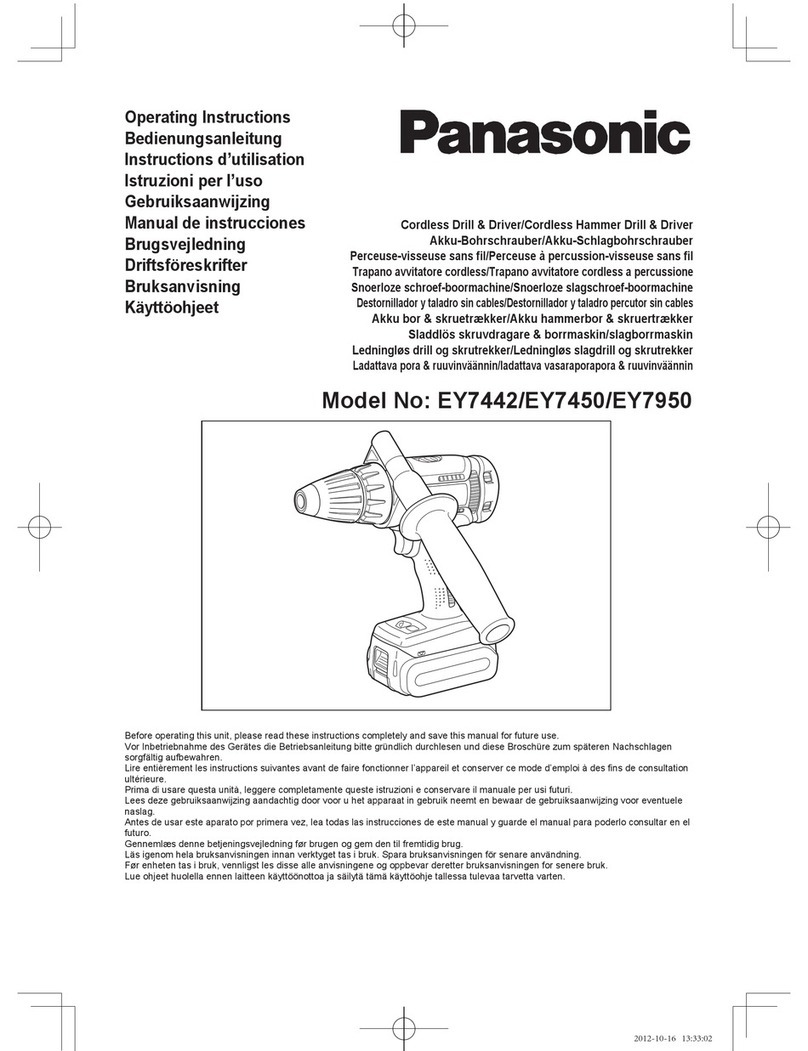
  9. Panasonic EY7441 User manual

Panasonic EY7441 User manual

Operating Instructions
Bedienungsanleitung
Instructions d’utilisation
Istruzioni per l’uso
Gebruiksaanwijzing
Manual de instrucciones
Brugsvejledning
Driftsföreskrifter
Bruksanvisning
Käyttöohjeet
ɂɧɫɬɪɭɤɰɢɹɩɨɷɤɫɩɥɭɚɬɚɰɢɢ
,ɧɫɬɪɭɤɰLɹɡɟɤɫɩɥɭɚɬɚɰɿʀ
Cordless Drill & Driver/Cordless Hammer Drill & Driver
Akku-Bohrschrauber/Akku-Schlagbohrschrauber
3HUFHXVHYLVVHXVHVDQV¿O3HUFHXVHjSHUFXVVLRQYLVVHXVHVDQV¿O
7UDSDQRDYYLWDWRUHFRUGOHVV7UDSDQRDYYLWDWRUHFRUGOHVVDSHUFXVVLRQH
Snoerloze schroef-boormachine/Snoerloze slagschroef-boormachine
'HVWRUQLOODGRU\WDODGURVLQFDEOHV'HVWRUQLOODGRU\WDODGURSHUFXWRUVLQFDEOHV
$NNXERUVNUXHWUNNHU$NNXKDPPHUERUVNUXHUWUNNHU
Sladdlös skruvdragare & borrmaskin/slagborrmaskin
/HGQLQJO¡VGULOORJVNUXWUHNNHU/HGQLQJO¡VVODJGULOORJVNUXWUHNNHU
/DGDWWDYDSRUDUXXYLQYllQQLQODGDWWDYDYDVDUDSRUDSRUDUXXYLQYllQQLQ
Ʉɨɦɛɢɧɢɪɨɜɚɧɧɵɣɚɤɤɭɦɭɥɹɬɨɪɧɵɣɩɟɪɮɨɪɚɬɨɪɲɭɪɭɩɨɜɟɪɬ
Ʉɨɦɛɿɧɨɜɚɧɢɣɚɤɭɦɭɥɹɬɨɪɧɢɣɩɟɪɮɨɪɚɬɨɪɲɭɪɭɩɨɜɟɪɬ
Model No: EY7441/EY7940
%HIRUHRSHUDWLQJWKLVXQLWSOHDVHUHDGWKHVHLQVWUXFWLRQVFRPSOHWHO\DQGVDYHWKLVPDQXDOIRUIXWXUHXVH
9RU,QEHWULHEQDKPHGHV*HUlWHVGLH%HWULHEVDQOHLWXQJELWWHJUQGOLFKGXUFKOHVHQXQGGLHVH%URVFKUH]XPVSlWHUHQ1DFKVFKODJHQ
VRUJIlOWLJDXIEHZDKUHQ
/LUHHQWLqUHPHQWOHVLQVWUXFWLRQVVXLYDQWHVDYDQWGHIDLUHIRQFWLRQQHUO¶DSSDUHLOHWFRQVHUYHUFHPRGHG¶HPSORLjGHV¿QVGHFRQVXOWDWLRQ
XOWpULHXUH
3ULPDGLXVDUHTXHVWDXQLWjOHJJHUHFRPSOHWDPHQWHTXHVWHLVWUX]LRQLHFRQVHUYDUHLOPDQXDOHSHUXVLIXWXUL
/HHVGH]HJHEUXLNVDDQZLM]LQJDDQGDFKWLJGRRUYRRUXKHWDSSDUDDWLQJHEUXLNQHHPWHQEHZDDUGHJHEUXLNVDDQZLM]LQJYRRUHYHQWXHOH
QDVODJ
$QWHVGHXVDUHVWHDSDUDWRSRUSULPHUDYH]OHDWRGDVODVLQVWUXFFLRQHVGHHVWHPDQXDO\JXDUGHHOPDQXDOSDUDSRGHUORFRQVXOWDUHQHO
IXWXUR
*HQQHPOVGHQQHEHWMHQLQJVYHMOHGQLQJI¡UEUXJHQRJJHPGHQWLOIUHPWLGLJEUXJ
/lVLJHQRPKHODEUXNVDQYLVQLQJHQLQQDQYHUNW\JHWWDVLEUXN6SDUDEUXNVDQYLVQLQJHQI|UVHQDUHDQYlQGQLQJ
)¡UHQKHWHQWDVLEUXNYHQQOLJVWOHVGLVVHDOOHDQYLVQLQJHQHRJRSSEHYDUGHUHWWHUEUXNVDQYLVQLQJHQIRUVHQHUHEUXN
/XHRKMHHWKXROHOODHQQHQODLWWHHQNl\WW||QRWWRDMDVlLO\WlWlPlNl\WW|RKMHWDOOHVVDWXOHYDDWDUYHWWDYDUWHQ
ɉɟɪɟɞɷɤɫɩɥɭɚɬɚɰɢɟɣɞɚɧɧɨɝɨɭɫɬɪɨɣɫɬɜɚɩɨɠɚɥɭɣɫɬɚɩɨɥɧɨɫɬɶɸɩɪɨɱɬɢɬɟɞɚɧɧɭɸɢɧɫɬɪɭɤɰɢɸɢɫɨɯɪɚɧɢɬɟɞɚɧɧɨɟɪɭɤɨɜɨɞɫɬɜɨ
ɞɥɹɢɫɩɨɥɶɡɨɜɚɧɢɹɜɛɭɞɭɳɟɦ
ɉɟɪɟɞɟɤɩɥɭɚɬɚɰLɽɸɞɚɧɨɝɨɩɪɢɫɬɪɨɸɛɭɞɶɥɚɫɤɚɩɨɜɧLɫɬɸɩɪɨɱɢɬɚɣɬɟɞɚɧɭLɧɫɬɪɭɤɰLɸLɡɛɟɪɟɠLɬɶɞɚɧɢɣɩɨɫLɛɧɢɤɞɥɹ
ɜɢɤɨɪɢɫɬɚɧɧɹɭɦɚɣɛɭɬɧɶɨɦɭ
IM-B098-01
IM-B105-01
- 2 -
Index/Index/Index/Indice/Index/Indice/Indeks/Index/Indeks/Hakemisto/
ɂɧɞɟɤɫȱɧɞɟɤɫ
English: Page 5
'HXWVFK 6HLWH 
Français: Page 27
,WDOLDQR 3DJLQD 
1HGHUODQGV%ODG]LMGH 
(VSDxRO 3iJLQD 
'DQVN 6LGH 
Svenska: Sid 84
1RUVN 6LGH 
6XRPL 6LYX 
Ɋɭɫɫɤɢɣ ɋɬɪɚɧɢɰɚ 
ɍɤɪɚʀɧɫɶɤɚɋɬɨɪLɧɤɚ 
FUNCTIONAL DESCRIPTION
FUNKTIONSBESCHREIBUNG
DESCRIPTION DES FONCTIONS
DESCRIZIONE DELLE FUNZIONI
FUNCTIEBESCHRIJVING
DESCRIPCIÓN FUNCIONAL
FUNKTIONSBESKRIVELSE
FUNKTIONSBESKRIVNING
FUNKSJONSBESKRIVELSE
TOIMINTAKUVAUS
ɎɍɇɄɐɂɈɇȺɅɖɇɈȿɈɉɂɋȺɇɂȿ
ɎɍɇɄɐ,ɈɇȺɅɖɇɂɃɈɉɂɋ
(A) (B) (C)
(D)
(I)
(N)
(L)
(K
)
(J
)
(M)
(E)
(F)
(F)
(P)
(H)
(G)
(O)
9ņV

(A)
.H\OHVVGULOOFKXFN
6FKOVVHOIUHLHV%RKUIXWWHU
0DQGULQSRUWHIRUHWVDQV¿O
0DQGULQRDXWRVHUUDQWH
%RRUNRS]RQGHUVOHXWHO
Mandril sin llave
1¡JOHIULERUHSDWURQ
1\FNHOO|VERUUFKXFN
1¡NNHOIULGULOOFKXFN
$YDLPHWRQSRUDQNLLQQLW\VODLWH
Ȼɟɫɤɥɸɱɟɜɨɣɡɚɠɢɦɧɨɣɩɚɬɪɨɧ
Ȼɟɡɤɥɸɱɨɜɢɣɡɚɬɢɫɤɧɢɣɩɚɬɪɨɧ
(B)
&OXWFKKDQGOH
.XSSOXQJVULQJ
3RLJQpHGHO¶HPEUD\DJH
,PSXJQDWXUDIUL]LRQH
.RSSHOLQJVKDQGJUHHS
Mango de embrague
.REOLQJKnQGWDJ
.RSSOLQJVKDQGWDJ
.REOLQJVKnQGWDN
.\WNLPHQNDKYD
Ɋɭɤɨɹɬɤɚɦɭɮɬɵ
Ɋɭɤɨɹɬɤɚɦɭɮɬɢ
(C)
6SHHGVHOHFWRUVZLWFK
%HUHLFKVVFKDOWHU
,QWHUUXSWHXUGHVpOHFWLRQGHYLWHVVH
5HJRODWRUHGLYHORFLWj
Snelheidskeuzeschakelaar
,QWHUUXSWRUVHOHFWRUGHYHORFLGDG
+DVWLJKHGVYOJHU
+DVWLJKHWVRPNRSSODUH
+DVWLJKHWVNRQWUROO
1RSHXGHQYDOLQWDN\WNLQ
ɉɟɪɟɤɥɸɱɚɬɟɥɶɜɵɛɨɪɚɫɤɨɪɨɫɬɢ
ɉɟɪɟɦɢɤɚɱɜɢɛɨɪɭɲɜɢɞɤɨɫɬɿ
(D)
)RUZDUG5HYHUVHOHYHU
5HFKWV/LQNVODXI6FKDOWHU
/HYLHUG¶LQYHUVLRQPDUFKHDYDQWPDUFKHDUULqUH
/HYDGLDYDQ]DPHQWRLQYHUVLRQH
9RRUZDDUWVDFKWHUZDDUWVKHQGHO
Palanca de avance/inversión
*UHEWLOIRUOQVEDJOQVUHWQLQJ
5LNWQLQJVRPNRSSODUH
)RURYHU5HYHUVEU\WHU
(WHHQSlLQWDDNVHSlLQYLSX
Ɋɵɱɚɝɩɟɪɟɤɥɸɱɟɧɢɹɜɩɟɪɟɞɧɚɡɚɞ
ȼɚɠɿɥɶɩɟɪɟɦɢɤɚɧɧɹɜɩɟɪɟɞɧɚɡɚɞ
(E)
%HOWKRRN
Riemenhaken
&URFKHWGHFHLQWXUH
*DQFLRGDFLQWXUD
5LHPFOLS
*DQFKRGHOFLQWXUyQ
%OWHNURJ
%lOWHVNURN
%HOWHNURN
9\|OHQNNL
(F)
$OLJQPHQWPDUNV
$XVULFKWPDUNLHUXQJHQ
0DUTXHVG¶DOLJQHPHQW
0DUFDWXUHDOOLQHDPHQWR
8LWOLMQWHNHQV
Marcas de alineación
)OXJWHPUNHU
$QSDVVQLQJVPlUNHQ
2SSUHWWLQJVPHUNH
6RYLWXVPHUNLW
Ɇɟɬɤɢɫɨɜɦɟɳɟɧɢɹ
Ɇɿɬɤɢɜɢɪɿɜɧɸɜɚɧɧɹ
*
%DWWHU\SDFNUHOHDVHEXWWRQ
$NNX(QWULHJHOXQJVNQRSI
%RXWRQGHOLEpUDWLRQGHEDWWHULHDXWRQRPH
7DVWRGLULODVFLRSDFFREDWWHULD
$FFXRQWJUHQGHOWRHWV
%RWyQGHOLEHUDFLyQGHEDWHUtD
8GO¡VHUNQDSWLOEDWWHULSDNQLQJ
)ULJ|ULQJVNQDSSI|UEDWWHUL
8WO¡VHUNQDSSIRUEDWWHULSDNNH
$NNXSDNHWLQLUURWXVSDLQLNH
Ʉɧɨɩɤɚɨɫɜɨɛɨɠɞɟɧɢɹɛɚɬɚɪɟɣɧɨɝɨɛɥɨɤɚ
Ʉɧɨɩɤɚɜɢɜɿɥɶɧɟɧɧɹɛɚɬɚɪɟɣɧɨɝɨɛɥɨɤɭ
(H)
%DWWHU\SDFN(</(</
$NNX(</(</
%DWWHULHDXWRQRPH(</(</
3DFFREDWWHULD(</(</
$FFX(</(</
%DWHUtD(</(</
%DWWHULSDNQLQJ(</(</
%DWWHUL(</(</
%DWWHULSDNNH(</(</
$NNX(</(</
Ȼɚɬɚɪɟɣɧɵɣɛɥɨɤ(</(</
Ȼɚɬɚɪɟɣɧɢɣɛɥɨɤ(</(</
(I)
&RQWUROSDQHO
Bedienfeld
Panneau de commande
3DQQHOORGLFRQWUROOR
%HGLHQLQJVSDQHHO
3DQHOGHFRQWUROH
.RQWUROSDQHO
.RQWUROOSDQHO
.RQWUROOSDQHO
6llW|SDQHHOL
ɉɚɧɟɥɶɭɩɪɚɜɥɟɧɢɹ
ɉɚɧɟɥɶɭɩɪɚɜɥɿɧɧɹ
(J)
2YHUKHDWZDUQLQJODPSEDWWHU\
hEHUKLW]XQJV:DUQODPSH$NNX
7pPRLQG¶DYHUWLVVHPHQWGHVXUFKDXIIHEDWWHULH
6SLDDYYHUWHQ]DVXUULVFDOGDPHQWREDWWHULD
2YHUYHUKLWWLQJZDDUVFKXZLQJVODPSMHDFFX
/X]GHDGYHUWHQFLDGHVREUHFDOHQWDPLHQWREDWHUtD
$GYDUVHOVODPSWLORYHURSKHGQLQJEDWWHUL
9DUQLQJVODPSDI|U|YHUKHWWQLQJEDWWHUL
9DUVHOODPSHIRURYHURSSKHWLQJEDWWHUL
<OLNXXPHQHPLVHQYDURLWXVODPSSXDNNX
ɉɪɟɞɭɩɪɟɠɞɚɸɳɚɹɥɚɦɩɨɱɤɚɩɟɪɟɝɪɟɜɚɛɚɬɚɪɟɢ
ɉɨɩɟɪɟɞɠɭɜɚɥɶɧɚɥɚɦɩɨɱɤɚɩɟɪɟɝɪɿɜɭɛɚɬɚɪɟʀ
- 4 -
(K)
/('OLJKWRQRIIEXWWRQ
/('/HXFKWHQ(,1$867DVWH
%RXWRQ0DUFKH$UUrWGHODOXPLqUH'(/
7DVWRGLDFFHQVLRQHHVSHJQLPHQWRGHOODOXFH/('
$DQXLWWRHWV212))YRRU/('ODPSMH
%RWyQ212))GHOX]/('
71'6/8.NQDSWLO/('O\V
6WU|PEU\WDUHI|U/('OMXV
3c$9NQDSSIRU/('O\V
/('YDORQN\WNLQNDWNDLVXSDLQLNH
Ʉɧɨɩɤɚɜɤɥɸɱɟɧɢɹɜɵɤɥɸɱɟɧɢɹɫɜɟɬɨɞɢɨɞɧɨɣɩɨɞɫɜɟɬɤɢ
Ʉɧɨɩɤɚɜɜɿɦɤɧɟɧɧɹɜɢɦɤɧɟɧɧɹɫɜɿɬɥɨɞɿɨɞɧɨɝɨɩɿɞɫɜɿɱɭɜɚɧɧɹ
(L)
/('OLJKW
/('/HXFKWH
/XPLqUH'(/
Luce LED
/('ODPSMH
Luz indicadora
/('O\V
/('OMXV
/('O\V
LED-valo
(M)
%DWWHU\ORZZDUQLQJODPS
$NNXODGXQJV:DUQODPSH
7pPRLQG¶DYHUWLVVHPHQWGHEDWWHULHEDVVH
6SLDDYYHUWHQ]DEDWWHULDVFDULFD
:DDUVFKXZLQJVODPSMHYRRUODJHDFFXVSDQQLQJ
/X]GHDYLVRGHEDMDFDUJDGHEDWHUtD
$GYDUVHOVODPSHVEDWWHULHIIHNWODY
9DUQLQJVODPSDI|UVYDJWEDWWHUL
9DUVHOODPSHIRUDWEDWWHULHWHUIRUODYW
$OKDLVHQDNNXMlQQLWWHHQYDURLWXVODPSSX
ɉɪɟɞɭɩɪɟɠɞɚɸɳɚɹɥɚɦɩɨɱɤɚɧɢɡɤɨɝɨɡɚɪɹɞɚɛɚɬɚɪɟɢ
ɉɨɩɟɪɟɞɠɭɜɚɥɶɧɚɥɚɦɩɨɱɤɚɧɢɡɶɤɨɝɨɡɚɪɹɞɭɛɚɬɚɪɟʀ
1
9DULDEOHVSHHGFRQWUROWULJJHU
%HWULHEVVFKDOWHU
*kFKHWWHGHFRPPDQGHGHYLWHVVH
*ULOOHWWRGLFRQWUROORYHORFLWjYDULDEOH
6WDUWVFKDNHODDUYDULDEHOHVQHOKHLG
'LVSDUDGRUGHOFRQWUROGHYHORFLGHGYDULDEOH
.RQWUROXGO¡VHUIRUYDULDEHOKDVWLJKHG
6WHJO|VYDUYWDOVUHJOHUDUH
+RYHGEU\WHUWULQQO¡V
1RSHXGHQVllW|N\WNLQ
ɉɟɪɟɤɥɸɱɚɬɟɥɶɪɟɝɭɥɢɪɨɜɤɢɩɟɪɟɦɟɧɧɨɣɫɤɨɪɨɫɬɢ
ɉɟɪɟɦɢɤɚɱɪɟɝɭɥɸɜɚɧɧɹɡɦɿɧɧɨʀɲɜɢɞɤɨɫɬɿ
(O)
%DWWHU\FKDUJHU(</
/DGHJHUlW(</
&KDUJHXUGHEDWWHULH(</
&DULFDEDWWHULH(</
$FFXODGHU(</
&DUJDGRUGHEDWHUtD(</
%DWWHULRSODGHU(</
%DWWHULODGGDUH(</
%DWWHULODGHU(</
$NNXODWXUL(</
(</
(</
(P)
Pack cover
Akkuabdeckung
&RXYHUFOHGHODEDWWHULHDXWRQRPH
&RSHUFKLRSDFFR
Accudeksel
&XELHUWDGHEDWHUtD
3DNQLQJVGNVHO
%DWWHULVN\GG
Pakkedeksel
$NNXNRWHORQNDQVL
- 5 -
Original instructions: English
Translation of the original instructions:
Other languages
This tool, as a complete unit with a battery
pack, satisfies appropriate IP Degrees of
Protection based on the IEC regulations.
'H¿QLWLRQRI,3FRGH
IP5X: Ingress of dust is not totally
prevented, but dust shall not penetrate
in a quantity to interfere with satisfactory
operation of the tool or to impair safety
(In case that the talcum powder under 75
ȝPLQWUXGHVLQVLGHWKHWRRO,3;:DWHU
projected in powerful jets against the tool
from any direction shall have no harmful
effects (In case that, with a nozzle of
12.5 mm inner diameter, approximately
100 L/min of normal temperature water is
injected to the tool for 3 minutes from 3
PHWHUGLVWDQFH
/,0,7(':$55$17<
7KHUDWLQJRI,3TXDOL¿HVWKLVWRROIRUWKH
minimum impact of water or dust, but not
for the assurance of performance in such
conditions. See Safety and Operating
Instructions for further details for proper
operation.
,,17(1'('86(
7KHVHWRROVFDQEHXVHGWRWLJKWHQ
VFUHZVLQFOXWFKPRGHDQGWRGULOO
KROHVLQZRRGDQGPHWDOLQGULOOPRGH
$GGLWLRQDOO\PRGHO(<FDQEH
XVHGWRGULOOKROHVLQVRIWFRQFUHWHDQG
VLPLODUPDWHULDOVLQKDPPHUPRGH
5HDGWKH6DIHW\,QVWUXFWLRQVERRNOHW
DQGWKHIROORZLQJEHIRUHXVLQJ
,,$'',7,21$/
6$)(7<58/(6
 :HDUHDUSURWHFWRUV
Exposure to noise can cause hearing
loss.
 8VHDX[LOLDU\KDQGOHVXSSOLHGZLWK
WKHWRRO
Loss of control can cause personal
injury.
 +ROGSRZHUWRROVE\LQVXODWHG
JULSSLQJVXUIDFHVZKHQSHUIRUPLQJ
DQRSHUDWLRQZKHUHWKHFXWWLQJWRRO
PD\FRQWDFWKLGGHQZLULQJ contact
with a “live” wire will make exposed
metal parts of the tool “live” and shock
the operator.
 :HDUDGXVWPDVNLIWKHZRUNFDXVHV
dust.
 %HDZDUHWKDWWKLVWRROLVDOZD\VLQDQ
operating condition, since it does not
have to be plugged into an electrical
outlet.
 :KHQGULOOLQJRUGULYLQJLQWRZDOOV
ÀRRUVHWF³OLYH´HOHFWULFDOZLUHVPD\
be encountered. DO NOT TOUCH
THE CHUCK OR ANY FRONT METAL
PARTS OF THE TOOL! Hold the tool
only by the plastic handle to prevent
electric shock in case you drill or drive
into a “live” wire.
 ,IWKHELWEHFRPHVMDPPHG
immediately turn the trigger switch
off to prevent an overload, which can
damage the battery pack or motor.
Use reverse motion to loosen jammed
bits.
 'R127RSHUDWHWKH)RUZDUG5HYHUVH
lever when the trigger switch is on.
The battery will discharge rapidly and
damage to the unit may occur.
 'XULQJFKDUJLQJWKHFKDUJHUPD\
become slightly warm. This is normal.
Do NOT charge the battery for a long
period.
 :KHQVWRULQJRUFDUU\LQJWKHWRRO
set the Forward/Reverse lever to the
FHQWHUSRVLWLRQVZLWFKORFN
 'RQRWVWUDLQWKHWRROE\KROGLQJWKH
speed control trigger halfway (speed
FRQWUROPRGHVRWKDWWKHPRWRUVWRSV
 'R QRWRSHUDWHWKHVSHHGVHOHFWRU
VZLWFK/2:+,*+ZKLOHSXOOLQJRQ
the speed control trigger. This can
cause the rechargeable battery to
wear quickly or damage the internal
mechanism of the motor.

:$51,1*
Do not use other than the Panasonic
L
bat-tery packs that are designed for
use with this rechargeable tool.
Panasonic is not responsible for any
L
dam-age or accident caused by the use
of the recycled battery pack and the
counterfeit battery pack.
Do not dispose of the battery pack in a
L
¿UHRUH[SRVHLWWRH[FHVVLYHKHDW
Do not drive the likes of nails into the
L
battery pack, subject it to shocks,
dismantle it, or attempt to modify it.
Do not allow metal objects to touch the
L
battery pack terminals.
Do not carry or store the battery pack
L
in the same container as nails or similar
metal objects.
Do not charge the battery pack in a
L
high-temperature location, such as next
WRD¿UHRULQGLUHFWVXQOLJKW2WKHUZLVH
WKHEDWWHU\PD\RYHUKHDWFDWFK¿UHRU
explode.
Never use other than the dedicated
L
charger to charge the battery pack.
Otherwise, the battery may leak,
overheat, or explode.
After removing the battery pack from
L
the tool or the charger, always reattach
the pack cover. Otherwise, the battery
contacts could be shorted, leading to a
ULVNRI¿UH
:KHQWKH%DWWHU\3DFN+DV
L
Deteriorated, Replace It with a New
One. Continued use of a damaged
battery pack may result in heat
generation, ignition or battery rupture.
6\PERO 0HDQLQJ
V Volts
Direct current
n°No load speed
...Min-1 Revolutions or reciprocations
per minutes
Ah Electrical capacity of battery
pack
To reduce the risk of
injury, user must read and
understand instruction
manual.
For indoor use only.
- 7 -
,,,$66(0%/<
$WWDFKLQJRU5HPRYLQJ%LW
127(
 :KHQDWWDFKLQJRUUHPRYLQJDELW
disconnect battery pack from tool or
place the switch in the center position
VZLWFKORFN
This tool is equipped with a keyless drill
chuck.
1. Attachment
Insert the bit and turn the lock collar
FORFNZLVHORRNLQJIURPWKHIURQWWR
WLJKWHQ¿UPO\XQWLOLWVWRSVFOLFNLQJ
2. Removal
Turn the lock collar counterclockwise
ORRNLQJIURPWKHIURQWWKHQUHPRYH
the bit.
127(
If excessive play occurs in the chuck,
secure the drill in place and open
the chuck jaws by turning the lock collar
and tighten the screw (left-handed
VFUHZZLWKDVFUHZGULYHUE\WXUQLQJ
it counterclockwise (viewed from the
IURQW
$WWDFKLQJRU5HPRYLQJ%DW
WHU\3DFN
1. To connect the battery pack:
Line up the alignment marks and attach
the battery pack.
Slide the battery pack until it locks
L
into position.
2. To remove the battery pack:
Push on the button from the front to
release the battery pack.
,923(5$7,21
>0DLQ%RG\@
6ZLWFK2SHUDWLRQ
1. The speed increases with the amount
RIGHSUHVVLRQRIWKHWULJJHU:KHQ
beginning work, depress the trigger
slightly to start the rotation slowly.
2. A feedback electronic controller is used
to give a strong torque even in low
speed.
3. The brake operates when the trigger
is released and the motor stops
immediately.
127(
 :KHQWKHEUDNHRSHUDWHVDEUDNLQJ
sound may be heard. This is normal.
Alignment marks
%XWWRQ
- 8 -
6ZLWFKDQG)RUZDUG5HYHUVH
/HYHU2SHUDWLRQ
&$87,21
To prevent damage, do not operate
Forward/Reverse lever until the bit
comes to a complete stop.
)RUZDUG5RWDWLRQ6ZLWFK
2SHUDWLRQ
1. Push the lever for forward rotation.
2. Depress the trigger switch slightly to
start the tool slowly.
3. The speed increases with the amount
RIGHSUHVVLRQRIWKHWULJJHUIRUHI¿FLHQW
tightening of screws and drilling.
The brake operates and the chuck
stops immediately when the trigger is
released.
4. After use, set the lever to its center
SRVLWLRQVZLWFKORFN
5HYHUVH5RWDWLRQ6ZLWFK
2SHUDWLRQ
1. Push the lever for reverse rotation.
Check the direction of rotation before
use.
2. Depress the trigger switch slightly to
start the tool slowly.
3. After use, set the lever to its center
SRVLWLRQVZLWFKORFN
Forward Reverse
Switch lock
&OXWFK7RUTXH6HWWLQJ
Adjust the torque to one of the 18 clutch
settings or “ ´SRVLWLRQ(<
Adjust the torque to one of the 18 clutch
settings or “ ”, “ ´SRVLWLRQ(<
127(
Always make sure to stop operation
of the tool and disengage it from the
work, when you select Hammering
mode from Drilling mode or when
you shift to Drilling mode from
Hammering mode by rotating clutch
handle.
&$87,21
Set the clutch setting at this mark ( 
before actual operation.
6SHHG6HOHFWLRQ
Choose a low or high speed to suit the
use.
The more the variable speed control
trigger is pulled, the higher the speed
becomes.
&$87,21
&KHFNWKHVSHHGVHOHFWRUVZLWFK
L
EHIRUHXVH
8VHDWORZVSHHGZKHQKLJKWRUTXH
L
LVQHHGHGGXULQJRSHUDWLRQ8VLQJ
DWKLJKVSHHGZKHQKLJKWRUTXH
LVUHTXLUHGPD\FDXVHDPRWRU
EUHDNGRZQ
'RQRWRSHUDWHWKHVSHHGVHOHFWRU
L
VZLWFK/2:+,*+ZKLOHSXOOLQJRQ
WKHVSHHGFRQWUROWULJJHU7KLVFDQ
FDXVHWKHUHFKDUJHDEOHEDWWHU\WR
ZHDUTXLFNO\RUGDPDJHWKHLQWHUQDO
PHFKDQLVPRIWKHPRWRU
* See specifications for “MAXIMUM
RECOMMENDED CAPACITIES”.
/2: +,*+
- 9 -
&$87,21
7RSUHYHQWH[FHVVLYHWHPSHUDWXUH
L
LQFUHDVHRIWKHWRROVXUIDFHGRQRW
RSHUDWHWKHWRROFRQWLQXRXVO\XVLQJ
WZRRUPRUHEDWWHU\SDFNV7KHWRRO
QHHGVFRRORIIWLPHEHIRUHVZLWFKLQJ
WRDQRWKHUSDFN
'RQRWFORVHXSYHQWKROHVRQWKH
L
VLGHVRIWKHERG\GXULQJRSHUDWLRQ
2WKHUZLVHWKHPDFKLQHIXQFWLRQLV
DGYHUVHO\DIIHFWHGWRFDXVHDIDLOXUH
'R127VWUDLQWKHWRROPRWRU7KLV
L
PD\FDXVHGDPDJHWRWKHXQLW
8VHWKHWRROLQVXFKDZD\DVWR
L
SUHYHQWWKHDLUIURPWKHERG\YHQW
KROHVIURPEORZLQJGLUHFWO\RQWR\RXU
VNLQ2WKHUZLVH\RXPD\JHWEXUQHG
%LWORFNLQJ)XQFWLRQ
:LWKWKHWULJJHUVZLWFKQRWHQJDJHG
and a screwdriver bit locked in
place, the tool can be used as a
PDQXDOVFUHZGULYHUXSWR1ÂP
NJIFPLQOEV
There will be a little play in the chuck,
but this is not a malfunction.
2. This feature is handy for tightening
screws that require more torque than
the maximum torque of the driver
(position RQWKHFOXWFKIRUFRQ¿UPLQJ
the tightness of a screw or to loosen an
extremely tight screw.
+RZWR8VHWKH%HOW+RRN
:$51,1*
%HVXUHWRDWWDFKWKHEHOWKRRN
L
securelyto the main unit with the screw
ILUPO\IDVWHQHG:KHQWKHEHOWKRRNLV
QRW¿UPO\DWWDFKHGWRWKHPDLQXQLWWKH
hook may disconnect and the main unit
may fall.
This may result in an accident or injury.
Periodically check screw for tightness.
L
,IIRXQGWREHORRVHWLJKWHQ¿UPO\
%HVXUHWRDWWDFKWKHEHOWKRRNILUPO\
L
and securely onto a waist belt or other
belt. Pay attention that the unit does not
slip off the belt. This may result in an
accident or injury.
:KHQWKHPDLQXQLWLVKHOGE\WKHEHOW
L
hook, avoid jumping or running with it.
Doing so may cause the hook to slip
and the main unit may fall.
This may result in an accident or injury.
:KHQWKHEHOWKRRNLVQRWXVHGEHVXUH
L
to return it to the storing position. The
belt hook may catch on something.
This may result in an accident or injury.
:KHQWKHXQLWLVKRRNHGRQWRWKHZDLVW
L
belt by the belt hook, do not attach
driver bits to the unit. A sharp edge
object, such as a drill bit, may cause
injury or an accident.
7R&KDQJHWKH%HOW+RRN
/RFDWLRQ6LGH
The belt hook can be attached to either
side of the unit.
1. Removing the hook
 5HPRYHWKHQXW
 'UDZRXWWKHKRRN
2. Attaching the hook to the other side
 ,QVHUWWKHKRRNLQWKHRWKHUVLGH
 7LJKWHQWKHQXWIXOO\VRWKDWLW
securely fastened.




- 10 -
&RQWURO3DQHO
(1)
(3)
(2)
/('OLJKW
%HIRUHWKHXVHRI/('
light, always pull the
power switch once.
Press the LED light
button.
The light illuminates with
very low current, and it does not adversely
affect the performance of the tool during
use or its battery capacity.
&$87,21
7KHEXLOWLQ/('OLJKWLVGHVLJQHG
L
WRLOOXPLQDWHWKHVPDOOZRUNDUHD
WHPSRUDULO\
Do not use it as a substitute for a
L
UHJXODUIODVKOLJKWVLQFHLWGRHVQRW
KDYHHQRXJKEULJKWQHVV
LED light turns off when the tool has
L
QRWEHHQXVHGIRUPLQXWHV
Caution:'212767$5(,172%($0
Use of controls or adjustments or
performance of procedures other than
those specified herein may result in
hazardous radiation exposure.
2YHUKHDWZDUQLQJODPS
To protect the motor or battery, be sure to
note the following when carrying out this
operation.
Off
(normal
RSHUDWLRQ
Illuminated:
Overheat
PRWRU
Flashing:
Overheat
EDWWHU\
Indicates operation has
been halted due to motor
or battery overheating.
If the motor or battery becomes hot, the
L
protection function will be activated and
the motor or battery will stop operating.
The overheat warning lamp on the
FRQWUROSDQHOLOOXPLQDWHVRUÀDVKHVZKHQ
this feature is active.
If the overheating protection feature
L
activates, allow the tool to cool
WKRURXJKO\DWOHDVWPLQXWHV7KH
tool is ready for use when the overheat
warning lamp goes out.
Avoid using the tool in a way that causes
L
the overheating protection feature to
activate repeatedly.
If the tool is operated continuously under
L
high-load conditions or if it is used in hot-
temperature conditions (such as during
VXPPHUWKHRYHUKHDWLQJSURWHFWLRQ
feature may activate frequently.
If the tool is used in cold-temperature
L
FRQGLWLRQVVXFKDVGXULQJZLQWHURULI
it is frequently stopped during use, the
overheating protection feature may not
activate.
%DWWHU\ORZZDUQLQJODPS
([FHVVLYHFRPSOHWHGLVFKDUJLQJRI
lithium ion batteries shortens their service
life dramatically. The driver includes a
battery protection feature designed to
prevent excessive discharging of the
battery pack.
The battery protection feature activates
L
immediately before the battery loses its
charge, causing the battery low warning
ODPSWRÀDVK
If you notice the battery low warning
L
lamp flashing, charge the battery pack
immediately.
Off
(normal
RSHUDWLRQ
Flashing
1RFKDUJH
%DWWHU\SURWHFWLRQ
feature active
- 11 -
>%DWWHU\3DFN@
)RU$SSURSULDWH8VHRI
%DWWHU\3DFN
/LLRQ%DWWHU\3DFN
For optimum battery life, store the Li-
L
ion battery pack following use without
charging it.
:KHQFKDUJLQJWKHEDWWHU\SDFNFRQ¿UP
L
that the terminals on the battery charger
are free of foreign substances such as
dust and water etc. Clean the terminals
before charging the battery pack if any
foreign substances are found on the
terminals.
The life of the battery pack terminals may
be affected by foreign substances such
as dust and water etc. during operation.
:KHQEDWWHU\SDFNLVQRWLQXVHNHHSLW
L
away from other metal objects like: paper
clips, coins, keys, nails, screws, or other
small metal objects that can make a
connection from one terminal to another.
Shorting the battery terminals together
PD\FDXVHVSDUNVEXUQVRUD¿UH
:KHQRSHUDWLQJWKHEDWWHU\SDFNPDNH
L
sure the work place is well ventilated.
:KHQWKHEDWWHU\SDFNLVUHPRYHGIURP
L
the main body of the tool, replace the
battery pack cover immediately in order
to prevent dust or dirt from contaminating
the battery terminals and causing a short
circuit.
%DWWHU\3DFN/LIH
The rechargeable batteries have
a limited life. If the operation time
becomes extremely short after
recharging, replace the battery pack
with a new one.
%DWWHU\5HF\FOLQJ
$77(17,21
For environmental protection and
recycling of materials, be sure that it
is disposed of at an officially assigned
location, if there is one in your country.
>%DWWHU\&KDUJHU@
Charging
&$87,21
If the temperature of the battery pack
L
IDOOVDSSUR[LPDWHO\EHORZí&)
charging will automatically stop to
prevent degradation of the battery.
The ambient temperature range is
L
EHWZHHQ&)DQG&)
If the battery pack is used when the
EDWWHU\WHPSHUDWXUHLVEHORZ&)
the tool may fail to function properly.
:KHQFKDUJLQJDFRROEDWWHU\SDFN
L
EHORZ&)LQDZDUPSODFH
leave the battery pack at the place and
wait for more than one hour to warm up
the battery to the level of the ambient
temperature.
Cool down the charger when
L
charging more than two battery packs
consecutively.
Do not insert your fingers into contact
L
hole, when holding charger or any other
occasions.
&$87,21
7RSUHYHQWWKHULVNRI¿UHRUGDPDJHWR
WKHEDWWHU\FKDUJHU
'RQRWXVHSRZHUVRXUFHIURPDQ
L
HQJLQHJHQHUDWRU
'RQRWFRYHUYHQWKROHVRQWKH
L
FKDUJHUDQGWKHEDWWHU\SDFN
8QSOXJWKHFKDUJHUZKHQQRWLQXVH
L
/LLRQ%DWWHU\3DFN
127(
Your battery pack is not fully charged at
WKHWLPHRISXUFKDVH%HVXUHWRFKDUJH
the battery before use.
- 12 -
%DWWHU\FKDUJHU(</
EY9L42 battery pack can only be charged
with the EY0L81 battery charge.
1. Plug the charger into the AC outlet.
2. Insert the battery pack firmly into the
charger.
/LQHXSWKHDOLJQPHQWPDUNVDQG
place the battery onto the dock on
the charger. Charging Lamp does
not turn on.
6OLGHIRUZDUGLQWKHGLUHFWLRQRIWKH
arrow.
3. During charging, the charging lamp
ZLOOEHOLW:KHQFKDUJLQJLVFRPSOHWHG
an internal electronic switch will
automatically be triggered to prevent
overcharging.
Charging will not start if the
L
battery pack is warm (for example,
immediately after heavy-duty
RSHUDWLRQ
Alignment marks
The orange standby lamp will be
flashing until the battery cools down.
Charging will then begin automatically.
7KHFKDUJHODPSJUHHQZLOOIODVK
slowly once the battery is approximately
80% charged.
:KHQFKDUJLQJLVFRPSOHWHGWKH
charging lamp in green color will turn
off.
,IWKHWHPSHUDWXUHRIWKHEDWWHU\SDFN
is 0°C or less, charging takes longer to
fully charge the battery pack than the
standard charging time.
Even when the battery is fully charged,
it will have approximately 50% of the
power of a fully charged battery at
normal operating temperature.
7. Consult an authorized dealer if the
FKDUJLQJODPSJUHHQGRHVQRWWXUQRII
8. If a fully charged battery pack is
inserted into the charger again, the
charging lamp lights up. After several
minutes, the charging lamp in green
color will turn off.
/$03,1',&$7,216
&KDUJLQJLVFRPSOHWHG)XOOFKDUJH
%DWWHU\LVDSSUR[LPDWHO\FKDUJHG
Now charging.
*UHHQ
Turn off Lit Flashing
2UDQJH
Charger is plugged into the AC outlet. Ready to charge.
Charging Status Lamp.
Left: green Right: orange will be displayed.
%DWWHU\SDFNLVFRRO
The battery pack is being charged slowly to reduce the load on the battery.
%DWWHU\SDFNLVZDUP
Charging will begin when temperature of battery pack drops. If
the temperature of the battery pack is -10° or less, the charging
VWDWXVODPSRUDQJHZLOODOVRVWDUWÀDVKLQJ&KDUJLQJZLOOEHJLQ
when the temperature of the battery pack goes up.
Charging is not possible. Clogged with dust or malfunction of
the battery pack.
- 13 -
,QIRUPDWLRQIRU8VHUVRQ&ROOHFWLRQDQG'LVSRVDORI2OG
(TXLSPHQWDQGXVHG%DWWHULHV
These symbols on the products, packaging, and/or accompanying
documents mean that used electrical and electronic products and batteries
should not be mixed with general household waste.
For proper treatment, recovery and recycling of old products and used
batteries, please take them to applicable collection points, in accordance
ZLWK\RXUQDWLRQDOOHJLVODWLRQDQGWKH'LUHFWLYHV(&DQG
EC.
%\GLVSRVLQJRIWKHVHSURGXFWVDQGEDWWHULHVFRUUHFWO\\RXZLOOKHOSWRVDYH
valuable resources and prevent any potential negative effects on human
health and the environment which could otherwise arise from inappropriate
waste handling.
For more information about collection and recycling of old products and
batteries, please contact your local municipality, your waste disposal
service or the point of sale where you purchased the items.
Penalties may be applicable for incorrect disposal of this waste, in
accordance with national legislation.
)RUEXVLQHVVXVHUVLQWKH(XURSHDQ8QLRQ
If you wish to discard electrical and electronic equipment, please contact your dealer or
supplier for further information.
>,QIRUPDWLRQRQ'LVSRVDOLQRWKHU&RXQWULHVRXWVLGHWKH
(XURSHDQ8QLRQ@
These symbols are only valid in the European Union. If you wish to discard these
items, please contact your local authorities or dealer and ask for the correct method of
disposal.
1RWHIRUWKHEDWWHU\V\PEROERWWRPWZRV\PEROH[DPSOHV
This symbol might be used in combination with a chemical symbol. In this case it
complies with the requirement set by the Directive for the chemical involved.
- 14 -
90$,17(1$1&(
Use only a dry, soft cloth for wiping the unit. Do not use a damp cloth, thinner, benzine,
or other volatile solvents for cleaning.
In the event that the inside of the tool or battery pack is exposed to water, drain and
allow to dry as soon as possible.
 &DUHIXOO\UHPRYHDQ\GXVWRULURQ¿OLQJVWKDWFROOHFWLQVLGHWKHWRRO,I\RXH[SHULHQFHDQ\
problems operating the tool, consult with a repair shop.
9,$&&(6625,(6
Use only bits suitable for size of drill's chuck.
9,,$33(1',;
0$;,0805(&200(1'('&$3$&,7,(6
Model EY7441 EY7940
Screw
driving
Machine screw M8
:RRGVFUHZ ¡PP
Self-drilling screw ¡PP
Drilling
)RU:RRG ¡PP
For Metal ¡PP
For Masonry – PP
9,,,63(&,),&$7,216
0$,181,7
Model EY7441 EY7940
Motor voltage 14.4 V DC
No load
speed
Low 70 - 400 min-1USP
High 200 - 1400 min-1USP
%ORZV5DWH
Per Minute
Low – PLQ-1ESP
High – PLQ-1ESP
Chuck capacity ¡PP¡PP
Clutch torque
$SSUR[1ÂPNJIFPLQOEV±
1ÂPNJIFPLQOEV
$SSUR[1ÂPNJIFPLQOEV±
1ÂPNJIFPLQOEV
Overall length PP PP
:HLJKWZLWKEDWWHU\SDFN NJOEV NJOEV
- 15 -
%$77(5<3$&.
Model EY9L41 EY9L42
Storage battery /LLRQ%DWWHU\
%DWWHU\YROWDJH 9'&9îFHOOV
Charging time Usable: 45 min Usable: 30 min
)XOOPLQ Full: 35 min
127( This chart may include models that are not available in your area.
Please refer to the latest general catalogue.
For the dealer name and address, please see the included warranty card.
%$77(5<&+$5*(5
Model EY0L81
Rating See the rating plate on the bottom of the charge.
:HLJKW NJOEV
127( This chart may include models that are not available in your area.
Please refer to the latest general catalogue.
127( For the dealer name and address, please see the included warranty card.

Other manuals for EY7441

7

This manual suits for next models

1

Other Panasonic Drill manuals

Panasonic EY7950LR2S User manual

Panasonic

Panasonic EY7950LR2S User manual

Panasonic 7441LF User manual

Panasonic

Panasonic 7441LF User manual

Panasonic EY6225CQ - CORDLESS User manual

Panasonic

Panasonic EY6225CQ - CORDLESS User manual

Panasonic EY7441 User manual

Panasonic

Panasonic EY7441 User manual

Panasonic EY6931 - 15.6V HAMMER DRILL User manual

Panasonic

Panasonic EY6931 - 15.6V HAMMER DRILL User manual

Panasonic EY7549 User manual

Panasonic

Panasonic EY7549 User manual

Panasonic EY7443 User manual

Panasonic

Panasonic EY7443 User manual

Panasonic EY7420 User manual

Panasonic

Panasonic EY7420 User manual

Panasonic EY6405-X8 User manual

Panasonic

Panasonic EY6405-X8 User manual

Panasonic EY6930 - HAMMER DRILL User manual

Panasonic

Panasonic EY6930 - HAMMER DRILL User manual

Panasonic 7460OLOA User manual

Panasonic

Panasonic 7460OLOA User manual

Panasonic EY7840X User manual

Panasonic

Panasonic EY7840X User manual

Panasonic EY6230 - CORDLES DRILL&DRIVER User manual

Panasonic

Panasonic EY6230 - CORDLES DRILL&DRIVER User manual

Panasonic 7430LA User manual

Panasonic

Panasonic 7430LA User manual

Panasonic EY6225 - 3.6V DRILL & DRIVER User manual

Panasonic

Panasonic EY6225 - 3.6V DRILL & DRIVER User manual

Panasonic EY7442 User manual

Panasonic

Panasonic EY7442 User manual

Panasonic EY6812NQKW User manual

Panasonic

Panasonic EY6812NQKW User manual

Panasonic EY6932-U1 User manual

Panasonic

Panasonic EY6932-U1 User manual

Panasonic EY 503 User manual

Panasonic

Panasonic EY 503 User manual

Panasonic EY6406 - CORDLES DRILL&DRIVER User manual

Panasonic

Panasonic EY6406 - CORDLES DRILL&DRIVER User manual

Panasonic EY7840 User manual

Panasonic

Panasonic EY7840 User manual

Panasonic EY7840 User manual

Panasonic

Panasonic EY7840 User manual

Panasonic EY7460 - DRILL DRIVER 21.6V User manual

Panasonic

Panasonic EY7460 - DRILL DRIVER 21.6V User manual

Panasonic EY74A2 User manual

Panasonic

Panasonic EY74A2 User manual

Popular Drill manuals by other brands

Weka HD16 Series Instructions for use

Weka

Weka HD16 Series Instructions for use

Draper CDH141V instructions

Draper

Draper CDH141V instructions

Rotabroach element 40/1 Original instructions

Rotabroach

Rotabroach element 40/1 Original instructions

HOLEMAKER 35 Operator's manual

HOLEMAKER

HOLEMAKER 35 Operator's manual

Fein KBE 52-2 M Repair instructions

Fein

Fein KBE 52-2 M Repair instructions

GreenWorks DDG401 Operator's manual

GreenWorks

GreenWorks DDG401 Operator's manual

AEG SBE 750 RE Original instructions

AEG

AEG SBE 750 RE Original instructions

Hammerhead HDHD060 manual

Hammerhead

Hammerhead HDHD060 manual

Meec tools Red Series operating instructions

Meec tools

Meec tools Red Series operating instructions

Skil 3085 Original instructions

Skil

Skil 3085 Original instructions

Echo EDR-210 Operator's manual

Echo

Echo EDR-210 Operator's manual

TYROLIT Hydrostress DME17DP manual

TYROLIT Hydrostress

TYROLIT Hydrostress DME17DP manual

Green Tools RD-ID26 user manual

Green Tools

Green Tools RD-ID26 user manual

Ingersoll-Rand QP Series Maintenance information

Ingersoll-Rand

Ingersoll-Rand QP Series Maintenance information

Makita DRILL 6406 instruction manual

Makita

Makita DRILL 6406 instruction manual

Fervi 339 Operation and maintenance manual

Fervi

Fervi 339 Operation and maintenance manual

Senix PDHX2-M2 instruction manual

Senix

Senix PDHX2-M2 instruction manual

Worx WX176 Original instructions

Worx

Worx WX176 Original instructions

manuals.online logo
manuals.online logoBrands
  • About & Mission
  • Contact us
  • Privacy Policy
  • Terms and Conditions

Copyright 2025 Manuals.Online. All Rights Reserved.