manuals.online logo
Brands
  1. Home
  2. •
  3. Brands
  4. •
  5. Panasonic
  6. •
  7. DVD Player
  8. •
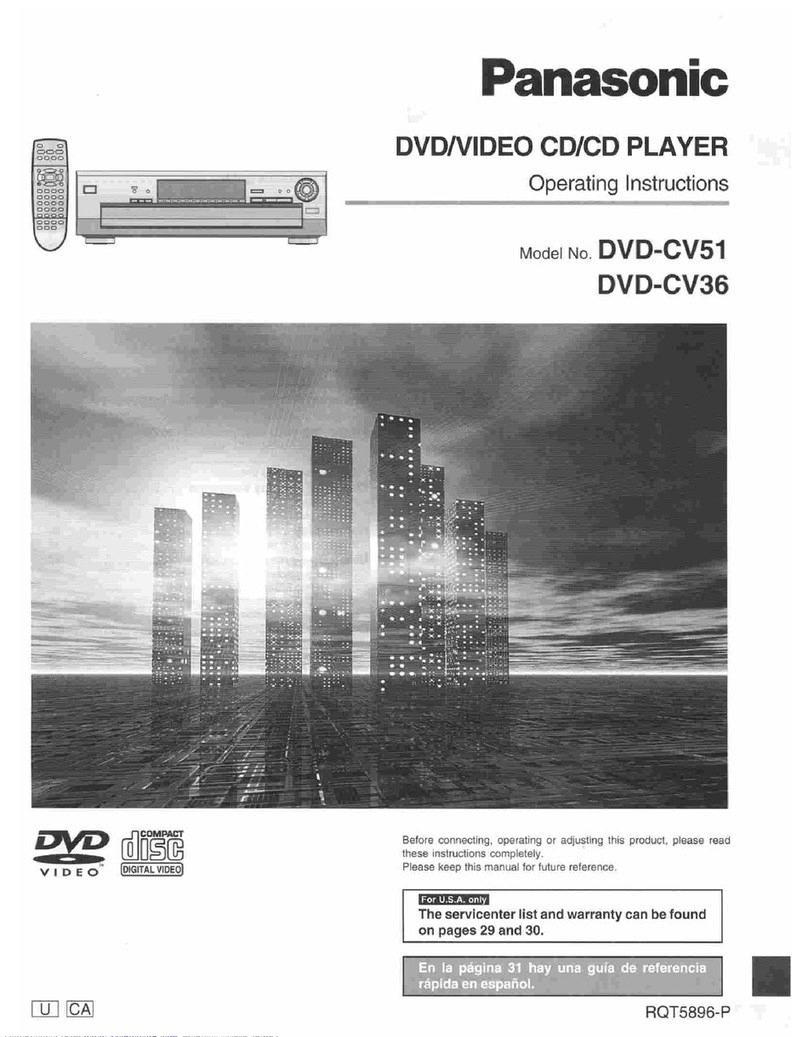
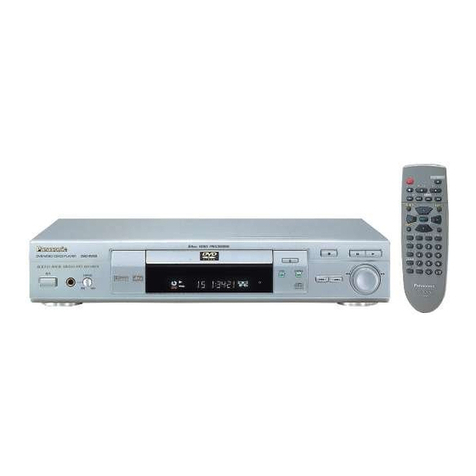
  9. Panasonic DVDCP67 - DIG. VIDEO DISC PLAY User manual

Panasonic DVDCP67 - DIG. VIDEO DISC PLAY User manual

this producl meets the ENERGY ~I’AW
..---___. guidelines for oncrgy efficiency.
Thank you for purchasing this product. For optimum performance and
safety, please readthese instructions carefully.
indicates features
DvR”cv52 only.
DVD-CV47 only.
IX/D-CV37 only.
applicableto DVD-CP67only.
f-J2 ~atterjea
for remote control
q
1 ~~djo/vjdeo gable
(KZKA6CAO0001)
The included AC power supply cord is for usa with this unit
only. Donot use it with other equipment.
The model number and serial number of ihis product can be found on
eitherthe back or the bottom of the unit.
Please note them in the space provided below and keep for future
m reference.
5
g
8 NlODELNUMBER . -..“...~- -.....
L
SERIAL NUMBER ~-..-_ ““”.._..---
..“.“_ -...-...^
lay .................................................................................
Disctype informationscreen ................................................................ 8
When a menrjscreen appears on the television .................................. 8
Changingthe display onthe main unit ................................................. 8
Sequential mode ................................................................................. 8
Changingother discs during play ......................................................... 6
Changingthe disc in the play position.................................................. 8
Replayinga scene -QUICK REPLAY................................................ 6
Using menusto play MP3discs ........................................................... 9
Resumefunction .................................................................................. 3
Skipping chapters or tracks ................................................................ ‘IO
Fastforward and rewind-SEARCH .................................................. 10
Slow-motion play ................................................................................ 10
Frame-by-frameviewing..................................................................... 10
Starting play from a selected title or track .......................................... 10
Setting the unitto turn off -’ SLEEPtimer ......................................... ‘IO
r@s...........................................“~“~.~“.~..~~~..~“~fZ
Prograrnplay ...................................................................................... 11
Randomplay ...................................................................................... 11
Repeatplay ........................................................................................ 12
A-B repeatplay.. ................................................................................. 12
vies .................................. 12
ADVANCEDSURROUND ............................................................ 12
BASS PLUS .................................................................................. .I3
CINEMA ........................................................................................ 13
DIALOGUE ENHANCER .............................................................. 13
Soundtracks ....................................................................................... 13
Subtitles.............................................................................................. 13
Angles ................................................................................................ 13
~~~~~~ na ~“~~Y~~O~~~//~~OI~“~“~““~“~“~““~.”~~~~~*~”~~”~~”14
Commonprocedures .......................................................................... 14
Disc information.................................................................................. 14
Unit information .................................................................................. I5
Progressindicator .............................................................................. 15
~~ttj~~~ ......................................................................
Commonprocedures.......................................................................... 47
Enteringa password (Ratings)........................................................... ‘17
Digitaloutput ...................................................................................... 17
wi?&?F “~~~~~i~~~~~~~ ~~W~~~~Ue~~~~~~~“~““~**.~.DY”.~~~I8
the limits for a Cla
the FGC Rules.
These limits are dl
against
harmful
in
This equipment
5
frequency energ:
accordance with
interference to ra
no guarantee that
installation. If I
interference to rat
determined by tur
encouraged to tr
more of the follovl
eReorient or reloc
Increase the s*
receiver.
@Connect the e
different from Ih
@?Consult the (
technician for hc
Any unauthoriz
equipment would
device.
This device con’
Operation is su
(1) This device I
(2) this device I
inclucling interferc
____- ..-...-
r
CAUTION: TO REDUCE I-HE RISK OF ELECTRIC
SHOCK, DO NOT REMOVE SCREWS.
NO U§~R-S~RVi~~A~L~ PARTS
INSIDE.
REFER SERVICING TO QUALIFIES
SERVING PERSONNEL.
The lightning flash with arrowhead symbol,
within an equilateral triangle, is intended to alert
the user to the presence of uninsulated
“dangerous voltage” within the product’s
enclosure that may be of sufficient magnitude
to constitute a risk of electric shock to persons.
-““I?~ ___I-- ,“..~~.C~, ..--~
The exclamation noint within an eauilateral
This equipment has been tested and found to comply with
the limits for a Class R digital device, pursuant to Part ‘i5 of
the FGG Rules.
These limits are designed to provide reasonable proteotion
against harmful interference in a residential installation.
This equipment generates, uses and can radiate radio
frequency energy and, if not installed and used in
accordance with the instructions, may cause harmful
interference to radio communications However, there is
no guarantee that interference will not accur in a particular
instaltation. If this equipment does cause harmful
interference ‘to radio or television reception, which can be
determined by turning the equipment oh and on, the user is
encouraged to try to correct the interference by one or
more of the following measures:
oReorient or relocate the receiving antenna.
@Increase the separation between the equipment and
receiver.
@Connect the equipment into an outlet on a circuit
different from that to which the receiver is connected.
*Consult the dealer or an experienced radio/TV
technician for help.
Any ut~alJthori~ed changes or modifications to this
equi~nlellt would void the user’s authority to operate this
device.
This device complies with Part 15 of the FCC Rules.
Qperatiotn is subject to the following two conditions:
(I) This device may nol cause harmful interference? and
(2) this device must accept any interference received,
including inierterence that may cause undesired operation.
_. .._..
~ ___...._~ __I_ ” ---_.
triangle is intended to alert the user to the
presence of important operating and
maintenance (servicing) instructions in the
literature accompanying the appliance.
(Insidetof product)
Read these operating instructions carefully before using the unit. Follow the safety instructions on the unit and the safety precautions listed below. Keep
these operating instructions handy for future reference.
~~w~~ e~~~~~.-Connect the unit to a power source of the type
described in these instructions or as marked on the unit.
~~~a~~~~%f~~-The unit is equipped with a polarized power plug whore
one blade is wider than the other. This safety feature
ensures that the plug fits into your household AC outlet only one way. If
the plug doesn’t fit one way, try reversing it. If ihe plug still doesn’t fit,
contact an electrician to replace the obsolete outlet. Do not attempt to
defeat the safety purpose of the plug.
~~w~~ ccxd ~~~%~~%i~~-Route the AC power supply cord so that it
will not be walked on or pinched by items placed on or against it. Never
take hold of the plug or cord with wet hands. Always grasp the plug
body firmly when connecting and disconnecting it.
~we~f~~~~~~-Wtlerl connecting the AC power supply cord, bo
careful not to averload the household AC ouilet, extension cord, or
o&et from any other device as this can result in fire or electric shock.
~~~~ae ~e~~~~~-Turn the unit off when it is not in use. Unplug Iho
unit from the household AC outlet if it is not to be used for a long time.
Unplug the unit during lightning storms.
~t%~~~rne~t~ end ~~oe~~~~~~~“-Use only the attachments and
accessories recommended in these operating irlstructions.
._ ._-^-. ._-- .- -..-l--l_l
1~ ~e~tff~%f~~.-~ituate the unit so that it receives proper ventilation. Do
2.
9.
4.
5.
6.
7.
not instalt in a confined space such as a bookcase &cabinet. Allow at
least 10 cm (4 inches) clearance from the rear of the unit. To prevent
the risk of electric shock or fire due to overheating ensure curtains and
other materials do not obstruct the unit’s ventilation.
~~~e~~~ m~~~~~af”-~nsLire objects and liquids do not get into the unit.
Avoid exposing the unit to excessive smoke, dust, mechanical
vibration, and shock.
~a~~~%ia~-~ituate the unit away from equipment and devices that
generate strong magnetic fields.
~%~~~~~~-~o not place heavy objects on top of this unit.
~~~~o~--~lace the unit on a flat, level surface.
&x%3 and ~%~~~~-Use the unit only with carts
and stands recommended by the r~i~~li~~f~7~;turer.
Move carts with care. Sudden stops. excessive
force, and uneven surfaces can cause carts to
overturn.
Wall end ~~i~i~~ ~~~M~ti~~--Do not mount ihe? unit on walls or
ceilings unless specified in the instructions.
^“,,I,___-“__,“l-lll.-.._.-.......---.I__--”“,..-“.-^-
__-.-.-.
1
4.
2.
Wa%erand ~~~f~%~~~~-.--~onot use the unit near water. such as near a
bathtub or :~wimming pool. Avoid damp basements.
He&--Situate the unit away from hoat sources. such as
radiators.
Do not situate where temperatures fall belaw 5°C (4 1°F) or rise above
WC (WF).
(See below for details.)
Unplug tile unit from the household AC autlet before cleaning.
Clean with a damp cloth.
Do not use abrasive pads, scouring powders, or solvents.
~~~~~~~ ~~~~f~f~~ service-The unit should be serviced by qualified
service personnel if:
(a) The AC power supply cord or the plug has been damaged; or
(b) Objects or liquids have gotten into the unit; of
(c) The unit has been exposed to rain: or
(d) The unit does not operate normally or exhibits a marked change in
performance; or
(e) The unil has beein dropped or the cabinet damagocl.
~~~~i~~~~-Do not attempt to service the unit beyond that described
in these operating instructions. Refer all other servicing to authorized
servicing personnel.
~~~~~~~~~~~~ ~~~%~-When parts need replacing ensure the servicer
uses parts specified by the manufacturer or parts ihi have the same
characteristics as the original parts. lJnauthorized substitutes may
result in fire. electric shock, or other hazards.
9afety ~~~~~-After repairs or service, ask the setvicor to perform
safety checks to confirm that the unit is in proper working condition.
z Never use alcohol. paint thinner or benzme to clean tncs unit.
g @Before using chemically treated cloth, rend the instructions that came with the cloth c:aref!@
@) . ..“-
@--“..-
z?--
5-
*tncluding CD-R/RW
Do not use irregularly
damage the unit.
+RW, DVD--f(W, CVD,
This unit has a Dolby D
DVDs with this mark.
This unit does not have
unit to equipment that I
DVDs with this mark.
ons listed below. Keep
r water, such as near a
Ms.
sources, such as
‘C (41°F) or rise above
-e cleaning.
be serviced by qualified
been damaged; oi
; or
nits a marked change in
damaged.
t beyond that described
servicing to authorized
zing ensure the servicer
arls that have the same
orized substitutes may
the servicer to perform
Lerworking condition.
-Including CD-RIRW and discs recorded with MP3 (and WMA fog
ID\ID-GPW] ,‘;. rii a*, *,
&#~~?7&Q~p),
00 not use irreQularly shaped discs (e.g. heart-shaped), as these can
dain+~s the unit.
This (IItit does not have a DTS decoder. Connect this
unit to equipmen\’ thal has a C)TSdecoder to enjoy
wn.5
with this mark.
Ds
The producer of these discs can conlrol how they are played so you may
not always be able to c:ontrol play as described in these operating
instructions. Read the disc’s instructions carefully.
audio) and video CD format audio CD-R
and CD-RW thaj have been finalized (a process thaw enables CD-RI
613~RW players to play audio CD-H and CD-RW) upon completion of
recording. It may not be able to play some ClN3 or CD-RW due to the
condition of the recording.
DV $3
Panasonic END-R recorded and finalized on a Panasonic DVD video
recorder are played as DVD-Video on this unit,
(t may not be possible to play these discs in all cases due to the type of
disc or condition of the recording.
instrument. with a ball-point pen or other writing
not use record cleaniny sprays. bcnzine, thinner, static electricity
prevention liquids or any other solvent. II
ado not altach labels or stickers to discs. (Do not use discs with exposed g
adhesive from tape or left over peeled-off stickers.) 8
en0 not use scratch-proof protectors or covers.
oDo not use discs prinled with label printers available on the market.
This page explains how to connect the unit to a television and set it up so you hear the audio through the television’s speakers. To get the full benefit from
the powerful multi-channel audio found on DVDs, YOUshould connect an amplifier and speakers (=+page ‘?a).
@Refer to the television’s operating instructions.
- AC power
(included)
The illustration shows
DVD-CPB7.
,---... -- ...” . “-‘.-..X --
8V OUT ~~~~~~~~
The o terminal achieves a more vivid picture than the VIDEC
OUT temiinal by separating the chrominance (C)
and
luminance (Y
signals. (Actual results depend on the television.) ‘~‘elevi~~~~~
video cable
ot included)
-...A. ,.‘~--^ ,,, I
When making this connection, ensure you connect the audio cables
to the corresponding audio input terminals on the television.
..-.- -.._ .- -/
-\
s the calor difference
signals (PB/PR) and luminance signal (Y) separately in order to
achieve high fidelity in reproducing colors.
@Thedescription of the component video input lerminals depends
on the television or monitor (e.g. YIPBIPR,Y/B-Y/R-Y, Y/CS/CR).
Connect to terminals of the same color.
@After making this connection, change the black Ievel for a better
picture (9 page 16, Video--Black Level Control).
cavil
These terminals can be used for either interlace or progressive
output and provide a purer picture that) the S VIDEO OUT
When rnaking this connection, ensure you connect the audio cables
to the corresponding audio input terminals on the television.
A.” ..- ~-_.--.. .-- _______.-._ --1
This unil consumes a small amount of power, even when it is turned off (approx. 2.5 W). To save power when the unit is not to be used for a long time,
unplug it from the household AC outlet.
elnsert so the poles (+ and -) match those in the remote control.
@Donot use rechargeable type batteries.
@usedifferent types at the same tirme.
@heator expose to flame.
@ake apart or short circuit.
oattempt to recharge alkaline or manganese batteries.
@usebatteries if the covering has been peeled off.
Mishandling uf batteries can cause electrolyte leakage which can damage
items the fluid contacts and rney cause a fire.
Remove if the remote control is not going to be used inr a long period of
time. Store in a cool, dark place.
Aim at the sensor. avoiding obstacles, at a maximum range of 7 m (23 feet)
directly in front of the unit.
The QUI S~~~~
SC
time afle rchase and
access this screen agait
SETUP).
~reparati0n
Turn on the television
levision to suit the car
oAudlo Language
OSubtitle Languat
@TVAspect (For !
Q;uvf9-39@ Prog
To reluvn to the previc
Press [RETURN].
Sele
If you have a regular 4::
are converted for view
version of the video i
recorded on the disc.
The letterbox (the OI
appear with black band
of the video is automati
the disc.
169 aspeci pictures i
stretched horizontally t
elf your televfstoo oa
Use the television to 6
081 yoke te~ev~efon
~ro~resslve
Press [PROGRESSI\
be interlace and 4:3 i
get the full benefit from
1
icture than the VIDEO
(C) and luminance (Y)
Xl.)
~eiev~ei~n
meet the audio cables
I the television. !
the color difference
leparately in order to
jut terminals depends
‘/B-Y/R-Y, Y/Co/&).
llack level for a better
x-&ml).
terlace or progressive
/ the S VIDEO OUT
nnect the audio cables
7the television. ,
be used for a long time,
kage which can damage
Ised for a long period of
rm range of 7 m (23 feet)
appears when you press [SETlJP] the first
sts you to
make necessary settings. You can
access this screen again later if you need to ( * page 16, Others-QUICK
rn on the television and select the appropriate video input on the
c&ion to suit the connections for the player.
nit.
&age (For setting details m page 16)
@Subtitle Language (For setting details e page 16)
@TVAspect (For setting details e ‘TV Aspect”, below)
6
gular) or “‘I&9” (widescreen) to suii your television
If you have a regular 4.:3television, you can also select how video on some
d page 16, Video.,-,-TV Aspect).
n Factory preset)
I- (the ariginal widescreen images /- “.
I
I
are converted far viewing on a regular television) I
; I
version of the video is automatically selected if I
; I
recorded on the disc. -1
The letterbox (the original widescreen images
appear with black bands above and below) version
of the video is automatically selected if recorded on
the disc.
Press [PROGRESSIVE OUT] so the indicator goes oul. Output will now
be interlace and 4:3 aspect picture is shown in the middle of the screen.
aas ~~~~~
For pr~~~ese~w~ 0~t~Mt jove)-c~6~~
Press [PROGRESSIVE OUT] so the indicator lights.
2
3 You can load discs on the other trays
by pressing [DISC SKIP] on the m&in
unit.
@The label of the disc must face
upward. (With double-sided discs,
load so the label for the side you want
to play is facing up.)
4 8f2 t
The disc indicator will go out when the unit reads a tray as empty.
*If a menu screen is shown,
see page 8. Disc No. in the
nh..
-
5
in the frant-left position.
&&j (MP3 discs)
Group and track names are displayed on the television.
Press [SUBTITLE] to turn the display on or off.
hen the disc ~i~~~~e~ ~tayi~~
If the sequential mode (* page 8) is off, select the disc using the disc
type information screen (* page 8).
(PLAY) to restart play.
load more than one disc per tray.
touch the drawer or the carousel while they are in motion
rotate the carousel by hand.
*close the drawer by hand.
The operation is prohibited by the unit or disc.
BThe disc continues to rotate the menu is displayed even after you
finish playing an item. Press when you finish to preserve the unit’s
motor and your television SC
cVolume may be lower when playing DVDs than when playing other discs
or during television broadcasts. If you turn the volume up on the
television or amplifier, be sure to reduce the volume again before playing
other sources so that a sudden increase in output does not occur.
oProgressive output is not possible if the “Progressive Out” setting is left
as “Disable” in the QUlCK SETUP menus.
c*Although the progressive out indicator lights if you press 2
[PROGRESSIVE OUT] after changing the “Progressive Out” setting to g
“Enable”,
outpt~t
will still only be interlace if you have connected the unit g
to your television through the VIDEO OUT or S VIDEO OUT terminals.
ou can check the kinds of discs loaded on the trays, and star! playing the
preferred disc.
Disc type information screen appears.
is no disc on the tray.
The disc on the selected tray starts playing.
The other numbered buttons ([6] - [9], &‘I],[ZlOj) do not workwhile the disc
type information screen is displayed.
‘l-0 selec:: a ~“~j~j~ r~~~r~~~~~
Example: To select item 23, press [>10] * 121m [3].
@When playing DVUs, you can also use [A, 8, 4, b] to select ilems.
Press [ENTER] to confirm your selection.
Play of the selected item now begins.
~M~t~~5 aseedto opwate rrwxw3
the disc’s instructions for further details about operation.
CD : Shows the next menu.
z : Shows the previous menu.
~REIURN]: Shows the menu screen. m
[TOP MENU]: Shows the first men
[MENU]: Shows the menu screen.
%Boff: Plays only nne disc in the play position (This mode is on
whenever you turn the unit on.)
This feature doesn’t work during pro~ram/ratldonl play.
You can change the other discs without interrupting play
ffmin unit ansy
moves the carousal iu the opposite direction by two disc trays.
Durirtg play 08‘ wlrilt3 e~~~~~e~
=I PE%% [Di186 EX
Play is stoppetl (if pressed during play), the drawer opens and the disc
tray that was in the play position comes to the frunt.-lail position.
The drawer closas and play begins from tlte IIC:Wdisc.
m (N1P3discs)
This unit can play MP3 f
Files are treated as tract
Play starts and COI
“LF’ indicates the
p-m
To show Qther
~~~~5
After listing all the tracks
To ~lctee the file ilist ec
Press [TOP MENU] or (f
Y
9
The file list for the
eDiscs must conform
formats). MP3 files ni\.
@Thisunit is compatible
it takes Imore time fat
minimum to avoid this.
@This unit is not compal
*This unit is nol cornpal
/13\(D-ep89; py
This unit can also play \i
@When creating a Wiblfi
@WfvlAfiles must have I
@Thisunit can play WM,
@Noise may occur whcr
@There are some files
“TRACK PROTECTEI:
unit’s display to indica
5) and Video CDs once
lights).
30CDs is canceled.
itian (This made is on
,g play
rawer opens and the disc
it!front--left position.
?new disc.
track or title)
rts of 8 disc or at all with. 1
/&i$j (MP3 discs)
This unit can play MP3 files recorded on CD-R/F&V with a computer.
Files are treated as tracks and folders are treated as groups.
~emate co~~t~a~~~~~r
A file list appears.
Play starts and continues to the last track in the last group.
“12? indicates the track currently playing.
To ebAr other pages
Press [d, V, 4, &] to select “Prev” or “Nexl” and press [ENTER].
After listing all the tracks in one group, the list for the next group appears.
‘I’0 close the me list scx?en
Press FOP MENU] or [MENU]
--.-_.-”
I
- - ...” -.-~
sipag Iart? h?e fxx?‘Bn ta8fin
I,
1
You cannot select gro;ps that
contain no compatible files.
2 [A, I V] Ee select a
fqs
The file list for the group appears.
For your re~e~~~~-~~e
‘1. During play, press [POSITION MEMORY].
C-1la jump layers in the tree screen.
2.
3,
must conform to ISO% level 1 or 2 (except tor extended
fomiats). MPB files must have the extension “MP3” or
".III@".
@Thisunit is compatible with multi-session but ii
lherc
are a lot of sessions
it takes more time for play to start. Keep the number of sessions to a
minimum to avoid this.
Press [POWER (.!J]to switch the unit to standby, or change the disc.
When you are ready to play the disc again, press [!%+I(PLAY).
Play starts from the memorized position and the position is cleared.
(When playing DVD e Chapter Preview below)
^,_ _..._ “, e-“~-.eu__c ...m..se. -,a-
To clear the ~~~itio~
] before recalling the Imemorized position.
olhis unit is not compatible with ID3 tags.
@This unit is noi compatible with files with a sampling rate ui 32 kl-lz.
-- ---.-“-.-
L ..- -..“- I
The message appears immediately
This unit can also play Windows Media Audio (WMA).
*When creating a WMA disc, ensure the copyright feature is off.
*WMA files must have the extension “.WMA” 01“.wma“.
@Thisunit cnn play WMA files with Rcompressiun rate of 48 kbps or more.
ONoise may occur when playing WMA files.
*There are sotme files this unit cannot play (e.g.$ copyright protected).
“TRACK PROI~ECTED” or “CANNOT PLAY ‘1’1115TRACK” appear or) the
unit’s display to indicate such tracks.
Press [Bl (PLAY) while the message is displayed
arld
the beginning
portions of each chapter up to the current one are played. Full play z
resumes from the point where you pressed [ 1or [POSITION MEMORY]. 2
(This feature works only within a title.) a0
If you do not press [Q] ( AY), the message disappears and play starts
from where you pressed ] or [POSlTlOiv MEMORY].
Narnj~~ ~ald~~~ and tiles root
At the time of recording, prefix folder and file
names with 3-d@ numbers in the order you
want to nlav them (this mav not work at times).
003
-i
E 001.mp3
002.mp3
003.mp3
..004.mp3
001.mp3
- 002mp3
003mp3
Windows Media, and the Windaws logo are
trademarks, or registered trademarks of Microsoft
Corporation in the United States and/or other countries.
WMA is a compression fomiat developed by Microsoft
Corporation. It achieves the same sound quality as
MP3 with a file size that is smaller than that of MP3.
The position you stopped play at is recorded by the unit when ‘9” is
flashing on the display
While “D” is flashing, press [ ] (PLAY) to start play from where you
stopped it. (When playing DVD Chapter Preview below)
~The position is cleared when e disc is changed or the unit is switched
0 clear the position,
_I--. -‘.- I._--.-.-- ~ -.... ._ I
--- .- -.-I
This function allows YOLIta memorize a position to start from even after
switching the unit to standby or changing discs. You can memarize
positions on up to five different discs at a time. When
you
memorize
another position, the earliest position is replaced.
orhis function doesn’t wark if the searrential mode is on.
@Press [
@Each press increases the number of skips.
*Audio will be heard during search (except for WMA files). You can turn
this audio off if you want to (* page 16, Audio-Audio during Search).
4] or [BB] on the main unit
The frame changes each time you press the button.
. . ...>.F.i.,TP ,*.-.z ,,--~.“->\\w=.::z ,.- ..c.~~
‘The frames change in succession if you press and hold the button.
] also activates forward frame-by-frame.
ll_i_ .-..- . “._--
Notes
@Thespeed of search and slow-motion increases up to 5 steps.
@Press [@] (PLAY) to restart play.
@Youcannot move backwards with Video CD during slow-motion
and frame-by-frame.
_____“...... -.... .-.-. .Tj ’
I- -_I____ - .._.. . . -_____ ..-
ibex ~~~~i~~~~~~~~ ybaek ~O~tr~~I
Pressing buttons to perform skip, search or slow-motion may take you
to a menu screen.
...^~- ..- --______ _-_..-. _
~--- i
Example: To select track 23, press ]Z IO] m [2] m 131.
f&a (MP3 discs)
Press [ENTER] after pressing the numbered buttons.
(You do not have to press [Z IO].)
Play starts from the selected item.
This works only when stopped with some discs.
t
Each time you press the button:
OFF 44U~i0z+60 min +90 min +I 20 min
%- .A
~The unit turns off 5 minutes after play
finishes.
The unit turns off after
60 minutes.
*AUTO also works with DVDs that show a menu after play finishes.
*AUTO does not work if you press [Sl], [NIENUJ, or i.l.hP MENIJ]. It is
activated again when you restart play.
@AUTO does not work correctly with some discs (e.g., if menus appear
after playing Video CDs).
The unit switches to standby mode after about 30 minutes in the stop
mode, irrespective of tlie SLEEP setting.
en the rmqa
.--....~
kQJ#m
You can program all the
Disc MO.
I
Track
Group (MP3 d
-0
-0
@Some items r
Play now begins
@You
can ontar RVDP
recorded on discs, bu
4f the chapter or track
buttons, press [ENTE’
au can program all the
Id hold the button.
ne.
__“...--
?Sup to 5 steps.
1
Jring slow-motion
ral
-motion may take you
ered buttons.
The unit turns off after
60 minutes.
after play finishes.
J], or [“RIP IVIENU]. It is
s (e.g., if menus appear
: 30 minutes in the stop
You can select up to 32 items to play in the order you choose
(Gwen the elapeer.i pk2y time ic ~~is~~~ye~~
f@“g+f&E
You can program all the items on discs.
drift et~~~~~
-0 Press “2Renu
-@) ~3~1 pwe
oSome items cannot be selected.
*Repeat steps 2 and 3 to program other items.
can enter DVDs, empty trays, and item numbers for items rtot
recorded on discs, but they are not played.
(211:the chapter or track number flashes after entering it with the numbered
buttons, press [ENTER] to continue to the next item.
..- ______.- . .~ .-......_~ ..i
all the items on a disc in the play position.
oSome iterns cannot be selected.
et~ifferent titles have different soundtracks and subtitles.
@Repeat steps 2 and 3 to program other items.
@Someitems cannot be played even if you programmed them.
-m s,x---
You cannot program if there is no disc on the tray in the play position.
To select an item ~~i~~ the cursor Arlene
Press [ENTER] and [A , ] to select an item, then press [ENTER]
again to register the number.
All the items on a disc, a title or a group are selected when you select
‘:ALI.“.
Press [A , V] to select an available item, then repeat steps 2 and 3.
To move to th &we or after the one e~ew~i
Press [-%d] or
1x3programmer itemr one by one
V] to select the item number ( [CANCEL.].
ely, you can select “Clear” with [ ] and press
[ENTER].)
To clear the Poole pro
Move to “Clear 811”with [ Er-]and press [ENTER]. The whole
program is also cleared
when
the disc is moved out of the play position
while the sequential mode is off or if you turn the unit off.
‘To exit the ~r~~r~~~ rne~~
Press [PROGRAM] while stopped. (The program is retained in
memory.)
You can play all discs in random order
Belle stoooe~
.”
Play now begins in random order.
, _I”_” >- >->r.
To exit the re~~~~rn mode
Pi-ess [RANDOM] while stopped.
QDVDS and empty trays are skipped during random play.
@Theplayback control functian on Video CDs is canceled.
- ..-.
Rs 0
8 is 1
You can play all the items on a disc in the play position in random order
To exit the r~~~~rn mode
Press [RANDOM] while stopped.
The playback
control
function on Video CDs is canceled.
e you press the button:
‘+Entire disc (D)*z->All discs (S)pS
-..--..- OFF;
k (‘r)*&Group (G)S2-+All discs (s)s3
L QFC”c.....I
‘,i”Ghapter (1)” or “Track (1)” during program play.
S’2”All(A)” during program and random play.
*3Only when the sequential mode is on (DVDs are skipped).
3. Press [REPEATj (e above).
ntire DVD or an entire iv%%disc.
trac tws
Start program play (m page 11) and press [REPEAT] to display “A”
You can repeat a section between points A and R within a title or track.
~W~l~~ play
Press [A-B REPEAT] until “a #:W is displayed.
e subtitles recorded around point A or B may fail to appear.
@The unit automatically determines the end of a title/track as point
the end of the title/track is reached.
@A-8 repeat is canceled when you press [CXJIW REQLAYJ.
~~,---, -,., -_,,^,.,,___~ __~-.~“l_--x-^ _,--,,
Use the buttons io conlrol the following features, used to
enhance your enjoyment of movies.
Turn ADVANCED §Ul~~~U~I.) and BASS PLUS off who(1 using Dolby Pro
Logic. Dolby Pro Logic will not work correctly if they are on.
y
lJse ADVANCED SURROUND V.S.S. (Virtual Surround
So~md) to enjoy a
surround-like effect if you are using 2 front speakers.
If you are playing a disc with surround effects recorded on it, ihc cffoct is
broadened and sound seems to come from virtual speakers on either side.
sADVANCl?D ~~~J~~~~(~U~Dwill not wnrk, or will have less effect with some discs.
o-rum off the surround sound eiie(;ts on the equipment YOII have
connected when using this effect.
IzTurn ADVANWD SIJIIROUND off if it causes distoriion.
Each time you press ths
0
e
inie
DIALOGUE ~N~lA~~;~
discs.
f&J m
~emQ~eCQ~~~Q~Qnl~c
.---.--
Turn BASS PLUS on when you have connected an active subwook?r to the
SUWVOOFER terminal or!
ihe
rear of the unit (m page IO).
>
Cin,‘l: Mellows images and
I i
enhances detail in dark
sccnos.
W&z Sharpens images and
I t
enhances detail in dark
scenes.
\
i..
W&r.: Normal mode (Factory preset)
lwing features, used In
If when using Dolby Pro
y are on.
houndSound) ta enjoy a
rs.
rded on it, the effect is
speakers on either side.
You can make liner adjustments to the picture if desired (a page 15,
Digital picture mod& Jser mode).
6s effectwith some discs.
equipment you have DIALOGUE ENMANCEFl will not work or will have less effect with some
Some DVDs have multiple soundtracks, subtitle languages and camera
angles, and you can change these during p1a.y.
~a“--”or “-.-2’ is displayed instead of the language nurnber in circumstances
suet-1as when no language is recorded on the disc.
The number changes each
time you press the button. Indicates that a multi-channel soundtrack
can be down-mixed to two channels.
o use this button to turn the vocals on and off on karaoke
the disc’s instruction for details.
n page 14 for audio signal type details.
ranges each time you press the button.
<ainsome cases, the subtitle language is not changed to the selected one
immediately.
elf the subtitles overlap closed captions recorded on discs, turn the
subtitles off.
~~~1~~play
Prsss [ I-
The number changes each time you press the button
I
- ,l....“. -~- . _~ _......-....... -.-
..- -...... ~ . / L-..---..... ~.. -
;torXion.
On-Screen Menu Icons are menus that contain information about the disc
or unit. These menus allow you to perform operations by changing this
c information.
Each time you press the button:
play memo C---F Video rn~~~
eSorne items require different operations. Read the following
explanations.
aDepending on the condition of the unit (playing, stopped, etc.) and the
type of software you are playing, there are some itoms that you cannot
select or change.
BWhen numbers are displayed (e.g. title No.), the numbered buttons are
also effective for setting. After entering numbers, press [ENTER] to
register the setting.
To &m the ieana
Press [RETURN] until the menus disappear.
1to show the elapsed play time or reimaining time for the
title (0; chapter during progr& and random play).
@Select a position to start play by specifying a time with the numbered
buttons and press [ENTER].
~~arn~~rn~the time ~i~~l~~ @j! m
Press [ ] to show the elapsed play tirne, remaining time for the
track, or remaining time for the disc.
~la~s~~ play tirm $@a(MP3 discs)
(display only, cannot be changed)
@ s~~rn~~rac~ lam~~a~~
Duet: OFF, V1 +
(MP3 discs)
@ Menu play E@ (with playback control only)
Indicates whether menu play (playback control) is on or off.
.-
~~~i~l~~~~~~~f~ ~~~~~~~~
G: English SVE: Swedish CRI: Chinese
FRA: French NOR: Norwegian MOW Morcan
DELJ: German DAN: Danish MAL: fvkllay
IRA: Italian POR: Portuguese VIE: Vietnamese
ESP: Spanish RUS: Rrussian THA: Thai
NLD: Dutch JPN: Japanese * 0ther.s
Signal t~~el~at~
LPCM/f;BB DigitaliDTSIMPEG: Signal type
k (It&): Sdrnpling frequency
b (bit): Nurnber of bits
ch (channel): Number of channels
2 .tch
T., I: Subwoofer signal
I.- (not displayed if there is no s&woofer signal)
0: No surround
1: Mono surround
2: Stereo surround (left/right)
- 1: Center
2: Front left-t-Front right
3: From left-i-Front right+Conter
0 re~sst ii
[ENTER] (start point
To cancel: [ENTER]
Chapter (C)~‘~:+
L-> OFF c
@$j ;\IccI/
Track (I) ‘-+I
^laOlT+ All dis
~1“Chapter (1)” or “7‘
\*“A11 (A)” during pro
‘30nly when the set
@ may abbe ~~s~lsy 1
---: Normal play
[ENTER] (The unit is
To mark a position:
To mark another pas
To recall a marker:
To erase a marker:
@~~~~ta~~~~~~~~Ernst
nor.: Normal mode
Cin.l: Mellows imag
Gin.%: Sharpens ima
ser: User mode (w
@ T~am~f~r mode
Select the meth
of material being pla
~~tc 1 ~rnmr~~l~~fOl
Auto 2: far film mat
frame per s
idea: for video ma
hange the picture’5
1, Mighlight the posi
2. Press [I 1.
3. Press [I] (left) or
4. Press [a] to enter
To return to the fact
@ ~~rntr~s~ (-7 to -1-T
increases the co&
@ ~~~~btrn~ss (0 to -V’
Adjust the shade of
rr remaining time for the
Play).
time with the numbered
remaining time for the
discs)
) is on or off.
:Hl: Chinese
;OR: Korean
AAL: Malay
(IE: Vietnamese
‘HA: Thai
-: Others
no subwoofer signal)
enter
@ A-B rspe &z m (* page 12)
[ENTER] ) s*p[ENTER] (finish point)
l-o cancel: [ENTER]
0 play (* page 12) @j] (NIP3 discs)
(C)‘,’ --Title (T))’ Track (T)*’ c-------- Group (G)-”
n
“i------+ OFF 1-1 4 OFF+-> All discs (S)S’“cf
p$$ pi?J
Track (T)- ’:- Entire disc (D)jz
t-OFF++ All discs (B)‘ 3c-
^i ‘Chapter (1)” or “Track (1)” during pragram play.
\2 “All (A)” during program and random play.
13Only when the se mode is on (DVDs are skipped).
@ Pley w.3de ~js%~la~ g@ jVCDl
___: Program play RND: Random play
g$ ivIa R%gI@xJ
YO
tp to 5 positions to play again.
/ENTER] (The unit is now ready to accept markers.)
To mark a position:
To mark another position:
To recall a marker: [+I, B-1- [ENTER]
To
erase a marker: [ 4, F*] e [CANCEL]
“~...-_ --..--
L-
-----. “.l~-...-.~--.--
~j~~~ ~~~~~~
..___- ..__._- - -....- ..- ..___ ..._
J
When the progressive out indicator is on (-” page 7).
@CJ,/(* page 13, CINEMA)
Nor ~Normal mode“~
Cin.‘l: Mellows images and enhances detail in dark scenes
Cin.2: Sharpens images and enhances detail in dark scenes
Daer: User mode (when the progressive out indicator is off)
@Trs~5f~rmode m
Select the method of conversion for progressive output to suit the type
of material being played (-* page 21, “Film and video”. Glossary).
km10 I ~~c~r~~a%~:for film Jnaterial
~~~~ 2: for film material (the same as Auto 1, but able to convert 30”
frame per second progressive video.)
idea: for video mat m
Change the picture’s position if it is off center.
.I. Highlight the position icon.
2. Press [‘I].
3. Press [I] (left) or [3] (right) to move the piduro.
4. Press [4] to enter the position (saved even if you turn
tl~e
unit off).
To return to the factory-set position: Press [2] in step 3.
Q ~~~~r~a~ (-7 to i-7)
Increases the contrast between light and dark parts of the picture.
@ ~r%~~t~e~~~(0 to + 15)
Brightens the picture.
@Color (-7 to +7)
Adjust the shade nf the picture’s color.
@ 4:3TVP
ON c>OFF
Expand a letterbox picture ( page 7) to fill more of a regular 45 aspect
television (The sides of the picture are cut off when you select ON).
043 IV ZOOM is cleared when you change discs or switch the unit to
standby.
ODepending on the video format of the disc and current play status,
this feature may not work as described.
etvlenus ma appear differently while 4:3 TV ZOOfvl is on.
(e page 21, Glossary)
ON -OFF
Displays the pit he still picture mode.
0
i5~~~~~i~~~
hanges the brig itness o
Bright ++Dim ~Auto”
LC
“The display is dimmed during play, but brightens when you perform
operations such as slow-motion, search, and pause.
have played through an item.
] to show the elapsed play time or remaining time for the
title (or chapter during program and random play).
oSelect a position to start play by specifying a time with the numbered
buttons and press [ENTER].
the time ~i~~la~ #$$gm
a] to show
the
elapsed play time or remaining time for the
track.
clauses play ‘rime &t&j (MQ3 discs)
(display only, cannot be changed)
-
-
ed subtitle language.
Choose the preferred language for disc menus.
_.......I.._......_I.......-.--
el to limit DVD-Video play.
screen is shown if you choose levels 0 to 7 or if you
choose “Ratings” when levels 0 to 7 have been selected (* page 17).
@Select “Level 0” to prevent play of discs that do not have ratings levels
recorded on them. -.^- . . . .._- ..._-- -.-._--. -
TV ~s~a~~ (- page 7) reference.
--..-.. ._-.- _...-- --..-- -_____ __
Stilt abbe (= page 21, Glossary)
Specify the type of picture shown when paused.
.
~ja~~ Lewel ~~~%roj
Change the black level of the picture if you connectecl a television through
the COMPONENT VIDEO OUT terminals.
- . - ..-_-
ve
so~wd
during search.,‘5 -----..
conga ~~~~~~~~
Choose the preferred language for these menus and the on-screen messages,
---. --... .^
o~s~~se~ messages
Choose whether to show on-screen messages or not.
A demonstration of the unit’s on-screen displays starts when )/ou select
“On”. The demonstration stops when you press a button and the setting
reverts to “OW. ~. .^^- .
TUP (* page 7)
Answer questions to rnake basic settings.
-.--- _ --...
-
--
_
--_
--
!
Lighta; when connected to a ‘TVthrough tl te VIDEO
OUT or S VIDEO OUT-terminal.
Darker: when connected to a TV through the
COMPONENT VIDEO OUT &‘/PPIP~)terminals.
No Yes
Bitslreanl PCM
~-._- --._ -” -.
m Bitstream
.._ __--._____ ~__.- -
m on
--“- -_~- _- I “” ” -_ ““-
Q!l Off
Fran~ais
Off
Espariol
--- - .-_” ...
or,
On
\: The original language of each disc will be selected.
:,eInput a code number with the numbered buttons (see below)
13If the language selected for “Audio” is not available, subtitles of that language will automatically appear if available on that disc.
S.4Prohibits play of DVD-Video with corresponding ratings recorded on them.
~5The feature doesn’t work for WMA files.
Abkhazian: 6566
Afar: 6565
Afrikaans: 6570
Albanian: 6381
Atneharic: 6!i77
Arabic: 6582
Armenian: 7289
Assamese: 6583
Aymara: 6588
Arcrbaiiani: 6590
Byclorussiiin: 6669
Cambodian: 7577
Catalan: 6765
Chinese: 9072
Corsican: 6779
Croatian: 7262
Czech: 6763
Danish: 6865
Dutch: 7876
English: 6976
Esperanto: 6979
Estonian: 6984
Faroese: 7079
Fiji: 7074
Finnish: 7073
French: 7082
Frrsian: 7089
Galician: 7176
Uashkir: 6665
Basque: 6965
Bengali;Bar&: 6678
Bhutoni: 6RYO
Bihari: 6fi72
Eweton: 6662
Bulgarian: 6671
B~~rmese: 7789
Georgian: '7565
German: 6669
Greek: 6976
Greer!landic: 7576
Guarani: 7176
Gujarati: 7185
t-lausa: 7265
th?brWK 7387
Hindi: 7273
Hungarian: 7265
Icelandic: 7383
Indonesian: 7376
Interlingua: 7365
Irish: 7165
Italian: 7384
Japanese: 7465
.JaVaileS~: 7487
KaUtladX 7578
Kashmiri: 7563
Kazakh: 7575
Kirghiz: 7589
Karoan: xi79
Kurdish: 7585
Laotian: 7679
Latin: 7665
Latvian,ILettish:7686
Lingala: 7678
Lithuanian: 76&l
Macedonian: 7775
Malagasy: 777'1
Malay: 7783
Malayalam: 7776
Maltese: 7764
Maori: 7773
Iviarafhi: 7782
Moldavian: 7779
Mongolian:
NaWLi: 777a
7665
Nepali: 7869
Noiwegisll: 7679
Oriya: 7982
Pashto,Pushto:
IPersian: 7065
Polish: 6076
Portuguese: 6084
Punjabi: 6065
Qucchua: 6165
Rhaeto-Romance:6277
Ilornanian: 8279
Russian: 8285
Samoan: 8377
Sanskrit: 8365
ScatsGaelic: 7168
Serbian: 6362
Serbo-Croalian:8372
Shona: 6378
Sindhi; 8368
Singh&ese: 6373
SlOV& 6375
Slovenian: 6376
Somali: 8379
Spanish: 6983
Sundanese: 0305
Swahili: 6387
Swedish: 8386
Tagaloy: 6476
Tajik: 647'1
Tamil: 6465
Tatar: 6464
TckJgu: 8469
Thai: 6472
Tibetan: 6679
Tigrinya: 803
Tonga: 8479
.Turkish: 6462
Tu~kmen: 847!i
Twi: 6467
Ilkrainian: 8575
Urdu: 8582
Uzbek: 8590
Vietnamese: 8673
VolaoOk: 6679
W&h: 6769
Wd0f: 8779
Xl10s.3: 8872
Yiddish: 7473
Yoruba: 6979
ZUIL!: 9085
The password screen is shown when you select levels 0 to 7.
1. Input a 4-digit password with the numbered buttons and press
[ENTERJ.
elf
you enter
a wrong number, press [CANCELJ to erase it before you
press [ENTERj.
‘) The lock symbol appears closed to show the rating is locked.
MB0 not forgot your Password.
2. Press [ENTER] to confirm the 4 digits.
Ich Spanish
inish
D-7 is sel~o~e~)
‘range Password
3mporary Unlock
I
Now, when you insert a DVD-Video that exceeds the ratings limit
you set, a message appears on the television.
Follow the on-screen instructions.
29
Change the settings when you have connected equipment through this
unit’s DIGITAl.. AUDIO OUT terminal (OPTICAL).
II-
. ..~ ..._._.- ..--- .._- -......
-~“- ~^~-~ I
Select how to output audio with a sampling frequency of 96 kHz.
Select “Yes” if the equipment you connect cannot process signals with a
sampling frequency of 96 kl-lz.
aSelect “No” if you use analog connection irrespective of the type of
equipment.
Mra(Factory preset):
Output as 96 kHz. There is no output if the disc has copy protection. Select
“Yes” in this case.
Yes :
Converted to 48 kHz far output.
’ through the VIDEO
srminal.
through the
JT (YIPBIPR)terminals.
. .._-.. ..”-...
“____ .____ -
spaiiol
I I
~i~e~~ea~ (Factory preset for Dolby Digital):
Select if the equipment you connected can decode the signal.
Select if the equipment you connected cannot decode the signal.
Off (Factory preset far DTS Digital Surround):
Select if
the
equipment you connected cannot decode the signal,
cThe QUIM SETlJP screen appears when you press [SETUP] the
first time after purchase (-3 page 7).
2 &“tg?se [“$ @*I to a&eel tail ~RU7Slab,
The screen changes to display the men~r.
Rise Video
ALldiO
c.
Others
rigrinya:
I”Wlfp:
Turkish:
6473
8479
0482
Turkmon: a475
Twi: 8487
Ukrainian: a575
Jtdu: 0502
Jzbei;: R590
dietnamw: a673
tiolapiik: R679
&=!lSll: 6789
NoId: 0779
r(hOStX 8872
<iddish:
7473
~0NhEl: 8979
7UlU: 9085
This model can play Dolby Digital, but only in two channels. This model does not have a DTS decoder, You must connect a unit with a Dolby Digital or
DTS decoder to enjoy surround sound.
~The equipment connections described are examples.
eperipheral equipment and optional cables said separately unless otherwise indicated.
c5efore connection, turn off all equipment and read the appropriate operating instructions
enjoy
stereo or
onnect a digital amplifier or
system component.
Change the settings in “Digital
You cannot use DTS Digital Surround
decoders not suited to DVD.
S~aak~ra (Example)
You can enjoy surround sound
by connecting three or more
Insert fully, with
this side facing up
1'
To eojoy stereo or DC3
Connect an analog amplifier or system component.
You can enjoy more powerful bass by connecting an active subwoofer.
@Place the subwoofer as close as possible to the front canter.
Turn BASS PLUS on to boost the
output
from the subwoofer (* page ‘13).
Adjust the volume on the subwoofer to suit your preference.
~~~~
t~~~e~
rBC0
reco digital signal directly to digital recording equipment. a cassette deck or other recording
the recording equipment with an optical digital audio cable Connect the recording equipment with an audio cable (Q
ove). There are no limitations on recording analog signals as the
digital signals.
DVD, the following conditions must be met: @ the disc doesn’t have
protection preventing digital recording, and @ the recording equipment
can handle signals with a sampling frequency of 40 kWz.
~You cannot record DTS signals.
~YOU cannot record MP3/WMA.
When recording DVDs, make the following settings.
ADVANCED SURROUND: OFF (- page 12)
PCM Down Conversion: Yes (- page 17)
f DTS Digital Surround: Off (” page 17)
F
Ls
Before requesting servic
solve the problem:
r- ._-_
---._._-.
_
MO
power"
I No menu dav.
effect.
; :
f i
t with a Dolby Digital or
,ystem camponent.
rr recording equipment.
Ii0 cable (=> above).
ignals as there are with
@Toconserve power, the unit automatically switches to standby after approximately 30 minutes in -
the stop mode. Turn the power back to 0N. I I
/. .___-_ ..-___-
1 @Theunit was switched Lostandby by the SLEEP timer.
___I_ ” -- ..-....._____
I.. ~- --- ...m
~r~ti~~~ can be ~erf~r~~~
@Check that the batteries are installed correctly. 8
wi%h %he ~~rn~%~ ~~~%~~~.
@Thebatteries are depleted: Replace them with new ones. I I
6
@Point the remote control at the’remote control signal sensor and operate.
~~a~~ense~~on has formed:
rThis function is dependent an software a~~il~bilfty, Even if a disc has a number”of angles ‘:”
-recorded, these an&es may be recorded ~~~~e~ifio .scenes iitlty. ^.
..._......~ “--~ _..-......--” ..-.___I_-.-. --.___II_ .._.~ ..__
oChock the volume on the equipment you have connected.
@Ensure that the input settings for the television and stereo system are correct.
eTurn ADVANCED SURROUND off if it causes distortion.
elf you have connected this,unit to other equipment through
ensure you have
selectecJ~
tire correct s&ngs & “Dolby D$?ital”:
SE?“UF m&u3 Audio mei%. : ni
-_ . l.-~” “...”.-.--~ ..-~_.. ...^.l-l_ .^-....-.- .--.-.-
-A----a -^^- ~ --..“-~.^~ B
5
8
00 stands for a number
s
YWJ may RISO
need to change ihe screen mode on the iolevision itself.
eEnsur% that the unit is connectcttl clireclly lo the television. and is not connected lhrougk a video
cassette recorder.
~The 43 TV ZOOIvYfunctiolt is on.
Yuu
canriul
view progressive viden if your television is nrri compatible.
rPress ~~~~~~~S~lV~ OUT] tu turn progressive output off. This problem is caused by the editing
method or material used on the DVD-Video, but should be corr%ded if you us%interlace rrutpul.
@Check the settings in the On-Screen Menu Icons’ Video menu.
@Adjust the ~lori~ontat pasitiori in the On-Scres? Menu Icolts’ Video me&u.
in i”
.:I~
,:
_--. .._ . “” “^ I ____-.,..-. .. ” -
_l^“-l “--._._- -... “...-
B~YOLIinserted a disc the unit cannot play; insert one it can.
-_,....---.. ^
&Iisc is dirty. Wipe the disc clean.
@Trouble is likely to have occurred.
The
number following “l4” clopends on the status of the unlit.
k%T& ~~a~e~~~~~
Press [POWER ti] to switch the unit to the standby mode and then back to ON. Alternatively,
press [POWER 61 to switch the unii to the standby mod%, disconnect the AC power supply
cord, and then reconnecl il.
@Ifthe service numbers fail lo clear, note the service number and contact a qualified s%rvic%p%rson.
.__ .-
@Use the television to change the aspect lo the correct on%.
It ~~~~ t%l~v~s~~~ ~a~i~~t ~~S~~~%the aspect when l~~~~t is ~~~~r%ee~ve,
Press [PROGRESSIVE OUT] so the indicator goes out. Output will now be interlace.
@Press [DISPLAY], and press [4, &] to highlight tha rightmost icon, then press [A, to adjust
Go to Disc in tho SETUP and select the pr~f%rr~d la~~guag%for “Menus”.
is is the digital form o
before it is decoded into
A decoder restoros the 8
called decoding.
This is a method of codin
Apart from stereo (2”ch
channel audio. A large i
one disc using this methc
e
m whf
channels and then is rest
is monaural and can repi
There is good separatior
are possible.
Dynamic range is the cliff
be heard above the nois
before distortion occurs.
DVD-Videos are recorc
recorded at 24 frames I
video is recorded at 30 f
1. ~~~% ~e~Mt~l~~ 90
vice personnel if:
(a) The AC power sue
(b) Objects or liquids
(c) The unit has been
(d) The unit does not
performance; or
uses parts specified k
characteristics as the
in fir%, electric shock,
4. ~~~et~ check--After
safety chocks to conf

Other manuals for DVDCP67 - DIG. VIDEO DISC PLAY

1

This manual suits for next models

3

Other Panasonic DVD Player manuals

Panasonic DVD-S53EE User manual

Panasonic

Panasonic DVD-S53EE User manual

Panasonic S295 Owner's manual

Panasonic

Panasonic S295 Owner's manual

Panasonic NV-VP32GN User manual

Panasonic

Panasonic NV-VP32GN User manual

Panasonic DVDRV32 - DIG. VIDEO DISC PLAY User manual

Panasonic

Panasonic DVDRV32 - DIG. VIDEO DISC PLAY User manual

Panasonic DVDA110 - DIG. VIDEO DISCPLAYE User manual

Panasonic

Panasonic DVDA110 - DIG. VIDEO DISCPLAYE User manual

Panasonic DVD-RA71 User manual

Panasonic

Panasonic DVD-RA71 User manual

Panasonic PVD4735S - DVD/VCR DECK User manual

Panasonic

Panasonic PVD4735S - DVD/VCR DECK User manual

Panasonic KX-VC300 User manual

Panasonic

Panasonic KX-VC300 User manual

Panasonic DVD-F65GCS User manual

Panasonic

Panasonic DVD-F65GCS User manual

Panasonic DVD-F61 User manual

Panasonic

Panasonic DVD-F61 User manual

Panasonic DVD-F65 User manual

Panasonic

Panasonic DVD-F65 User manual

Panasonic DVDH2000 - DIG. VIDEO DISCPLAYE User manual

Panasonic

Panasonic DVDH2000 - DIG. VIDEO DISCPLAYE User manual

Panasonic DVD-S700EG-K User manual

Panasonic

Panasonic DVD-S700EG-K User manual

Panasonic DVD-RV80 User manual

Panasonic

Panasonic DVD-RV80 User manual

Panasonic DVDRV41 - DIG. VIDEO DISCPLAYE User manual

Panasonic

Panasonic DVDRV41 - DIG. VIDEO DISCPLAYE User manual

Panasonic DVD-RV31K Operating User manual

Panasonic

Panasonic DVD-RV31K Operating User manual

Panasonic PV-D4733S-K User manual

Panasonic

Panasonic PV-D4733S-K User manual

Panasonic DVD-S35GD User manual

Panasonic

Panasonic DVD-S35GD User manual

Panasonic DVD-RA61 User manual

Panasonic

Panasonic DVD-RA61 User manual

Panasonic DMP-BD10 - Blu-Ray Disc Player Installation manual

Panasonic

Panasonic DMP-BD10 - Blu-Ray Disc Player Installation manual

Panasonic DVDRV31 - DIG. VIDEO DISCPLAYE User manual

Panasonic

Panasonic DVDRV31 - DIG. VIDEO DISCPLAYE User manual

Panasonic NV-VP60 Series User manual

Panasonic

Panasonic NV-VP60 Series User manual

Panasonic SL-DT100EG Instruction manual

Panasonic

Panasonic SL-DT100EG Instruction manual

Panasonic DVDLX95 - PORTABLE DVD PLAYER User manual

Panasonic

Panasonic DVDLX95 - PORTABLE DVD PLAYER User manual

Popular DVD Player manuals by other brands

Philips DVP3880 user manual

Philips

Philips DVP3880 user manual

ZENEC ZE-MC294 Software update

ZENEC

ZENEC ZE-MC294 Software update

Akai DV-P4930KDSM Service manual

Akai

Akai DV-P4930KDSM Service manual

LG VLK9320W owner's manual

LG

LG VLK9320W owner's manual

Philips DVP 720 SA user manual

Philips

Philips DVP 720 SA user manual

Pioneer DV-363-S Service manual

Pioneer

Pioneer DV-363-S Service manual

Philips DVP3008/93 Service manual

Philips

Philips DVP3008/93 Service manual

Sony DVP-NS700P - Cd/dvd Player Dimensions

Sony

Sony DVP-NS700P - Cd/dvd Player Dimensions

Sony DVP-S735D operating instructions

Sony

Sony DVP-S735D operating instructions

Sharp DV-SL1500W Operation manual

Sharp

Sharp DV-SL1500W Operation manual

Philips DVP762/00 Service manual

Philips

Philips DVP762/00 Service manual

Sharp DV-SV92S(B) Operation manual

Sharp

Sharp DV-SV92S(B) Operation manual

Daewoo DVG-8400N owner's manual

Daewoo

Daewoo DVG-8400N owner's manual

THOMSON DVD3654 User guide manual

THOMSON

THOMSON DVD3654 User guide manual

Kenwood DV-402 Service manual

Kenwood

Kenwood DV-402 Service manual

Apex Digital AD-2600 user guide

Apex Digital

Apex Digital AD-2600 user guide

Grundig DVD-Kit1 Service manual

Grundig

Grundig DVD-Kit1 Service manual

Pioneer DV-490V-S operating instructions

Pioneer

Pioneer DV-490V-S operating instructions

manuals.online logo
manuals.online logoBrands
  • About & Mission
  • Contact us
  • Privacy Policy
  • Terms and Conditions

Copyright 2025 Manuals.Online. All Rights Reserved.