Panasonic KY-R647EL User manual

Operating and Installation Instructions
Induction Hob Household Use
Mode d’emploi et notice d’installation
Table de cuisson à induction Usage domestique
Instrucciones de instalación y funcionamiento
Placa de inducción Uso doméstico
Model No./Nº de modèle/N.º de modelo KY-R647EL
English Français Español
Operating and Installation Instructions �������������������������������������������������������������� EN-1 - 28
Thank you for purchasing a Panasonic appliance.
• This appliance is intended for household use only.
• Please read these instructions carefully before attempting to install, operate or service
this appliance.
• For optimum performance and safety, please read these instructions carefully and follow
safety precautions when using this appliance.
• Before using this appliance please pay extra attention to “Safety Precautions”
(pages EN-2 - 4).
Keep this Operating and Installation Instructions for future use.
Instrucciones de instalación y funcionamiento ������������������������������������������������� ES-1 - 28
Gracias por comprar un electrodoméstico Panasonic.
• Este electrodoméstico es solo para uso doméstico.
• Lea estas instrucciones detenidamente antes de instalar, hacer funcionar o realizar
mantenimiento en este electrodoméstico.
•
Para que el funcionamiento y la seguridad sean óptimos, lea estas instrucciones
detenidamente y respete las precauciones de seguridad cuando use este electrodoméstico.
• Antes de usar este electrodoméstico, preste mucha atención a las “Precauciones de
seguridad” (páginas ES-2 - 4)�
Conserve estas Instrucciones de instalación y funcionamiento para consultarlas en el futuro.
Mode d’emploi et notice d’installation ���������������������������������������������������������������� FR-1 - 28
Nous vous remercions d’avoir choisi cet appareil Panasonic.
• Cet appareil est uniquement prévu pour un usage domestique.
• Veuillez lire attentivement ces instructions avant d’installer, d
’
utiliser ou d
’
effectuer
l
’
entretien de votre appareil.
•
Pour un meilleur rendement et une sécurité optimale, veuillez lire attentivement ces instructions
et respecter soigneusement les consignes relatives à la sécurité lorsque vous utilisez l’appareil.
• Avant toute utilisation de cet appareil, veuillez porter une attention particulière aux
« Précautions relatives à la sécurité » (pages FR-2 - 4)
Conservez ce mode d’emploi et la notice d’installation pour consultation ultérieure.


Safety Precautions ����������������������������������������������������������������������������������������������������������2 - 4
Parts Identification..................................................................................................................5
Using the Induction Hob ..................................................................................................6 - 16
• Types of Cookware that can be used..................................................................................6
• How to Check the Cookware Compatibility.........................................................................7
• Operating the Induction Hob ..........................................................................................8 - 9
• Timer Function ...........................................................................................................10 - 12
• Safety Features for Induction Hob .............................................................................13 - 14
• Cooking Guidelines....................................................................................................15 - 16
Cleaning and Maintenance...................................................................................................17
Troubleshooting.............................................................................................................18 - 19
Failure Display and Inspection .............................................................................................20
Specifications .......................................................................................................................21
For Installer
Installation Instructions..................................................................................................22 - 28
• Installation Requirements...........................................................................................24 - 27
• Electrical Connection ........................................................................................................28
EN-1
English
Tables of Contents
■What is induction technology?
With features like safety, easy care, and energy efficiency, induction hobs have
become the choice of cooking professionals as well as those who love home cooking
around the globe� Induction hobs represent one of the symbolic home appliances
that make everyone’s life better�
Cookware
Coil Coil
Eddy current
Magnetic
Force
Top plate
IH (Induction Heating) refers to
electromagnetic induction heating. When
electricity flows in the magnetic coils
underneath the top plate, magnetic lines
of force pass through metallic cookware
when an eddy current is induced. The
heat that is generated by the electrical
resistance of the cookware is used for
heating.

EN-2
Safety Precautions
In order to prevent accidents or injuries to the users, other people, and damage to
property, please follow the instructions below�
■The following charts indicate the degree of damage caused by wrong operation�
WARNING
Indicate serious injury or death�
CAUTION
Indicate risk of injury or property damage�
■The symbols are classified and explained as follows�
These symbols
indicate prohibition� This symbol indicates requirement
that must be followed�
Make sure to follow these instructions
WARNING
Stop using the unit when
abnormality / failure occurs and
turn ‘OFF’ the power switch or
pull out the 3 pin plug�
Example of abnormality / failure:
• Abnormal noise or heat.
• Abnormal emission of smoke, fire.
• Fire or oil ignition.
The unit must be grounded�
Plug the power cord to socket
outlet with grounding continuity
terminal�
Improper grounding could cause
electric shock.
The means for disconnection
must be incorporated in the fixed
wiring in accordance with the
wiring rules�
This appliance is necessary to
allow disconnection from the
supply after installation� The
disconnection may be achieved
by having the plug accessible or
by incorporating a switch in the
fixed wiring in accordance with
the wiring rules�
This appliance is not intended
to be operated by means of an
external timer or a separate
remote-control system�
If the supply cord is damaged,
it must be replaced by the
manufacturer, its service agent
or similarly qualified persons in
order to avoid a hazard�
Be sure to disconnect the Power
Plug from the wall outlet or switch
OFF the external switch before
maintenance, repair or service�
Also, do not handle the Power Plug
or external switch with wet hand�
When disconnecting the Power
Plug, hold the plug itself� Do not
pull the cord in anyway� The cord
may be damaged and may cause
fire or electric shock�
Insert the Power Plug firmly,
otherwise it may cause fire or
electric shock�
Clean the Power Plug regularly,
otherwise, it may cause
insufficient insulation due to
moisture, and may cause fire�

EN-3
English
WARNING
This appliance is not intended
for use by persons (including
children) with reduced physical,
sensory or mental capabilities,
or lack of experience and
knowledge, unless they have been
given supervision or instruction
concerning use of the appliance
by a person responsible for
their safety� Children should be
supervised to ensure that they do
not play with the appliance�
Unattended cooking on a hob with
fat or oil can be dangerous and
may result in a fire�
If the surface is cracked, switch
off the appliance to avoid the
possibility of electric shock�
When deep frying, keep following
conditions to prevent the risk of
fire:
• The quantity of oil is minimum 500 g
(17 41/64 oz.).
• The curve of the cookware bottom is
less than 2mm (5/64 in.).
• Use power level 8, or less.
• Use Cooking Zone 1 or 3 (see page 5).
Do not damage the power cord or
Power Plug�
Do not connect the power voltage
other than 208 V / 220 V / 230 V /
240 V AC, may cause fire or
electric shock�
Must not disassemble the unit for
reconstruction�
CAUTION
Installation and servicing must be
carried out by competent persons
in accordance with the regulation
in force�
Before the appliance is put into
operation, all the protective film
applied must be removed�
Stir liquids (e�g� soup, stewed
food) before heating� If you heat
liquids without stirring:
• The pot may jump and damage the
Glass Panel.
• The liquids may splatter and cause
burns or injuries.
Keep all combustibles away�
It may cause fire.
After use, switch off the hob
element by its controls (OFF/ON
and the main power switch) and
do not rely on the pot detector
(safety functions)�
Person with cardiac pacemakers
or other electrical implants (such
as insulin pumps) must consult
with their doctor or implant
manufacturer before use�
The cooking process has to be
supervised� A short term cooking
process has to be supervised
continuously�
Keep pots stable�
May cause injuries or burns if the
pots fall down.
If acidic food (e�g� vinegar, jam,
food which contains lemon
or plum) sticks to the Glass
Panel, wipe it off immediately�
Otherwise, the Glass Panel may
be discolored�

EN-4
Safety Precautions
■Note:
This appliance emits magnetic lines of force. Keep away anything affected by magnetism:
• Radios, TVs, hearing aids, etc. may be susceptible to noise interference.
•
The records of cassette tapes, automatic turnstile tickets or bankcards etc. may be erased or damaged.
• Electro magnetic wave generated by the induction products such as induction rice cooker or
portable induction cooktop may damage the Induction Hob.
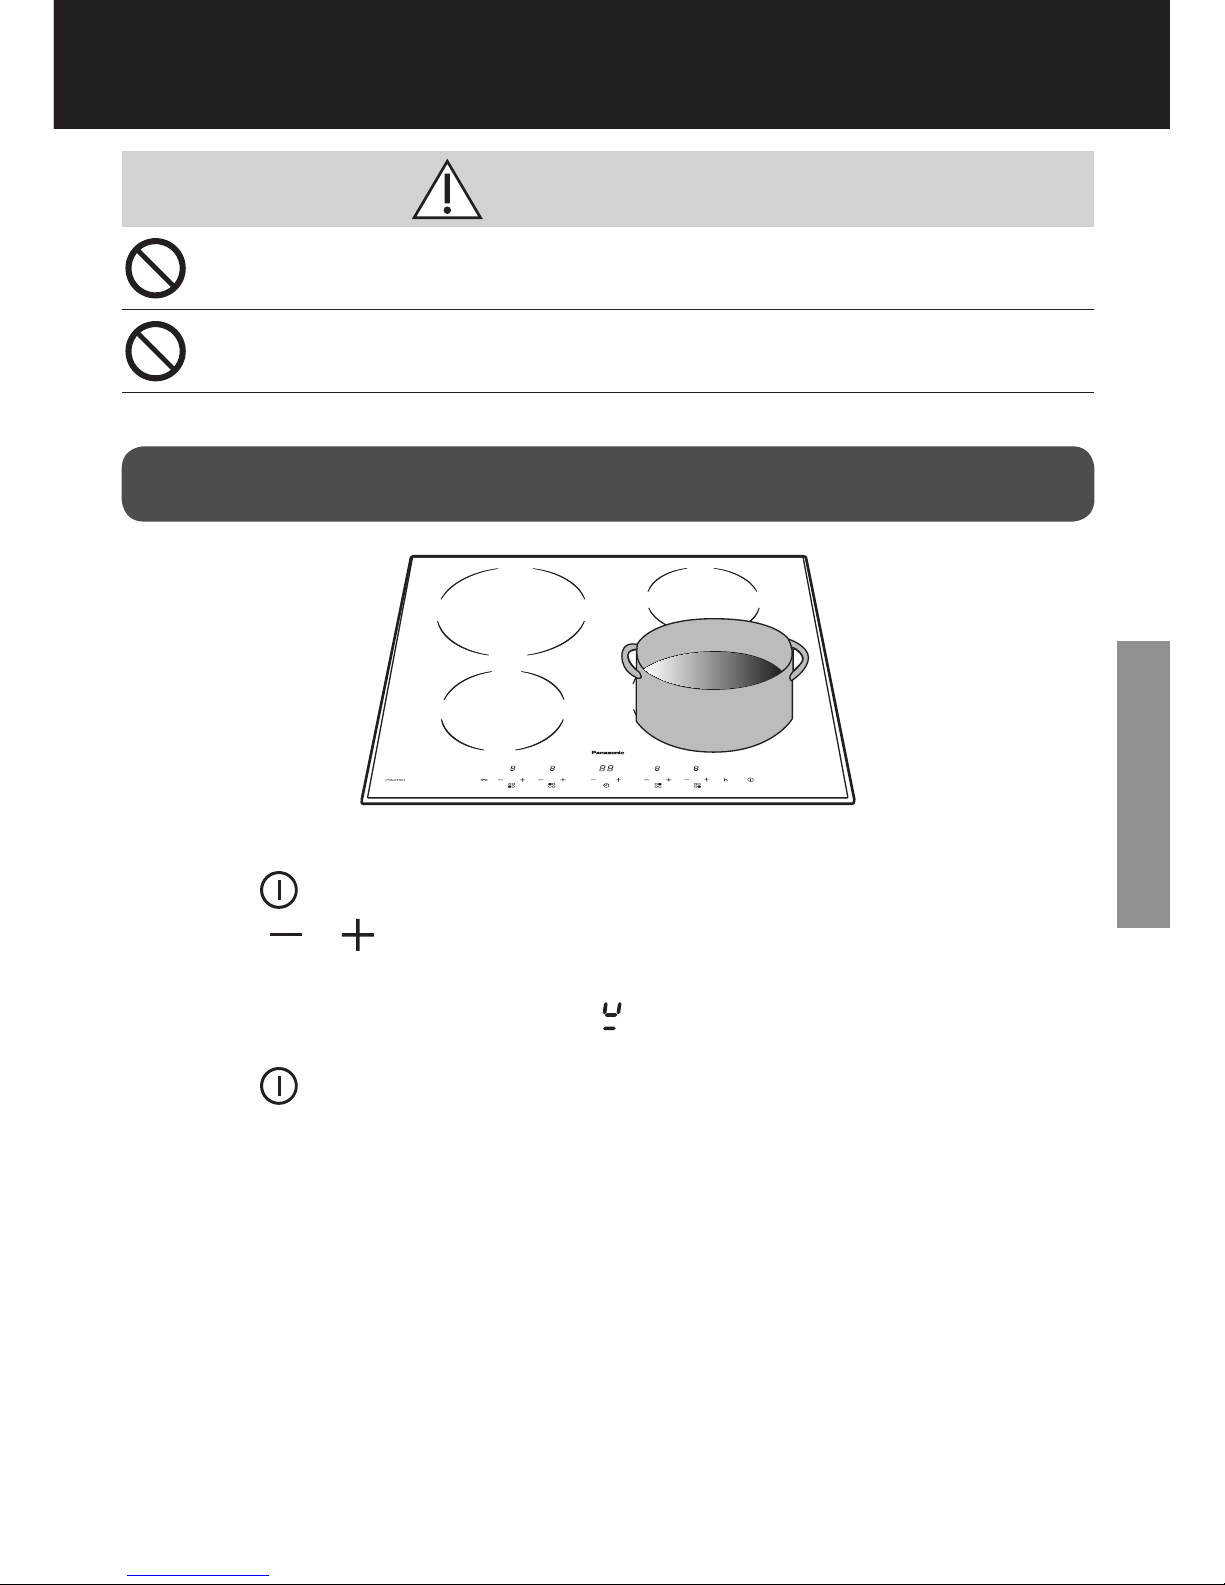
CAUTION
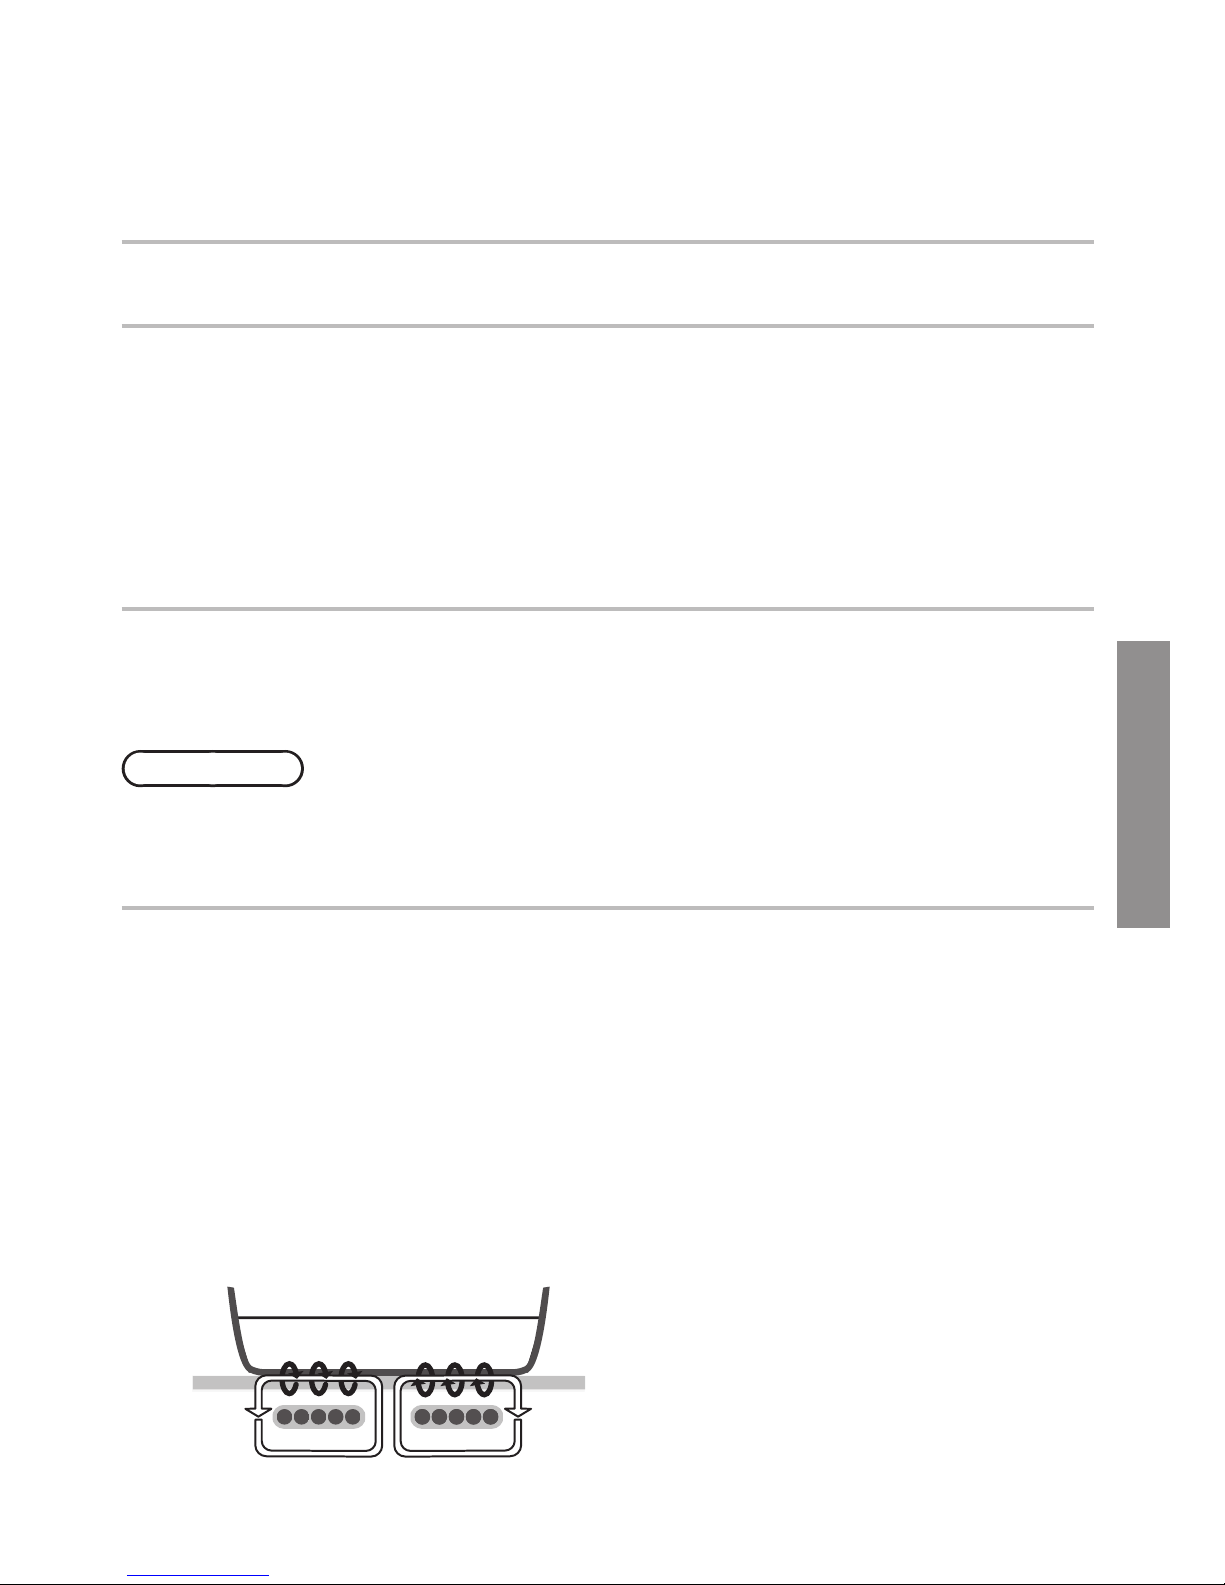
When stir frying with Induction
Hob, observe the following points:
• Do not leave this unit unattended.
• Do not overheat.
• Use lower heat levels for preheating.
(If a small quantity of oil is used and
heated excessively, the oil temperature
will rise rapidly and the oil may catch
fire. If the bottom of the pot is thin, it
may become red due to heat).
When using the heat level “9” of
Induction Hob:
• Do not use for stir frying. The bottom of
the pot may be deformed.
• Do not use for simmering. The
ingredients may boil over.
• When boiling water, turn down the heat
level as soon as the water has boiled.
Water may boil or splatter around.
To protect the Glass Panel from
damage, observe the following
instructions:
• Do not place portable gas burner, steel
cylinders or canned goods. They would
burst if mistakenly heated.
• Metallic objects such as knives, forks,
spoons and lids should not be placed
on the hob surface since they can get
hot.
• Do not apply high pressure on Glass
Panel or drop things on it.
• Do not use harsh abrasive cleaners
or sharp metal scrapers to clean the
Glass Panel, since they can scratch the
surface, which may result in shattering
of the glass.
Spray cleaner is not to be used
for cleaning�
A steam cleaner is not to be used�
It may cause malfunction, if the
water enters the electric parts�
Do not insert metallic objects
such as pins or wire into the
intake / exhaust vent�
Do not disassemble, attempt to
repair or modify this appliance�
For repair, contact the dealer or
Customer care center.
Do not replace the parts of the
appliance with spare parts other
than authorized Panasonic parts�
Do not touch the Glass Panel
during or after use� Be extra
careful when the high temperature
caution signal “H” lights up�
• Clean the unit after it has cooled down.
For proper use of this
appliance, observe the following
instructions:
• Do not place paper, etc. under the pot.
The paper may scorch due to the heat
of the pot.
• Do not heat empty pots or overheat.
The ingredients may burn or the pot
may be damaged.
• Danger of fire : Do not stack items on
the cooking surfaces.
• Do not use the appliance for purpose
other than cooking.
• Do not use ceramic pots such as
earthen pots even if they are for
induction heating. It may damage the
appliance by their shape.
• Do not heat and scorch empty
enamelled pots. Glass Panel may be
damaged by melted bottom.
• Do not rub the glass plate with the
bottom of the pot or place a hot pot on
it. The Glass Panel may be damaged
or discolored.
Make sure to follow these instructions

Cooking
Zone 2
Cooking
Zone 3
Cooking
Zone 1
Cooking
Zone 4
Glass Panel
Control Panel
English
EN-5
English
1� Display Screen
2� Child Lock
3� Cooking Zone 1 Controls
4� Cooking Zone 2 Controls
5� Program Time Controls
6� Cooking Zone 3 Controls
7� Cooking Zone 4 Controls
8� Boost Function
9� OFF/ON Control
Parts Identification
■Output power of each cooking zone
Voltage 208 V 220-240 V
Level Level 9 Boost Level 9 Boost
Cooking
zone
11100 W 1400 W 1200 W 1500 W
3
22000 W 2400 W 2300 W 2600 W
4
■Accessories
Brackets (2 pieces)
Screws (2 pieces)

EN-6
Types of Cookware that can be used
Material
Compatible
Iron / Cast iron Enamelled iron Magnetic Stainless Steel
• Magnets stick to the bottom.
Incompatible
Aluminum / Copper Heat resistant glass Ceramic and
earthenware
Non-magnetic
Stainless Steel
• Magnets do not stick to the bottom.
• These may not be heated, or the heating power may decrease.
Shape of the bottom
Compatible
• The bottom is flat and uniformly contacts with the top
plate.
Incompatible
Round-bottomed With legs or
protrusions
Thin-bottomed Curved bottom
• Do not use cookware with the bottom curved 3 mm (7/64 in.) or over, as the
safety features may not activate properly, the heating may decrease, or the
cookware may not be heated.
Size (bottom diameter)
Compatible
For cooking zone 1 / 3: 12 cm (4 47/64 in.) or over
For cooking zone 2 / 4: 16 cm (6 5/16 in.) or over
• Use the cookware that fits the size of the cooking zone.
Using the Induction Hob

EN-7
English
CAUTION
Do not use ceramic pots such as earthen pots even if they are for induction
heating� It may damage the Induction Hob by their shape�
Do not heat and scorch empty enamelled pots� The Glass Panel may be
damaged by melted bottom�
How to Check the Cookware Compatibility
1. Place cookware filled with about 1 cup of water on the selected cooking zone.
2. Touch to turn on the main power.
3. Touch or of the cooking zone you have placed your cookware.
• If the cookware is compatible, the power indicator will stay lit and heating will
continue.
• If the cookware is incompatible, the will be displayed and no heating will take
place. (The display will automatically turn off after 1 minute).
4. Touch to turn off the main power.

EN-8
Using the Induction Hob
Operating the Induction Hob
Before use
• Read this guide, taking special note of the ‘Safety Precautions’ section.
• Remove any protective film that may still be on your Induction Hob.
Using the Touch Controls
• The controls respond to touch, so you don’t need to apply any
pressure.
• Use the ball of your finger, not its tip.
• You will hear a beep each time a touch is registered.
• Make sure the controls are always clean, dry, and that there is
no object (e.g. a utensil or a cloth) covering them. Even a thin
film of water may make the controls difficult to operate.
Suitable Unsuitable
Start cooking
After connecting the Induction Hob to the power supply, a beep will sound once.
1. Touch , all displays show or , indicating that the Induction Hob has
entered the state of standby mode.
2. Place a suitable cookware on the cooking zone that you wish to use.
• Make sure the bottom of the cookware and the surface of the cooking zone are
clean and dry.
3. Select a heat setting by touching the or control on the cooking zone which
you require. (Heating should be within 1-9)
• If you don’t choose a heat setting within 1 minute, the Induction Hob will
automatically switch off. You will need to start again from step 1.
• You can modify the heat setting at any time during cooking.
■Note:
If the display flashes on the display, it means one of the following:
• You have not placed a cookware on the correct cooking zone.
• The cookware you are using is not suitable for induction cooking.
• The cookware is too small or not properly centered on the cooking zone.
No heating takes place unless there is a suitable cookware on the correct cooking zone.
The display will automatically turn off after 1 minute if no suitable cookware is placed on it.

EN-9
English
Finish cooking
1. Turn off the cooking zone by touching to , or touching and
simultaneously. will be visible on the display.
2. Turn off the power completely by touching the OFF/ON control, .
Boost function
1. Touch or control of the cooking zone which you require.
2. As the heat setting is still flashing, touch to turn on the Boost function.
will be visible on the display.
3. This function immediately boosts the power to the maximum level. However, it only
boosts for 5 minutes before reverting to its original heat setting.
(Therefore, it ensures the safety of the user in case you forget to cancel the Boost
function.)
4. Cancel the Boost function by touching .
■Note:
• If the Boost function of cooking zone 1 is activated, the cooking zone 2 is limited to
maximum heat setting of level 2 and vice versa.
• If the Boost function of cooking zone 3 is activated, the cooking zone 4 is limited to
maximum heat setting of level 2 and vice versa.

EN-10
Using the Induction Hob
Timer Function
You can use the timer for any of the 3 methods below:
To set as Reminder. In this case, the timer will not turn any cooking zone off when the
set time is up.
To set time to turn only one cooking zone off when the set time is up.
To set time to turn two or more cooking zones off when the individual set time is up.
■Note:
• You can cancel the timer by touching to , or touching and
simultaneously. will be visible on the display.
• Touch or control of the “Program Time Control” to decrease or increase timer by
1 minute.
• Hold or control of the “Program Time Control” to decrease or increase timer by
10 minutes.
For method 1
In standby mode,
1. Touch or of the cooking zone you require.
2. Wait for the power level to stop flashing.
3. Touch or of the “Program Time Control” to set the time. (0-99 minutes)
4. It will begin to countdown immediately. The display will show the remaining time.
Alternatively, you can operate the timer in following steps:
• Touch or of the “Program Time Control” first, then touch or of the cooking
zone you require without waiting for any indicator to stop flashing.
■Note:
• A beep will sound when the timer reaches . will be visible on the display.
Touch any control on the display to stop the beep.
• The heating will continue until you cancel the operation, or the appliance will shutdown
automatically based on default heating time. (Refer to “Auto Shutdown Protection”)
• During the countdown, you can change the power level by touching or on the
corresponding cooking zone.

EN-11
English
For method 2
In standby mode,
1. Touch or of the cooking zone you require.
2. While the power level is still flashing, touch or of the “Program Time Control”
to set the time. (0-99 minutes)
3. A red dot flashing next to the power level will be visible on the display,
for example, . The dot indicates which cooking zone has been selected.
4. It will begin to countdown immediately. The display will show the remaining time.
■Note:
• A beep will sound once when the timer reaches . will be visible on the
display.
• The selected cooking zone will turn off automatically. Other cooking zones will keep
operating if they had been turned on previously.
• During the countdown, you can change the power level by touching or of the
corresponding cooking zone.
For method 3
When you have set the cooking time for several cooking zones, the display will show
the remaining time of the cooking zone that has the shortest countdown. A dot of the
corresponding cooking zone will light next to the power level.
In standby mode,
1. Touch or of the cooking zone you require.
2. While the power level of the selected cooking zone is still flashing, touch or
of the “Program Time Control” to set the time. (0-99 minutes)
3. A red dot flashing next to the power level of the selected cooking zone will be visible
on the display.
4. Repeat steps 1-3 above for other cooking zones you require.
■Note:
• A beep will sound once when the timer of the cooking zone with the shortest cooking
time reaches . will be visible on the display for the corresponding cooking
zone.
• The corresponding cooking zone will turn off automatically.
• Then the display will show a new countdown for the cooking zone that has the shortest
cooking time. The red dot of the corresponding zone flashes.
• During the countdown, you can change the power level by touching or of the
corresponding cooking zone.

EN-12
Using the Induction Hob
Example: If all the cooking zones are set to the power level 3, and each of the
zones is set to the below cooking time, the display will be shown with the
lapse of preset time as follows:
Countdown timer (Selected cooking zone)Power level
Set to
10 minutes
Set to
30 minutes
Set to
15 minutes
Set to
50 minutes
10 minutes after:
15 minutes after:
30 minutes after:
50 minutes after:

EN-13
English
Safety Features for Induction Hob
Child Lock Protection
To Lock: Touch , there will be a ‘beeping’ sound, and will be visible on the
display. All controls will be disabled, except the OFF/ON control in case of
emergency.
To Unlock:Touch for approximate 3 seconds, a beep will sound and will go off,
indicating all controls are ready for use.
■Note:
You can always turn off the Induction Hob with under lock mode, but release the lock
before starting the next operation.
Over-Temperature Protection
A temperature sensor equipped monitors the temperature inside the Induction Hob. When
an excessive temperature is monitored, the Induction Hob will stop operation automatically.
Detection of Small Articles
When an unsuitable size or non-magnetic cookware (e.g. aluminum), or some other
small item (e.g. knife, fork, key) has been left on the Induction Hob, the Induction Hob
automatically goes to standby in 1 minute. The fan will keep operating for further 1 minute.
Auto Shutdown Protection
Auto shut down is a safety protection function for your Induction Hob. It shuts down
automatically if you forget to turn off after your cooking. The default working time for various
power levels are shown in the below table:
Power level 1 2 3 4 5 6 7 8 9
Default shutdown time
(hour) 888444222
Pan Detection Sensor
When the cookware is removed, the Induction Hob will stop heating immediately and the
power will shut down after 2 minutes.

EN-14
Using the Induction Hob
Residual Heat Warning
When the hob has been operating for some time, there will be some residual heat. The
letter appears and blinks to warn you to keep away. The letter will disappear when
the hob has cooled down.
WARNING
Beware of hot surfaces�
Induction Hob will show which cooking zone is hot with the
flashing on the display� It will disappear when the surface has cooled
down to a safe temperature�

EN-15
English
Cooking Guidelines
WARNING
Take care when frying as the oil and fat will heat up very quickly� At extremely
high temperatures, oil and fat will ignite spontaneously and this presents a
serious fire risk�
■Cooking Tips:
• When food comes to the boil, reduce the temperature setting.
• Using a lid will reduce cooking time and save energy by retaining the heat.
• Minimize the amount of liquid or fat to reduce cooking time.
• Start cooking on a high setting and reduce the setting when the food has been heated
through.
Simmering, cooking rice
• Simmering occurs below boiling point, at around 85 ˚C (185 °F), when bubbles are just
rising occasionally to the surface of the cooking liquid. It is the key to delicious soups and
tender stews because the flavors do not develop when food is overcooked. You should
also stop cooking egg-based and flour thickened sauces before reaching boiling point.
• Some tasks, including cooking rice by the absorption method, may require a setting
higher than the recommended setting to ensure the food is cooked properly in the time
recommended.
Searing steak
• To cook juicy flavorsome steaks:
1. Stand the meat at room temperature for about 20 minutes before cooking.
2. Heat up a heavy-based frying pan.
3. Brush both sides of the steak with oil. Drizzle a small amount of oil into the hot pan
and put the meat in the hot pan.
4. Turn the steak only once during cooking. The exact cooking time will depend on the
thickness of the steak and how tender you want it. The cooking time may vary from
about 2 – 8 minutes per side. Press the steak to judge how cooked it is; the firmer it
feels the more ‘well done’ it is.
5. Leave the steak to rest on a warm plate for a few minutes to allow it to rest and
become tender before serving.

EN-16
Using the Induction Hob
Stir-frying
1. Choose a flat-based wok or a large frying pan.
2. Be ready with all the ingredients and equipment. Stir-frying should be quick. If
cooking large quantities, cook the food in several smaller batches.
3. Preheat the pan briefly and add two tablespoons of oil.
4. Cook any meat first, put it aside and keep warm.
5. Stir-fry the vegetables. When they are hot but still crisp, turn the cooking zone to a
lower setting, return the meat to pan and add seasoning.
6. Stir the ingredients gently to make sure they are heated through.
7. Serve immediately.
Heat setting
The settings below are guidelines only. The exact setting will depend on several factors,
including the type of cookware used and the cooking portion. Experiment with the Induction
Hob to find the settings that best suit you.
Power level Suitable cooking mode
1-2
• Delicate warming for small amounts of food
• Melting chocolate, butter, and foods that burn quickly
• Gentle simmering
• Slow warming
3-4
• Reheating
• Rapid simmering
• Cooking rice
5-6 • Pancakes
7-8 • Sautéing
• Cooking pasta
9
• Stir-frying
• Searing
• Bringing soup to the boil
• Boiling water

English
EN-17
English
Cleaning and Maintenance
What How Important!
■Everyday
dirt on the
Glass Panel
(fingerprints,
marks, stains
left by food or
non-sugary
spillovers on
the glass)
1. Switch OFF the power.
2. Apply a neutral detergent
while the glass is cool down.
3. Rinse and wipe dry with a
clean cloth or paper towel.
• When the power is switched
off and there are no hot
surfaces, indication
will disappear but extreme
care should be taken as the
cooking zone may still be hot.
• Hard scourers, some nylon
scourers and harsh abrasive
cleaning agents may scratch
the Glass Panel. Make sure
the cleaner or the scourer is
suitable.
• Never leave residues left from
cleaning on the Induction
Hob: the Glass Panel may be
permanently stained.
■Boil-overs,
melted and hot
sugary spills on
the Glass Panel�
Remove these immediately with
a palette knife or a razor blade
scraper that is suitable for the
Glass Panel, but beware of the
hot cooking zone surface:
1. Switch OFF the power.
2. Hold the blade or utensil at a
30° angle and scrape the dirt
or the spill to a cool area of
the Induction Hob.
3. Follow steps 2 to 3 for
‘Everyday dirt on the Glass
Panel’.
• Remove stains left by melted
and sugary food or spillovers
as soon as possible. If left to
cool on the Glass Panel, they
may be difficult to remove or
even permanently damage
the glass surface.
• Cut hazard: when the safety
cover is removed, the blade
of a scraper is razor-sharp.
Handle with extreme care and
always store it safely, out of
children’s reach.
• Take extreme care when
handling utensils with a blade,
the Glass Panel may scratch.
■Spillovers
on the touch
controls�
1. Switch OFF the power.
2. Absorb the spill with paper or
dry cloth.
3. Wipe the touch control area
with a clean damp sponge or
cloth.
4. Wipe the area until it is
completely dry with a paper
towel.
• The Induction Hob may
beep and turn itself off, and
the touch controls may not
function when there is liquid
on it.
• Make sure you dry the touch
control area before turning
ON the Induction Hob again.

EN-18
Troubleshooting
Problem Possible causes Solution
■The Induction Hob
cannot be switched ON�
No power. Make sure the Induction
Hob is connected to the
power supply and that
it is switched on. Check
whether there is a power
shortage in your home or
area. If you have checked
everything and the problem
still persists, call a qualified
technician for assistance.
■The touch controls are
not responding�
The controls are locked. Unlock the controls. See
section ‘Safety Features for
Induction Hob’.
■The touch controls are
difficult to operate�
There may be a slight film
of water over the controls or
you may be using the tip of
your finger when touching
the controls.
Make sure the touch control
area is dry and use the ball
of your finger when touching
the controls.
■The Glass Panel has
been scratched�
Rough-edged cookware.
Unsuitable, abrasive
scourer or cleaning products
used.
Use cookware with flat and
smooth base. See ‘Types
of Cookware that can be
used’.
See ‘Cleaning and
Maintenance’.
■Some cookware make
crackling or clicking
noises�
This may be caused by
the construction of your
cookware. (Layers of
different metals vibrating
differently).
This is normal for the
cookware and does not
indicate a fault.
■The Induction Hob
makes a low humming
noise when used on a
high heat setting�
This is caused by the
technology of induction
cooking.
This is normal, and the
noise should quieten down
or disappear completely
when you decrease the heat
setting.
Table of contents
Languages:
Other Panasonic Hob manuals

Panasonic
Panasonic KY-T936SL Product guide

Panasonic
Panasonic KY-B927GF Product guide

Panasonic
Panasonic KY-B64CG User manual

Panasonic
Panasonic KY-B915AB User manual

Panasonic
Panasonic KY-T937VF Product guide

Panasonic
Panasonic KY-B615AB Product guide

Panasonic
Panasonic KY-B627GB Product guide

Panasonic
Panasonic KY-B64BG User manual

Panasonic
Panasonic KY-B915AB Product guide

Panasonic
Panasonic KY-R645RLJPQ User manual