manuals.online logo
Brands
  1. Home
  2. •
  3. Brands
  4. •
  5. Panasonic
  6. •
  7. Microwave Oven
  8. •
  9. Panasonic NN-S962 User manual

Panasonic NN-S962 User manual

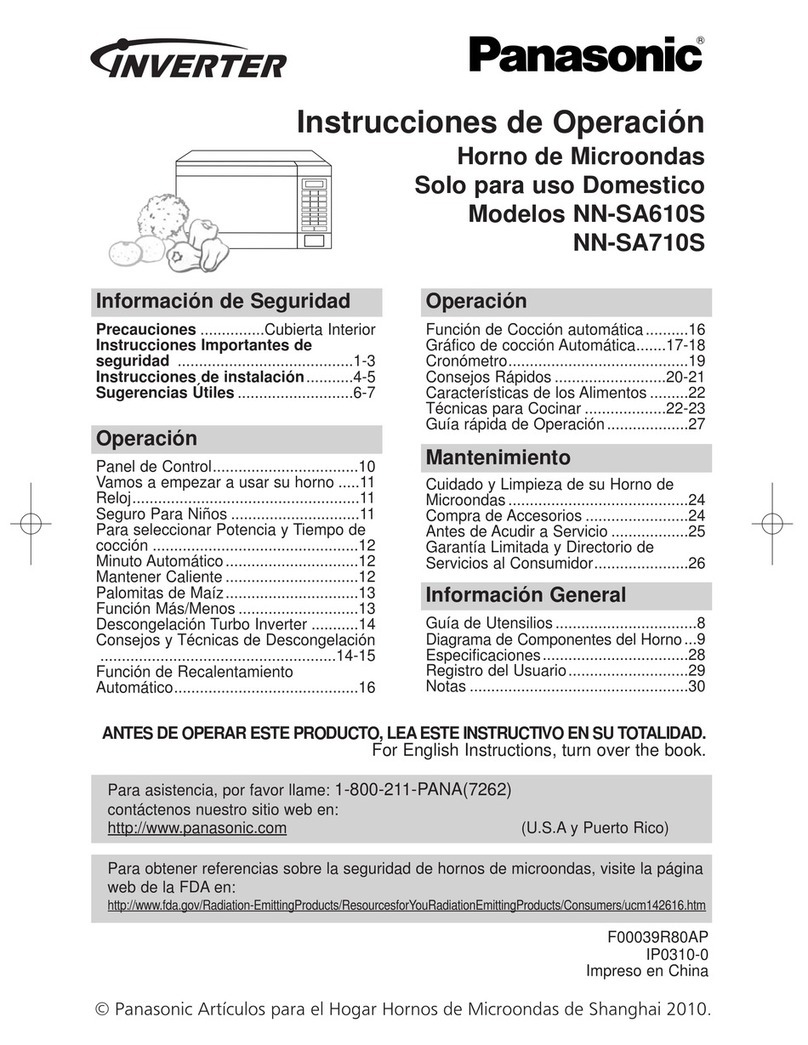
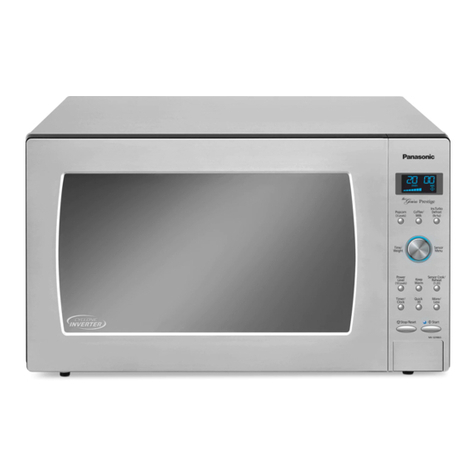
Panasonic
Operating instructions
Microwave Oven
Models NN-S962
NN-3762
TMttj manual cenrams Sateiy Lnstru^tlQi"!?, Operating Insnuerkmsand Mafcitona«it# aftbsovGri
Bflfof i? Operating this av&n. please f^QCJ \t)i-*m instructions cornfj'pfeiy.
Antes dft Qp&ri+r este p^odiJLikj, l#a este rrunruclivo sn totali'dacl
El manual ds •Ti^i.riiyoiCirteg en eapni'irji fpjede sor a/i^nntr.jjfirj rh la B^fliag t:2-29
(Spanish Operating Inatm^aions can bo foumi en pages 22-29>
For assi stance; pfeasa ea N:1-BO0-2 1i-PANA(7262.}
Of- S^nd e-mail tp ^OnsLimerpFQHriijas^p^rigscnjc-.cc!^
QT_y is it at yvww. Parianic.egm fU.S-Ai
:F^r.assistianeeHplease call: 787-750-4300
Of. visit US at ^^.panaspninpr.qQrri (Puerto Rfeo}
Thank you for purchasing aPanasonic Microwave Oven.
PRECAUTIONS TO AVOID
POSSIBLE EXPOSURE TO
EXCESSIVE MICROWAVE ENERGY
(a) Do not attempt to operate this oven with the door open since open-door
operation can result in harmful exposure to microwave energy. It is
important not to defeat or tamper with the safety interlocks. Under nor-
mal conditions oven will not operate with door open.
(b) Do not place any object between the oven front face and the door or
allow soil or cleaner residue to accumulate on sealing surfaces.
<c) Do not operate the oven if it is damaged. It is particularly important that
the oven door close properly and that there is no damage to the:
(1) door (bent),
(2) hinges and latches (broken or loosened),
(3) door seals and sealing surfaces.
(d) The oven should not be adjusted or repaired by anyone except properly
qualified service personnel.
Technical Specifications
NN-S962 NN-S762
Power Source:
Power Consumption:
Output:*
Outside Dimensions
(H xWx D):
Oven Cavity Dimensions
(H xWx D):
Operating Frequency:
Uncrated Weight:
120 V, 60 Hz
11. 5Amps, 1,320 W
1,300 W
14"x237e"x19 7/i6"
(356 x606 x493 mm)
10 15/i 6"x187i6"x18 1/2"
(278 x469 x470 mm)
2,450 MHz
Approx. 36 lbs. (16.4 kg)
120 V, 60 Hz
11.5Amps, 1,320 W
1,300 W
11 15/l6"x21 7/8"x19 7/i6"
(304 x555 x493 mm)
9"x167i6"x 18 72"
(228x418x470 mm)
2,450 MHz
Approx. 32 lbs. (14.3 kg)
*IEC 705-88 Test procedure Specifications subject to change without notice.
The serial number of this product may be Model No.
found on the back side of the oven. You
should note the model number and the Serial No.
serial number of this oven in the space
provided and retain this book asaperma-
nent record of your purchase for future Date of Purchase
reference.
©Copyrighted by Matsushita Electric Industrial Co., Ltd. 2002.
CONTENTS
Before Operating
Precaution Inside Front Cover
Important Safety Instructions 2-3
Installation and Grounding Instructions 4
Safety Precautions 5
Cookware and Utensil Guide 6
Feature Diagram 7
Control Panel 7
Operation &Hints
To use Function Pad 8
Clock Setting 9
To use More/Less Pad 10
To use Popcorn Pad 9
To Reheat using Power &Time Setting 9
Sensor Reheat 12
To Detrost using Power &Time Setting 9
Inverter Turbo Defrost 10 -11
To Cook using Power &Time Setting 9
Sensor Cook 12-14
To use Keep Warm Pad 10
Quick Min Function 10
Timer Setting (Kitchen Timer /Stand Time /Delay Start) 15
Microwave Shortcuts 16
Food Characteristics 17
Cooking Techniques 17-18
Quick Guide to Operation Back Cover
Maintenance
Technical Specifications Inside Front Cover
Care of Your Microwave Oven 19
To order Accessories, Book, etc 19
Before Requesting Service 20
Limited Warranty &Customer Services Directory 21
Manual de instrucciones (Spanish Operating Instructions)
Precauciones 22
Instrucciones de Seguridad 23 -24
Instrucciones para Conexi6n aTierra 24
Instrucciones de Instalaci6n 25
Sugerencias Utiles 26
Panel de Control 27
Sugerencias 27
Como Utilizar las Teclas de Funcion 28
Guia Rapida de Operacion :29
1
IMPORTANT SAFETY INSTRUCTIONS
Your microwave oven is acooking device and you should use as much care as you use
with astove or any other cooking device. When using this electric appliance, basic safe-
ty precautions should be followed, including the following:
14. This appliance should be serviced only
by qualified service personnel. Contact
WARNING-To reduce the risk
of burns, electric shock, fire, injury to per-
sons, or exposure to excessive microwave
energy:
1.Read all instructions before using the
appliance.
2. Read and follow the specific "PRECAU-
TIONS TO AVOID POSSIBLE EXPO-
SURE TO EXCESSIVE MICROWAVE
ENERGY," found on the inside front
cover.
3. This appliance must be grounded.
Connect only to properly grounded out-
let. See "GROUNDING INSTRUC-
TIONS" found on page 4.
4. Install or locate this appliance only in
accordance with the installation instruc-
tions found on page 4.
5. Do not cover or block any openings on
this appliance.
6. Do not store or use this appliance out-
doors.
Do not use this product near water—for
example, near akitchen sink, in awet
basement, or near aswimming pool,
and the like.
7. Use this appliance only for its intended
use as described in this manual. DO
NOT use corrosive chemicals, vapors,
or non-food products in this appliance.
This type of oven is specifically
designed to heat, or cook fooa. It is not
designed for industrial or laboratory use.
The use of corrosive chemicals in heat-
ing or cleaning will damage the appli-
ance and may result in radiation leaks.
8. When cleaning surfaces of door and
oven that come together on closing the
door, use only mild, non-abrasive soaps
or detergents applied with asponge or
soft cloth.
9. Do not allow children to use this appli-
ance, unless closely supervised by an
adult.
10. Do not operate this appliance if it has a
damaged cord or plug, if it is not work-
ing properly, or if it has been damaged
or dropped.
11. Do not immerse cord or plug in water.
12. Keep cord away from heated surfaces.
13. Do not let cord hang over edge of a
table or counter.
the nearest authorized servicenter for
examination, repair or adjustment.
15. Some products such as whole eggs,
narrow neck bottles and sealed contain-
ers—for example, closed glass jars-
may explode and should not be heated
in this oven.
16. To reduce the risk of fire in the oven
cavity:
(a) Do not overcook food. Carefully
attend appliance if paper, plastic, or
other combustible materials are
placed inside the oven to facilitate
cooking.
(b) Remove wire twist-ties from paper or
plastic bags before placing bag in
oven.
(c) If materials inside the oven should
ignite, keep oven door closed, turn
oven off, and disconnect the power
cord, or shut off power at the fuse
or circuit breaker panel.
(d) Do not use the cavity for storage pur-
poses. Do not leave paper products,
cooking utensils, or food in the cavity
when not in use.
17. Liquids, such as water, coffee, or tea
are able to be overheated beyond the
boiling point without appearing to be
boiling due to surface tension of the liq-
uid, visible bubbling or boiling when the
container is removed from the
microwave oven is not always present.
THIS COULD RESULT IN VERY HOT
LIQUIDS SUDDENLY BOILING OVER
WHEN ASPOON OR OTHER UTEN-
SIL IS INSERTED INTO THE LIQUID.
To reduce the risk of injury to persons:
(a) Do not overheat the liquid.
(b) Stir the liquid both before and halfway
through heating it.
(c) Do not use straight-sided containers
with narrow necks.
(d) After heating, allow the container to
stand in the microwave oven for a
short time before removing the con-
tainer.
(e) Use extreme care when inserting a
spoon or other utensil into the con-
tainer.
SAVE THESE INSTRUCTIONS
For proper use of your oven read remaining safety cautions and operating instructions.
2
IMPORTANT SAFETY INSTRUCTIONS
General Use
1.DO NOT tamper with or make any adjust-
ments or repairs to door, Control Panel hous-
ing, safety interlock switches or any other
part of the oven. DO NOT remove outer
panel from oven. Repairs must only be done
by aqualified service person.
2. DO NOT operate the oven empty. The
microwave energy will reflect continuously
throughout the oven causing overheating, if
food or water is not present to absorb energy.
This could damage the oven and result in the
risk of afire.
3. DO NOT dry clothes, newspapers or other
materials in oven, or use newspapers or
paper bags for cooking. Fire could result.
4. DO NOT use recycled paper products unless
the paper product is labeled as safe for
microwave oven use. Recycled paper prod-
ucts may contain impurities which may cause
sparks, and result in fires when used.
5. DO NOT hit or strike Control Panel. Damage
to controls may occur. Fire could result.
6. POT HOLDERS should always be used
when removing items from the oven. Heat is
transferred from the HOT food to the cooking
container and from the cooking container to
the Glass Tray. The Glass Tray can be very
HOT after removing the cooking container
from the oven.
7. DO NOT store flammable materials next to,
on top of, or in the oven. These could be fire
hazards.
Glass Tray
1.DO NOT operate the oven without Roller Ring
and Glass Tray in place.
2. DO NOT operate the oven without the Glass
Tray fully engaged on the drive hub. Improper
cooking or damage to the oven could result.
Verify that the Glass Tray is properly engaged
and rotating by observing its rotation when you
press Start.
3. Only use the Glass Tray specifically designed
for this oven. Do not substitute any other glass
tray.
4. If the Glass Tray is hot, allow to cool before
cleaning or placing in water.
5. DO NOT cook directly on the Glass Tray.
Always place food in amicrowave-safe dish, or
on a rack set in amicrowave-safe dish.
6. If food or utensil on the Glass Tray touches oven
walls, causing the tray to stop moving, the tray
will automatically rotate in the opposite direction.
This is normal,
7. Glass Tray can turn in either direction.
Roller Ring
1. Roller Ring and oven floor should be cleaned
frequently to prevent excessive noise.
2. Roller Ring must always be used for cooking
along with Glass Tray.
3. Always replace Roller Ring and Glass Tray in
their proper positions.
3
Installation and Grounding Instructions
Examine Your Oven
Unpack oven, remove all packing material and
examine the oven for any damages such as dents,
broken door latches or cracks in the door. Notify
dealer immediately if oven is damaged. DO NOT
install if oven is damaged.
Placement of Oven
1.Oven must be placed on aflat, stable surface.
For proper operation, the oven must have suffi-
cient air flow. Allow 3-inches (7.6 cm) of space
on both sides of the oven and 1-inch (2.5 cm) of
space on top of oven.
a. DO NOT block air vents.
If they are blocked during operation, the oven
may be overheated and damaged. When
using any cloth over the oven, the air intake
and exhaust should not be blocked. Also
should allow space on back and both sides of
oven properly.
b. DO NOT place oven near ahot, damp sur-
face such as agas or electric range, or dish-
washer.
c. DO NOT operate oven when room humidity
is too high.
2. This oven was manufactured for household use
only.
3. This oven may be built into awall cabinet, if
desired, by using the proper trim kit, which may
be purchased from alocal dealer. Follow all
installation instructions packed with the kit.
Installation
1.DO NOT block air vents. If they are blocked
during operation, the oven may overheat. If the
oven overheats, athermal safety device will turn
the oven off. The oven will remain inoperable
until it has cooled.
2. This oven was manufactured for household use
only.
Grounding
Instructions
This appliance must be grounded. In the event
of an electrical short circuit, grounding reduces the
risk of electric shock by providing an escape wire
for the electric current. This appliance is equipped
with acord having agrounding wire with aground-
ing plug. The plug must be plugged into an outlet
that is properly installed and grounded.
WARNING-,_use of the
grounding plug can result in arisk of electric
shock.
Consult aqualified electrician or service person if
the grounding instructions are not completely
understood, or if doubt exists as to whether the
appliance is property grounded. If it is necessary to
use an extension cord, use only athree wire
extension cord that has a three blade grounding
plug, and athree slot receptacle that will accept
the plug on the appliance. The marked rating of
the extension cord should be equal to.or greater
than the electrical rating of the appliance.
Power Supply
1.Ashort power-supply cord is provided to reduce
the risks resulting from becoming entangled in
or tripping over alonger cord.
2. Longer cord sets or extension cords are avail-
able and may be used if care is exercised in
their use.
3. If along cord or extension cord is used, (1) the
marked electrical rating of the cord set or exten-
sion cord should be at least as great as the
electrical rating of the appliance, (2) the exten-
sion cord must be agrounding-type 3-wire cord,
and (3) the longer cord should be arranged so
that it will not drape over the counter top or
tabletop where it can be pulled
on by children or tripped
over accidentally.
Wiring Requirements
1. The oven must be operated on aSEPARATE
CIRCUIT. No other appliance should share the
circuit with the microwave oven. If it does, the
branch circuit fuse may blow, the circuit breaker
may trip, or the food may cook slower than the
times recommended in this manual.
2. The VOLTAGE used must be the same as spec-
ified on this microwave oven (120 V, 60 Hz).
Using ahigher voltage is dangerous and may
result in afire or another incident causing oven
damage. Using alower voltage will cause slow
cooking. Panasonic is NOT responsible for any
damages resulting from the use of the oven with
any voltage other than specified.
3. The oven must be plugged into at least a20
AMP, 120 VOLT, 60 Hz GROUNDED OUTLET.
Where astandard two-prong outlet is encoun-
tered, it is the personal responsibility and obliga-
tion of the consumer to have it replaced with a
properly grounded three-prong outlet.
TV /Radio Interference
1.Operation of the microwave oven may cause
interference to your radio, TV or similar equip-
ment.
2. When there is interference, it may be reduced or
eliminated by taking the following measures:
a. Clean door and sealing surfaces of the oven.
(See Care of Your Microwave Oven)
b. Place the radio, TV, etc. away from the
microwave oven as far as possible.
c. Use aproperly installed antenna to obtain
stronger signal reception.
4
Safety Precautions
Follow These Safety Precautions When Cooking in Your Oven
IMPORTANT
Proper cooking depends upon the power, the
time set and quantity of food. If you use a
smaller portion than recommended and cook
at the time for the recommended portion, fire
could result
1) HOME CANNING /DRYING FOODS /
SMALL QUANTITIES OF FOODS
•Do not use your oven for home canning, your
oven cannot maintain the food at the proper '
canning temperature. Improperly canned food
may spoil and be dangerous to consume.
•Do not dry meats, herbs, fruits or vegetables in
your oven. Small quantities of food or foods with
low moisture content can dry out, scorch or
catch on fire if overheated.
2) POPCORN
Popcorn may be popped in amicrowave
oven corn popper. Microwave popcorn
which pops in its own package is also
available. Follow popcorn manufacturers'
directions and use abrand suitable for the
wattage of your microwave oven.
CAUTION: When using pre-packaged
microwave popcorn, follow recom-
mended package instructions. Check
package weight before using the
Popcorn pad (see Popcorn Pad sec-
tion). Set the oven for the weight of the
popcorn package.
If these instructions are not followed,
the popcorn may not pop adequately or
may ignite and cause aTire. Never leave
oven unattended when popping pop-
corn. Allow the popcorn bag to cool
before opening, always open the bag
away from your face and body to pre-
vent steam burns.
3) DEEP FAT FRYING
•Do not attempt to deep fat fry in your
microwave oven. Cooking oils may burst into
flames and may cause damage to the oven and
perhaps result in burns. Microwave utensils may
not be able to withstand the temperature of the
hot oil, and could shatter or melt.
4) FOODS WITH NONPOROUS SKINS
•Potatoes, apples, egg yolks, whole eggs,
whole squash and sausages are examples of
foods with nonporous skins. These types of
foods must be pierced before microwave cook-
ing to prevent their bursting.
•Use fresh potatoes for baking and cook until just
done. Use recommended weights for pro-
grammed cooking. Overcooking causes dehy-
dration and mav result in afire.
"
5) GLASS TRAY /COOKING UTENSILS /FOIL
•Cooking utensils get hot during microwaving.
Heat is transferred from the HOT food to the
container and the Glass Tray. Use potholders
when removing utensils from the oven or when
removing lids or plastic wrap covers from cook-
ing utensils, to avoid burns.
•The Glass Tray will get hot during cooking. It
should be allowed to cool before handling or
before paper products, such as paper plates or
microwave popcorn bags, are placed in the
oven for microwave cooking.
•When using foil, skewers, warming rack or uten-
sils made of metal in the oven, allow at least 1-
inch (2.5 cm) of space between metal material
and interior oven walls. If arcing occurs (spark-
ing), remove metal material (skewers etc.)
and/or transfer to anon-metallic container.
•Dishes with metallic trim should not be used, as
arcing may occur.
•If an entree is heated in afoil tray, maintain at
least 1-inch (2.5 cm) spacing from the oven
walls.
6) PAPER TOWELS /CLOTHS
•DO NOT use paper towels or cloths which con-
tain asynthetic fiber woven into them. The syn-
thetic fiber may cause the towel to ignite. Use
paper toweling under supervision.
7) BROWNING DISHES /OVEN COOKING
BAGS
•Browning dishes or grills are designed for
microwave cooking only. Always follow instruc-
tions provided by the manufacturer. DO NOT
preheat browning dish more than 6minutes.
•If an oven cooking bag is used for microwave
cooking, prepare according to package direc-
tions. DO NOT use awire twist-tie to close bag,
instead use plastic ties, cotton string or astrip
cut from the open end of the bag.
8[THERMOMETERS
•DO NOT use aconventional meat thermometer
in your oven. Arcing may occur. Microwave-safe
thermometers are available for both meat and
candy.
9) BABY FORMULA/FOOD
•DO NOT heat baby formula or food in the
microwave oven. The glass jar or surface of the
food may appear warm while the interior can be
so hot as to burn the infant's mouth and esopha-
gus.
10) REHEATING PASTRY PRODUCTS
•When reheating pastry products, check temper-
atures of any fillings before eating. Some foods
have fillings which heat faster and can be
extremely hot, while the surface remains warm
to the touch (ex. Jelly Donuts).
11) GENERAL OVEN USAGE GUIDELINES
•DO NOT use the oven for any reason other than
the preparation of food.
.•DO NOT leave oven unattended while in use.
Cookware and Utensil Guide
ITEM MICROWAVE COMMENTS
Aluminum Foil Yes for
Shielding
only
Small strips of foil can be molded around thin parts of
meat or poultry to prevent overcooking. Arcing can occur
if foil is too close to oven wall or if too much foil is used.
Browning Dish Yes Browning dishes are designed for microwave cooking
only. Check browning dish information for instructions
and heating chart. Do not preheat tor more than 6minutes.
Brown paper bags No May cause a fire in the oven.
Dinnerware
Labeled
"Microwave-Safe"
Other Dinnerware
Yes
?
Check manufacturers' use and care directions for use in
microwave heating. Some dinnerware may state on the
back of the dish, "Oven-Microwave Safe".
Use CONTAINER TEST below.
Disposable polyester
Paperboard Dishes Yes Some frozen foods are packaged in these dishes. Can be
purchased in grocery stores.
Fast Food Carton
with Metal Handle No Metal handle may cause arcing.
Frozen Dinner Tray
Microwave-safe
Voc
TtJS
Yes
Frozen dinners may be heated in foil tray, if tray is less than
3/«-in.(2 cm) high. Place foil tray in center of oven. Leave at
least 1-in. (2.5 cm) space between foil tray and oven walls.
Heat only 1foil tray in the oven at atime. For containers
more than 3A-inch (2 cm) deep.remove food and place in a
similar size microwave-safe container.
VJ idoo ociio Yes,
use caution Remove lid. Heat food untiljust warm, not HOT. Most glass
jars are not heat resistant. Do not use for cooking.
Glassware
Heat Resistant Oven
Glassware &Ceramics Yes Ideal for microwave cooking and browning.
(See CONTAINER TEST below)
Metal Bakeware No Not recommended for use in microwave ovens.
Metal Twist-Ties No May cause arcing which could cause afire in the oven.
Ovpn ("Innkinn Ran
VVCII vUUIMI 1^ UCIU Yes
Follow manufacturers' directions. Close bag with the nylon tie
provided, astrip cut from the end of the bag, or apiece of
cotton string. Do not close with metal twist-tie. Make six
1/2-inch (1 cm) slits near the closure.
Yes Use to warm cooked foods, and to cook foods that require
short cooking times such as hot dogs.
Paper Towels &Napkins Yes Use to warm rolls and sandwiches by microwave.
Parchment Paper Yes Use as acover to prevent spattering. Safe for use in
microwave, microwave/convection and conventional ovens.
Plastic
Microwave-Safe
Cookware
Reheat &Storage
Melamine
Yes
Yes,
use caution
No
Should be labeled, "Suitable for Microwave Heating." Check
manufacuters' directions for recommended uses.
Some microwave-safe plastic dishes are not suitable for
cooking foods with high fat or sugar content. The heat from
hot food may cause the plastic to warp.
This material absorbs microwave energy. Dishes get HOT!
Plastic Foam Cups Yes,
use caution Plastic foam will melt if foods reach ahigh temperature. Use
to bring foods to a low serving temperature.
Plastic Wrap Yes Use to cover food during cooking to retain moisture and
prevent spattering. Should be labeled "Suitable for
Microwave Heating". Check package directions.
Straw, Wicker, Wood Yes Use only for short term reheating and to bring
food to alow serving temperature.
Thermometers
Microwave-safe, only
Conventional
Yes
No
Use only microwave-safe meat and candy thermometers.
Not suitable for use in microwave oven, will cause sparks
and get hot.
Wax paper Yes Use as acover to prevent spattering and to retain moisture. |
CONTAINER TEST
TO TEST ACONTAINER FOR SAFE MICROWAVE OVEN USE: Fill a1- cup glass measure with water
and place it in the microwave oven along with the container to be tested; heat one (1) minute at P10
(HIGH). If the container is microwave oven-safe (transparent to microwave energy), the container should -
remain comfortably cool and the water should be hot. If the container is hot, it has absorbed some
microwave energy and should NOT be used. This test cannot be used for plastic containers.
6
Feature Diagram
Hal-©
§Door Release Button
Internal Air Vents
Door Safety Lock System
(d) External Air Vents
(e) Control Panel
(T) Identification Plate
Glass Tray
(J) Roller Ring
("7") Heat/Vapor Barrier Film
(do not remove)
(T) Menu Label
(k) Cover (do not remove)
Control Panel
(1 )Display Window
12) Sensor Reheat Pad (•'page 12)
(3) Quick Min Pad (*-page 10)
(4) Sensor Cook Pads
(•-page 12)
(5) Inverter Turbo Defrost Pad
(•-page 10)
(6) Popcorn Pad («-page 9)
(7) Keep Warm Pad (•'page 10)
(8) Power Level Pad («-page 9)
(9) Number Pads
(1 0) Timer Pad (*-page 15)
(11) Clock Pad (•pages 9)
(12) More/Less Pad (•-page 9, 10, 12)
(13) Serving/Weight Pad («-page 10)
(14) Function Pad (•-page 8)
(15) Start Pad
One tap allows oven to begin func-
tioning. If door is opened or
Stop/Reset Pad is pressed once
during oven operation, Staff Pad
must be pressed again to restart
oven.
(16) Stop/Reset Pad
Before cooking: One tap clears
your instruction.
During cooking: One tap tem-
porarily stops the cooking process.
Another tap cancels all your instruc-
tions and time of day or colon
appears on the Display Window,
Beep Sound:
When apad is pressed correctly, abeep
will be heard.
If apad is pressed and no beep is
heard, the unit did not or cannot accept
the instruction. The oven will beep twice
between programmed stages. At the end
of any complete program, the oven will
beep 5times.
To Use Function Pad
This unique feature of your PANASONIC microwave oven allows you to establish the initial non-
cooking features of your oven such as CHILD LOCK, WORD SPEED, LANGUAGE CHOICE (ENG-
LISH, FRENCH OR SPANISH), plus many more. See below.
1) (Ql
fattx
Press: FUNCTION. Menu Action Message is "Select Function 0
through 9,
1--LANGUAGE CHOICE —etc".
2) Select anumber (0-9)
Ex. CHILD LOCK is 5
3> Select [7] £2] or QTj Press: One number. Your selection is now part of the operating
system. You can change it any time.
4) Continue until you have com-
pleted your selections. See below for other options.
iQ)
faction
1
->
LANGUAGE CHOICE
The oven has English, French and Spanish display. The display appears in
English when you plug-in.
1ENGLISH *Display appears in English.
2FRANCAIS Display appears in French.
3ESPANOL ** Display appears in Spanish.
-» 2
->
-»
Lb/KG CHOICE
The oven has both imperial and metric weight measurements. The oven dis-
plays the weight in imperial when you plug it in.
1Lb *Weight can be set in oz/lb, (Imperial).
2KG ** Weight can be set in g/kq, (Metric).
-» 3
-»
>
-»
WORD SPEED
The speed of word scrolling on the Display Window can be sped up or slowed down.
1QUICK ** Words scroll quickly.
2MEDIUM ** Scrolling speed returns to initial setting.
3SLOW *> Words scroll slowlv.
-» 4
[
MENU ACTION ON/OFF
MENU ACTION SCREEN helps you to program your oven by prompting the next step
to be taken. When you become familiar with your oven, the prompting can be turned off.
1ON ** Prompting Guide will appear.
2OFF •* Prompting Guide will not appear.
5
t
CHILD LOCK ON/OFF
The oven has Child Safety Lock feature which prevents use by children. It does not lock the door.
1ON •* Child Lock has been set and operation will not be accepted.
£Urh •* Oniid Lock has been cancelled.
*6
k
BEEP ON/OFF
If you wish to have the oven operate with no beep, it can be eliminated.
1ON ** Beep sound will reactivate.
2OFF •* Beep sound will not be heard.
*7
[
REMINDER BEEP ON/OFF
Areminder beep works to remind you to remove the food from the oven after
the completion of cooking. It will occur every 15 seconds.
1ON ** Reminder beep will work.
2OFF *> Reminder beep will not work.
c
DAYLIGHT SAVING ON/OFF
1ON *» Time of day will advance one hour.
2OFF •> Time of day returns to original setting.
9
t
CLOCK ON/OFF
Clock display can be turned off.
1ON •* Clock display will appear on the Display Window.
2OFF ** Clock display will not appear on the Display Window.
Time of day will not be lost while the display is off.
0
k
DEMO MODE ON/OFF
Demo mode is designed for retail store display. In this mode, the oven can be
demonstrated with no power in the oven.
1ON ** The oven is in Demo mode.
2OFF *The oven is not in Demo mode.
8
Clock Setting
Example: To set 11 :25 a.m. or p.m.
1. Clock
*Press once.
>Colon flashes.
2. 00 •Enter time of day using the
number pads.
Mime appears on the
Display Window,
colon is continues
flashing.
3. |—
\Clock
*Press.
>Colon stops flashing;
time of day is entered.
NOTES:
1To reset the clock, repeat steps 1-3.
2The clock will retain the time of day as long as
the oven is plugged in and electricity is supplied.
3.Clock is a12 hour display.
4.0ven will not operate while colon is flashing.
To Use Popcorn Pad
Example: To heat 3.5 oz. of Popcorn
1.
Press 5times
2. AW
Less
Optional.
3.
Start
Set the desired weight of
prepackaged microwave
popcorn.
Press |Weight
once
twice
3times
4times
5times
1.75 oz.
2.65 oz.
2.85 oz.
3.0 oz.
3.5 oz.
T50gT
(75g)
(80g)
(85g)
J99gl
(see page 10.)
Press Start Pad.
>After several seconds,
cooking time appears on
the Display Window and
begins to count down.
NOTES ON POPCORN PAD:
1.Use prepackaged room temperature microwave
popcorn. Read manufacturers' instructions.
2. Place bag in oven according to manufacturers'
directions.
3. Pop only one bag at atime.
4. After popping, allow the contents of the bag to
cool for afew minutes before opening. Open bag
carefully away from face and body because pop-
corn and steam are extremely hot.
5. Do not reheat unpopped kernels or reuse bag.
6. NEVER leave oven unattended when popping
popcorn. Stop the oven when popping slows
to 2to 3seconds between pops. Overcooking
may cause scorching.
7. With the many varieties of microwave popcorn
available in the market place, it may be necessary
for you to move the popcorn container to the
outer edge of the Glass Tray to obtain the best
cooking results.
Power &Time Setting
How do Iprogram Power and Time?
Example: To cook at P6(MEDIUM) Power
for 1minute 30 seconds
1. Power
Level
(WLeveli)
Press 5times.
2. 00
3.
Start
Select Power Level.
(according to the
chart below)
Set Cooking Time
using number pads.
Press.
>Cooking will start. The
time on the Display
Window will count
"down.
Press Power Level
once P10(HIGH)
twice P9
3times P8
4times P7(MEDIUM-HIGH)
5times P6(MEDIUM)
6times P5
7times P4
8times P3(MEDIUM-LOW)/DEFROST
9times P2
10 times P1(LOW)
NOTES:
1. For more than one stage cooking, repeat
steps 1and 2for each stage of cooking
before pressing Sfart Pad. The maximum
number of stages for cooking is 5stages.
2.When selecting P10 (HIGH) power for the
first stage, you may begin at step 2.
3Two beeps will sound between each stage of
programming. Five beeps will sound at the
encfof the enrire sequence.
4.When selecting P10 (HIGH) power, the
maximum programmable time is 30 minutes.
For other power levels, the maximum time is
99 minutes and 99 seconds.
5. For reheating, use P10 (HIGH) for liquids,
P7 (MEDIUM-HIGH) for most foods and
P6 (MEDIUM) for dense foods.
6. For defrosting, use P3 (MEDIUM-LOW).
REMARKS:
When popping multiple bags one right after the
other, the cooking times may vary slightly. This
does not affect the popcorn results.
To Use Keep Warm Pad
This feature helps you to keep a certain selection
of foods warm for 30 minutes after cooking. (Pie,
Gravy, Stew, Casserole or Mashed Potatoes)
Example: To keep 2cups of Gravy warm.
1.
Press twice.
2.
Serving/
Press twice.
3.
Sun
*Select the desired cate-
gory.
Verify serving size on
the Display Window.
Press.
Keep Warm will start.
The time on the
Display Window'will
count down from 30
minutes.
Inverter Turbo Defrost
This feature allows you to defrost meat, poultry
and seafood simply by entering the weight.
Example: To defrost 1.5 pounds of meat
Place food on microwave safe roasting rack in an
appropriately sized dish.
*Press
"INVERTER TURBO
DEF" appears briefly
on the Display Window.
2-00 •Enter weight of the food
using the number pads.
3.
Start
•Press.
Defrosting will start.
The time on the
Display Window will
count down. Halfway
through defrosting,
beep sounds. Turn
over, rearrange foods,
remove defrost areas or
shield with aluminum
foil. (See directions
"DURING DEFROST-
ING" in page 11.)
NOTE:
Time will vary depending on size and wattage of
your oven.
Conversion Chart:
Follow the chart to convert ounces or hundredths
of apound into tenths of apound. To use Auto
Defrost, program the weight of the food in lbs.
(1.0) and tenths of alb. (0.1). If apiece of meat
weighs 1.95 lbs. or 1lb. 14 oz., program 1.9 lbs.
Ounces Hundredths Tenths of
of aPound aPound
0.01 -.05 0.0
1-2.06 -.15 0.1
3-4 .16 -.25 0.2
5.26 -.35 0.3
6-7 .36 -.45 0.4
8.46 -.55 0.5
9-10 .56 -.65 0.6
11 -12 .66 -.75 0.7
13 .76 -.85 0.8
14-15 .86 -.95 0.9
Quick Min Function
This feature allows you to set and/or add cook-
ing times easily in multiples of one minute.
To Set Cooking Time:
1. Quick
Min
2.
Set cooking time
(up to 10) Power Level
is P10.
•Press Start Pad.
>Cooking begins and
Display Window
counts down.
At the end of cook-
ing, 5beeps sound
and colon or time of
day appears.
NOTE:
1.You can use other power levels. Select desired
power level before setting cooking time.
2.After setting the time by Quick Min Pad, you
cannot use Number Pads, and vice versa.
3. Press Quick Min Pad to add more time during
cooking. To verify the additional cooking time,
check the Display Window.
To Use More/Less Pad
For Popcorn:
When using Popcorn pad, maybe the weight is
not the same as offered. By using the More/Less
pad, the programs can be adjusted to cook food
for alonger or shorter time or aheavier or lighter
weight.
1tap =More+Cooking
2taps =More++ Cooking
3taps =Less" Cooking
4taps =Less" Cooking
5taps =original setting
For Sensor Reheat/Cook:
Preferences for food doneness vary with each
individual. After having used the Sensor Cook
feature afew times, you may decide you would
prefer your food cooked to adifferent doneness.
1tap =More+Cooking
2taps =Less" Cooking
3taps =original setting
Press More/Less pad before pressing Start.
10
Defrosting Tips &Techniques
Before Freezing:
1.Freeze meats, poultry, and fish in packages with only 1or 2layers of food. Place wax paper between
layers.
2. Package in heavy-duty plastic wraps, bags (labeled "For Freezer"), or freezer paper.
3. Remove as much air as possible, i.e. create avacuum.
4. Seal securely, date, and label.
To Defrost:
1.Remove wrapper. This helps moisture to evaporate. Juices from food can get hot and cook the food.
2. Set food on microwave safe roasting rack in an appropriately sized dish.
3. Place roasts fat-side down. Place whole poultry breast-side down.
4. Drain liquids during defrosting.
5. Turn over (invert) items during defrosting.
6. Shield edges and ends if needed. (See Cooking Techniques).
7. Select power and minimum time so that items will be under-defrosted.
After Defrosting:
1. Large items may be icy in the center. Defrosting will complete during STANDING TIME.
2. Let stand, covered with plastic wrap, in the refrigerator for time shown in the chart below.
3. See chart below for standing time and rinsing directions.
4. Items which have been layered should be rinsed separately or have alonger stand time.
FOOD DEFROST
TIME at P3
(minVlb.)
DURING DEFROSTING AFTER DEFROSTING
Stand Time Rinse
Fish and Seafood
[up to 3lbs. (1.4 kg)]
Crabmeat 6Break apart/Rearrange
5min. YES
Fish Steaks 4to 6Turn over
Fish Fillets 4to 6Turn over/Rearrange/Shield ends
Sea Scallops 4to 6Break apart/Remove defrosted pieces
Whole fish 4to 6Turn over
Meat
Ground Meat 4to 5Turn over/Remove defrosted portion/
Shield edges 10 min.
NO
Roasts
[2Vr4bs. (1.1-1.8 kg)] 4to 8Turn over/Shield ends and
defrosted surface 30 min. in refrig.
Chops/Steak 6to 8Turn over/Rearrange/Shield ends and
defrosted surface
5min.
Ribs/T-bone 6to 8Turn over/Rearrange/Shield ends and
defrosted surface
Stew Meat 4to 8Break apart/Rearrange/
Remove defrosted pieces
Liver (thin sliced) 4to 6Drain liquid/Turn over/
Separate pieces
Bacon (sliced) 4Turn over
Poultry
Chicken, Whole
[up to 3lbs. (1.4 kg)]
4to 6Turn over/Shield 20 min. in refrig.
YES
Cutlets 4to 6Break apart/Turn over/
Remove defrosted Pieces 5min.
Pieces 4to 6Break apart/Turn over/Shield 10 min.
Cornish Hens 6to 8Turn over/Shield
Turkey Breast
[5-6 lbs. (2.3-2.7 kg)] 6Turn over/Shield 20 min. in refrig.
11
Sensor Reheat
This sensor feature allows you to reheat
any quantity of food with only one touch.
The oven does it all for you.
FT
Example: To reheat 2cups of soup
2. More/
Less
Optional.
3. Start
Press.
(see page 10)
Press.
>Cooking starts.
After heat/steam is detected by the
Genius, 2beeps sound.
The remaining cooking time appears on
the Display Window and begins to
count down.
At the end of cooking, five beeps sound.
NOTES:
Casseroles -Add 3to 4tablespoons of
liquid; cover with iid or vented plastic
wrap. Stir when time appears on the
Display Window.
Canned foods -Empty contents into
casserole dish or serving bowl; cover dish
with iid or vented plastic wrap. After
reheating, release plastic wrap and stand.
Plate of food -Arrange food on plate; top
with butter, gravy, etc.. After reheating,
release plastic wrap and stand.
Follow the recommendations for Sensor
Cooking, in addition to the following:
DO NOT:
1.Reheat bread and pastry products. Use
manual power and time for these foods.
2. Reheat raw or uncooked food.
3. Use if oven cavity is warm.
4. Use for beverages.
5. Use for frozen foods.
Sensor Cook
Breakfast
Lunch/Snack
Side Dish
Dinner
This sensor feature allows you to cook
any quantity of food with only one touch.
The oven does it all for you.
Example: To cook a10 oz. Frozen Entree.
1.
Press twice.
More/
Less
Optional.
3. Start
Press until the
desired category
appears on the
Display Window.
(see page 10)
Press.
VCooking starts.
After heat/steam is detected by the
Genius, 2beeps sound.
The remaining cooking time appears on
the Display Window and begins to
count down.
At the end of cooking, five beeps sound.
For the best results with the GENIUS, fo
BEFORE Reheating/Cooking
1.The room temperature surrounding the
oven should be below 95° F(35° C).
2. Food weight should exceed 4oz. (110 g).
3. Glass Tray and outside of container
should be dry.
4. Cover food loosely with lid, or with vent-
ed plastic wrap.
5. All foods should be taken from their nor-
mal storage place.
/these recommendations.
DURING Reheating/Cooking:
DO NOT open the oven door until 2beeps
sound and time appears on the Display
Window. Doing so will cause inaccurate
cooking since the steam from food is no
longer contained within the oven cavity.
Once the timer begins to count down, the
oven door may be opened to stir, turn,
shield, rearrange, mix or add foods.
AFTER Reheating/Cooking:
All foods should have acovered stand
time.
12
Sensor Cook Chart
Pad Recipe Serving/Weight HINTS
Breakfast Oatmeal 1/2, 1cup Place inside amicrowave-safe serving bowl
with no cover. Follow manufacturers' directions
for preparation of quick oatmeal.
Breakfast
Sausage 8maximum Follow manufacturers' directions for preparation
of pre-cooked breakfast sausage.
Place in aradial pattern.
Omelet 2, 4eggs Follow Basic Omelet recipe on page 14.
Lunch
/Snack Soup 1-2cups Pour soup into amicrowave-safe serving bowl.
Cover loosely with lid or vented plastic wrap.
Frozen
Entrees 8-32 oz. Follow manufacturers' directions for preparation of
8and 10 oz. sizes. For larger sized entrees,
where the directions state for the entire film cover
to be removed, do not vent or remove film cover
to ensure the sensor will detect accurately for
complete cooking. Be careful when removing the
film mwor aftor r-r\rXc'\r\r\ Romnuc th^m awaw frnm
llllil LUVcI cULtM UUUr\IFiy> ncllHJVfci Lllt?lN a»ay ilLMit
you to avoid steam burns.
If additional time is needed, continue to cook
manually.
Frozen Pizza 4, 8oz. Follow manufacturers' directions for preparation.
nox uuy Amqvimiim
H11idah iiui i
1
Maka 1elite; fin par'h Hnt flnn PlflPP Hnt Dnn
on paper plate or microwave-safe dish leaving
space between each.Tlmes may vary by size and
manufacturer.
uid iucd Am^Yimurn
11IdAII 1IUJ I1
(6-8 oz. each) Pierce at least 6times on top of the potato with
afork. Place potatoes on potato amicrowave-safe
dish. Do not cover. Let stand 5minutes to
complete cooking.
Rice 1/_ 11/- n|r*\C
/2 1/2 UU|Jb HleHJt? Ntt? Willi TlUl Went?IIn aMllVjiUWave-oaie
casserole dish. Cover loosely with lid or vented
plastic wrap. Let stand 5to 10 minutes before
serving.
Fresh
Vegetables V* -1lb. All pieces should be the same size. Add asmall
amount of water and cover loosely with lid or
vented plastic wrap.
Canned
Vegetables 15 oz. Empty contents into microwave-safe serving bowl.
Cover loosely with lid or vented plastic wrap.
Frozen
Vegetables 6-16 oz. Follow manufacturers' directions. Do not salt until
after cooking. (Not suitable for vegetables in butter
or sauce.) After 2beeps, stir or rearrange.
Dinner Frozen
Dinners 11,15 oz. Follow manufacturers' directions for covering or
removing covers. For best results, do not use
frozen foods packaged in foil tray.
Chicken
Pieces V? -2lb. Place skin-side up. Cover with vented plastic
wrap. Let stand 5minutes before serving.
Ground
Meat 1-2lb.
(16-32 oz.) Break apart in glass bowl or colander. Cover with
vented plastic wrap. After 2beeps, stir. Re-cover
and press Start. Juices should be clear. Drain.
Fish Fillets 'A -1lb. Arrange in asingle layer.
Cover with vented plastic wrap.
Pasta 2-8oz. Place pasta with hot water in amicrowave-safe
casserole dish. Cover loosely with ltd or plastic
wrap. Drain.
Casserole Prepare according to recipes found on page 14.
13
Sensor Cook Recipe
OMELET
Basic Omelet
1tablespoon butter or margarine
2eggs
2tablespoons milk
salt and ground black pepper, if
desired
Heat butter in a9-inch pie plate, 30 seconds
at P10, or until melted, turn the plate to coat
the bottom with butter.
Meanwhile, combine the remaining
ingredients in aseperate bowl and beat
together; pour into the pie plate.
Cook, covered with vented plastic wrap, on
OMELET. Let stand 2minutes. With aspatu-
ra, loosen the edges of the omelet from the
plate; fold into thirds to serve.
Yield: 1serving
Approx. cooking time: 4minutes.
NOTE: Double ingredients for a4egg
Omelet.
CASSEROLE
Shepherd's Pie
1pound lean ground beef
Vz cup frozen peas, thawed
Va cup chopped onion
1tablespoon gravy powder
7a teaspoon curry powder
1Ateaspoon salt
1Ateaspoon ground black pepper
2cups mashed potatoes
In a2-Qt. casserole dish, crumble the beef
and cook for 5-7 minutes at P6, until the meat
is cooked; stirring twice. Add the remaining
ingredients, except the potatoes. Stir well and
spread the potatoes evenly on the top. Cover
with alid and cook on CASSEROLE.
Yield: 4servings
Approx. cooking time: 20minutes
Macaroni and Cheese
V4 cup butter
2tablespoons chopped onion
1clove minced garlic
'A cup all-purpose flour
1teaspoon dry mustard
1teaspoon salt
'A teaspoon ground black pepper
2cups milk
2cups grated chedder cheese
8oz. (7a lb dry weight) macaroni,
cooked and drained
V3cup bread crumbs
1teaspoon paprika
In a2-Qt. casserole, melt the butter for
40 seconds at P10. Add onion and garlic and
cook for 1minute at P10. Stir in flour, mus-
tard, salt and pepper then, gradually add the
milk. Cook for 3-4 minutes at P10, stirring
once. Continue cooking for 3-4 minutes at
P10 or until sauce thickens. Stir in the
Cheddar cheese. Stir the sauce into the mac-
aroni, in a3-Qt. casserole.Top with bread
crumbs and paprika. Cover with vented plas-
tic wrap. Cook on CASSEROLE.
Yield: 6servings
Approx. cooking time: 20minut.es
Beef and Macaroni Casserole
1pound lean ground beef
1small chopped onion
7a green bell pepper, chopped
1cup chopped celery
2cans (15 oz.) tomato sauce
1Va cups water
1cup uncooked elbow macaroni
1teaspoon parsley
7z teaspoon salt
'A teaspoon ground black pepper
7a cup grated Cheddar cheese
Crumble the ground beef in a3-Qt.
casserole. Cook for 5-7minutes at P6 or '
until the meat is cooked; stirring twice.
Add onion, peppers and celery. Cook for
3-4 minutes at P10. Add the remaining
ingredients, except cheese. Cover with vent-
ed plastic wrap. Cook on CASSEROLE.
Sprinkle with cheese. Cover and let stand
5minutes.
Yield: 4-6 servings
Approx. cooking time: 20minutes
Tuna Casserole
1can (6 oz.) drained and flaked tuna
4cups cooked and drained noodles
1can (103Aoz.) condensed cream of
mushroom soup
1can (4 oz.) mushroom pieces and
stems, drained
1package (16 oz.) frozen peas,
defrosted
3Acup milk
1cup crushed potato chips
7a cup grated Cheddar cheese
In a3-Qt. casserole, combine tuna,
noodles, soup, mushrooms, peas and milk;
mix well. Cover with vented plastic wrap.
Cook on CASSEROLE. Top with potato chips
and cheese.
Yield: 4-6 servings
Approx. cooking time: 20minutes
14
Timer Setting
This feature allows you to program a
Standing Time after cooking is completed
and to program the oven as akitchen timer
and/or to program adelay start.
To Use as aKitchen Timer:
Example: To count 5minutes
1- n
Timer
•Press.
2'000 *Set desired amount of
time using number pads,
(up to 99 minutes and
99 seconds).
3. Press.
>Time will count
down without oven
operating.
Start
To Set Stand Time:
Example: To stand for 5mins. after
cooking (3 mins. at P6-
MEDIUM Power)
1. Power
Level
(JO Levels)
5times
*
000
2.
3. 000
4.
Start
Enter the desired
cooking program
(see page 9for
directions).
Press.
Set desired amount
of Stand Time using
number pads, (up to
99 minutes and 99
seconds)
Press.
>Cooking will start.
After cooking,
stand time will
count down without
oven operating.
To Set Delay Start:
Example: To start cooking 5minutes
later. (3 mins. at PS-MEDI-
UM Power).
1- n
7Imer
•Press.
000 •Enter desired amount
of delayed time using
number pads, (up to
99 minutes and
99 seconds)
3. Power
Level
UOLevels)
*Enter the desired
cooking program
(see page 9for direc-
tions).
5times
000
4.
Start
Press.
>Delayed time will
count down. Then
cooking will start.
NOTES:
1.When each stage finishes, atwo-
beep signal sounds. At the end of the
program, the oven will beep five
times.
2. If oven door is opened during Stand
Time or Kitchen Timer, the time on
the Display Window will continue to
count down.
3. Stand time and Delay time cannot be
programmed before any Auto Control
Function. This is to prevent the start-
ing temperature of food from rising
before defrosting or cooking begins.
Achange in starting temperature
could cause inaccurate results.
15
MicrowdvG Shortcuts
FOOD POWER TIME
(in mins.) DIRECTIONS
To separate Bacon,
1pound (450 g)
P10(High) 30 sec. Remove wrapper and place in microwave-
sate dish. After heating, use a plastic
spatula to separate slices.
To soften Brown Sugar
1cup (250 mL) P10 (High) 20 -30 sec. Place brown sugar in microwave-safe dish
with aslice of bread. Cover with plastic
wrap.
To soften Butter,
1stick, 'A pound (110 g)
To melt Butter,
1stick, y* pound (110 g)
P3 (MED-LOW)
P6 (MEDIUM)
1
17*-
2
Remove wrapper and place butter in a
microwave-safe dish.
Remove wrapper and place butter in a
microwave-safe dish covered with
plastic wrap.
To melt Chocolate,
1square, 1oz. (28 g)
To melt Chocolate,
72 cup (125 mL) chips
P10 (High)
P10{High)
1-Vk
1-1Va
Remove wrapper and place chocolate
in amicrowave-safe dish. Stir before
adding more time. (Stir until completely
melted.) Note: Chocolate holds its shape
even when softened.
To toast Coconut,
1/~ a, iH HOC ml \
i2 cup (idb mL)
P10(High) 1Place in amicrowave-safe dish.
Stir every 30 seconds.
To soften Cream Cheese,
8oz. (250 g)
P3 (MED-LOW) 1-2 Remove wrapper and place in a
microwave-safe bowl.
To brown Ground Beef,
1pound (450 g)
P10(High) 4-5 Crumble into amicrowave-safe colander
set into another dish. Stir twice.
Drain grease.
To steam Hand Towels -4P10(High) 20 -30 sec. Soak in water, then wring out excess.
Place onamicrowave-safe dish.
Heat. Present immediately.
To soften Ice Cream,
Va gallon (2 L)
P3 (MED-LOW) 1-17a Check often to prevent melting.
Cup of liquid
boiling water, broth, etc.
1cup, 8oz. (250 mL)
2cups, 16oz. (500 mL)
to heat milk
1cup, 8oz. (250 mL)
2cups, 16 oz. (500 mL)
P10(High)
P7 (MED-HIGH)
27a-
3
4
2-3
4-5
Heated liquids can erupt if not stirred.
Do not heat liquids in microwave oven
without stirring before and after heating.
To roast Nuts,
1Va cups (375 mL)
P10(High) 4-5 Spread nuts into a9-inch (230 mm)
microwave-safe pie plate.
Stir occasionally.
To toast Sesame Seeds,
V* cup (50 mL)
P10(High) 3-5 Place in asmall microwave-safe bowl.
Stir twice.
To skin Tomatoes
(one at atime)
P10 (High) 30 sec. Place tomato into amicrowave-safe bowl
containing boiling water. Rinse and peel.
Repeat for each tomato.
To remove Cooking Odors P10 (High) 5Combine 1to VU cups (250 -375 mL)
water with the juice and peel of one
lemon in asmall microwave-safe bowl.
After heating, wipe interior of oven with
acloth.
16
Food Characteristics
Bone and Fat
Both bone and fat affect cooking. Bones may
cause irregular cooking. Meat next to the tips of
bones may overcook while meat positioned under
alarge bone, such as aham bone, may be
undercooked. Large amounts of fat absorb
microwave energy and the meat next to these
areas may overcook.
Density
Porous, airy foods such as breads, cakes or rolls
take less time to cook than heavy, dense foods
such as potatoes and roasts. When reheating
donuts or other foods with different centers be
very careful. Certain foods have centers made
with sugar, water, or fat and these centers attract
microwaves (For example, jelly donuts). When a
jelly donut is heated, the jelly can become
extremely hot while the exterior remains warm to
the touch. This could result in aburn if the food
is not allowed to cool properly in the center.
Quantity
Two potatoes take longer to cook than one pota-
to. As the quantity of the food increases so does
the cooking time. When cooking small amounts of
food such as one or two potatoes, do not leave
oven unattended. The moisture content in the
food may decrease and a fire could result.
Shape
Uniform sizes heat more evenly. The thin end of a
drumstick will cook more quickly than the meaty
end. To compensate for irregular shapes, place
thin parts toward the center of the dish and thick
pieces toward the edge.
Size
Thin pieces cook more quickly than thick pieces.
Starting Temperature
Foods that are room temperature take less time
to cook than if they are chilled, refrigerated, or
frozen.
Cooking Techniques
Piercing
Foods with skins or membranes must be pierced
scored or have astrip of skin peeled before cook-
ing to allow steam to escape. Pierce whole egg
yolks and whites, clams, oysters, chicken livers,
whole potatoes and whole vegetables. Whole
apples or new potatoes should have a 1-inch strip
of skin peeled before cooking. Score sausages
and frankfurters.
Browning
Foods will not have the same brown appearance
as conventionally cooked foods or those foods
which are cooked utilizing abrowning feature.
Meats and poultry may be coated with browning
sauce, Worcestershire sauce, barbecue sauce or
shake-on browning sauce. To use, combine
browning sauce with melted butter or margarine;
brush on before cooking.
For quick breads or muffins, brown sugar can be
used in the recipe in place of granulated sugar, or
the surface can be sprinkled with dark spices
before baking.
17
Cooking Techniques
Spacing
Individual foods, such as baked potatoes, cup-
cakes and appetizers, will cook more evenly if
placed in the oven equal distances apart. When
possible, arrange foods in acircular pattern.
Covering
As with conventional cooking, moisture evapo-
rates during microwave cooking. Casserole lids or
plastic wrap are used for atighter seal. When
using plastic wrap, vent the plastic wrap by fold-
ing back part of the plastic wrap from the edge of
the dish to allow steam to escape. Loosen or
remove plastic wrap as recipe directs for stand
time. When removing plastic wrap covers, as well
as any glass lids, be careful to remove them
away from you to avoid steam burns. Various
degrees of moisture retention are also obtained
by using wax paper or paper towels. However,
unless specified, arecipe is cooked covered.
Shielding
Thin areas of meat and poultry cook more quickly
than meaty portions. To prevent overcooking,
these thin areas can be shielded with strips of
aluminum foil. Wooden toothpicks may be used to
hold the foil in place.
Timing
Arange in cooking time is given in each recipe.
The time range compensates for the uncontrol-
lable differences in food shapes, starting temper-
ature, and regional preferences. Always cook
food for the minimum cooking time given in a
recipe and check for doneness. If the food is
undercooked, continue cooking. It is easier to add
time to an undercooked product. Once the food is
overcooked, nothing can be done.
Stirring
Stirring is usually necessary during microwave
cooking. We have noted when stirring is helpful,
using the words once, twice, frequently, or occa-
sionally to describe the amount of stirring neces-
sary. Always bring the cooked outside edges
toward the center and the less cooked center por-
tions toward the outside of the dish.
Rearranging
Rearrange small items such as chicken pieces,
shrimp, hamburger patties, or pork chops.
Rearrange pieces from the edge to the center
and pieces from the center to the edge of the
dish.
Turning
It is not possible to stir some foods to redistribute
the heat. At times, microwave energy will concen-
trate in one area of afood. To help insure even
cooking, these foods need to be turned. Turn
over large foods, such as roasts or turkeys,
halfway through cooking.
Stand Time
Most foods will continue to cook by conduction
after the microwave oven is turned off. In meat
cookery, the internal temperature will rise 5°F to
15°F (3°C to 8°C), if allowed to stand, tented with
foil, for 10 to 15 minutes. Casseroles and
vegetables need ashorter amount of standing
time, but this standing time is necessary to allow
foods to complete cooking to the center without
overcooking on the edges.
Test for Doneness
The same tests for doneness used in convention-
al cooking may be used for microwave cooking.
Meat is done when fork-tender or splits at fibers.
Chicken is done when juices are clear yellow and
drumstick moves freely. Fish is done when it
flakes and is opaque. Cake is done when atooth-
pick or cake tester is inserted and comes out
clean. Candy is done when it reaches the proper
temperature for each stage of crystallization.
18

This manual suits for next models

1

Other Panasonic Microwave Oven manuals

Panasonic NN-SD351M User manual

Panasonic

Panasonic NN-SD351M User manual

Panasonic NN-SB658S User manual

Panasonic

Panasonic NN-SB658S User manual

Panasonic NN-ST34NBMPQ User manual

Panasonic

Panasonic NN-ST34NBMPQ User manual

Panasonic NN-CD575M User manual

Panasonic

Panasonic NN-CD575M User manual

Panasonic inverter NN-ST450W Assembly Instructions

Panasonic

Panasonic inverter NN-ST450W Assembly Instructions

Panasonic Inverter NN-A755 Assembly Instructions

Panasonic

Panasonic Inverter NN-A755 Assembly Instructions

Panasonic NN-V673SBBPQ User manual

Panasonic

Panasonic NN-V673SBBPQ User manual

Panasonic NN-ST756W User manual

Panasonic

Panasonic NN-ST756W User manual

Panasonic NE-1853BPQ User manual

Panasonic

Panasonic NE-1853BPQ User manual

Panasonic NN-6550 User manual

Panasonic

Panasonic NN-6550 User manual

Panasonic NN-DS581M User manual

Panasonic

Panasonic NN-DS581M User manual

Panasonic NN-T655 User manual

Panasonic

Panasonic NN-T655 User manual

Panasonic NN-CD989S User manual

Panasonic

Panasonic NN-CD989S User manual

Panasonic NN-CD87KS User manual

Panasonic

Panasonic NN-CD87KS User manual

Panasonic NN-GT462M User manual

Panasonic

Panasonic NN-GT462M User manual

Panasonic NN-L731WF User manual

Panasonic

Panasonic NN-L731WF User manual

Panasonic NN-SM330W Operating instructions

Panasonic

Panasonic NN-SM330W Operating instructions

Panasonic NN-ST661B User manual

Panasonic

Panasonic NN-ST661B User manual

Panasonic NN-S554MF User manual

Panasonic

Panasonic NN-S554MF User manual

Panasonic NN-ST45KW User manual

Panasonic

Panasonic NN-ST45KW User manual

Panasonic NN-SN936B User manual

Panasonic

Panasonic NN-SN936B User manual

Panasonic NN-S710S User manual

Panasonic

Panasonic NN-S710S User manual

Panasonic NN-S251WL User manual

Panasonic

Panasonic NN-S251WL User manual

Panasonic NN-S562 User manual

Panasonic

Panasonic NN-S562 User manual

Popular Microwave Oven manuals by other brands

Kleenmaid MWK101X Instructions for use

Kleenmaid

Kleenmaid MWK101X Instructions for use

Samsung M1716N Owner's instructions and cooking guide

Samsung

Samsung M1716N Owner's instructions and cooking guide

Swann Symphony SM22038 instruction manual

Swann

Swann Symphony SM22038 instruction manual

Samsung MS23H3115 series Owner's instructions & cooking guide

Samsung

Samsung MS23H3115 series Owner's instructions & cooking guide

GE PVH1970 owner's manual

GE

GE PVH1970 owner's manual

Sanyo EMS 1001 datasheet

Sanyo

Sanyo EMS 1001 datasheet

RAMTONS RM 396 instructions

RAMTONS

RAMTONS RM 396 instructions

Frigidaire FMV156DCB Wiring diagram

Frigidaire

Frigidaire FMV156DCB Wiring diagram

Haier QVM7167 installation instructions

Haier

Haier QVM7167 installation instructions

Smeg MI20XU Owner's instruction manual

Smeg

Smeg MI20XU Owner's instruction manual

Midea EG823A4X Operation manual

Midea

Midea EG823A4X Operation manual

GENERAL COOKING GEW1050E-C instruction manual

GENERAL COOKING

GENERAL COOKING GEW1050E-C instruction manual

Danby DBMW009201M1 user manual

Danby

Danby DBMW009201M1 user manual

Whirlpool MWD319 Instructions for use

Whirlpool

Whirlpool MWD319 Instructions for use

Somogyi Elektronic home HG MH 23 GR instruction manual

Somogyi Elektronic

Somogyi Elektronic home HG MH 23 GR instruction manual

Toshiba MM-MM20P instruction manual

Toshiba

Toshiba MM-MM20P instruction manual

Amana DQ22HS Service manual

Amana

Amana DQ22HS Service manual

Bosch CM583MS0K instruction manual

Bosch

Bosch CM583MS0K instruction manual

manuals.online logo
manuals.online logoBrands
  • About & Mission
  • Contact us
  • Privacy Policy
  • Terms and Conditions

Copyright 2025 Manuals.Online. All Rights Reserved.