manuals.online logo
Brands
  1. Home
  2. •
  3. Brands
  4. •
  5. Panasonic
  6. •
  7. TV VCR Combo
  8. •
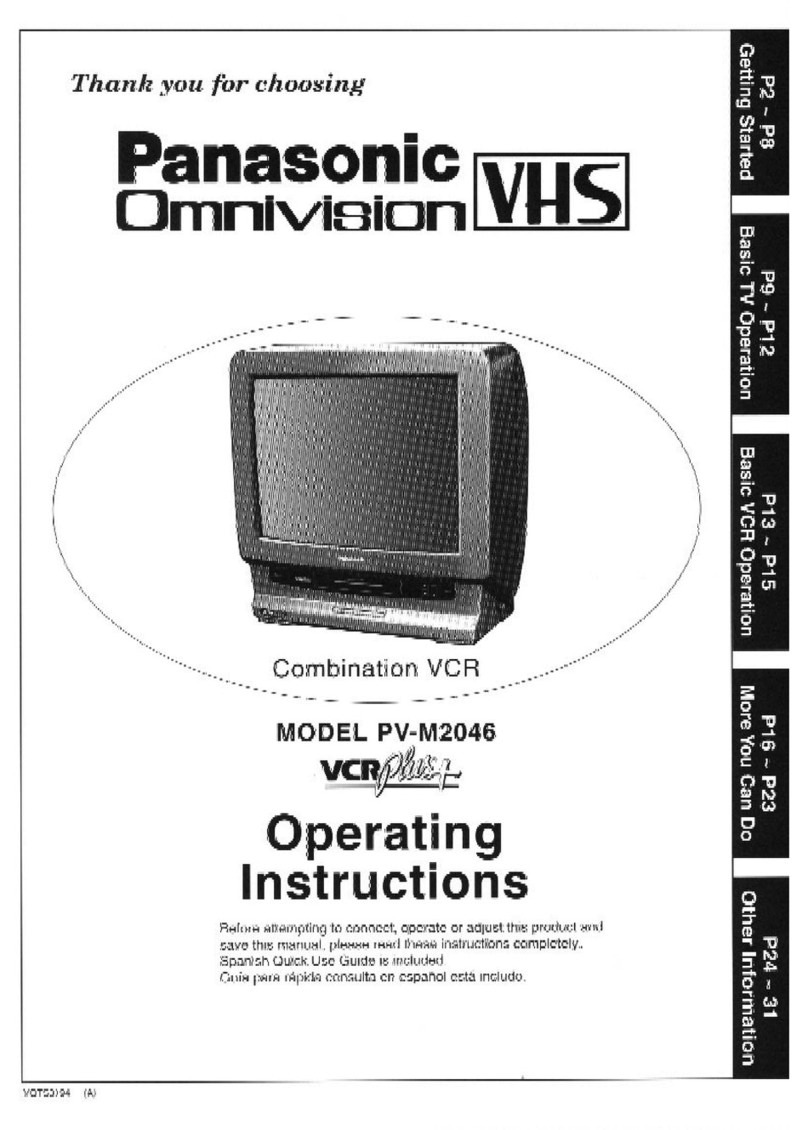
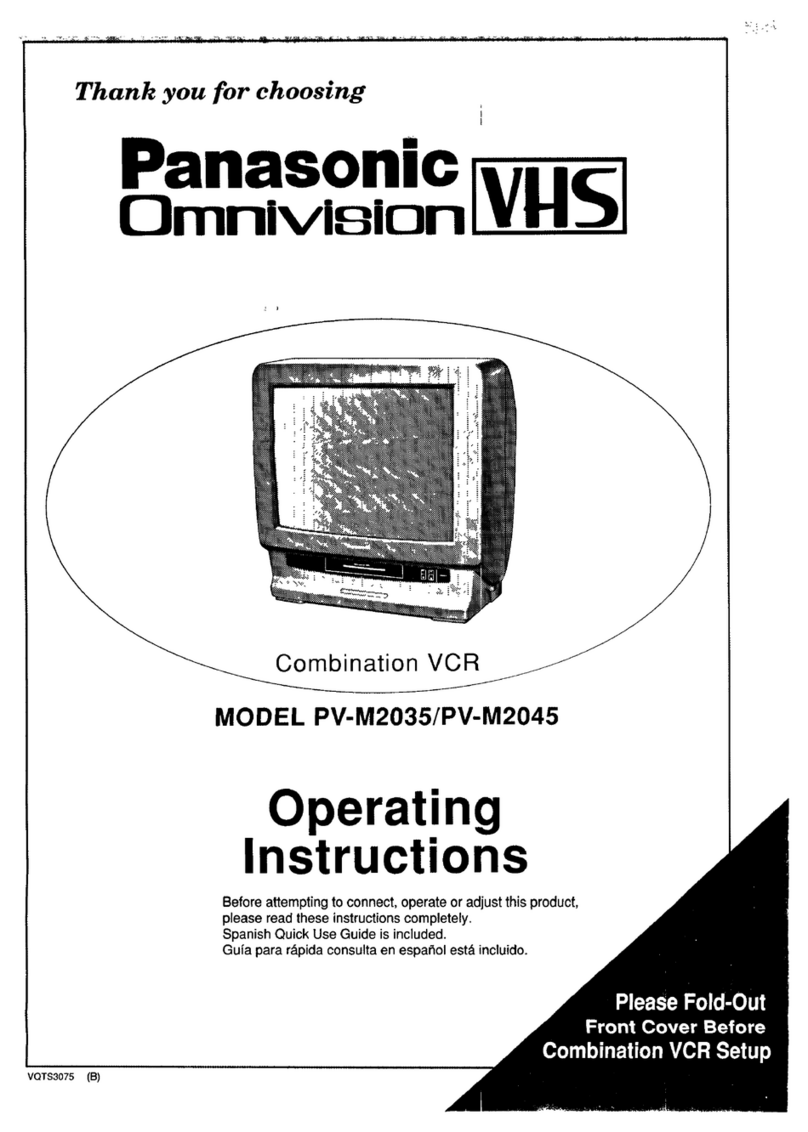
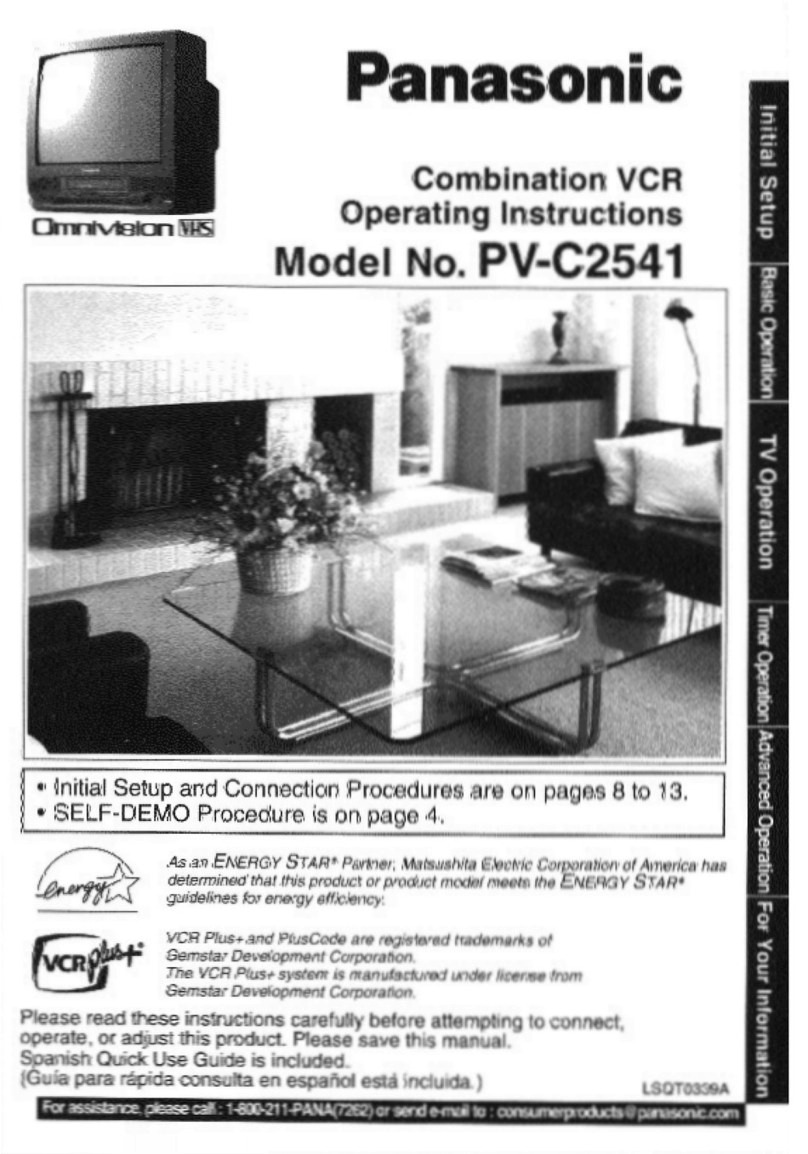
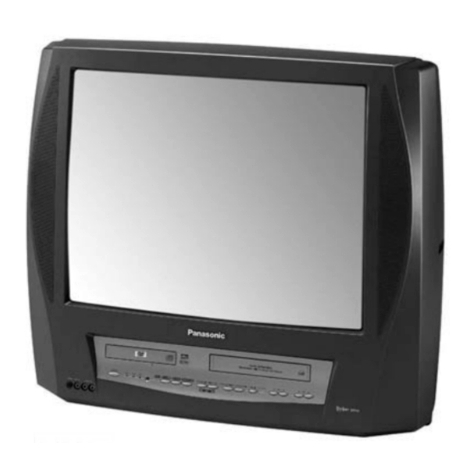
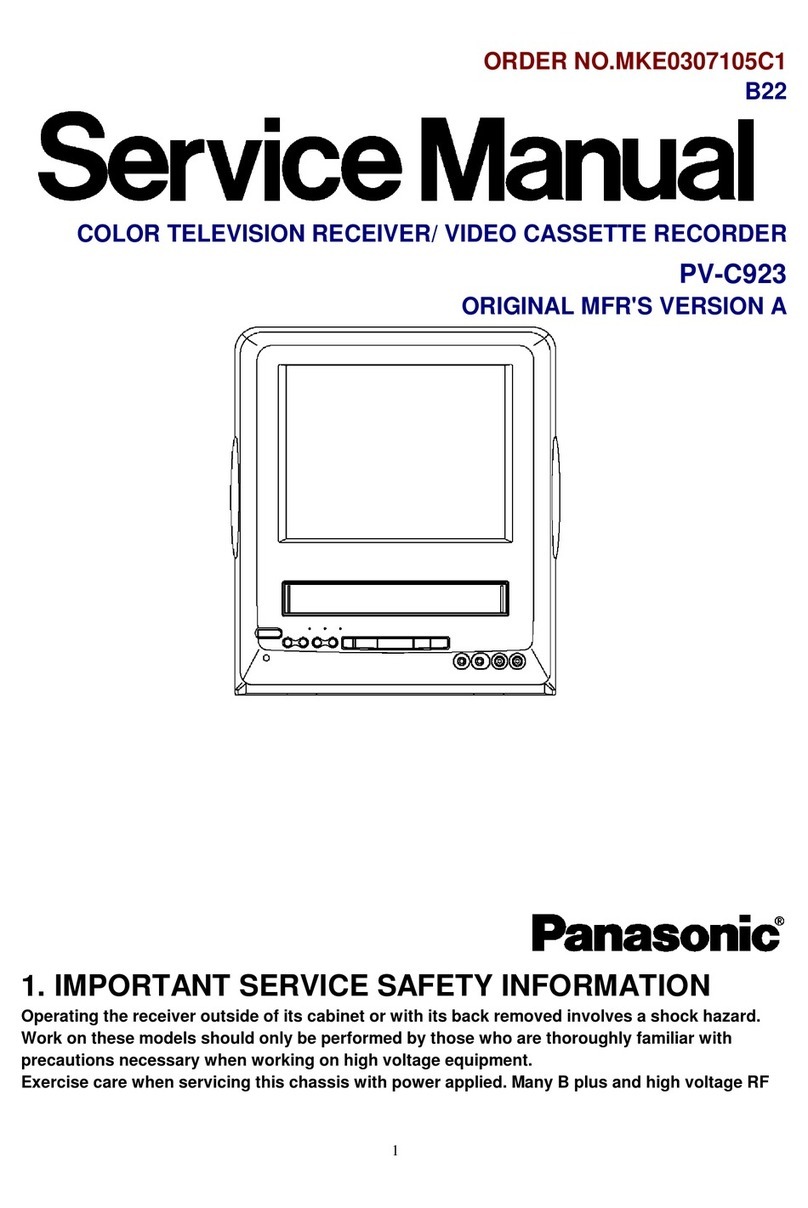
  9. Panasonic Omnivision PV-M1378W User manual

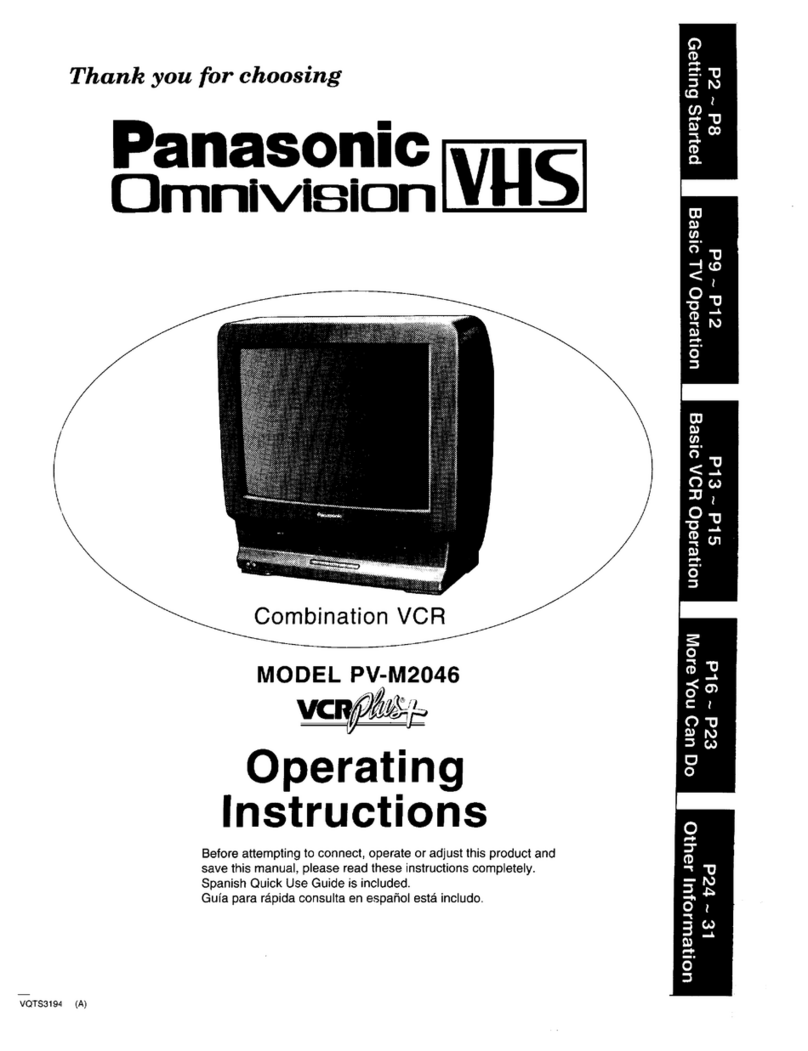
Panasonic Omnivision PV-M1378W User manual

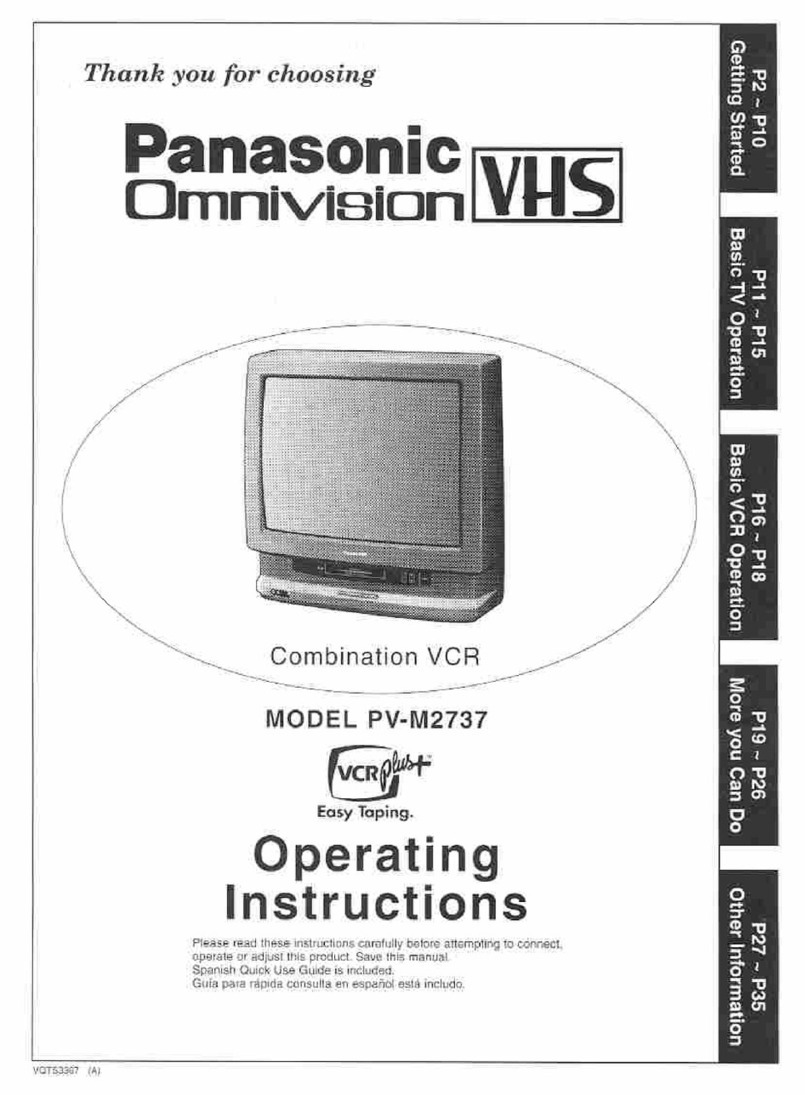
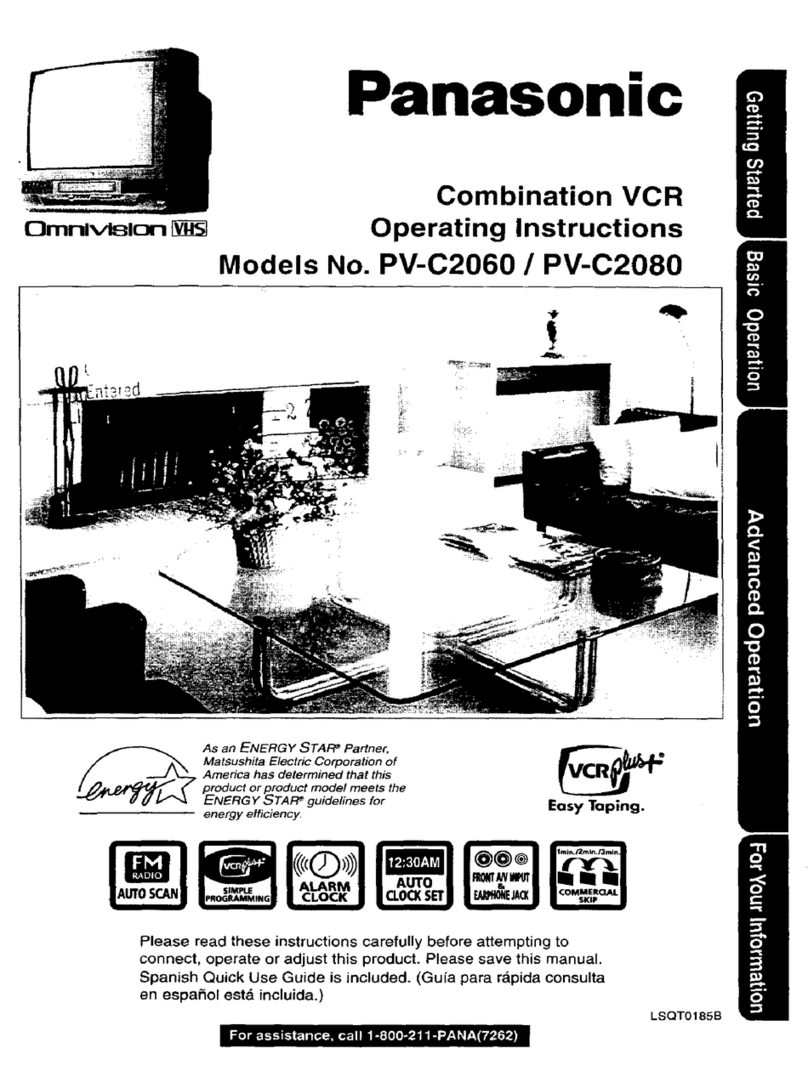
Thank you for choosing
panasonic
OmnlvBion_
ed 81998
Combination VCR
MODEL PV-M1378W
Operating
Instructions
Pleaseread theseinstructionscarefullybeforeattemptingtoconnect,
operateor adjustthisproduct.Pleasesavethismanual.
SpanishQuickUseGuideisincluded.
Gufapara rdpidaconsultaen espaSolestdincludo.
VQTS3436 (A)
Things -You Should Know
Congratulations
on your purchase of one of the most sophisticatedand reliable products
on the market today. Used properly,it willbring you and your family
years of enjoyment. Please fill inthe informationat dght.The serial
number ison the tag located on theback of your CombinationVCR.
Date of Purchase
Dealer PurchasedFrom
Dealer Address
Dealer PhoneNo.
Model No. PV-M137QW
Serial No.
Safety Precautions
Wamlng: To prevent fire or shock hazard, do not expose this equipment to rain or moisture.
This video recorder, equipped with the HQ ( High Quality) System, is compatible with existing VHS equipment.
Only use those tapes with the _mark. It is recommended that only cassette tapes that have been tested and
inspected for use in 2, 4, 6, and 8 hour VCR machines be used.
This television receiver provides display of television closed captioning in accordance with §15.119 of the FCC rules.
IG&U'TI_ TO R_ 1'1,_E RISK OF ELECTR_ SFI_
p_lr=Rs_mr,clNo TOQ_l/_L=na_SERVK__
Thissymbolwarns the user thatuninsulatedvoltage withinthe unit
may have sufficientmagnitudeto cause electricshock. Therefore, itis
dangerousto make any kindof contactwith any inside part ofthis unit.
This symbolalerts the userthat importantliterature concerningthe
operation and maintenance of this unithas been included.
Therefore, it shouldbe read carefullyin.orde_toavoid any problems.
Table of Contents
Things You Should Know................................................................................................................ 2
Important Safeguards and Precautions .......................................................................................... 3
Unpacking Your Combination VCR =Product Features .................................................................. 4
[etF;ll i ii1._1,.1_.! v![_l_
Antenna or Cable Connections (Outdoor Antenna, Cable Box, Scrambled/Unscrambled Channels) ................. 5
Location of Controls (Remote Control, Combination VCR) .................................................................... 6, 7
One Time Setup (On-Screen Language, Channel Memory, Auto Clock Set) ............................................... 8, 9
On-Screen Displays (OSD) (Function, Channel, Menu, VCR Status/Clock, Waming, Instruction) .................... 10
I=_._-t_ IktlOj iZ_ _.t4 (,) ,1
TV Operation (MainOperation, Using the 100 key, Rapid Tune, Audio Mute, Phones, SELF-DEMO Mode) ........... 11
Picture Adjustment (Color, Tint, Brightness, Picture, Sharpness, Reset) ..................................................... 11
TV Timer Features (KitchenTimer,Alarm Timer,SleepTimer)........................................................... 12, 13
Closed Caption System (Main Operation, Caption On Mute)................................................................... 14
FM Radio ...................................................................................................................................... 15
Playback a Tape (Main Operation, Special Effects, Quality Picture Features) ................................................ 16
Record On a Tape (Main Operation, One Touch Record, Input Select) ....................................................... 17
I_VJ(e) d_;i°4[o] I i_t oo Ille] t
Timer Recording (Main (_peration,Cancel, Clear or ReplaceProgramContents) ..................................... 18, 19
Copying Your Tapes (Connection,Main Operation)............................................................................... 19
".SpecialVCR Features (ChannelCaption,TimeStamp,BlueBackON/OFF,VCRLock,WarningBeeper)............. 20, 21
Tape Operation (IndexSearch,RepeatPlay,One MinuteSkip,ZeroSearch,AutoFunctions)............... 22, 23, 24
[e]_ o[_ i Jr_(e) _,il_.ll =i(ell il
Unit and Cassette Information ...................................................................................................... 25
•Before Requesting Service (Self-checkItems)...................................... ..'_'......................................... 26
Service Center List........................................... :............................................................................ 27
Spanish Quick Use Guide/Guia para rdpida consulta ............................................................ 28-31
Warranty .......................................................................................................................... Back Cover
2
Important Safeguards and Precautions
FOR YOUR SAFETY, READ AND RETAIN ALL I
SAFETY AND OPERATING INSTRUCTIONS. 1
[ HEED ALL WARNINGS IN THE MANUAL AND
l ON THE UNIT
[ INSTALLATION I
1 POWER SOURCE CAUTION
Operate only from a power source indicated on the
unit or in this manual.
If necessary, have your Electric Utility Service
Company or Video Products Dealer verify the power
source in your home.
2 POLARIZED OR GROUNDING PLUG
As a safety feature, this Video product comes with
either a poladzed power cord plug (one blade is
wider than the other), or a three-wire grounding type
plug. 2
pOLARIZED PLUG CAUTION:
This plug will only fit into an outlet one way. If you
cannot fully insert the plug, try reversing it. If it still will
not fit, have an electrician install the proper wall outlet.
Do not defeat the safety feature by tampering with the
plug.
GROUNDING PLUG CAUTION:
This plug will only fit into a three-hole grounding outlet.
If necessary, have an electrician install the proper - I
outlet. Do not defeat the safety feature by tampedng =
with the plug.
3 POWER CORD
Make sure power cords are routed so that they are
not likely to have anything rest on them, roll over
them, or be in the way of walking traffic.
If an extension cord is used, make sure it also has
either a poladzed or grounded plug and that the
cords can be securely connected.
Frayed cords, damaged plugs, and damaged or
cracked wire insulation are hazardous and should be
replaced by a qualified service technician.
Overloaded outlets and extension cords are fire
hazards and should be avoided.
4 DO NOT BLOCK VENTILATION HOLES
Ventilation openings in the cabinet release heat
generated during operation. If they are blocked, heat
build-up inside the unit can cause failures that may
result in a fire hazard or heat damage to cassettes.
For protection follow these rules:
a. Never cover ventilation slots or the unit while in
use, or operate the unit when placed on a bed,
sofa, rug, or other soft surface.
b. Avoid built-in installation, such as a book case or
rack, unless proper ventilation is provided.
5 AVOID EXTREMELY HOT LOCATIONS OR
SUDDEN TEMPERATURE CHANGES
Do not place the unit over or near any kind of heater
or regulator, in direct sunlight, inside a closed
vehicle, etc.. Do not move the unit suddenly between
areas of extreme temperature variation. If the unit is
suddenly moved from a cold place to a warm place,
moisture may condense in the unit and on the tape.
6 TO AVOID PERSONAL INJURY
•Do not place unsecured equipment on a sloping I
surface. I
•,Do not place this unit on any support that is not 1
firm, level and adequately strong. The unit could fall
causing serious injury to child or
adult and damage to the unit.
•An appliance and cart combination
should be moved with care. Quick _2
stops, excessive force, and
uneven surfaces may cause the
appliance and cart combination to
overtum.
• Carefully follow all operating 3
instructions and use the manufacturer's
recommended accessodes when operating this unit
or connecting it to any other equipment.
OUTDOOR ANTENNA INSTALLATION ]
SAFE ANTENNA AND CABLE CONNECTION
If an outside antenna or cable
system isconnected to the /_
equipment, be sure the
antenna or cable system is _
grounded so as to provide _
some protection against _// _rj_u=
built up static charges and i _]_,,,'[ _,_¢uc_oM=_.
voltage surges. Section 8101 _I_/._p=.j.__o,,
of the National Electdcal _ _=_u.oo._,w=
Code, ANSI/NFPA 70 (in __,_,
Canada, part 1 of the _--.J..f._____a._m_=_,_
Canadian Electrical Code) ,r.c.__coo_ _=_,rr==_F_,r_
provides information with respect to proper grounding of the mast and
supporting structure, grounding of the lead-in wire to an antenna discharge
unit, size of grounding conductors, location of antenna discharge unit,
connection to grounding electrodes and requirements for the grounding
electrode.
KEEP ANTENNA CLEAR OF HIGH VOLTAGE POWER LINES
OR CIRCUITS
An outside antenna system should be located well away from power lines,
electric light or power circuits and where it will never coma into contact with
these power sources if it should happen to fall. When installing an outside
antenna, extreme care should be taken to avoid touching power lines,
circuits or other power sources as this could be fatal. Because of the
hazards involved, antenna installation should be left to a professional
USING THE VIDEO UNIT I
If the unit has been in storage or moved to a new location, refer first to the
INSTALLATION section of these safeguards.
1 KEEP THIS VIDEO UNIT AWAY FROM WATER OR MOISTURE
OF ANY KIND.
2 IF EQUIPMENT IS EXPOSED TO RAIN, MOISTURE, OR
STRONG IMPACT, unplug the unit and have it inspected by a qualified
service technician before use.
3 DURING AN ELECTRICAL STORM
Dudng a lightning storm, whether indoors or outdoors, or before leaving the
unit unused for extended pedods of time, disconnect all equipment from the
power source as well as the antenna and cable system.
4 WHEN THE UNIT IS PLUGGED IN
•Never expose the unit to rain or water. DO NOT OPERATE if liquid has
been spilled into the unit. Immediately unplug the unit, and have it
inspected by a service technician. Fire and shock hazards can result from
electrical shorts caused by liquid contact inside.
• Never drop or press any object through openings in the unit. Some
intemal parts carry hazardous voltages and contact can cause electric
shock or fire hazard.
•Avoid placing the unitdirectly above or below your TV set as this may
cause electrical interference. Keep all magnets away from electronic
equipment.
5 USING ACCESSORIES
Use only accessories recommended by the manufacturer to avoid dsk of fire,
shock, or other hazards.
6 CLEANING THE UNIT
Unplug the unit. Then, use a clean, dry, chemically untreated cloth to gently
remove dust or debris. DO NOT USE cleaning fluids, aerosols, or forced air
that could over-spray, or seep intothe unitand cause electrical shock. Any
substance such as wax, adhesive tape, etc. may mar'the cabinet surface.
Exposure to greasy, humid, or dusty areas may adversely affect intemal pads.
SERVICE I
DO NOT SERVICE THIS PRODUCT YOURSELF
If, after carefully following the detailed opareting instructions, this Video
product does not operate properly, do not attempt to open or remove covers,
or make any adjustments not described in the manual. Unplug the unit and
contact a qualified service technician. .. r:,
IF REPLACEMENT PARTS ARE REQUIRED
Make sure the service technician uses only pads specified by the manufacturer,
or those having the same safety characteristics as the odginal pads, The use of
unauthorized substitutes may result in fire, electric shock, or other hazards.
HAVE THE SERVICE TECHNICIAN PERFORM ASAFETY CHECK
After any service or repairs to the unit, request the service technician to
conduct a thorough safety check as descdbed in the manufacture's service
literature to insure that the video unit is in safe operating condition. 3
UnpackingYourCombinationVCRoProductFeatures
Unpacking Your
Combination VCR
The accessories shown below are provided to
help you use or set up your Combination VCR.
Accessories
•.÷
_1 IDN
Q®®t
Q®®e
Remote Control
VSQS1567
2"AA" Batteries
O
Kitchen (Easy-Find _)
Remote Control
(VSQS1572)
with one CR2025 Battery
• The Kitchen remote control
has been loaded with battery.
To order accessories,
calltollfree 1-800-211-PANA(7262).
Load the batteries
1Pressin anduponthelatch with
yourthumbnailand liftoffthe lid.
2Installtwobatteries as indicated
insidethe BatteryCompartment.
O Fit the lid's hinge piece into the
indent on the case, and snap the
lid intoplace.
Battery replacement caution
•Do not mix old and new batteries.
•Do not mix alkaline with manganese batteries.
Replace the battery for
the Kitchen remote control
1_While pressingthe stoppertab,
(_)pulltheBatteryTray out.
2Insertthebatteryintothe Battery
Tray withthe®mark facing
down.DOnotreversethe
3Replace theBatteryTray.
ReplacebatterywithPanasonicPARTNO.VSBW0004(CR2025)only.
Useofanotherbatterymaypresentariskoffireorexplosion.Caution-
batterymayexplodeifmistreated.Disposeofusedbatterypromptly.Keep
awayfromchildren.Donotrecharge,disassembleordisposeofinfire.
Product Features
Alarm Timer ................................................................................................................................... 13
All Channel Auto Set/181-CH TV/CABLE Tuner ............................................................................. 8
Auto Clock Set ............................................................................................................................. 8, 9
Auto Daylight Saving Time ............................................................................................................ 25
Auto Operation Functions (AutoShutOff.AutoPlayback,Rewind,TapeEject,PowerOff).............................. 24
Auto Repeat Function .................................................................................................................... 24
Closed Caption System .............................................................. _............ :............. ;....;.................. 14
Easy-to-Read English/Spanish/Frer_ch On-Screen Displays :8, 9, 18, 19
FM Radio -- - 15
Front-mounted AN In Terminals ................................................................................................... 19
I_tchen (Easy-Fin_) Remote Control............................................................................................... 6
Kitchen Timer ................................................................................................................................ 12
One Minute Skip ............................................................................................................................ 24
One Month, 8 Program Auto Timer Recording ....................... ............................................... ,: 18, 19
One Touch Recording (OTR) ........................................................................................................ 17
Quick Play Mechanism ................................................................................................................... 26
Rapid Tune ......................................................................................... ._/........................................ 11
Special Effects Playback ................................... ,........................................................................... 16
Special VCR Features (ChannelCaption,Time Stamp, BlueBackON/OFF Feature, VCR Lock, Waming Beeper) ...... 20, 21
VHS Index Search System (Direct Access Index Search, Program Index Search, Index Scan Search) ........ 22, 23
Zero Search ................................................................................................................................... 24
4
Antenna,,or Cable Connections
Unhook the antenna from your previous TV
or VCR and connect it to the back of the
Combination VCR as shown in the diagram.
If your antenna system has separate UHF
and VHF lead-ins, you need a UHFNHF
Band Mixer (not supplied).
(Flat)Twin Lead
300 Ohm Cable UHFNHF Band
7_5Ohm _) Mixer (not supplied)
(Round)
• -. .... or
300-75 ohm
.__ TransformerI-r-rfi_.
_n_nna (not supplied)L_
-----r__---" J Backof
(Flat)Twin Lead CombinationVCR
300OhmCable
(A) Without a Converter/Descrambler Box
With this connection, you can use your
Combination VCR remote control to select
channels for viewing and select
unscrambled channels for timer recording.
Scrambled channels may not be viewed or
recorded with this connection.
(B) With a ConvertedDescrambler Box
With this connection, you may record and
view any channel including scrambled
channels. Please note, however that
channel selection must be made at the
cable company converter box. Timer
recording is limited to one channel at a time,
and you can only view the channel you are
recording.
To Watch and Record Scrambled/
Unscrambled Channels
Set theCombination VCR to the output
channel of the cable converter box (e.g. CH3).
Now, select channels to be viewed or
recorded at the cable converter box.
(A) Back of Combination VCR
(B) Cable TV
Converter Box
FCCWARNING: Any un_authorizedch_lngesor
modificationsto this equipmentwould void the
user's authority to operate.
v.
Note to CABLE System Installer
ThisreminderisprovidedtocalltheCABLE
(Cable"IV)SystemInstallersattentiontoArticle
820-40 oftheNEC thatprovidesguidelinesfor
propergroundingand,inparticular,specifiesthat
thecable groundshallbeconnectedtothe
groundingsystemofthebuilding,as closetothe
pointofcableentryas practical.
5
Location of Controls /
i -B(_.]i|[t]_'_ [iK_,i iii'_ I i'_Ti|(o] il,:l
POWER
See pages 8, 11.
MUTE
See pages 11, 14.
CHANNEL UP/DOWN
SELECT UP/DOWN
See pages 8-15, 17-24.
ACTION
See pages 8-11, 14, 17,
20, 21, 24.
NUMBERED KEY
See pages 9, 11, 15, 17, 22.
DISPLAY
See pages 10, 13, 15, 24.
INDEX
See pages 22, 23.
PLAY
See pages 16, 23.
REWIND/SEARCH
See pages 16, 22, 23.
PAUSE
See pages 16, 17.
ADD/DELETE
See pages 8, 9,12,13,15,19, 20.
STOP
Seepages16,17,19,23.
COUNTER RESET
Seepage24.
RAPID TUNE
See page 11.
VOLUME UP/DOWN
SET/BACKSPACE
See pages 8-14, 17-24.
PROGRAM
See pages 18, 19.
;KING UP/DOWN
See page 16.
SLEEP
See page 13.
FM/TV
See page 15.
ON-TIMER
See page 13.
FAST FORWARD/SEARCH
See pages 16, 22, 23.
RECORD/TIME
See page17.
SPEED
See page 17.
ZEROI1 MINUTE SKIP
See page 24.
SLOW
See page 16.
Kitchen (Easy-Find') Remote Control
•This remote control has amagnet on the back so you can
stick it to your refrigerator, etc. for convenience.
•The Kitchen remote control buttons work the same as the
above remote control.
POWER
See pages 8, 11.
STOP
See pages 16,17,19, 23.
VOLUME UP/DOWN
SET/BACKSPACE
See pages 8-14, 17-24.
PLAY
See pages 16, 23.
FM/TV
See page15.
CHANNEL UP/DOWN
SELECT UP/DOWN
See pag_'8-15, 17-24.
6
CHANNEL UP/DOWN
TRACKING UP/DOWN
See pages 8, 11, 16, 17.
See pages 8, 11.
POWER
See pages 8, 11.
Audio/Video In
See page 19.
Cassette Compartment
See pages 16, 17.
Built-In Speaker
Remote Sensor
Phones Jack
See page 11.
STOP/EJECT REWIND/ PLAY/REPEAT FAST FORWARD/
See pages SEARCH See pages SEARCH
16,17,19,23. See pages 11,16,23,24. Seepages
16,22,23. 16,22,23.
RECORD/TIME FM/TV KITCHEN
See pages 17, 21. See page 15. TIMER
See page 12.
ON TIMER Indicato_
LightswhentheOn
Timer isset.
See page13.
REPEAT Indicator
Lightswhen=REPEATPLAY:ON"is
selectedand playbackisin progress.
See page24.
B -"f:_.! ifJ [:tvlv|o) i | IT:]L_o] iil _ I iP.i q[o_lifl_ :n
PROGRAM TIMER Indicator
Lights when the Combination
VCR is set for Timer Recording.
It flashes when a Timer
Recording has been set with no
tape inserted, the clock is not
set, or the tape is in motion.
See pages 17-19.
RECORD Indicator
Lightsduringrecording.In RecPauseor
OTR Pausemode,the indicatorflashes.
See page 17.
AC Power Plug
When plugged into an AC
_outlet, the Combination VCR
consumes 5 W of electric
power in OFF condition.
Easy-Grip-Handle
Use when transporting the
Combination VCR.
JHF Antenna Input Terminal
In from your Antenna or Cable.
See page 5. 7
"One Time Setup
WhentheCombinationVCR isturned onfor
thefirst time, itautomaticallyentersthe
setupmode.Setupincludesthe following:
•Choosethelanguageforon-screenmenus
and messages.
•Tellthe CombinationVCR howyour
equipmentishookedup(page5) sothe
CombinationVCR cancorrectlyplace
channelsintomemory.
•Get theCombinationVCR readyfor clockset.
_'Check list before you begin.
[] Your CombinationVCR is connected to an
Antenna, orCable system (see page 5).
1
[1
_k/Ooeo_ r3r_Tr_=oo ©®
_-. \ "_t-_-'
22-3.4
1
ACTION
DELETE
SELECT/
SET
(Av• • )
keys
2.
3.
4
To Set Language, Channels and Clock
1 Press POWER to turn the Combination VCR on.
2Press CH AV, or VOLb, for on
screen displays in English,
Spanish or French.
•If you choose the wrong language,
please see the =Reset all Combination
VCR Memory Functions" section on
page 25.
•If you use a cable box, the cable box must be left on for auto
channel set.
SELECTLANGUAGE
PUSH CH • :English
OPRIMIR CH • :Espa_ol
APP. VOL + :Fran_ais
Important: If you use a cable box, turn it on and select
the PBS station in your time zone.
3Press CH •to start Channel
Auto Set and Clock Auto Set.
These on-screen displays will
appear in sequence.
°CH AUTO SET PROCEEDING
-°CH AUTO SET COMPLETED
•AUTO CLOCK SET PROCEEDING
712811998TUE12:00PM
DST:ON
SETTING : CH 10
AUTO CLOCK SET
COMPLETED
END : PUSH CH UP KEY
I CHANNEL/CLOCKAUTOSET
CONNECT ANTENNA CABLE
AND IF YOU USE A CABLE
BOX, TUNE I T TO YOUR
LOCAL PBS CH THEN...
PLEASE PUSH CH UP KEY
AUTOCLOCK SET
iS t NCOMPLETE
PUSH ACTION TO SET CLOCK
4If the displayed time is correct, press CH • to
exit.
°This concludesonetime CombinationVCRsetup.
•See important note at the bottom of this page.
If the displayed time and DST. are not correct...
If you happen to live close to two time zones, the Combination VCR may
have recognized the PBS channel (setting channel) in the wrong time
zone. Please do the followingto correct the situation.
a. Make a note of the SETTING: CH number shown on-screen and
press CH •to exit.
b. Delete the setting channel from the Combination VCR channel memory.
(See the Add or Delete a Channel section on the next page.)
c. Press ACTION to display the MAiN MENU.
d. Press •V<!_ to select =CLOCK," and then press ACTION to display
the SET CLOCK screen. ' '
• If you use a cable box and have multiple PBS stations, tune the
cable box to a different PBS station and try auto clock set again "
using the menu.
e. Press •v to select =AUTO CLOCK SET," and then press • to set
and CH • to start Auto Clock set.
Usin_ the AV <•keys
Whenever a menu or program
screen is displayed, CHANNEL
UP/DOWN and VOLUME UP/DOWN on
the remote control function as AV<•
onFy.For VOLUME UP/DOWN functions,
use the buttons o.nthe Combination VCR.
8
IMPORTANT NOTE FOR AUTO CLOCK SET
• Auto clockset will be performed when the CombinationVCR istumed
offthe firsttime each day. If you use a cable box and you want auto
clock setto be performed, the cable box must be left on and tuned to
the PBS channel at the time the COmbinationVCR power is turnedoff.
• If you use Audle/Video Jack connection between the Combination VCR
and Cable Box, you must also connect the RF coaxial cable inorder to
usethe auto clockset and channel auto set features.
•If for any reason the time ischanged manually, automatic time
correction will not occur.
(_lf AUTO CLOCK SET IS INCOMPLETE
appears, please set the clock manually.
a. Press ACTION to display the SET
CLOCK screen.
b. Press &v to select and _to
enter the month, date, year, time
and DST. (Daylight Saving Time).
To Make Corrections,
repeatedly press 41, to move the
cursor to the incorrect entry and
make the correction.
C. Press ACTION twice to start the
clock and exit the MAIN MENU.
/I \DST:ON
......................
mmmmm-m
SELECT:A • KEY
SET :1_ KEY
END :ACTION KEY
•"DST:ON"automatically
adjustsfor daylight
savingtime.
(See page25.)
ACTION
keys
To Change the OSD Language
1 PressACTIONto displaythe MAIN MENU.
2 Press AYe• toselectthelanguage selection
icon.
3 PressACTION repeatedlytochangethe language
as shown.
<Spanish>
M_U _I_IP_
EEGIR: • ••)
FIJ_ :ACT I_
_} <French>
SEL : ••• I_
REGLER :ACT ION
4Press A_',<• to select "EXIT," and then press
ACTION to exit the MAIN MENU.
To Replace Channels in Memory
Incase, you havecable installed,etc.
1Press ACTION to display tl_eMAIN MENU.
2Press AY'_• to select "CH,"
and then press ACTION to
display the SET UP CHANNEL
screen.
3 Press AV repeatedly to select
=ANTENNA," and then press
•to select your antenna
system (_I'V" or "CABLE"):.
4Press AV to select "AUTO
ET," and then press
to start.
• To exittheSET UP CHANNEL
screen,pressACTIONtwice.
MAIN MENU
SS.IECT :A v _11P KEY
SET :ACTION KEY
SELECT:A •KEY
SET :_. KEY
END :ACTION F_=Y
ADD/
DELETE
To Set or Reset the Clock
In casetheclockiswrong,ora powerfailureoccurred.
1Press ACTION to ..... SET CLOCK ......
display the MAIN
MENU. AUTOCLOCKSET
2Press A_I'<• to
select "CLOCK." SELECT:A• KEY
SET :1_ KEY
Then, press ENO :ACTIONKEY
ACTION to display
the SET CLOCK r--.,t-- SETCLOCK......
screen. I_
3/1\ OSTON
Press &_!' to select /.................. :
"MANUAL," and then I=mm_mm_
•todisplay the I SELECT:, •KEY
SET CLOCK screen. _ _ I_C_I_NKEY
4Please do steps b
and ¢at the top of this page.
To Add or Delete a Channel
1Seteqt a channel [ CHANNEL08_OEO ]
using the -I ' ' /
NUMBERED keysl I CHANNEL 08 DELETED
to add or CH Ai,VI ]
to delete. I I
2 Press ADD/DLT
to add or delete L
the channel.
•Toselecta channelonceit'sdeleted,use the
NUMBEREDkeys.
9
On-Screen Displays (OSD)
Channel & Function Display
Whenever the channel is
changed, the channel
number will appear for a few
seconds on-screen.
(Some station names may
also appear if Channel
Caption isset. See page 20.)
When a function button is
pressed (PLAY, FF, etc.), the Combination VCR
mode will be displayed.
•When a recording is started, both REC and
the channel number will appear together.
08
ABC
Warning and Instruction Displays
These displayswillalertyouofa missedoperationor
providefurtherinstructions.
If no active channelsare
found forCHANNEL
MEMORY...
(seepage5.)
NO CH FOUND
PLEASE CHECK ANTENNA
CABLE CONNECTION THEN
PUSH CH UP KEY AGAI N
Ifyouattempttosetor
reviewa TimerRecordingor
settheOn-Timerandthe
Clockisnotset...
(see pages8, 9.) PLEASE SET CLOCK
BEFORE PROGRAMIdI NG
Menu Screen
1Press ACTION to
display the MAIN
MENU.
2Press AV4b, and
ACTION to make your
selection (see page 8).
•To getthe mostfromeachfeature,
pleasereadtheOperationManual
beforeattempting anyoperation.
IfyoupressRECon the
remotecontrolorthe
CombinationVCR, anda
cassetteisinsertedwithno
recordtab...
(seepage 17.)
Ifyou press STOP
during a Timer
Recording...
(see page 19.)
CHECK CASSE'rI_
RECORD TAB
TO CANCEL TIMER REC
HOLD OOWN STOP KEY
FOR APPROX 3 SEC
VCR Status & Clock Display
Press DISPLAY to display and remove the
overlay shown below.
Rec
Remaining
(OTR mode
onlysee
page17.)
Function Current ChannelCaption
Status Time (See page20.)
f
0:25 ,Bc/
-0:12:34 SP\
Ta
\Tape Speed
)e Counter
If you press PLAY,FF,
REW, orREC onthe
remote controlorthe
CombinationVCR without
a cassetteinserted...
(seepages16, 17.)
IftheCombinationVCR is
notin Stopmodeora
cassettewithrecordtab is
notinsertedtwominutes
beforea TimerRecording
isabouttobegin...
(see pages18, 19.)
If head cleaning becomes
necessary while playing
back a tape...
(see page 25.)
NO CASSETTE
PLEASE INSERT A CASSETTE
PLEASE PREPARE
FOR TIMER REC
r
V IDEO HEADS MAY
NEED Ct.EANI NG
PLEASE INSERT HEAD
Q.EANING CASSETTE
ON REFER TO MANUAL
END:PLAY KEY
Blank Tape/No Video Signal Indication
Whenever a blank section of a tape comes up
in Play mode, or when the selected channel
has no broadcast signal with the "Blue Back
ON/OFF Feature" (page 21) set to ON, the TV
screen will turn solid blue.
10
If you press a function
button other than
STOP/EJECT or POWER
while the Combination VCR
is in VCR Lock mode...
(See page 21.)
V_R LOCK ACTIVATED
"TV Operation/Picture Adjustment
[_Check list before you begin.
[] Allconnectionsaremade(seepage5).
[] YourCombinationVCR ispluggedin.
TV Operation
1 Press POWER to turn the Combination VCR on.
2Select a channel using CH &V or the NUMBERED keys.
3Press VOLdF to adjust the volume level. _':
1"
3
"Ol
/ / I /
2PLAW PHONES
REPEAT Jack
1
MUTE
3
TUNE
2
a SET
bkeys
e b
c.
d
100
KEY
Picture Adjustment
COLOR Control
To adjusttheintensityofthecolor.
TINT Control
To'adjust for the most natural
fleshtones.
BRIGHTNESS Control
To adjust the brightness of the picture.
PICTURE Control
To acTjustthe intensity of the picture by
adjusting contrast and color level at the
same time and in the proper balance.
SHARPNESS Control
To adjust the sharpness of the picture.
Usin_o the 100 key
When selecting CABLE channels 100 to 125 with the NUMBERED
keys, first press the 100 key, and then enter the remaining two digits.
For example, for channel 125: Press NUMBERED keys 100-2-5.
Rapid Tune
Press R-TUNE to display the last channel you were watching.
•WhenselectingchannelswithCHAV, Previous Present
thechannelsmustbe displayedforat channel channel
least4 secondsin orderfor theCombination
VCR torecognizethemas anewselection. CH08 _CH10
Audio Mute
PressMUTEto instantlymutethesound.
Pressagain,to restoretheprevioussoundlevel.
Phones
Connectan earphone(notsupplied)or headphones(notsupplied)to
thePhonesJack.
SELF-DEMO Mode
InPowerONcondition,holddownPLAY/REPEATontheCombination
VCR,withnotapeinserted,for5 seconds.Thedemoscreenappears.
To cancel:Repeattheaboveoperation.The demoscreendisappears.
Picture Adjustment
aPress ACTION to display the MAIN
MENU.
bPress AV ,d•to select "-I'V,"and
then press ACTION to display the
SET UP "IV screen.
C Press A_' to select "VIDEO
ADJUST," and then press •to
display the VIDEO ADJUST screen.
Press AV repeatedly to select the
desired adjust item, and then press
<• to adjust. (See descriptionat left.'
MAIN
...... SET UP TV ......
CAPTION
I NPU1' SELECT : TUNER
SELECT :k. •KEY
SET :1_ KEY
BqO :ACTION KEY
To Reset Picture Controls to the
Factory Setting
Press &Y and I_ to select and set
"NORMAL."
All controls retum to their factory settings.
m ....... I......
TINT ....... I......
BRIGHTNESS ....... I......
PICTURE .............. 4
SHARPNESS ....... I......
NORMAL
COLOR ....... I......
TINT ....... I......
BRIGHTNESS ....... [......
P ICllJRE .............. 4
SHARPNESS -'""1: .....
SELECT:A •KEY
SET :l_ KEY
END :ACTION KEY
ePress ACTION three times to returnto the normal screen.
•Ifnobuttonispressedwithin5minutes,the videoadjustoverlaydisappears.
11
TV Timer Features
I_Check list before you begin.
[] Allconnectionsaremade(seepage5).
[] YourCombinationVCRispluggedin.
o[
KITCHEN TIMER
1
Kitchen Timer
This feature allows you to set a timer alarm for up to 60 minutes. Useful for
when you are cooking and need to leave the kitchen.
1Repeatedly press KITCHEN TIMER on the
Combination VCR to display the KITCHEN TIMER
screen and select the desired time (as shown below).
°The countdownwillstartthreesecondsafterthe KitchenTimer has
beenset.
To cancel the countdown, press ADD/DLT.
1:00 (oneminute)......
4,
2:00
t00 <one-minute increase
: until10:00>
=
w
9"00
4,
'_'10:00 .................... ,
4,
15:00
4, <five-minute increase
20:00
4, until 30:00>
25:00 ',
4, ',
- 30:00 "_
.......... I
40:00 <ten-min_Jteincrease
,, 4,
i50:00 until 60:00>
. 4, i
'-60:00 (Max) .....
,.____J
DELETE
12
The current time
(only if clock is set)
and remaining time
change positionson
the screen every 10
seconds. 5:20PM O2_
_: AIX)/DLT KEY
Remaining
Time
NOTE:
During the countdown, pressing KITCHEN TIMER once will restart
the countdown rounded up to the nearest 1, 5, or 10 minute
interval. ' '
<Example>
a If the current remaining time is 12:15, pressing KITCHEN
TIMER will restart the countdown from 15:00.
b If the current remaining time is 9:15, the countdown will restart
from 10:00.
2The alarm will go offat 0:00 (the KITCHEN TIMER
screen display disappears). The volume of the alarm
gradually increases for one minute and then continues
to beep until any one of the remote control or
Combination VCR buttons is pressed.
Ol
ON TIMER Indicator
2.
3

DISPLAY'
,SLEEP
ADD/
DELETE
On-Timer with Alarm Feature
The Combination VCR can be set to automatically power on in one of 3
modes ('IV, Playback, or FM radio). You can also combine the On-Timer
with a one minute alarm that gradually increases in volume.
1 Press ON-TIMER to display the ON
TIMER screen.
2Press AV to select and •to fix
the On-Timer time and also to
choose the On-Timer mode (TV,
PLAY, or FM radio). See the AV
selection order shown below.
•Make surea tape isinsertedifPlayback
mode isselected.
•See "FMRadioFeature"onpage15 for
instructionsonhowtopresetFMstations.
_CH02mCH03 ..... CH125-_
CH01 PLAY
L,FM9--FM8.....FMI----J
...........
i- ...........
/m
I .... _°°"
| CANCEL:ADD/DLT KEY
/ SELEC'r:Av KEY
/ SET :4 I_ KEY
LENO :ON-TIMER KEY
315ress AV to select alarm "ON" or
"OFF."
When "ON" is selected,
an alarmwillgraduallyincreasein
volumefor one minuteoruntilcancelled
bypressing any button onthe remoteor
/ CANCEL :ADO/DLT KEY
I SELECT :& _r KEY
/SET :4=, KEY
( ENO :ON-TIMER KEY
Combination VCR (including VOL 4_ ). When the alarm sound
stops, the sound of the mode you selected will ensue.
To Make Corrections,
use AY and 4b, tomove backand correctas necessary.
A
€-IFPress ON-TIMER to set the On
Timer. This screen will appear for
about 5 seconds.
•The ON TIMER indicator lightsonthe front
panel.
ON TIMER SET
To cancel,
press ON-TIMER to redisplay the screen in step 3. Then, press
ADD/DLT to clear the time ("6"is flashing). Now, press ON-TIMER
to end. "ON TIMER END" appears on-screen for a few seconds.
Set the Sleep Timer
The Combination VCR canbe set forautopower off.
Press SLEEP repeatedly to set the sleep
timer.
•Eachpresswillchangethe timeinthe-ordershown
at right.
•Ifyoupres,s_DISPLAYwiththeSLEEPTIMER set,
the remainingtimewillappearon-screen.
t
SLEEP TIMER 30
SLEEP TIMER 60
4,
SLEEP TIMER 90
4,
SLEEP TIMER O0
I
To Cancel, pressSLEEP repeatedlyuntil=SLEEPTIMER 00" appears.
13
Closed Caption System
_f'Check list before you begin.
[] Allconnectionsaremade (seepage5).
[] YourCombinationVCRispluggedin.
Closed Caption Mode Feature
This multi-use system not only allows the hearing impaired to enjoy
selected programs, but also makes useful information from "IV stations
available to everyone. At first, read through the different closed caption
options below left.
1\ g
2.
5
a
d
4
/ Press ACTION to display the
MAIN MENU.
2Press AV4_ to select 'q'V,"
12
3
a
b 4
C
and then press ACTION to
display the SET UP "IV screen.
Press &V to select
"CAPTION," and then press •
to display the CAPTION screen.
MAIN MENU
,_=:1_, • _ dbw=:y
...... SET UP TV ......
INPUT SELECT :TUNER
VI DEO ADJUST
SELECT :• •KEY
SET :_" KEY
END :ACTION KEY
Press At to select "CAPTION
MODE," and then press
•repeatedly to select the
desired caption mode. (See
=Caption Mode description"
below left).
• Each press •will change the
display as shown at right.
....... CAPTION .......
CC ON MUTE : CAP C1
SEL_:& • KEY
SET :_" KEY
END :ACTION KEY
/,-_OFF----_CAP Cl-._
TEXTC2 TEXTCl
CArC2
IClosed Caption Modes From
which to Choose
Caption Mode: CAPTION Cl or C2
A narration of selected TV programs
will be displayed on the screen.
Check your TV program listings for
C.C. (Closed Caption) broadcasts.
Caption Mode: TEXT Cl or C2
The lower half of the screen will be
blocked out. When the FV station
broadcasts text, such as program
listings, special information, etc., itwill
appear in this space.
Caption Mode: OFF
Narration will notappear on the screen
even ifa closed caption or text
broadcast is received.
Note: Theclosed caption or text signal may
be broadcast over Cl, C2, or both.
Also,textcontentscan varyso you f
maywishtotry differ6_t_etUngs.
IRecording and Playing Back a
Closed Caption/Text Program
Record: Your Combination VCR will
automatically record the Closed
Caption/Text signal. Just follow normal
recording operation.
Playback: To display the Closed
Caption narration or Text during
playback, follow steps 1-3 in the
abSve section, and then select the
desired caption mode in step 4.
14
5 Press ACTION three times to exit the caption mode
and return to the normal screen.
Caption On Mute Feature
Thisfeature allowsyoutoturnoffthesoundand, at thesame time,
displayClosedCaptionnarration.Perfectfor whenyou needsilence,
butwouldliketo continuewatchingtheprogram.
aFollow steps 1-3 in the above section.
b
C
In step 4, press •to select
"OFF."
Press AV to select "CC ON
MUTE," and then press
• repeatedly to select the
desired caption on mute mode.
•Eachpressof •willchangethe
displayas shownat dght.
•The captionmaybe broadcastover
CAP C1 orC2.
....... CAPT I ON .......
CC ON MUTE : CAP C1
....... CAPTION .......
CAPTION MODE : OFF
SELECT:& • KEY
:> KEY
END :ACTION KEY
.J
U Press ACTION three times to return to the normal
screen.
ePress MUTE to mute the sound. The closed caption
narration (if available) is displayed on the screen.
•PressMUTE againto resumenormalsoundandpicture.
FM Radio
The CombinationVCR has an FM
radiowithbuilt-in antenna,9 station
preset,and a bandrangeof
87.5-108.1 MHz. You canevensetthe
On-Timer(page 13)towakeuptoyour
favorite musicstation.
_PCheck list before you begin.
[] Allconnections are made (see page 5).
[] Your CombinationVCR isplugged in.
Ol
1
FM Radio Feature Setup
a
b
C
Press FM/TV on the remote control
or Combination VCR to select FM
Radio mode.
In FM Radio mode, press a
NUMBERED key (1~9).
Press AV to select the desire
d radio station. (Each press
changes the frequency by 200
KHz.)
Quick Station Scan
Hold down • or V formorethan one
second,andthen release.
The CombinationVCR automatically
advancesthefrequency 200KHz at
a time.
Whennearingthedesiredstation,press
•or •to selectthestation.
dPress ADD/DLT to memorize the
desired station.
•To preset other stations, repeat steps
b-d,
To Make Corrections,
press theNUMBERED keyto selectthememorized
number,and thenrepeatstepsb~d to changethe
memorizedstation.
12:00PM
FM 187, 5MHZ ....
12;OOPM
FM 1 87. TMHz
MEMORY:PUSH ADOIDLT KEY
12:00PM
FM 1 87.7MHz
MEMORfZED
DISPLAY
DELETE
(&v)
keys
NUMBERED
keys
-2
1
Using the FM Radio
1 Press FMFrV on the remote
control or Combination VCR
to select FM Radio mode.
12:00PM
FM 1 87. 5MHz
2Press a NUMBERED key (1-9)
to select a preset station
(see steps a~d above).
Note: Once stations are preset, the selected station and
current time will be displayed when FM/TV is
pressed ON. After t 0 seconds the station
disappears. To remove the time, press DISPLAY. if
DISPLAY is pressed while the station is stillon
screen or there is no display, the.Combinatipn VCR
status screen appears.
To cancel FM Radio mode, press FM/TV again to
return to the normal screen.
15
Playback a Tape
_f'Check list before you begin.
[] Allconnectionsaremade(seepage5).
[] YourCombinationVCR ispluggedin.
Insed a casse_e.
•The Combination VCR power comes on automatically.
2Press PLAY on the remote control or Combination VCR
to start playback.
•Playbackbeginsautomaticallyifcassettehasno recordtab (see
page24).
o[
T.ACK,N3"4 /REW
V-LOCK Search
--1
•PLAY
2
3Press STOP on the remote controlor Combination VCR
to stop playback.
°To rewindthetape,pressREW.
4Press STOP/EJECT on the Combination VCR to eject
the cassette.
•Youmayejecta cassettewithpoweronoroff.
To Find a Particular Scene During Playback
Press REW or FF on the remote controlor Combination
VCR to quickly locate a scene.
•Searchspeedfor SP modetapesis 7 timesand SLPm(_detapes21
timesthenormalspeed.
•Somenoisebarswillappearduringsearch.
TRACKING/
V-LOCK
FF/REW
Search
PLAY
2
PAUSE SLOW
f_;aution:
Pleaseinspectyourcassette tapes
and removeanylouseorpeeling
labelstopreventthemfrom
becomingjammedinyourunit.
16
Special Effects During Playback
These features work best in SP or SLP mode. The sound will be muted.
Slow Motion Playback
PressSLOWtostartslowmotionplayback.PressPLAYorSLOW
torelease.
Still (Freeze) Frame Picture
Press PAUSE to freeze and release the picture.
°To reducepicturenoise,first pressSLOW.Next,usethe3 or6
NUMBERED keyontheremotecontrolorCH AV onthe Combination
VCR toclearupthepicture.Now,pressPAUSE.
Frame by Frame Advance
While in Still mode, press SLOW repeatedly or hold down to
advance the stillpicture one frame at a time. Press PAUSE or
PLAY to release.
(After the Combination VCR is in Still or Slow mode for 3 minutes, it will
switch to the Stop mode automatically to protect the tape and the video
head.)
Features for a Qual!ty Picture • .
Digital Auto Trackin_o
This feature continuously analyzes the signal and adjusts for
optimum picturequality.
Manual Tracking Control
Use during Playback and Slow Motion mode to reduce picture
noise.
Press the 3 or 6 NUMBERED key on the remote control or CHAv
on the Combination VCR untilthe picture clears up.
To retum to Auto Tracking, press POWER off and then on again.
V-Lock Control
In Still mode, the 3 or 6 NUMBERED key on the remote control or
CH AT on the Combination VCR operate as a V-Lock control to
reduce jitter. Press one of these keys until the picture is stabilized.
Record On a Tape
I I
_VCheck list before you begin. 1Insert a cassette with record t_b. _/( q _ _
•The CombinationVCR power
['7 Allconnectionsaremade(seepage5). comesonautomatically. L._._' "1_ '_
[] YourCombinationVCRispluggedin. i
2_ _ "_1
I> I /\--<.
5P.OGRAM4 RECO.O
TIMER Indicator Indicator
2Press CH &V, or
NUMBERED keys on the
remote control to select a
channel.
•Or,pressCHAT onthe
CombinationVCR.
•To recordfroman outside
source,pressCH AV to select
LINE input(see bottomof thispage).
CliO8
ABC
3Press SPEED repeatedly
until the desired tape
speed is displayed (see
page 25).
SP = Standard Play
LP = Long Play
SLP = Super Long Play
SLP
SET
( ,_vo )
keys
2
ACTION _1
54
PAUSE 3
ISelecting the Input Mode
You can selectthe InputModein eitherof the
followingways.
•Press CH AV. The digplay will chan_e in
the order below.
•,,_--_ 1-- 2-- 3
( (CABLE) (CABLE) 6('1_9)_
"_-.- LINE,4_-- 125 or
• a Press ACTION to displaythe MAIN MENU.
b Press AT4b, to select "TV," and then
-- press ACTION to display the SET UP TV
screen.
c Press AY to select "INPUT SELECT,"
- and then press •repeatedly to select
"TUNER" or "LINE."
APress REC/TIME on the
remote control to start
recording.
•Or, pressREC/'rlME onthe
CombinationVCR.
•To editoutunwantedportions,
pressPAUSE topausethe
REC 08 I
ABC
ITO SET SPECIFIC REC TIME
|PLEASE PUSH REC KEY
recordinginprogress. To release,press PAUSEagain.
•Youcan notview anotherchannelduringrecording,
One Touch Timer Recording (OTR)
The CombinationVCR stopsrecordingat apresettime.
In step 4, press REC/TIME repeatedly to set the
length ofthe recording. Each press will change the
time as shown.
•The PROGRAM TIMER indicator lights on the front panel.
5 Press STOP on the remote contr()l to
recording.
•Or, pressSTOP/EJECTonthe CombinationVCR.
17
Timer Recording
Your Combination VCR can be set upto do
arecordingwhileyouare awayor
otherwiseoccupied.Upto8 programscan
be placedinmemory.You can chooseto
recordonetime,daily,or weekly.
I_Check list before you begin.
[] Allconnectionsare made (seepage5).
[] YourCombinationVCRispluggedin.
[] The clockisset.
[] Thetape islongenough.
[] The recordtab isinplace.
1Press PROG to display the SET
PROGRAM screen.
•Ifa programisalready in memory,
press Av repeatedly,andthen •to
selectan unusedprogramnumber.
START
SELECT:& •KEY
SET :P, KEY
END :PROG KEY
2Press &• and Ii_ to select and set one of the
following as the DATE:
1-31 = One time recording
DAILY = Same time MON ~ FRI
WEEKLY SUN-SAT = Same time once a week
Ol
STOP/EJECT PROGRAM TIMER
Indicator
(_8--9 ........ 31_1 m2 ...... 6_,_
/
Today's _7 SELECT& I• SelectionOrder DAILY
Date LWEEKLY WEEKLY WEEKLYJ
-- (SAT) ...... (MON) (SUN)
3Press &• and •to select and set each of the
remaining items as follows.
Remaining Items:
•STARTtime
•STOP time
•CH(annel)number,or LINEforoutsidesourcerecording
•Category[N/A(notapplicable),SPORTS, MOVIE, COMEDY,
MUSIC, DRAMA]
•Speed(SP, LP, SLP)
To Make Corrections
Repeatedly press •or < to move the cursor to the right or left,
and then make the correction.
SELECT/
SET
(Av4_)
keys
2.
3
DELETE
PROG
!
4.
5
STOP
/I
N, Press PROG to end the program.
•Thisscreenappearsfor confirmation.
To Enter More Programs
Press Av and •toselectand seta
blankprogramnumber,andthen repeat
steps2 and3.
I_ I:.... :......
[CANCEL:ADD/DLT KEY I
I SELECT 1-8:& • KEY I
I ENTER :_. KEY I
I_o :P.oQ.EY I
E" Press PROG to exit this mode and return to the
normal screen.
•The PROGRAMTIMER indicatorlightsonthefront panel.
• Ifyou'reusinga cable box, makesurethatit,ist_nedtothe
desiredchannelandthepoweris]eftonfor timer recording.
Two minutes before the Timer Recording starts, =TIMER REC
WILL START SOON" will appear on-screen.
18
Cancel a Timer Recording:
(Recording is in progress)
Hold down STOP for afew seconds to
cancel the Timer Recording.
• Anyfuturedailyorweeklyrecordingswillbe
performedas programmed.
Replace Program Contents:
(Recording is no____ttin progress)
1 Do step 1 on previous page.
All currently set programs will be
displayed on-screen.
2 PressAY
repeatedlyto
selectthe
desired
program,and
thenpress•to
displaythe
settings.
(See page 18.)
2 8 10100p12_OOp125 SP/
3 10 8:009 9:001) 10 SP/
,_,:oo,,o:oo.• L_
SELECT 1-8:A •KEY
ENTER :• KEY
END :PROG KEY
3Press At'
repeatedlyto
select,and then
press • to
enter
replacement
information.
,-_ItsT_zr SToPc.|
!1_.11lOIilII]'iliPJIlllllOP_|
_'_Jff_, C_l
SELECT:A •KEY /
SEt" :4 •KEY l
END :PROG KEY _ J
4PressPROG twicetoexitthismode
andreturntothenormalTV screen.
Review or Clebr Program
Contents:
(Recording is not in progress)
a Do step 1on [PDTSTARTSTOPCHSPD
previous page. I_z"8,"_:oop"_2:"_1"_s='_'
All currently set la lo e:oop9:oop lo sP
4 SU 9:00plO:OOp L LP
programswillbe ICANCEL:ADD/DLTKEY
displayed ISELECT 1-e:_, v KEY
I ENTER :• KEY
on-screen. [ END :PROG KEY
bPress J,v -- -
repeatedlyto
selectthe Ii DT_._A___s_ c_._sPoI
_esired program12 e 10:OOp12:oop125 ,SPI
I
/' su 9:oo.lo:oo. L
number. 13 10 9:oop 9:00p 10
/
I SELECT 1-8:,1, •
I ENTER :•KEY
[ END :PRO(] KEY
CPress the
ADD/DLT ifyou
want to clear the
program.
d PressPROGto exitthismodeand
ret-urntothenormalTV screen.
CopyingYourTapes(Dubbing)
Connections you'll need to make.
• Use this same connection for your video
camera, laser disc player, video
games, etc. Recording(Editing)
Combination VCR
Playing (Source)
VCR
1 Insert a pre-recorded tape into
the Playing (source) VCR. It, o.._.. ,I
2Insert a blank tape with record
tab intothe Recording (editing)
Combination VCR.
_( q_) )_
I
3Select "LINE" as the input on the Combination
VCR.
•See "Selecting the Input Mode" section on page 17.
4
5
Press PLAY on the VCR.
Then, press PAUSE when the tape reaches the
point at which you want to start copying.
Press REC on the Combination VCR, and then
immediately press PAUSE on the remote control.
6Press PAUSE on both units at th_same time to
begin copying.
You can edit out unwanted parts of the original recording by
using PAUSE (on the Recording unit) while copying is in progress.
7Press STOP on both unitsto stop CODying.
Caution:
Unauthorizedexchangingand/orcopyingof copydghte
recordingsmaybecopyrightinfringement.
19
Special VCR Features
Channel Caption
You can set channel names, i.e. ABC,
CBS, so that when selected, the
channel name and number appear on-
screen for easy identification.You can
go with preset names (up to 24), or
manuallycreate your own (up to 10).
Note:You will need a list of channels
received in your area and the channel
numbersyou receive them on.
Preset Caption
1Press ACTION to display the MAIN
MENU.
2Press &Y4• to select"CH," and
then press ACTION to display the
SET UP CHANNEL screen.
3Press AV toselect"CHANNEL
CAPTION,"and then press •todisplay
the CHANNELCAPTIONscreen.
MAIN
.... SET UP CHANNEL ....
ANTENNA : CABLE
SELECT:& •KEY
SET :=. KEY
END :ACTION KEY
!
a
e
DD
DELETE
2
?
4
5
a
b
c
d
A
LI_Press AT toselect"PRESET
CAPTION," and then press•todisplay
thePRESET CAPTIONscreen.
•You can set up to twenty-four channel
captions. If you want to set a station
name other than these, go to the "Manual
Caption" section below.
5 Press •to move the shaded area
to the right side.
Then, press A_' to change the
CHANNEL CAPTION ---
_l=JaZi=_'i=l
MANUAL CJ_P'I"tON
.... PRESET CAPTION ....
M"" PBS --
CBS -- CNN --
FOX -- ESPN --
NBC -- HBO --
SELECT :• •KEY
SET :I_ KEY
END :ACTION KEY
memorized channel number to [.... PRESETCAPTION.... l
match the caption. T_r 42 cBc s2 I
Next, press •to set the memorized [uPN -- cm 21 I
WB 35 TBN 52 I
channel number. _sc -- _.e6ma I
CLEAR :ADD/DLT KEY I
Now, press AY to continue. SELECT:••KEY I
SET :< KEY l
Repeat step 5 untilthe Caption List END :ACTIONKEY )
is complete.
To Make Corrections
Press AV and •toselectthememorizedchannelnumber.Then,
press &T tochange,orADD/DLTtodeletethememorized
channelnumber.
6Press ACTION four times to exit this mode and return
to the normal screen.
Manual Caption
aFollow steps 1-3 in the above section, dPress AV to select, [.... MANUALC_"T,ON.... I
and then press •to I cHNUMBERC_'noNI
bIn step 4, press &V [--- CHAN,ELCAPT,ON--- / enter each character I_a--- I
tOselect "MANUAL ,of the caption. " I ;LF__:_O,DLTKEY I
I_/ SELECT:• •KEY I
CAPTION," and then •Characters will change in I sET :,qi. KEY I
" the following order. [END :ACTIONKEY J
press •to display-- I SELECT:• •KEY ---_-A--*B_C ..... _.Z-_BLANK---_----=-&_
the MANUAL I sET :, KEY
•-CAPTION screen. I END :ACTIONKEY [ " 94 .....24-14--(pI-/4-!4_ /
CI.... MANUAL CAPTION .... )
Press &_' to select CHN ER CAPTION
"CHNUMBER'"and] ;8 /
then press •to ....
move the shaded area I SELECT:••KEY I
I sET :, KEY I
to the right side. !,END :ACTIONKEY J
•Channels already set in
_the "Preset Caption" section are not displayed.
•You can set a total of ten channel captions with up to
four characters each.
Now, press •repeatedlyto move thecursorback
to=CHNUMBER."Repeat stepsc-d as desired.
To Make Corrections, repeatedlypress I_. to
movethecursortothe right,or •tomovetothe
lefttotheincorrect-entryand makethecorrection.
To Clear the caption, pressADD/DLT.
ePress ACTION four times to exit this
mode and return to the normal screen.
20

Other manuals for Omnivision PV-M1378W

1

Other Panasonic TV VCR Combo manuals

Panasonic Omnivision VHS PV-C2780 User manual

Panasonic

Panasonic Omnivision VHS PV-C2780 User manual

Panasonic AG527DVDE - DVD/VCR/MONITOR User manual

Panasonic

Panasonic AG527DVDE - DVD/VCR/MONITOR User manual

Panasonic Omnivision PV-M2768 User manual

Panasonic

Panasonic Omnivision PV-M2768 User manual

Panasonic Omnivision PV-C2540-K User manual

Panasonic

Panasonic Omnivision PV-C2540-K User manual

Panasonic PV-C1323A User manual

Panasonic

Panasonic PV-C1323A User manual

Panasonic PV-C1323A User manual

Panasonic

Panasonic PV-C1323A User manual

Panasonic PVDF204 - DVD/VCR/TV COM User manual

Panasonic

Panasonic PVDF204 - DVD/VCR/TV COM User manual

Panasonic Omnivision PV-M1378W User manual

Panasonic

Panasonic Omnivision PV-M1378W User manual

Panasonic AG527D - COMBINATION VCR User manual

Panasonic

Panasonic AG527D - COMBINATION VCR User manual

Panasonic PV-M949W Operating User manual

Panasonic

Panasonic PV-M949W Operating User manual

Panasonic PV-C1323-K User manual

Panasonic

Panasonic PV-C1323-K User manual

Panasonic QUASAR PV-C1320 User manual

Panasonic

Panasonic QUASAR PV-C1320 User manual

Panasonic Omnivision VHS PV-C2780 User manual

Panasonic

Panasonic Omnivision VHS PV-C2780 User manual

Panasonic Omnivision PV-C1321 User manual

Panasonic

Panasonic Omnivision PV-C1321 User manual

Panasonic OmniVision PV-M1347 User manual

Panasonic

Panasonic OmniVision PV-M1347 User manual

Panasonic PV-C2022 User manual

Panasonic

Panasonic PV-C2022 User manual

Panasonic Omnivision VHS PV-M2035 User manual

Panasonic

Panasonic Omnivision VHS PV-M2035 User manual

Panasonic AG513F - COMBINATION VCR/TV User manual

Panasonic

Panasonic AG513F - COMBINATION VCR/TV User manual

Panasonic PV-DF2003-K User manual

Panasonic

Panasonic PV-DF2003-K User manual

Panasonic OmniVision PV-Q1311 User manual

Panasonic

Panasonic OmniVision PV-Q1311 User manual

Panasonic OmniVision PV-M2037 User manual

Panasonic

Panasonic OmniVision PV-M2037 User manual

Panasonic PV-M1358W Operating User manual

Panasonic

Panasonic PV-M1358W Operating User manual

Panasonic PV-M1327 User manual

Panasonic

Panasonic PV-M1327 User manual

Panasonic TX-29GV10 Series User manual

Panasonic

Panasonic TX-29GV10 Series User manual

Popular TV VCR Combo manuals by other brands

Sony Trinitron KV-14VM5G operating instructions

Sony

Sony Trinitron KV-14VM5G operating instructions

Optimus 16-421 owner's manual

Optimus

Optimus 16-421 owner's manual

Philips/Magnavox CCA254AT Specifications

Philips/Magnavox

Philips/Magnavox CCA254AT Specifications

Symphonic 13TVCRMKIII manual

Symphonic

Symphonic 13TVCRMKIII manual

Sylvania SRC2113 owner's manual

Sylvania

Sylvania SRC2113 owner's manual

FUNAI F3809U owner's manual

FUNAI

FUNAI F3809U owner's manual

Sylvania SC313C Service manual

Sylvania

Sylvania SC313C Service manual

Philips 21PV335 Product information

Philips

Philips 21PV335 Product information

Hitachi C1420VT-311 instruction manual

Hitachi

Hitachi C1420VT-311 instruction manual

RCA T090802 user guide

RCA

RCA T090802 user guide

Quasar VV-1301 operating instructions

Quasar

Quasar VV-1301 operating instructions

Philips 14PV405 Product information

Philips

Philips 14PV405 Product information

Sylvania Sylvania 6313CCB owner's manual

Sylvania

Sylvania Sylvania 6313CCB owner's manual

RCA TV/VCR Combo specification

RCA

RCA TV/VCR Combo specification

Magnavox CC13B1MG Specifications

Magnavox

Magnavox CC13B1MG Specifications

LG KE/KL-20/21P32X Service manual

LG

LG KE/KL-20/21P32X Service manual

Symphonic SC3809 owner's manual

Symphonic

Symphonic SC3809 owner's manual

FUNAI F19TRB1C owner's manual

FUNAI

FUNAI F19TRB1C owner's manual

manuals.online logo
manuals.online logoBrands
  • About & Mission
  • Contact us
  • Privacy Policy
  • Terms and Conditions

Copyright 2025 Manuals.Online. All Rights Reserved.