2EN |
TABLE OF CONTENTS
Overview .......................................3
Garden Oasis Essentials Outdoor Music System ....3
Contents of the System: ........................3
Additional Required Components (Sold Separately) ..3
Required Tools ................................3
Power .......................................3
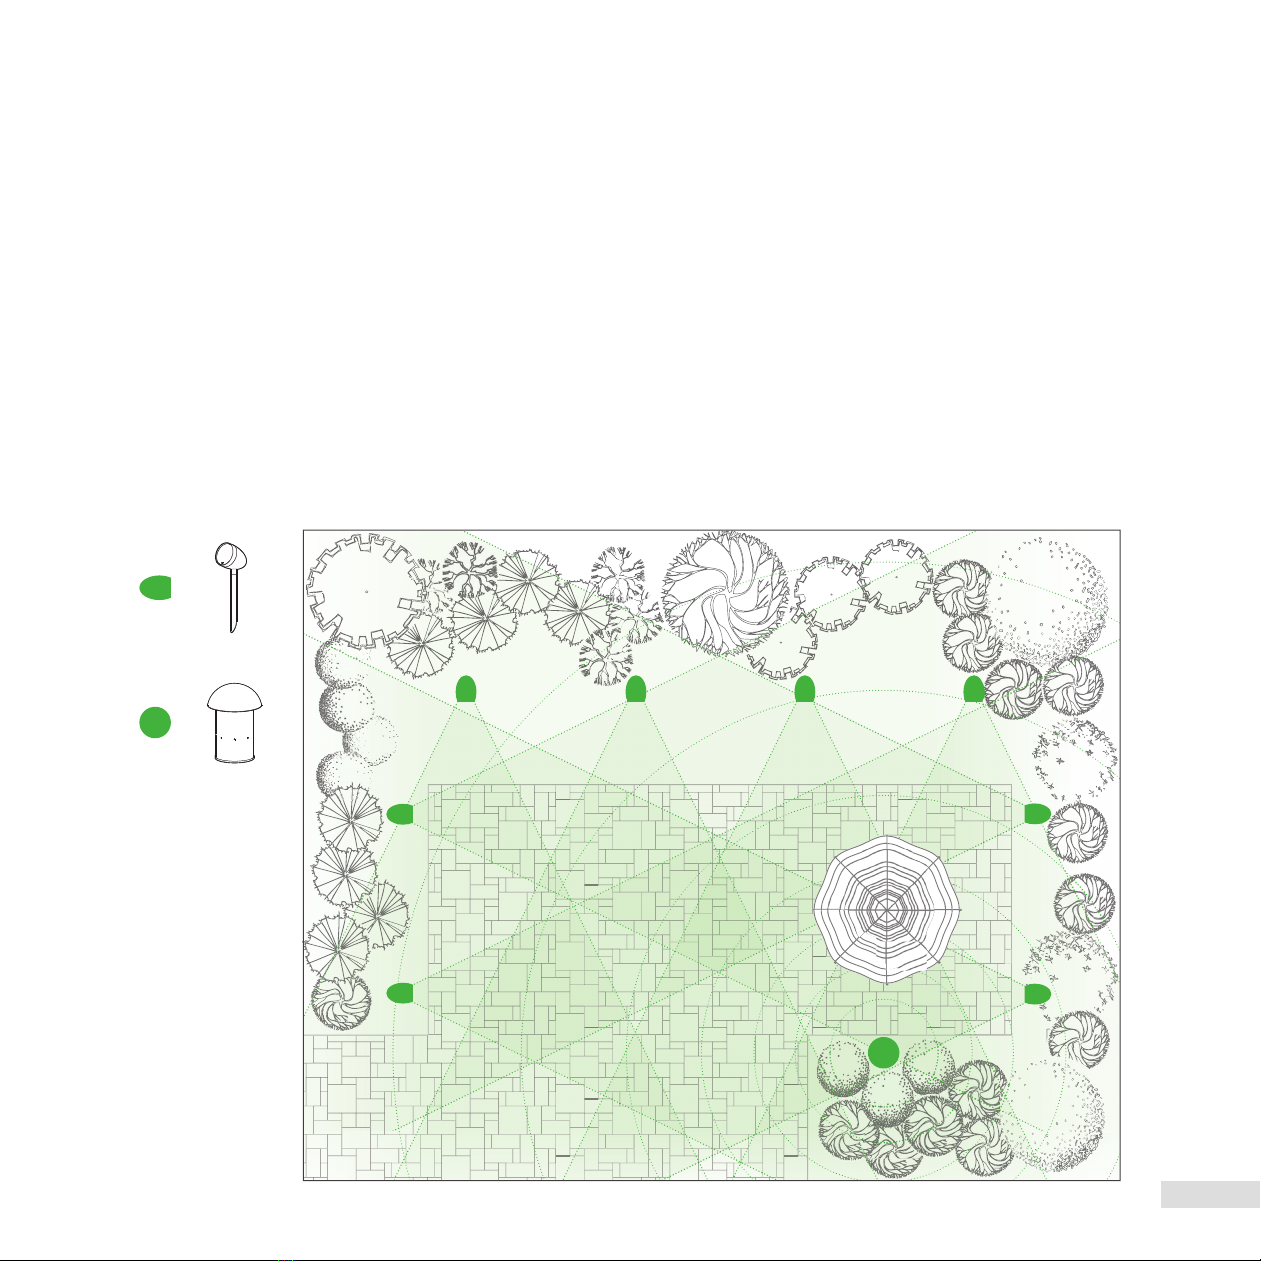
Planning the System Layout.......................4
Cable Recommendations .........................5
Installation Considerations .......................5
Wiring & Speaker Installation .....................6
Stereo Setup Using 4 Conductor Burial Cable
& Amplifier (Option 1) ..........................6
Stereo Setup Using 4 Conductor Burial Cable
& Amplifier (Option 2) ..........................7
Mono Setup Using 2 Conductor Burial Cable
& Amplifier (Option 3) ..........................8
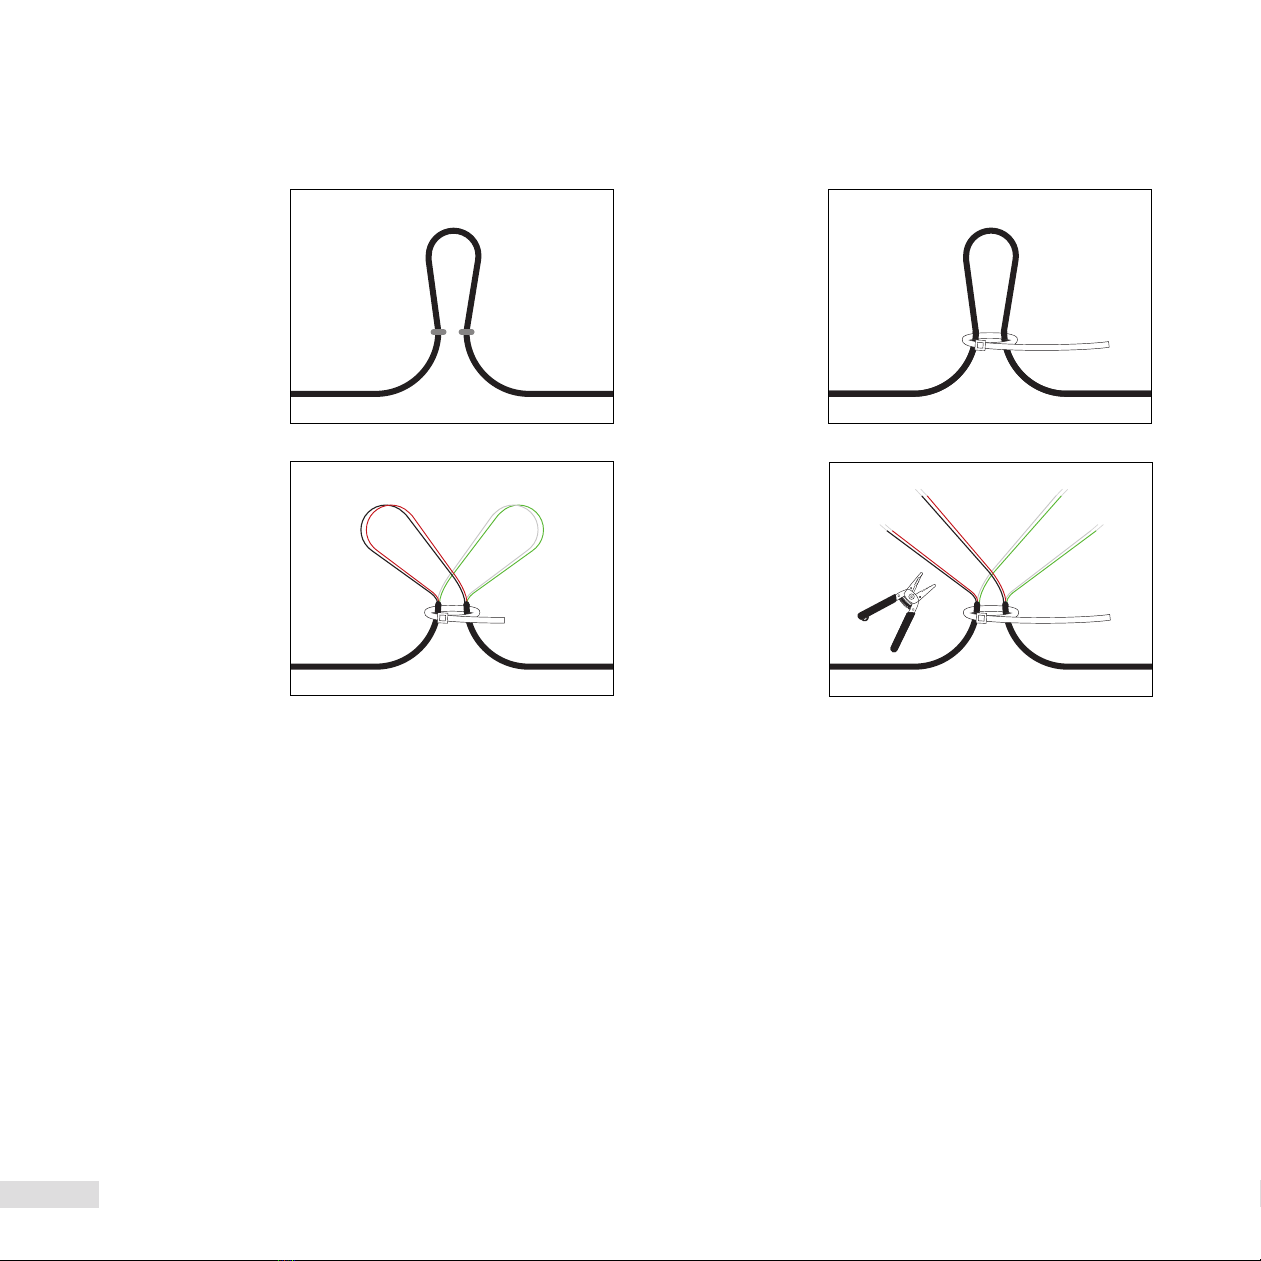
Preparing the 4 Conductor Burial Cable
(For Stereo Setup)..............................9
Preparing the 2 Conductor Burial Cable
(For Mono Setup)..............................10
Attaching Ground Stake to Speaker & Installation ..11
Cable Connections from Speaker to RED (+) and
BLACK (-) Burial Cable ........................12
Cable Connections from Speaker to WHITE (+) and
GREEN (-) Burial Cable...........................12
Cable Connections from Subwoofer to Burial Cable...13
Test System ...................................14
To Avoid Speaker Damage .......................14
Listening Outdoors .............................14
Limited Warranty...............................15
Serial Number | Numéro de série