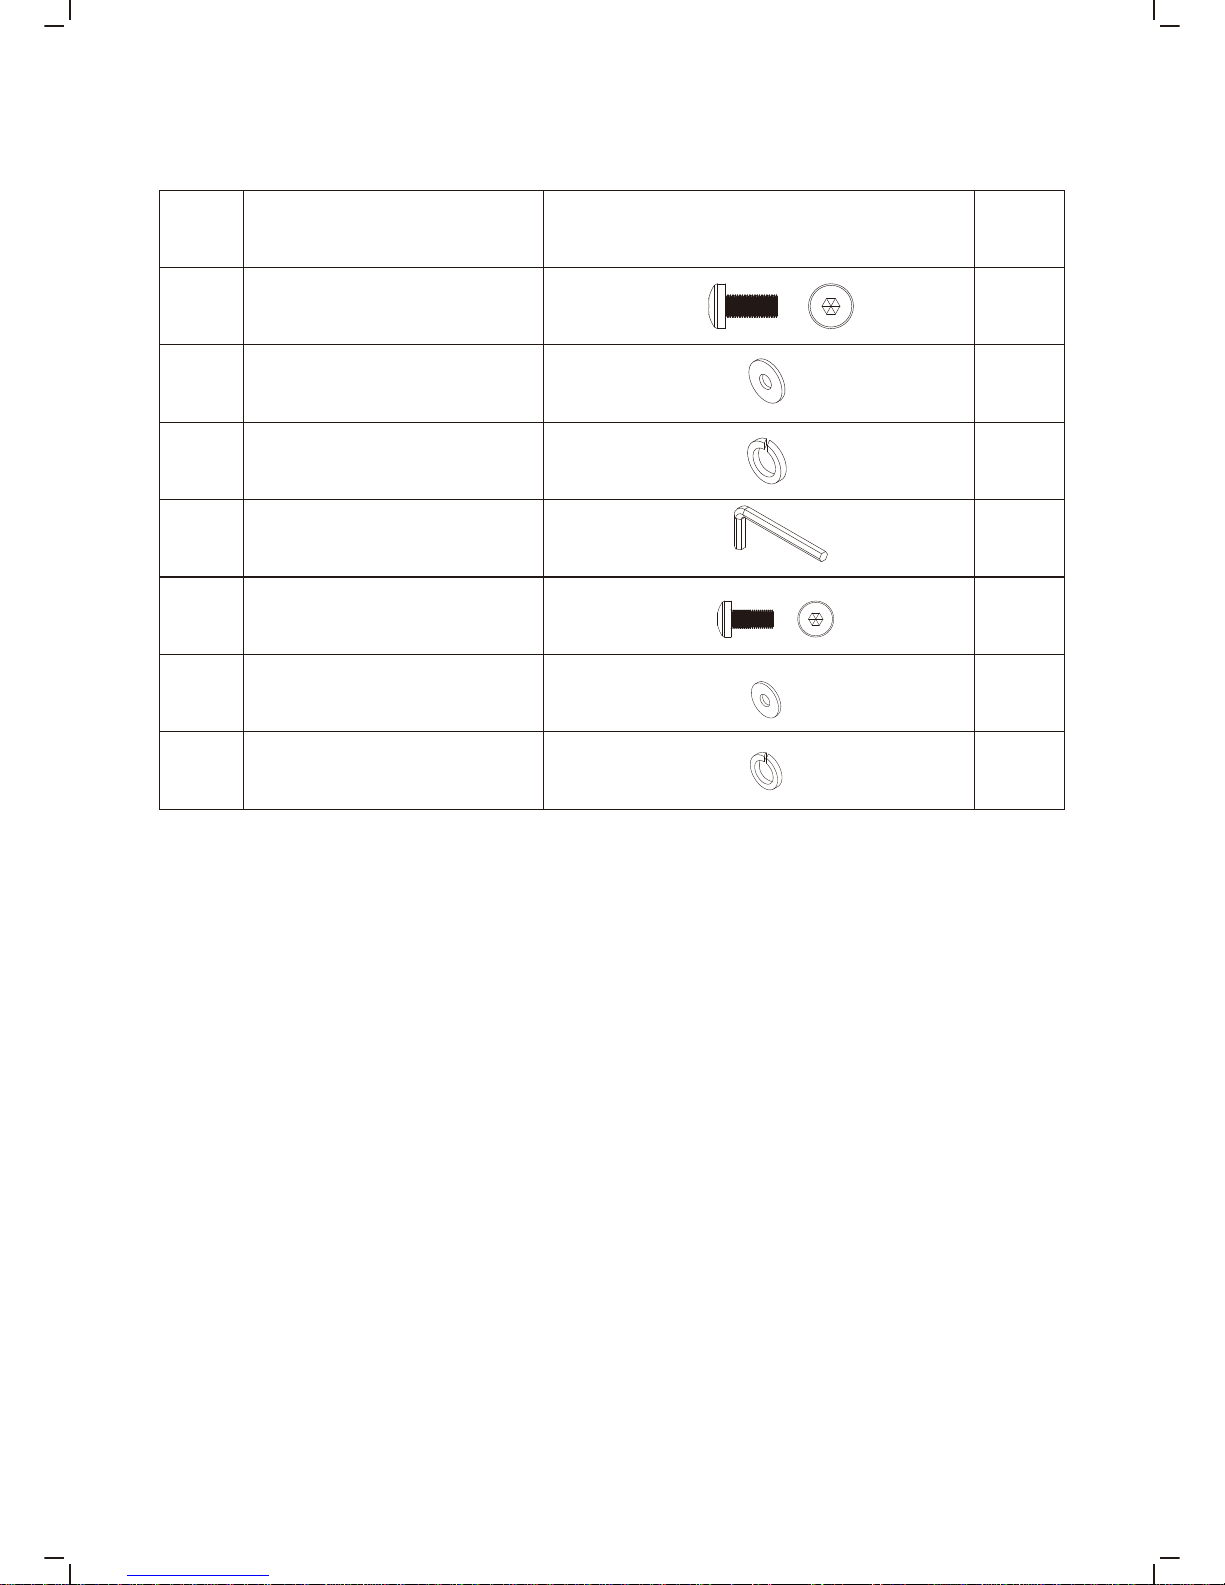
Party King Grills REDZONE User manual


ASSEMBLY AND OPERATING INSTRUCTIONS
FOR THE REDZONE GRILL
Notes to the user:
● Description: 2 Burner Gas Grill
● Type of Gas: Propane
● Power: (2) 11,200 BTU Stainless Steel Tube burners
● Cooking area: 20.2” x 14.4”
● Warming area: 19” x 4.7”
Read instructions and follow carefully to ensure your grill is properly assembled. Failure
to follow instructions may result in serious bodily injury and/or property damage. If you
have any questions concerning the assembly or operation of this barbecue, please contact
Party King Grills, the store you bought if from will not be as suitable to answer questions
as the manufacturer.
“OUTDOOR USE ONLY”.
“READ THE INSTRUCTIONS BEFORE USING THE GRILL”.
“WARNING ACCESSIBLE PARTS MAY BE VERY HOT. KEEP CHILDREN AWAY.”
“DO NOT MOVE THE GRILL DURING USE”.
“RETAIN FOR FUTURE REFERENCE”.
“TURN OFF THE GAS SUPPLY AT THE GAS CYLINDER AFTER USE.”
-1-

-2-
IMPORTANT:
Never light the grill with the lid closed.
The grill and propane tank must be placed on level surface to use.
Never transport the grill with the propane tank under or on the grill.
How to use
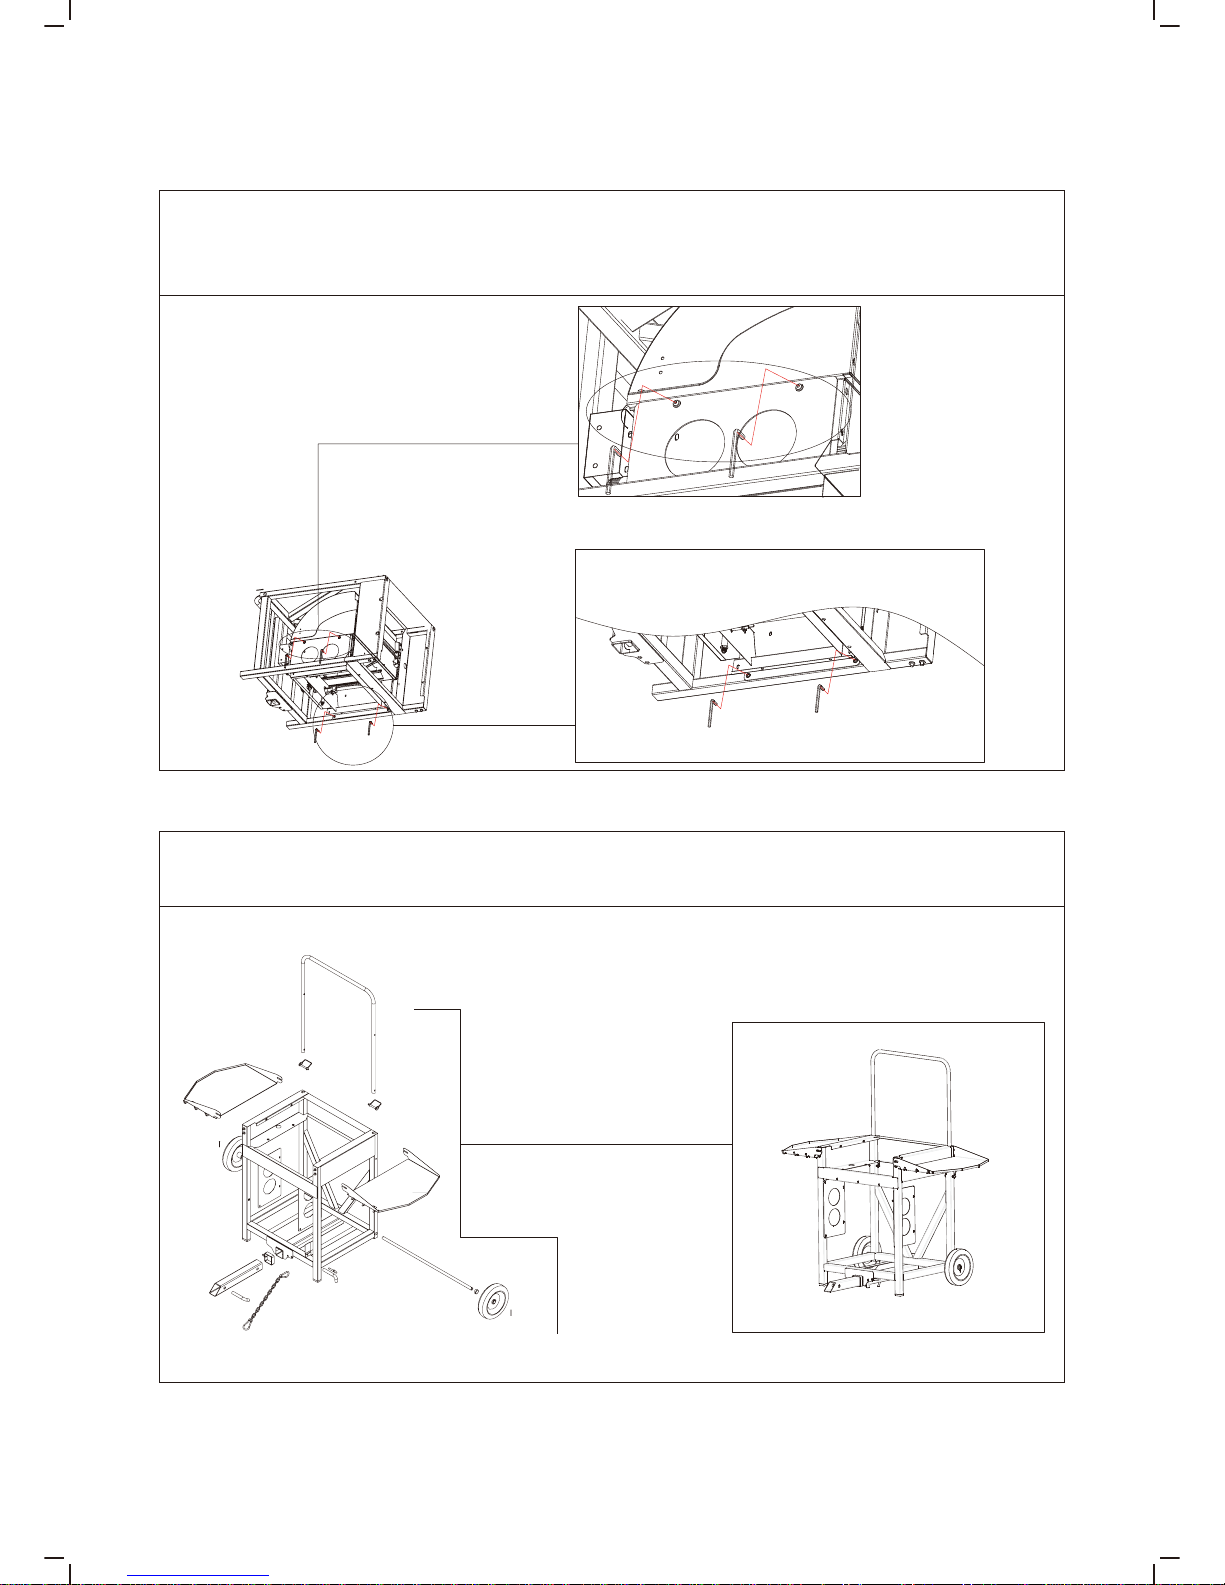
The Redzone Grill has been designed with large flotation wheels for easy maneuverability.
Food can be grilled with or without the lid being closed. When the lid is closed for more than
a couple minutes, slowly open the hood to release heat.
The grease tray is located below the grill, and the easiest access is from the back of the grill.
To avoid a grease spill and a mess do not move the grill when there is very much grease in the
grease foil cup.
When grilling in the wind always turn front of grill to face the wind. Never face the back of grill into
the wind. Wind effects the exhaust vents on the grill and grilling into the wind is puts all the smoke
in the grillers face.
The grill is designed for outdoor use only.
Warning! As with all grills they get hot, keep children away.
Do not move the grill while in use.
Turn off the grill at the cylinder valve or regulator after use.
Any modification to the grill may be dangerous and may cause injury or property damage.
Any unauthorised modification of the grill will void the grill’s warranty.
Never mount the cylinder under the grill on the bottom shelf. The bottom shelf is there for hauling
an ice chest or other miscellaneous items to and from the grilling site. You may lay a propane tank
on the bottom shelf to avoid carrying the tank to the grilling site but when grilling sit the tank on the
ground beside the grill.
The grill must not have any overhead obstruction. E.g. trees, shrubs, lean to roofs. The grill must be
installed with a clearance of 5’ around the grill.
The grill must not be used near flammable materials. (Petroleum based products, thinners or any other
solid object that carries a flammable warning label.)
Close the valve of the gas cylinder or the regulator after use.
The use of this grill in enclosed areas can be dangerous and is PROHIBITED.

-3-
13
14
15
16
17
18
1
2
3
4
5
6
7
8
9
9
10
11
12

-4-
30
29
28
31
27
26
25
24
23
22
21
20
19

-5-
PACKAGE CONTENTS
1
2
3
4
5
6
7
8
92
1
2
1
1
2
2
1
2
NO. Spare Parts
Safety Chain
Pin
Clip
Drawbar
Drawbar Depth
Set Ring
Tube Plug
Grill Base
Shipping Plates
Wheel Washer
10 2Wheel
Photos QTY

-6-
PACKAGE CONTENTS
11
12
15
18
19 1
1
2
1
1
NO. Spare Parts
Wheel Clip
Left Side Shelf
13 1Dolly Handle
14 2Dolly Handle Pin
Right Side Shelf
16 1Axle
17 1Clamp Screw
Drawbar Holder
Thermometer
20 1Hood Handle
21 2Hood Handle Bezel
Photos QTY

-7-
PACKAGE CONTENTS
22
28
1
1
NO. Spare Parts
Hood & Body
23 2Burner Heat deflector
24 1Grease Tray
25 1Grease Cup Keeper
26 1Grease Cup Holder
27 1Foil Grease Cup
Cooking Grate
29 1Warming Rack
30 2Butterfly Screw
31 1Regulator & Hose
Photos QTY

-8-
Fastener
A
B
C
D
E
F4
4
1
9
9
9
NO. Spare Parts
M6×15 Round
Head Screw
M6 Washer
M6 Spring Washer
4mm Allen Wrench
M5 x 10 Screw
M5 Washer
G4M5 Lock Washer
Photos QTY
PREPARATION
Before assembling make sure all parts are present. Compare parts with package contents list.
If any part is missing or damaged, do not attempt to assembly the product, contact Party King
Grills Customer service at www.PartyKingGrills.com or call 877-788-5464 to leave a message
and number to call back, include your time zone and best time to call back.

-9-
ASSEMBLY INSTRUCTIONS
Step 1 Unbox grill and remove all packing material from the grill.
Next, use the Allen wrench to remove the screws on the grill and remove
grill from the shipping plates.
Step 2 Assemble the grill stand using the drawing below.

-10-
Step 4 Insert the grill head into the top of the stand then fasten with
eight M6 x15 screws (4 screws each side).
Step 3 Using four M5 x 10 screw, fasten grease cup holder the fire box floor and
Connect hose to grill

-11-
Step 6 Assembly finished
Step 5 Insert the grill grate
Note:The shipping plates are only used for
packing and shipping the grill head in the base,
after assembling remove and discard.

INSTRUCTIONS FOR USE
Follow these instructions carefully to avoid seriously damaging your grill and causing injury to
yourself and property. Always use protective gloves when handling particularly hot components.
Connecting the fuel hose to the fuel supply tank
LIGHTING instructions
Warning: If any burner fails to ignite, turn the control knob off and also turn the
cylinder valve off. Wait five minutes before attempting to relight with ignition
sequence.
MANUAL IGNITION
Lighting Instructions: Main Burners
1.Make sure propane tank on/off valve is completely off then connect the propane fuel hose
with regulator to the propane tank.
2.Turn both front temperature control knobs to the ‘OFF’ position before turning on the fuel supply tank.
Note: If grill temperature controls are not completely off and they propane is turned on it will trip the
built in safety valve in the regulator. To reset, shut off fuel supply and grill temperature control knobs
and simply remove the regulator then reconnect.
1.Open the lid before lighting.
2.Turn the two front control knobs to the ‘OFF’ position.
Turn ‘ON’ the gas supply at the propane tank.
See Leak Testing below for instructions on how to check for leaks.
3.To light the left hand burner, push down and turn the left burner control knob counter-clockwise to
the 90° position (Full rate position). An audible click will be heard, this should light the burner. Check
that the burner is lit. If the burner has not lit, repeat this process.
4.If the burner has not lit after two attempts, turn ‘OFF’ the gas tap and wait 5 minutes before retrying
the ignition sequence.
5.When the burner has lit, the burner rate can be adjusted by turning the knob counter-clockwise to
any position between the full and low rate positions.
6.Light the remaining burner from left to right in sequence.
7.To turn ‘OFF’ the grill, turn the cylinder valve handle or regulator switch to the ‘OFF’ position by
following the regulator instructions. Once the burners have extinguished turn all the control knobs to
the ‘OFF’ position.
If necessary this grill can be lit manually. Simply use a long lighter and insert through the top of the grill
grate and point the two burner and light the lighter then slowly turn on the burner that the lighters is at.
Repeat for second burner.
-12-

LEAK TESTING
REGULATOR AND HOSE
STORAGE OF THE GRILL
GAS CYLINDER
Storage of a grill indoors is only permissible if the cylinder is disconnected
and removed from the grill. When the grill is not to be used for a period of time
it should be stored in a dry dust free environment.
▪ How to check for leaks after connecting the propane tank to the grill.
▪ Make 2-3 fluid ounces of leak detecting solution by mixing one part dish soap with 3 parts water.
▪ Ensure the control valve is “OFF”.
▪ Connect the regulator to the cylinder and ON/OFF valve to the burner, ensure the connections are
secure then turn ON the gas.
▪ Brush the soapy solution on to the hose and all joints. If bubbles appear you have a leak, which must
be rectified before use.
▪ Retest after fixing the fault. Turn OFF the gas at the cylinder after testing.
▪ If detected leakage can not be rectified, do not attempt to fix leak; contact Party King Grills.
Contact information is located at the bottom of the assembly guide.
▪ Use only regulators and hose approved for LPG for USA. The life expectancy of the regulator is
estimated as 10 years. It is recommended that the regulator is changed within 10 years of the date of
manufacture.
▪ The use of the wrong regulator or hose is unsafe; always check that you have the correct items before
operating the barbecue.
▪ The hose used must conform to the relevant standard for the country of use. The length of the hose
must be 0.6 meters. Worn or damaged hose must be replaced. Ensure that the hose is not obstructed,
kinked, or in contact with any part of the grill other than at its connection.
▪ The hose should not be twisted or kinked when attached to the gas cylinder. No part of the hose
should touch any part of the grill. When grilling sit the tank on the ground beside the grill, position the
tank so that the hose is not kinked.
All propane tanks 40 pounds and under with the US standard BBQ grill connection can be used to
fuel this grill. The gas cylinder should not be dropped or handled roughly! If the grill is not in use, the
cylinder must be disconnected. Replace the protective cap on the cylinder after disconnecting the
cylinder from the grill.
Cylinders must be stored outdoors preferably in the shade in an upright position and out of the reach
of children. The cylinder must never be stored where temperatures can reach over 95 degrees. Do not
store the cylinder near flames, pilot lights or other sources of ignition. DO NOT SMOKE around propane
tanks.
-13-
CLEANING AND CARE
CAUTION: All cleaning and maintenance should be carried out when the grill is cool and with the fuel
supply turned OFF at the gas cylinder.

Grill Grate
First time use: Use a soapy water solution or scouring powder and scrub then rinse off with water, then
light and heat up then shut off and spray with aerosol non-stick cooking spray before using.
GREASE TRAY
▪ The Redzone grill uses a disposable foil cup to catch the grease.
▪ Make sure there is a foil cup in the grease cup holder before using.
▪ Change foil grease catch cup after each use to help avoid excess grease from catching on fire.
▪ Do not move the grease cup foil during use.
▪ Do not move the grill when there is grease in the foil cup.
CLEANING THE GRILL
Turn the gas OFF at the control knob and disconnect the cylinder. All cleaning and maintenance
should be carried out when the grill is cool.
One of the best ways to clean the grill is taking it to the carwash and remove from vehicle hitch then
remove cooking grate and grease cup and then wash with high pressure soap and rinse. If you have
an air compressor you can blow dry the grill, if not simply let it air dry. If you have excess build up in
bottom of grill, use putty knife to remove prior to washing.
Clean any clogged ports with a pipe cleaner or stiff wire such as an opened paper clip.
If your grill has not been used in a while sometimes spiders build nests inside the burner, to clean
remove the burner and blow out with compressed air.
Loading and Transporting the Redzone on a vehicles 2” receiver hitch
The Redzone grill has a telescoping handle which should to be pinned in the bottom hole of the
handle to use a dolly handle. Pin handle in the top hole when using.
The Redzone Grill has a removable hitch tube referred to as a drawbar which stowed on the right
front vertical leg of the grill stand. To remove from the stow position simply lift up and off the storage
bracket. The grill stand has a receiver tube built into the bottom framework of the grill stand. This
tube has a hitchpin hole and a set screw. The drawbar has a stop ring with a set bolt.
After grill has been used simply burn off the grates on high heat for a few minutes then shut off the fire
and scrap grate with a wire brush. After scraping spray lightly with aerosol non-stick cooking spray.
NEVER USE OVEN CLEANER
-14-
CLEANING
“Burning off” the grill after every use (for approx 15 minutes) will keep excessive food residue to a
minimum.

Before installing the drawbar on the grill first insert the bevelled end of the hitch tube into your vehicles
receiver hitch until the holes line up on the tube and receiver hitch. Next, slide the stop ring over the
open end of the hitch tube with set bolt pointing to either side all the way up against the vehicle receiver
hitch. Pull out on the drawbar and push the stop ring up against the vehicle receiver hitch until its snug
then tighten the set ring very tight. Next, remove the pin from the hitch and remove the drawbar. Now
you have the drawbar set to slide in to the point that the pins align when loading, you should not have
to do this step again unless the rings slips or you change vehicles.
To install the drawbar in the grill base simply insert the square cut end into the grills receiver hitch until
the hitch pin hole on the draw bar aligns with the hitch pin hole on the grills receiver tube, then insert
hitch pin and safety clip on end of hitch pin. Next, tighten the set screw on the side of the grill receiver
hitch. Note: the opposite end of the drawbar has a sloped end. Install the drawbar with the sloped end
on the top (short side of tube on top and long side of sloped tub on bottom). Now you are ready to load
the grill on the vehicles hitch.
To Load the grill simply tilt the grill backwards using the dolly handle and roll the grill up to the vehicles
receiver hitch. Hook approximately ¾” of the tip of the bevelled end of the drawbar in the vehicle hitch.
Next, Raise and push on the grills handle at the same time. When the grill reaches the point of just past
level, it will slide into the vehicle's hitch. Push the grill in until the pre-set drawbar stop ring is up against
the vehicle's receiver hitch and insert the hitch pin. Next, connect the safety chain to the vehicle safety
chain hole. To connect the safety chain simply run the chain through the safety chain hole on the
vehicles receiver hitch and back to the grill until snug, then snap the loose end back to the grill base or
to the chain. The reason you must use the chain is so if the hitch pin in the vehicle happens to fall out
due to a failure of adding the clip pin on the hitch pin the grill cannot fall off.
To remove the grill, remove the vehicle receiver hitch pin and safety chain while leaving the grill’s hitch
pin in place until grill is down. Next, grab hold of the dolly handle on the back of the grill and slightly lift
the grill while gently (very gently) pulling the grill out of the vehicle hitch (do not pull out to far or grill
falls out). You only want to pull it out a couple inches or so then lower the grill until the grills tires touch
the ground. If the grill does not go all the way to the ground before it stops then lift grill back up to level
and pull the grill ever so slightly out a little more, then lower until tires touch the ground. When grill is
on the ground push the dolly handle down and pull the grill away from the hitch. Note: the first few times
you load and unload the grill it is important to have a couple of helpers holding each side of the grill
until you master the concept. It is very easy after you have done it a couple of times. After grill is on the
ground you can tilt the grill completely over on its back if you wish so that you have complete access to
the grill’s hitch pin to remove (make sure grill hood is latched before tipping). After drawbar is removed
insert hitch pin back in grill’s receiver tube to stow. The drawbar stows on the drawbar keeper bracket
located on the front left lower part of the grill stand leg and simply slides over the bracket. Tip: to learn
how far to pull the grill out of the hitch pull the grill a quarter of an inch or so then lower, repeat until grill
completely lowers to the ground, next time you will know about how far to pull out before lowering to
the ground.
-15-
To see a video example of loading, unloading and transport of the Redzone Grill, please visit:
Partykinggrills.com/support

Warranty Information:
Because of the nature of this product being used as an automotive attachment, and the damage it can
sustain due to driving habits, road conditions, etc., Party King®Grills will warranty the Redzone Grill for
30 days from date of purchase. Party King®Grills will warranty Redzone Grill for one year against defects,
workmanship or construction issues.
PAINT AND FINISH: Due to the nature of this product, Party King®Grills cannot warranty the Redzone
Grill paint or finish.
If you have questions or comments please send them to [email protected] or call
our toll free voice mail at 1-877-788-5464 and one of our customer service representative will return you
call in 24 hours or less. (Excluding weekends and holidays)
Party King ® is a US registered trademark. Redzone Grill is a trademark of Party King®Grills. For more
information or customer service visit www.partykinggrills.com
-16-
Table of contents
Other Party King Grills Grill manuals
Popular Grill manuals by other brands

nedis
nedis FCRA210FBK2 quick start guide

Team Kalorik
Team Kalorik TKG RAC 1003 manual

KitchenAid
KitchenAid 720-0893 Installation Instructions and Use & Care Guide

Saber Compact
Saber Compact R67SB0312 Assembly & product guide

Char-Broil
Char-Broil 466247010 Product guide

Pit Boss
Pit Boss CHARLESTON PB1230CC Operating instructions and recipes