6m x 12m Peg & Pole Electron Marquee Setup Instructions (1 piece roof) – Party Warehouse. Page 2 of 3
2) Ground Pegs:
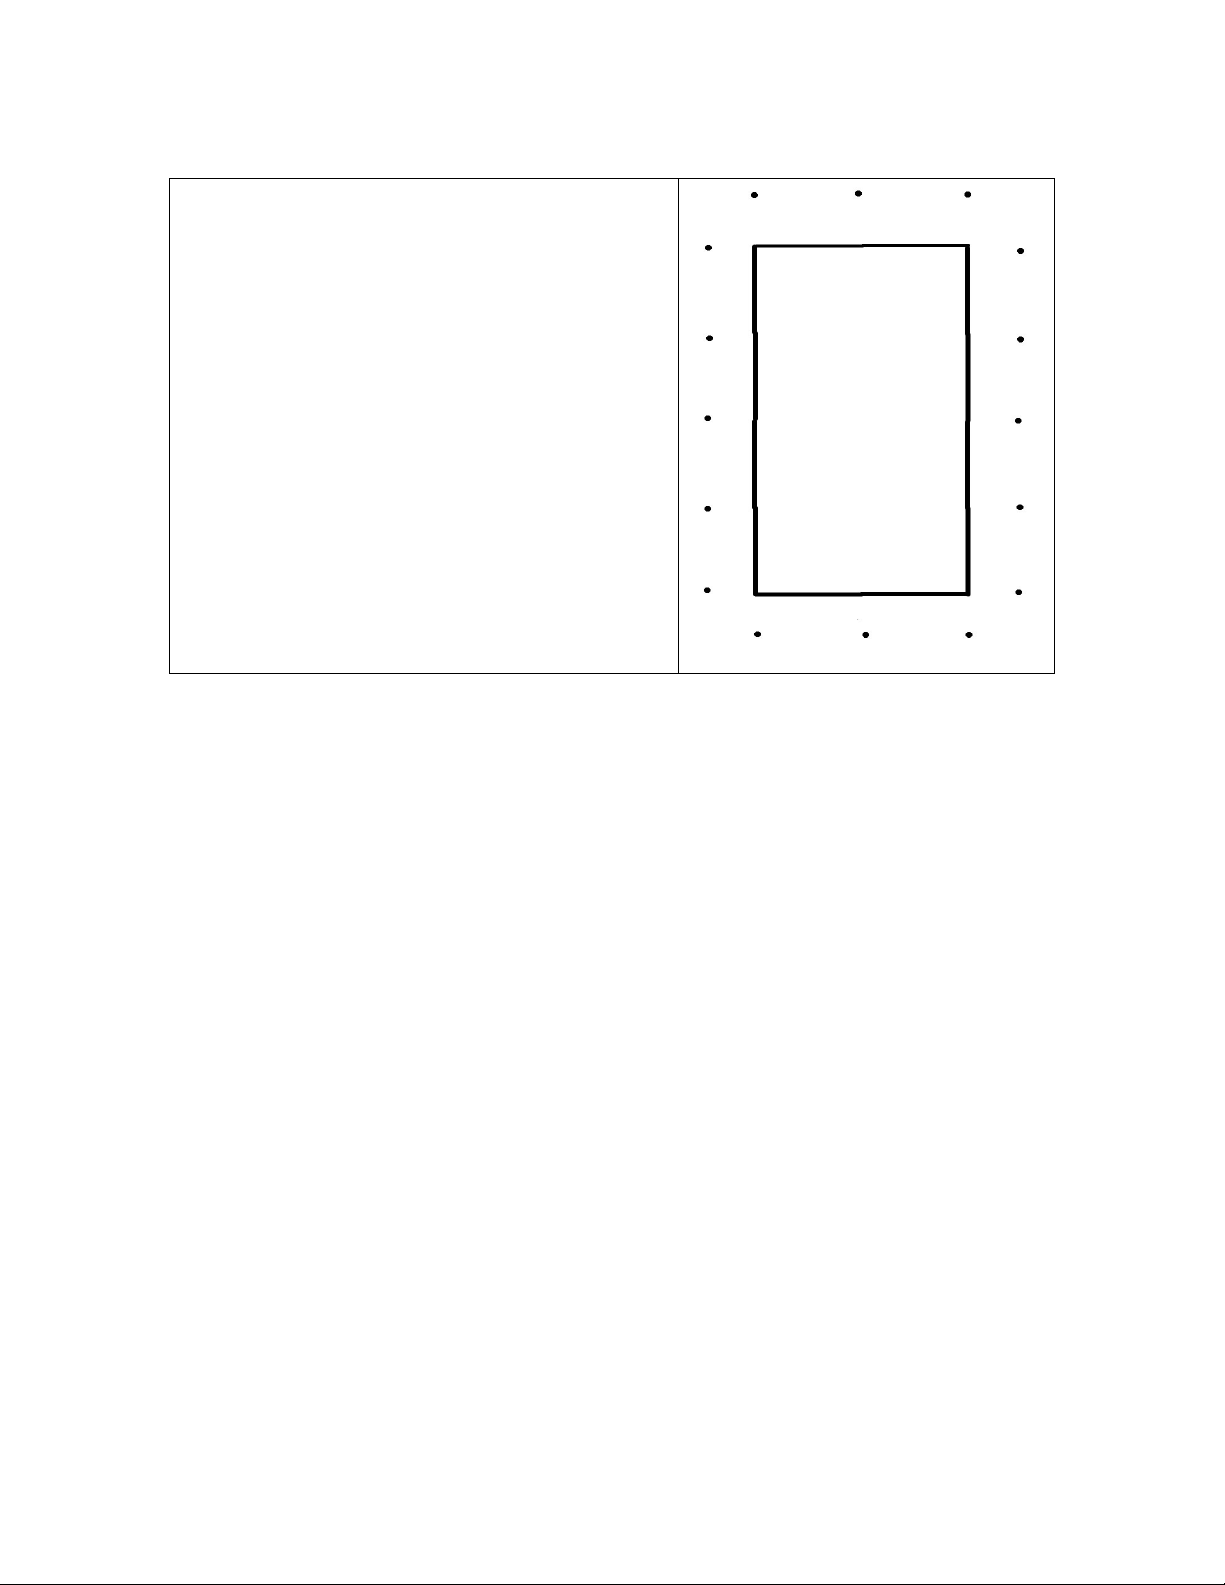
Starting in one corner, insert the
ground pegs approximately 1.5 metres
from the marquee roof. Each peg
should be 3 metres apart, with two
pegs in each corner at right angles.
(Refer to Diagram).
Once the pegs are laid out they can be
hammered in, to ensure the safety of
the marquee once erected the pegs
need to be hammered down to the
eyelet.
3) Raising the Roof:
To prepare, place a pole, foot and a guy rope by each eyelet around the
perimeter of the roof. The corner pole uses two guy ropes. Start in one corner
and insert the spike of the pole through the eyelet in the roof, place the foot on
and stand the pole up straight.
The loops on the guy ropes attach over the top of the pole spike once they have
been pushed through the roof. Attach the guy ropes to the ground pegs.
Continue this around the marquee until all eight poles are erected. Ensure that
the roof is reasonably taut between all the wall poles, the guy ropes on the side
should be tight enough to take the tension but not too tight at this stage.
Insert centre pole spike through the hole at the centre of the marquee roof, then
attach the second section of the pole. Raise each pole a bit at a time, lifting and
dragging the pole until the base is at the exact middle of the marquee. If the pole
is difficult to lift, release some tension from the guy ropes.
Walk around the marquee straightening all of the wall poles and tightening the
guy ropes, making sure you have got all the slack out of the marquee roof.


