-7-
Operating procedures
After unpacking the unit for the rst time, please charge the unit for about 4-5 hours before
any operation. This is absolutely necessary as the built-in rechargeable battery might have
been discharged naturally due to long shipment and storage time, even though it has been
fully charged in the factory prior to shipment.
To operate this portable sound unit, switch on the main POWER switch, the GREEN LED
above it will glow. However, if the RED LED also glows at the same time, it means the
battery is getting weak and a recharge of the battery is necessary. To know the battery
status, its remaining level can be detected by pressing the battery status button and the
LEDs can tell whether the batteries need to be charged. The red LED lighting implies the
power is too low, the green one implies enough power and the yellow one means the power
level is in between.
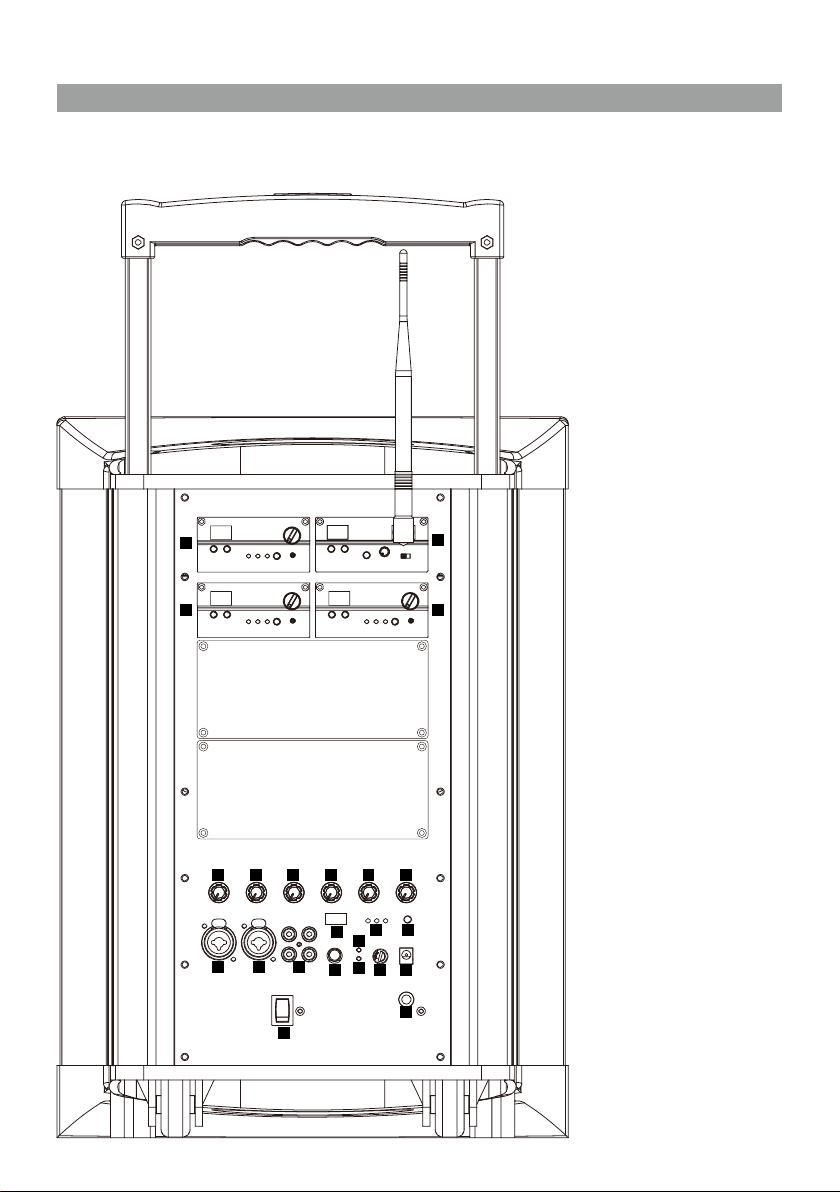
The main POWER switch does NOT switch on the Wireless receiver module and Tape/CD
Player/Digital Recorder as each of them has dedicated Power / Volume control switch on
its panel. To operate each of them, you must switch them on accordingly.
Operating the dynamic wired microphone.
To use a cable microphone, simply plug it into any MIC IN socket. The mic sockett accepts
both phone and Cannon jack. Rotate the dedicated volume control knob and master
volume control, amplied sound could be heard from the speaker when voice is spoken
into the cable microphone.
When a full range high delity sound is emphasized, the mode selector should be put to
MUSIC. For vocal frequencies where better clarity and projection is emphasized, put the
mode selector to SPEECH and this will produce more mid-range frequency.
Operating the Wireless Microphone System.
To operate the wireless system, just switch on the power/volume control on the module
panel and the matching transmitter. Please have the channel setting on both the transmitter
and receiver module be the same before operation. Please as well make sure that master
volume control is set to minimum level before turning the unit on, especially working on
a wireless version! Set the Master volume control to the mid position. Rotate the volume
control knob on receiver panel clockwise to the desired levels. When voice is spoken into
the microphone, amplied sound should be heard over the built-in speaker.
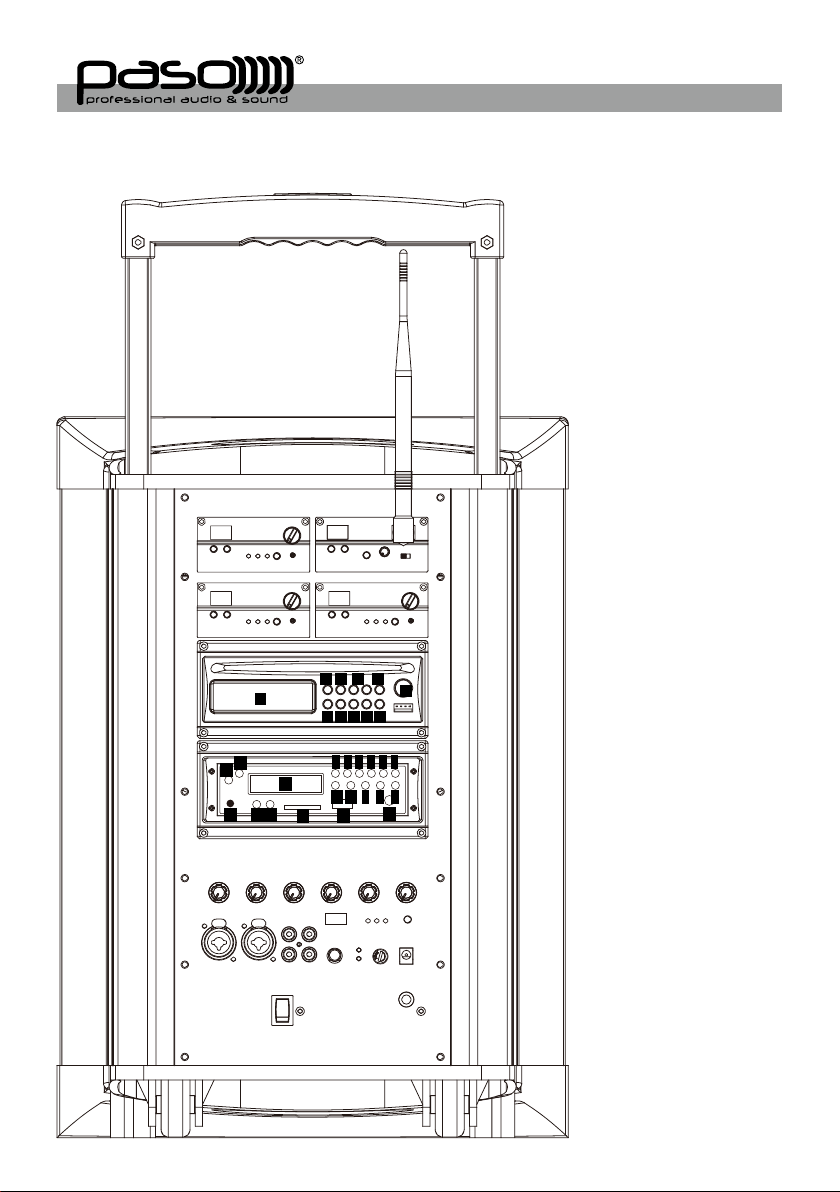
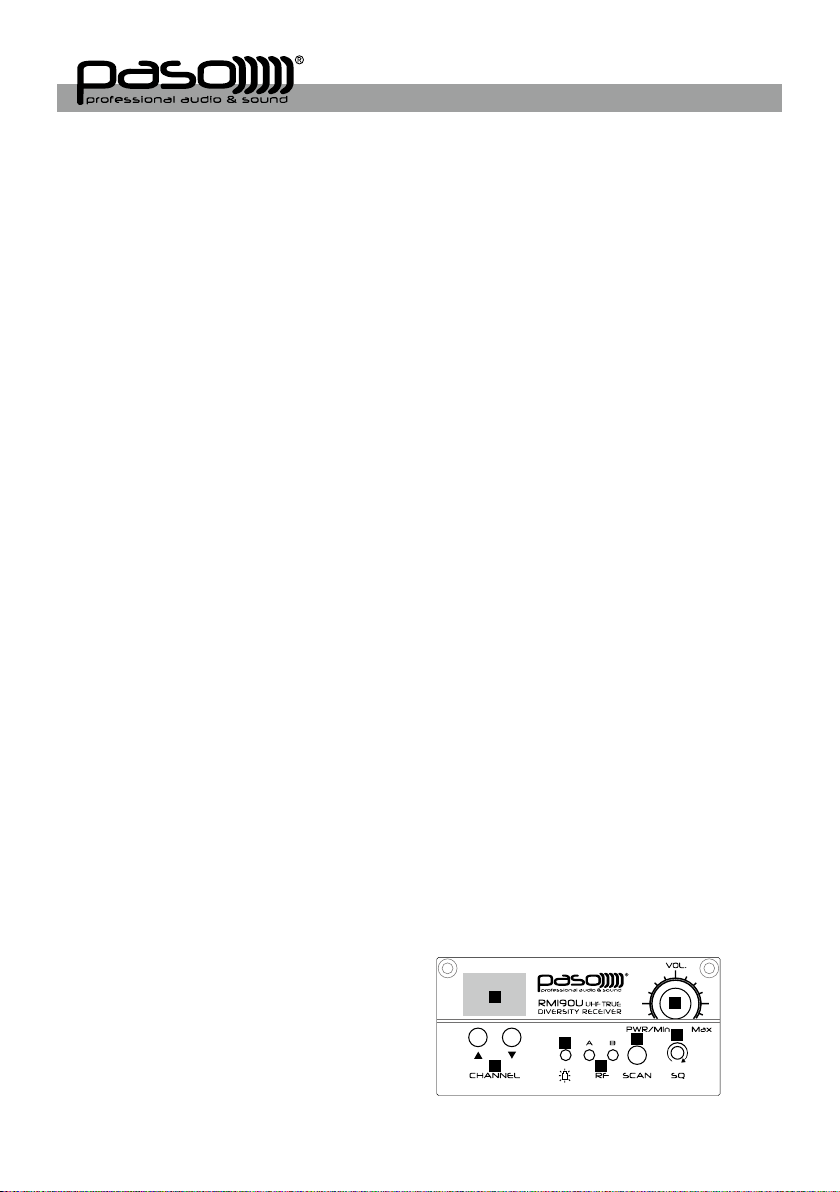
RM190U receiver module
1. Channel Indicator
2. Power switch/volume control
3. Channel Selector
4. Transmitter battery weak indicator
5. Diversity A/B Indicator
6. SCAN
7. Squelch control
12
3
4
5
67