Paula Deen FHTG-U218DF User manual

1
XXL Griddle
Instruction Manual
MODEL FHTG-U218DF

WHAT’S INCLUDED
!" #$%&'()*+'
," -.%**/0'12.3$40'
5" 60780.$92.0':.);0'
<" =.%8'6.$+'
2

IMPORTANT SAFEGUARDS
>?0&'2@%&A'0/049.%4$/'$88/%$&40@B';$@%4'@$309+'
8.04$2C)&@'@?)2/*';0'3)//)D0*'$@'3)//)D@E'
! "#$%&$''&()#&*+,(-./01+,2&&
! 31&+1(&.,#&()#&.+*(&41-&$+5()*+6&1()#-&()$+&*+(#+%#%&.,#2&&
! 7#8#-&*99#-,#&()#&.+*(&4.''5&*+(1&:$(#-&1-&1()#-&'*;.*%&(1&$81*%&
%$9$6#&(1&()#&-1$,(#-2&
! 31&+1(&'#$8#&()#&.+*(&.+$<#+%#%&%.-*+6&1=#-$01+2&&
! 31&+1(&='$/#&()#&.+*(&1+&1-&+#$-&6$,&1-&#'#/(-*/&/11>(1=,&(1&$81*%&
%$9$6#,2&
! ?$>#&,.-#&()#&.+*(&*,&.+='.66#%&@#41-#&918*+6&()#&.+*(2&
! A':$5,&$<$/)&()#&(#9=#-$(.-#&=-1@#&(1&()#&.+*(&B-,(C&()#+&='.6&/1-%&
*+(1&$&:$''&1.('#(2&D)#+&%*,/1++#/0+6&()#&=1:#-C&(.-+&()#&
(#9=#-$(.-#&=-1@#&(1&EFGC&()#+&-#918#&4-19&:$''&1.('#(2&&
! H'$/#&()#&.+*(&1+&$&'#8#'&,.-4$/#&$:$5&4-19&:$'',&$+%&/.=@1$-%,2&31&
+1(&'#(&()#&/1-%&)$+6&18#-&()#&#%6#&14&$&($@'#&1-&/1.+(#-&1-&(1./)&
)1(&,.-4$/#,2&
! I'1,#&,.=#-8*,*1+&*,&+#/#,,$-5&:)#+&$+5&$=='*$+/#&*,&.,#%&@5&1-&+#$-&
/)*'%-#+2&&
! 31&+1(&918#&()#&$=='*$+/#&%.-*+6&/11>*+62&&
! J4&51.&$-#&.,*+6&='$,0/&.(#+,*',C&%1&+1(&'#$8#&()#9&*+,*%#&()#&
$=='*$+/#&:)#+&)1(2&&
! 31&+1(&.,#&,)$-=&.(#+,*',&*+&()#&.+*(&(1&$81*%&%$9$6*+6&()#&/1$0+62&
! 31&+1(&(1./)&)1(&,.-4$/#,2&K,#&)$+%'#,&:*()&%-5&=1(&)1'%#-,&1-&18#+&
9*<,&(1&918#&()#&.+*(2&
! 31&+1(&.,#&()#&.+*(&+#$-&1-&.+%#-&,.-4$/#,&()$(&$-#&)#$(&,#+,*08#&1-&
()1,#&()$(&9$5&@#&%$9$6#%&@5&,(#$92&&
! LM(-#9#&/$.01+&9.,(&@#&.,#%&,*+/#&()#&.+*(&/1+($*+,&)1(&411%C&)1(&
1*',&$+%&'*;.*%,2&&
! 31&+1(&.,#&()#&.+*(&:*()&$+&#M(#+,*1+&/1-%C&$':$5,&='.6&*+(1&$&:$''&
1.('#(2&
! K+='.6&4-19&1.('#(&:)#+&+1(&*+&.,#&$+%&@#41-#&/'#$+*+62&A''1:&(1&
/11'&@#41-#&/'#$+*+62&
3

! N1&=-#8#+(&#'#/(-*/$'&,)1/>&%1&+1(&*99#-,#&()#&/1-%&1-&(#9=#-$(.-#&
=-1@#&*+&:$(#-&1-&1()#-&'*;.*%2&&
! 31&+1(&1=#-$(#&.+*(&:*()&$&%$9$6#%&/1-%&1-&='.6&1-&$O#-&()#&.+*(&
9$'4.+/01+,&1-&)$,&@##+&%$9$6#%&*+&$+5&9$++#-2&&
! A&,)1-(&=1:#-&,.=='5&/1-%&*,&,.=='*#%&(1&-#%./#&()#&-*,>&14&()#&/1-%&
@#/19*+6&($+6'#%&1-&(-*==*+6&18#-&$&'1+6&/1-%2&&
! N)#&$=='*$+/#&)$,&$&=1'$-*P#%&='.6&Q1+#&@'$%#&*,&:*%#-&()$+&()#&
1()#-R2&N1&-#%./#&()#&-*,>&14&#'#/(-*/&,)1/>C&()*,&='.6&*,&*+(#+%#%&(1&B(&
*+(1&$&=1'$-*P#%&1.('#(&1+'5&1+#&:$52&
! J4&()#&='.6&%1#,&+1(&B(&4.''5&*+(1&()#&1.('#(C&-#8#-,#&()#&='.62&J4&*(&,0''&
%1#,&+1(&B(C&/1+($/(&$&;.$'*B#%&#'#/(-*/*$+2&31&+1(&$<#9=(&(1&91%*45&
()#&='.6&*+&$+5&:$52&
! 31&+1(&.,#&1.(%11-,2&
! SATL&NULSL&J7SN"KINJV7S2&&
4

BEFORE FIRST USE
1. Remove all packaging materials. Locate all
included parts before discarding the box.
2. Clean the skillet and lid with hot water,
dishwashing liquid, and a non-abrasive sponge.
3. Wipe the outside of the skillet with a soft cloth.
USING THE APPLIANCE
1. Place unit on a level surface. Insert temperature
probe into the unit with the control knob facing
upwards and in the “0” position. Place the drip tray in
the unit.
2. Plug cord into an electrical outlet.
3. Turn the control knob to desired setting, the indicator
light will illuminate. The range is from low to sear with
1 being low heat and sear being the maximum heat.
4. The unit will need to preheat for 3-8 minutes,
depending on the desired temperature setting. The
light will be on during preheating and when the
chosen temperature is reached the light will turn off.
Note: Do not preheat for more than the suggested time to
avoid damage to the coating of the skillet.
5. Place food on the unit. Cook recipe as desired.
6. Once cooking is complete turn the control knob to the
“0” position and unplug the unit.
5

CLEANING
I'#$+&$O#-#-5&.,#2&&
1. Switch the control knob on the unit to the “0”
position, unplug the unit and allow to cool
completely.
FGH6IJKE To prevent injury or electric shock, always
remove the temperature probe before cleaning. Do
not immerse temperature probe, cord, or the unit in
water or other liquid.
2. Remove excess food and oil with a clean cloth.
Remove the drip tray. Clean the unit and drip
tray with hot water, dishwashing liquid, and a
non-abrasive sponge. Never submerge in water.
STORAGE
1. Unplug the cord.
2. Make sure all parts are clean and dry.
3. Do not place the temperature probe on the unit
as this may scratch the coating.
6

RECIPE NOTES
________________________________
________________________________
________________________________
________________________________
________________________________
________________________________
________________________________
________________________________
________________________________
________________________________
________________________________
________________________________
________________________________
________________________________
________________________________
________________________________
________________________________
________________________________
________________________________
________________________________
________________________________
7

LI#I6M='JKM'NMGO'>GOOGK6N'
N)*,&:$--$+(5&/18#-,&$''&%#4#/(,&*+&:1->9$+,)*=&1-&9$(#-*$',&*+&()#&=$-(,C&$-*,*+6&.+%#-&
+1-9$'&.,#&$+%&/$-#&*+&()*,&=-1%./(&41-&$&=#-*1%&14&WX&91+(),&4-19&()#&%$(#&14&=.-/)$,#&
=-18*%#%&51.&$-#&$@'#&(1&=-#,#+(&$&8$'*%&=-114Y14Y=.-/)$,#2&A&8$'*%&=-114Y14Y=.-/)$,#&*,&$&-#/#*=(&
,=#/*45*+6&*(#9C&%$(#&=.-/)$,#%C&$+%&/1,(&14&*(#92&A&6*O&-#/#*=(&,)1:*+6&*(#9&$+%&%$(#&14&
=.-/)$,#&*,&$+&$//#=($@'#&=-114Y14Y=.-/)$,#2&H-1%./(&*,&*+(#+%#%&41-&)1.,#)1'%&.,#&1+'52&A+5&
/199#-/*$'&.,#&81*%,&()#&:$--$+(52&&
N)*,&:$--$+(5&/18#-,&()#&1-*6*+$'&-#($*'&=.-/)$,#-&1-&6*O&-#/*=*#+(2&3.-*+6&()#&$=='*/$@'#&
:$--$+(5&=#-*1%&:*()*+&+1-9$'&)1.,#)1'%&.,#C&:#&:*''&-#=$*-&1-&-#='$/#C&$(&1.-&%*,/-#01+C&$+5&
=$-(&:)*/)&=-18#,&%#4#/08#C&1-&-#='$/#&.+*(&:*()&$&/19=$-$@'#&91%#'2&S)*==*+6&$+%&)$+%'*+6&
/1,(,&$-#&+1(&*+/'.%#%&41-&:$--$+(5&-#='$/#9#+(,&$+%&$-#&()#&-#,=1+,*@*'*(5&14&()#&/.,(19#-2&&
N1&1@($*+&,#-8*/#&.+%#-&()#&(#-9,&14&()*,&:$--$+(5C&,#+%&$+	$*'&(1&
/.,(19#-/$-#Z$''*#%-*/)2+#(&1-&/$''&[WXY\X]Y[^]F2&H'#$,#&=-18*%#&()#&91%#'&+.9@#-&'*,(#%&1+&
()#&@1<19&14&()*,&=$6#&:)#+&/1+($/0+6&.,2&&
NUJS&_J?JNL3&DA""A7N`&IVTL"S&K7JNS&HK"IUASL3&A73&KSL3&DJNUJ7&NUL&K7JNL3&
SNANLS&A73&3VLS&7VN&IVTL"a&
!V-%*+$-5&:#$-&$+%&(#$-&*+/'.%*+6&,/-$(/)#,C&%#+(,&1-&,($*+,2&&
!U#$(&%*,/1'1-$01+C&9*+1-&*9=#-4#/01+,&$+%&,'*6)(&/1'1-&8$-*$01+,&*+&()#&&/#-$9*/&
/1$0+6C&9#($',&1-&6'$,,2&
!3$9$6#&/$.,#%&@5&#M(-#9#&(#9=#-$(.-#,&/)$+6#,&,./)&$,&=-#Y)#$0+6&/11>:$-#&
#9=(5C&'#b+6&'*;.*%,&@1*'&%-5&1-&*99#-,*+6&$&)1(&=1(&1-&'*%&*+(1&/1'%&:$(#-2&
!J9=-1=#-&/'#$+*+6&9#()1%,&/$.,*+6&,/-$(/)#,2&&
!3$9$6#,&*+&(-$+,*(2&
!3#4#/(,&1()#-&()$+&9$+.4$/(.-*+6&%#4#/(,2&
!3$9$6#,&4-19&9*,.,#C&$@.,#C&$//*%#+(C&$'(#-$01+C&'$/>&14&=-1=#-&/$-#&$+%&
9$*+(#+$+/#2&
!3$9$6#&4-19&,#-8*/#&@5&1()#-&()$+&$.()1-*P#%&%#$'#-&1-&,#-8*/#&/#+(#-2&
!S)*==*+6&$+%&)$+%'*+6&/1,(,2&
!N)*,&:$--$+(5&6*8#,&51.&,=#/*$'&'#6$'&-*6)(,&$+%&51.&9$5&$',1&)$8#&1()#-&-*6)(,&(1&
:)*/)&51.&$-#&#+0('#%&:)*/)&9$5&8$-5&4-19&,($(#&(1&,($(#2&
?$+.4$/(.-#-&%1#,&+1(&$,,.9#&-#,=1+,*@*'*(5&41-&'1,,&1-&%$9$6#&41-&-#(.-+&,)*=9#+(2&
D#&-#/199#+%&()$(&51.&>##=&51.-&1-*6*+$'&=$/>$6*+6&,)1.'%&51.&-#;.*-#&-#=$*-&,#-8*/#2&c#41-#&
-#(.-+*+6&=-1%./(&='#$,#&/1+($/(&1.-&/.,(19#-&/$-#&%#=$-(9#+(&41-&-#(.-+&$.()1-*P$01+2&D)#+&
-#(.-+*+6&=-1%./(&41-&-#=$*-&='#$,#&*+/'.%#&51.-&4.''&+$9#C&-#(.-+&$%%-#,,C&$+%&%$509#&=)1+#&
+.9@#-2&A',1&*+/'.%#&$&@-*#4&%#,/-*=01+&14&()#&=-1@'#9&51.&$-#&#M=#-*#+/*+6&$+%&$&/1=5&14&51.-&
,$'#,&-#/#*=(&1-&1()#-&=-114&14&=.-/)$,#&*+&1-%#-&(1&8$'*%$(#&:$--$+(5&,($(.,2'
#J=ML'PQ6-RH,!S=P
8
Table of contents
Other Paula Deen Griddle manuals
Popular Griddle manuals by other brands

Nostalgia Electrics
Nostalgia Electrics LIving Collection NGD200 Instructions and recipes
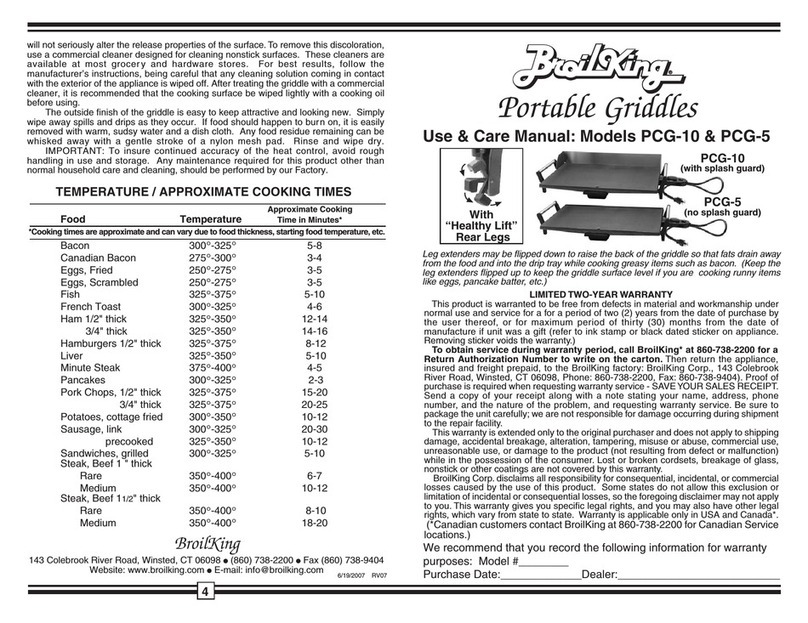
Broil King
Broil King PCG-10 Use & care manual
Oster
Oster CKSTGR3008-033 instruction manual

Homecraft
Homecraft GD20C Instructions and recipes
Lincat
Lincat Silverlink 600 GS3 Installation, operating and service instructions

Black Stone
Black Stone Culinary 1883 owner's manual
