manuals.online logo
Brands
  1. Home
  2. •
  3. Brands
  4. •
  5. Broil King
  6. •
  7. Griddle
  8. •
  9. Broil King PCG-10 User manual

Broil King PCG-10 User manual

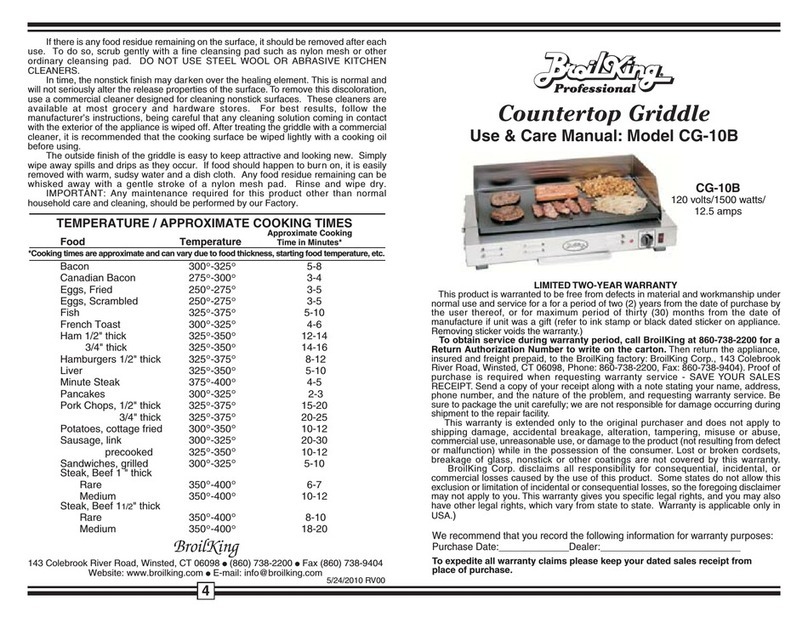
will not seriously alter the release properties of the surface. To remove this discoloration,
use a commercial cleaner designed for cleaning nonstick surfaces. These cleaners are
available at most grocery and hardware stores. For best results, follow the
manufacturers instructions, being careful that any cleaning solution coming in contact
with the exterior of the appliance is wiped off. After treating the griddle with a commercial
cleaner, it is recommended that the cooking surface be wiped lightly with a cooking oil
before using.
The outside finish of the griddle is easy to keep attractive and looking new. Simply
wipe away spills and drips as they occur. f food should happen to bur n on, it is easily
removed with warm, sudsy water and a dish cloth. Any food residue remaining can be
whisked away with a gentle stroke of a nylon mesh pad. Rinse and wipe dry.
MPORTANT: To insure continued accuracy of the heat control, avoid rough
handling in use and storage. Any maintenance required for this product other than
normal household care and cleaning, should be performed by our Factory.
6/19/2007 RV07
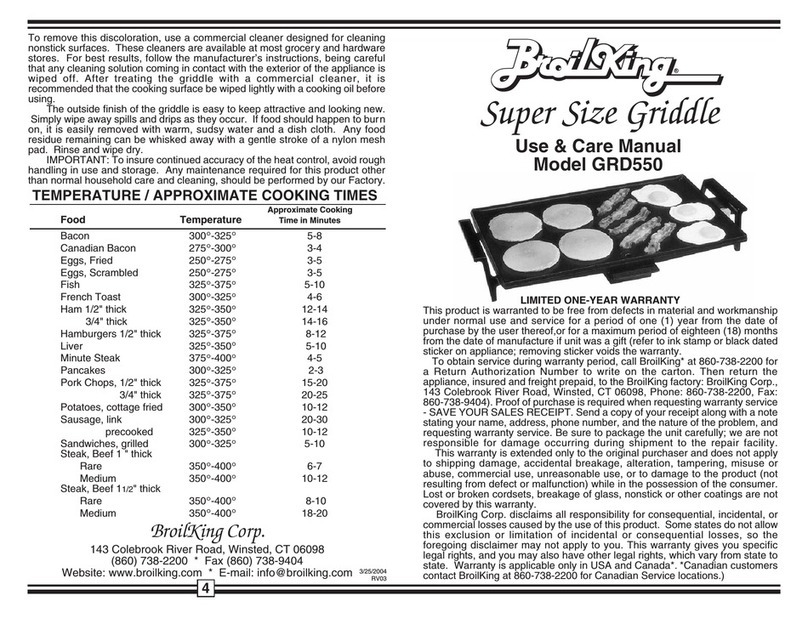
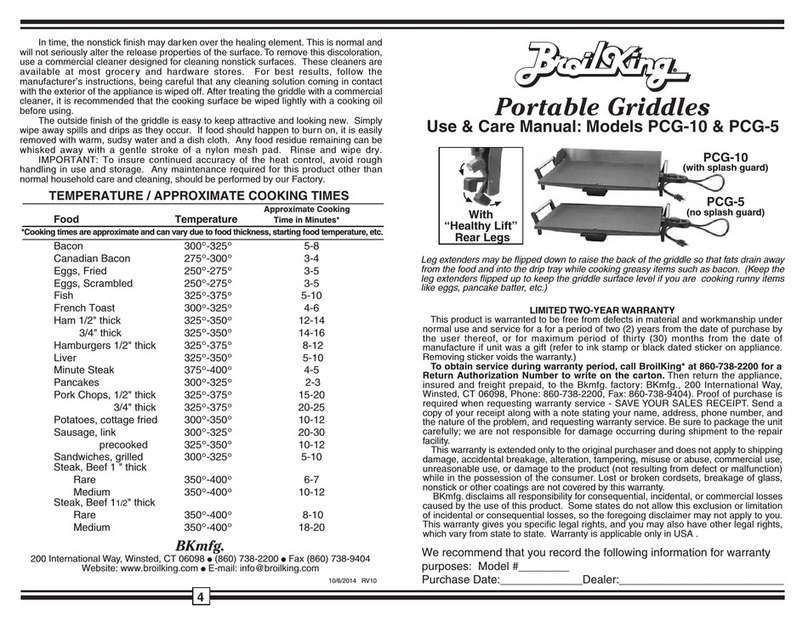
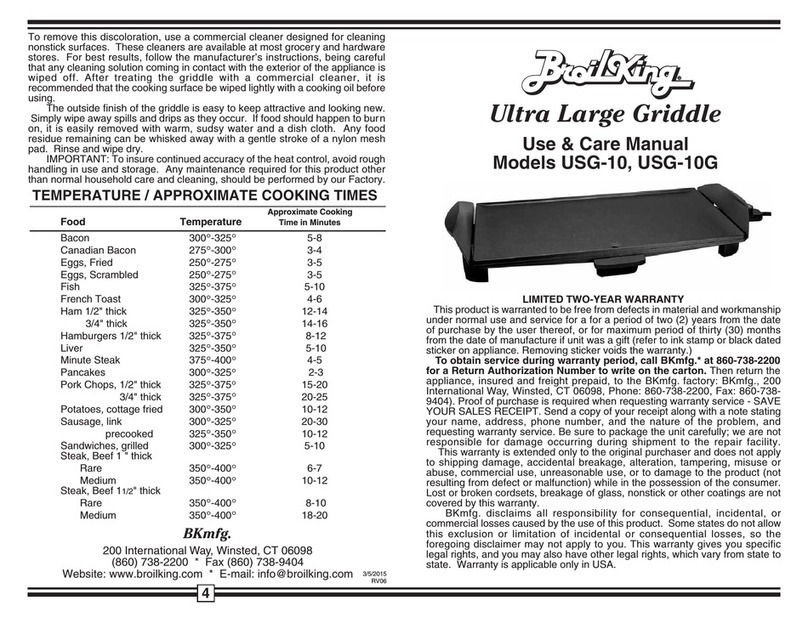
TEMPERATURE / APPROXIMATE COOKING TIMES
Approximate Cooking
Food Temperat re Time in Min tes*
Bacon 300°-325°5-8
Canadian Bacon 275°-300°3-4
Eggs, Fried 250°-275°3-5
Eggs, Scrambled 250°-275°3-5
Fish 325°-375°5-10
French Toast 300°-325°4-6
Ham 1/2" thick 325°-350°12-14
3/4" thick 325°-350°14-16
Hamburgers 1/2" thick 325°-375° 8-12
Liver 325°-350° 5-10
Minute Steak 375°-400°4-5
Pancakes 300°-325° 2-3
Pork Chops, 1/2" thick 325°-375°15-20
3/4" thick 325°-375°20-25
Potatoes, cottage fried 300°-350°10-12
Sausage, link 300°-325°20-30
precooked 325°-350°10-12
Sandwiches, grilled 300°-325°5-10
Steak, Beef 1 " thick
Rare 350°-400°6-7
Medium 350°-400°10-12
Steak, Beef 11/2" thick
Rare 350°-400° 8-10
Medium 350°-400°18-20
4
BroilKing
143 Colebrook River Road, Winsted, CT 06098 l (860) 738-2200 l Fax (860) 738-9404
Website: www.broilking.com l E-mail: [email protected]
LIMITED TWO-YEAR WARRANTY
This product is warranted to be free from defects in material and workmanship under
normal use and service for a for a period of two (2) years from the date of purchase by
the user thereof, or for maximum period of thirty (30) months from the date of
manufacture if unit was a gift (refer to ink stamp or black dated sticker on appliance.
Removing sticker voids the warranty.)
To obtain service d ring warranty period, call BroilKing* at 860-738-2200 for a
Ret rn A thorization N mber to write on the carton. Then return the appliance,
insured and freight prepaid, to the BroilKing factory: BroilKing Corp., 143 Colebrook
River Road, Winsted, CT 06098, Phone: 860-738-2200, Fax: 860-738-9404). Proof of
purchase is required when requesting warranty service - SAVE YOUR SALES RECE PT.
Send a copy of your receipt along with a note stating your name, address, phone
number, and the nature of the problem, and requesting warranty service. Be sure to
package the unit carefully; we are not responsible for damage occurring during shipment
to the repair facility.
This warranty is extended only to the original purchaser and does not apply to shipping
damage, accidental breakage, alteration, tampering, misuse or abuse, commercial use,
unreasonable use, or damage to the product (not resulting from defect or malfunction)
while in the possession of the consumer. Lost or broken cordsets, breakage of glass,
nonstick or other coatings are not covered by this warranty.
BroilKing Corp. disclaims all responsibility for consequential, incidental, or commercial
losses caused by the use of this product. Some states do not allow this exclusion or
limitation of incidental or consequential losses, so the foregoing disclaimer may not apply
to you. This warranty gives you specific legal rights, and you may also have other legal
rights, which vary from state to state. Warranty is applicable only in USA and Canada*.
(*Canadian customers contact BroilKing at 860-738-2200 for Canadian Service
locations.)
*Cooking times are approximate and can vary d e to food thickness, starting food temperat re, etc.
We recommend that you record the following information for warranty
purposes: Model #________
Purchase Date:_____________Dealer:__________________________
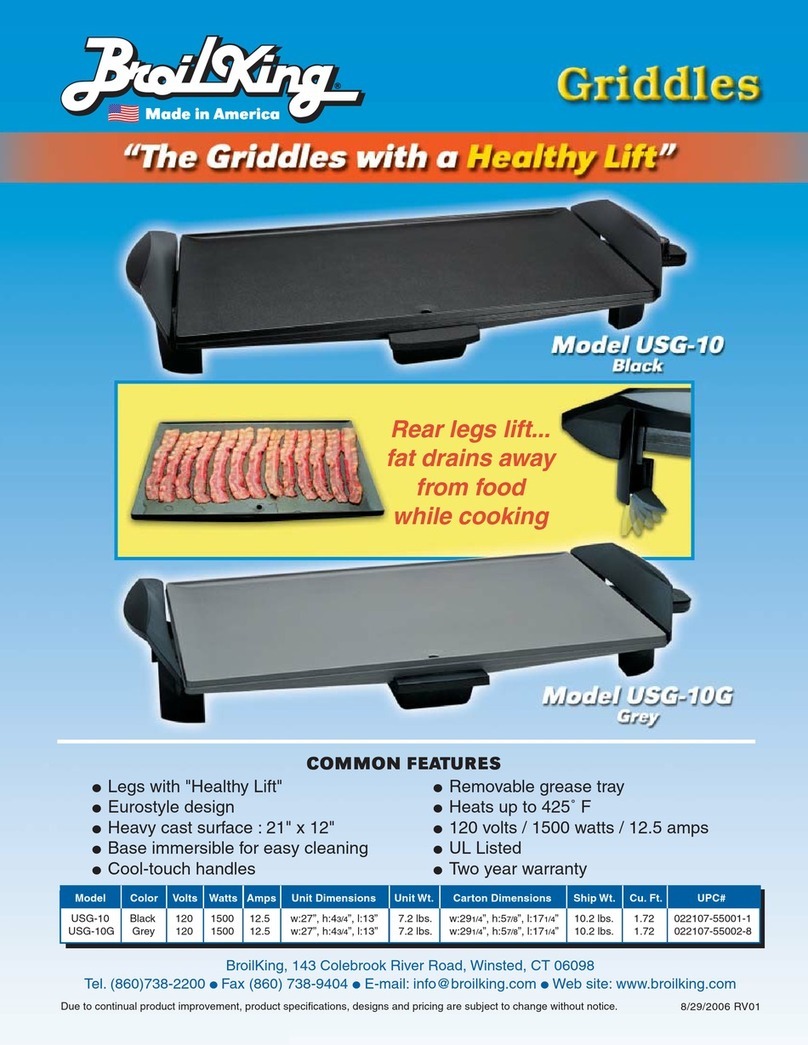
Leg extenders may be flipped down to raise the back of the griddle so that fats drain away
from the food and into the drip tray while cooking greasy items such as bacon. (Keep the
leg extenders flipped up to keep the griddle surface level if you are cooking runny items
like eggs, pancake batter, etc.)
Portable Griddles
Use & Care Man al: Models PCG-10 & PCG-5
PCG-10
(with splash g ard)
PCG-5
(no splash g ard)
With
Healthy Lift
Rear Legs
HOW TO USE
(Before using for the first time, become familiar with the griddle features, Figure B.
Wash griddle in dishwasher or in warm sudsy water, rinse and dry. Do not s bmerge
heat control or let the heat control come in contact with any liq id. )To "season" the
nonstick properties of the surface coating, rub the cooking surface of the griddle lightly
with cooking oil. Repeat periodically to maintain the nonstick properties.
1. Prepare food for cooking.
2. Plug unit into appropriate 3-prong wall socket. Turn heat control to desired temperature.
Preheat griddle for at least 5 min tes before placing food on it. Pilot light will turn
off when selected temperature is reached. During cooking, pilot light will go on and
off, indicating desired temperature is being maintained.
3. Because the griddle features a nonstick finish, food may be prepared with or without
shortening, according to taste.
4. Place food on griddle and cook according to temperature time table (page 4). Heat
should be adjusted according to personal preference and particular food being cooked.
Temperatures and times in the table are approximate.
5. NOTE: You may notice at higher temperatures that the left side of griddle is a little
hotter than right side, due to the nature of how heat behaves in the curve of a heating
element. This is not a defect. Use the left side to cook items that normally take a little
longer to cook. Another option is to start placing the food on the griddle from right to
left, so the right food has a little longer to cook.
6. Turn heat control to OFF when cooking is completed. Unplug heat control from wall
outlet, then from appliance. Allow nit to cool completely before removing grease
tray to empty, or removing splash g ard. Splash guard is made of stainless steel
for durability. During use, it get very hot. Extreme care should be used when handling,
emptying, etc. As a precaution, always use a hot mitt or potholder.
CARE AND CLEANING
Before initial use and after each subsequent use, disassemble and wash griddle in
dishwasher or in warm sudsy water, rinse and dry. DO NOT MMERSE HEAT
CONTROL N WATER OR LET T COME N CONTACT W TH ANY L QU D.
Periodically, "season" the cooking surface by rubbing with cooking oil to maintain the
nonstick properties.
Only nylon, plastic, wooden or rubber utensils should be used. Metal utensils may
not be used. Do not use a knife to cut the food on the cooking surfaces.
f there is any food residue remaining on the surface, it should be removed after each
use. To do so, scrub gently with a fine cleansing pad such as nylon mesh or other
ordinary cleansing pad. DO NOT USE STEEL WOOL OR ABRAS VE K TCHEN
CLEANERS.
n time, the nonstick finish may dar ken over the healing element. This is normal and
This is a UL Listed appliance. The following important safeguards are
recommended by most portable appliance manufacturers.
IMPORTANT SAFEGUARDS
To reduce the risk of personal injury or property damage when using electrical
appliances, basic safety precautions should always be followed, including the
following:
1. READ ALL INSTRUCTIONS.
2. Do not touch hot surfaces. Use handles. Use hot mitts or potholders.
3. To protect against electrical shock, do not immerse control, cord or plug in
water or other liquid.
4. Close supervision is necessary when any appliance is used by or near
children.
5. Unplug from outlet when not in use and before cleaning. Allow to cool
before p tting on or taking off parts, and before cleaning the appliance.
6. Do not operate any appliance with a damaged cord or plug or after the
appliance malfunctions or has been damaged in any manner. Contact the
BroilKing Factory Service Department at (860) 738-2200 for examination,
repair or adjustment.)
7. The use of accessory attachments not recommended by the appliance
manufacturer may cause injuries.
8. Do not use outdoors.
9. Do not let cord hang over edge of table or counter or touch hot surfaces.
10. Do not place on or near a hot gas or electric burner or in a heated oven.
11. t is recommended that this appliance not be moved when it contains hot
oil or other hot liquid.
12. ALLOW GREASE TRAY TO COOL COMPLETELY BEFORE REMOV NG.
13. Always attach heat control to appliance first, then plug cord into wall outlet.
To disconnect, turn control to "OFF", then remove plug from wall outlet
14. Do not use appliance for other than intended use.
SAVE THESE INSTRUCTIONS
This prod ct is for ho sehold se only.
CAUTION: For safety's sake, when using non-stick cookware or electric appliance with
nonstick coatings, keep your pet birds out of the room. Birds have respiratory systems
that are sensitive to many kinds of fumes, including fumes from overheated nonstick
cookware.
NOTE: A short power supply cord (or cord set) has been provided to reduce the hazards
resulting from becoming entangled in or tripping over a longer cord. Longer cord sets or
extension cords may be used if care is properly exercised in their use. f a long cord set
or extension cord is used, the marked electrical rating of the cord set or extension cord
should be at least as great as the electrical rating of the appliance. The longer cord should
be arranged so that it will not drape over the counter top or table top where it can be
pulled on by children or tripped over accidentally.
23
ASSEMBLY
Please read these instructions carefully. Refer to Figure A.
1. Place unit securely on table or counter.
2. (Model PCG-10) Position the splash guard above the cooking surface with the long
sides parallel, the splash guard arms facing forward, and the front edge of the right
arm lined up directly behind the heat control socket on right side of the unit.
3. Press splash guard down until it sits on the cooking surface.
4. Push the splash guard toward rear until the splash guard hooks are flush with the rear legs.
Fig re B
Fig re A
Grease Tray
Heat
Control
Handle/Leg
Handle/
Leg
Splash G ard (PCG-10 only)
Heat
Control
Socket
Splash G ard
Splash G ard Hook
Rear
Leg
Rear Leg
5. To remove for cleaning, pull spash guard back until it is flush with the heat control
socket, and lift up. Allow nit to cool before removing splash g ard.
6. Push heat control into heat control socket, dial side up.
Non-stick
Cooking
S rface
This manual suits for next models

1

Other Broil King Griddle manuals

Broil King CG-10B User manual

Broil King

Broil King CG-10B User manual

Broil King PWT-1B User manual

Broil King

Broil King PWT-1B User manual

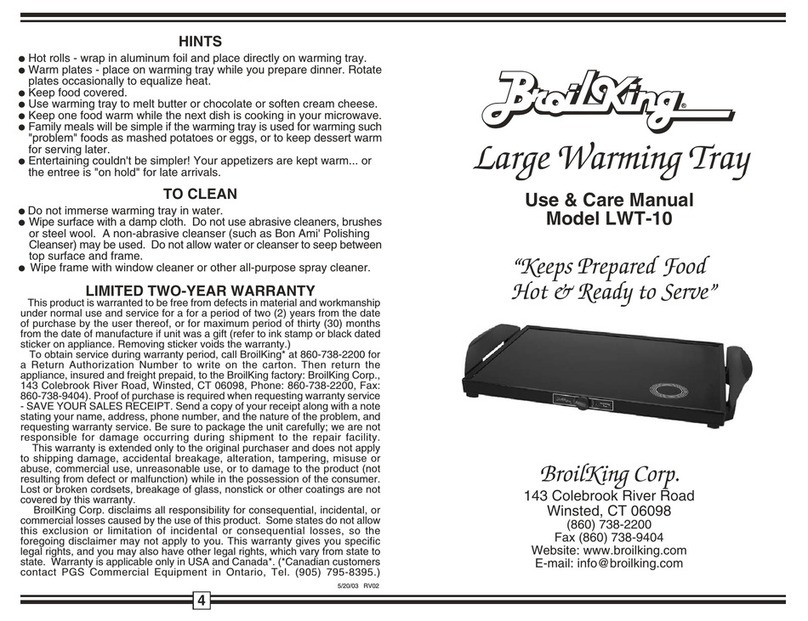
Broil King LWT-10 User manual

Broil King

Broil King LWT-10 User manual

Broil King USG-10 User manual

Broil King

Broil King USG-10 User manual

Broil King PCG-10 User manual

Broil King

Broil King PCG-10 User manual

Broil King CG-10B User manual

Broil King

Broil King CG-10B User manual

Broil King USG-10G User manual

Broil King

Broil King USG-10G User manual

Broil King USG-10 User manual

Broil King

Broil King USG-10 User manual

Broil King DPA115 User manual

Broil King

Broil King DPA115 User manual

Broil King GRD550 User manual

Broil King

Broil King GRD550 User manual

Broil King PCG-10 User manual

Broil King

Broil King PCG-10 User manual

Popular Griddle manuals by other brands

croydon GR1E instruction manual

croydon

croydon GR1E instruction manual

Lang 172TBC Installation and operation instructions

Lang

Lang 172TBC Installation and operation instructions

Royal Catering RC-EG73 user manual

Royal Catering

Royal Catering RC-EG73 user manual

Star STAR-MAX 524CHSD Specification sheet

Star

Star STAR-MAX 524CHSD Specification sheet

Martellato 50PR002 Use and maintenance handbook

Martellato

Martellato 50PR002 Use and maintenance handbook

Wolf TYG48 Installation & operation manual

Wolf

Wolf TYG48 Installation & operation manual

Rankam Member's Mark GR2298906-MM-01 Assembly instructions & user manual

Rankam

Rankam Member's Mark GR2298906-MM-01 Assembly instructions & user manual

Casselin CPASF30G manual

Casselin

Casselin CPASF30G manual

infernus GT1200 Installation and operation instruction

infernus

infernus GT1200 Installation and operation instruction

Riviera & Bar QPL 550 Operating	 instruction

Riviera & Bar

Riviera & Bar QPL 550 Operating instruction

Magikitch'n L22-288 Exploded Parts Manual

Magikitch'n

Magikitch'n L22-288 Exploded Parts Manual

Thermador SGRIDDLEW Quick reference guide

Thermador

Thermador SGRIDDLEW Quick reference guide

NEFF Z9416X2 manual

NEFF

NEFF Z9416X2 manual

USR Brands SR-G12-M user manual

USR Brands

USR Brands SR-G12-M user manual

Bestron ABP605BB instruction manual

Bestron

Bestron ABP605BB instruction manual

Anvil FTA7016 Troubleshooting

Anvil

Anvil FTA7016 Troubleshooting

Sunbeam CKSBGRFM10-033 owner's guide

Sunbeam

Sunbeam CKSBGRFM10-033 owner's guide

MasterChef GRILL TURISMO Assembly manual

MasterChef

MasterChef GRILL TURISMO Assembly manual

manuals.online logo
manuals.online logoBrands
  • About & Mission
  • Contact us
  • Privacy Policy
  • Terms and Conditions

Copyright 2025 Manuals.Online. All Rights Reserved.