PCD J601 User manual
J601 User Manual
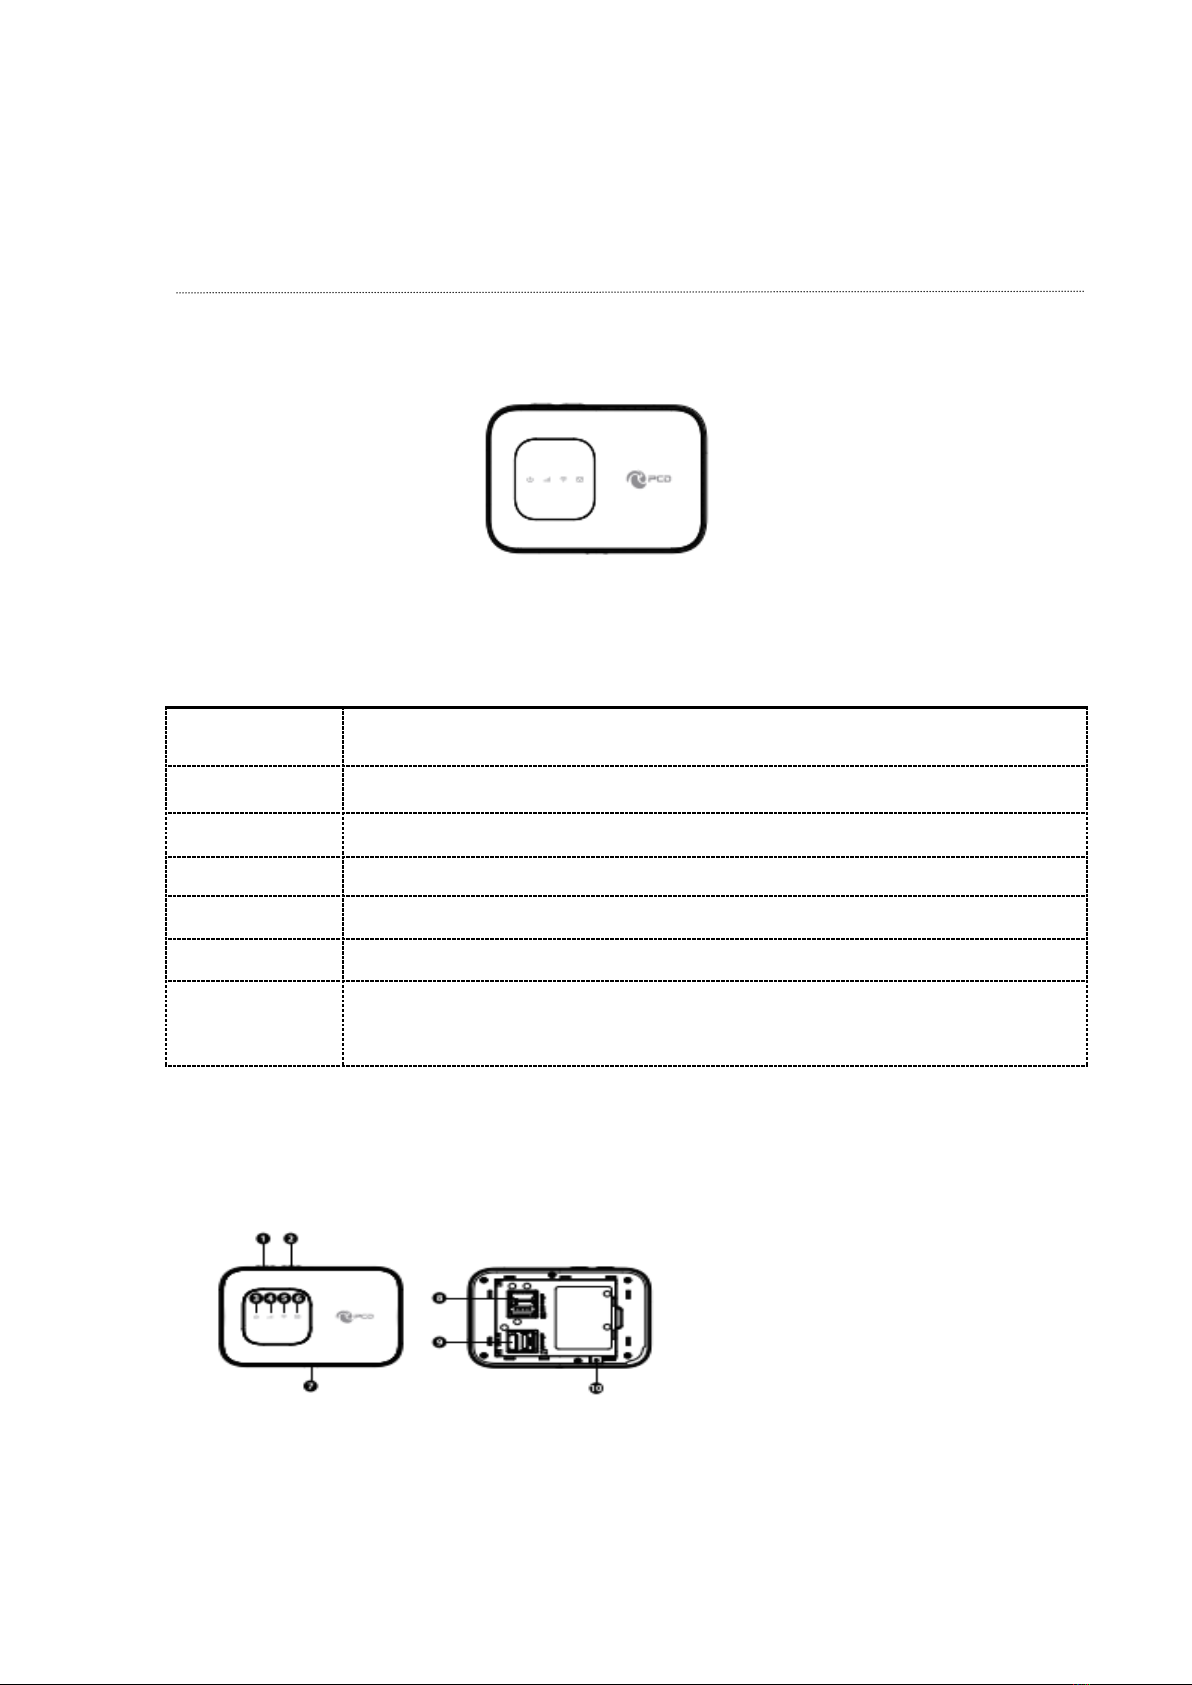
Interface
KEY Definition:
key
Illustrate
1 Power key
Long press over 5 seconds to power on and long press to power off
2 WPS key
Press to active the WPS
7 USB port
Insert USB into LAN port
8 SIM card Slot
Insert SIM card
9 SD card Slot
Insert SD card
10 Reset
The Reset button is on the opposite side of the machine. If you forget Administrator password or
Wireless network key, you can press the Reset key to restore factory default settings.
LED Indication Definition:

Indicator
Color
Working Status
3 Power LED
Green
Solid: booting up the device
Blink:
Turn on-0.5s
Blue
Solid: Battery High(100%-60%) or Charge Completed
Amber
Solid: Battery Middle (60%-15%)
Red
Solid: Battery too low nearly shut down (<15%)
4 Signal LED
Blue
Blink: Register to LTE(not connect)
Solid: Connected to LTE network
Green
Blink: Register to 3G(not connect)
Solid: Connected to3G network
Purple
Blink: Register to2G(not connect)
Solid: Connected to2G network
5 Wi-Fi LED
Blue
Solid: No Client
Blink:
Turn on-0.2s
Blink: Client is actived
Blink: WPS is active
6 SMS LED
Blue
Blink: New SMS
Blink:
Turn on-0.5s
Installation
Follow the diagram to install the SIM card and SD card
Tips: Always switch the device off and disconnect the charger before removing the
battery.
1. Remove the back cover and battery;
2. Insert the SIM card and SD card. Ensure that the contact area on the card is facing down and that the beveled
corner on the card is facing the beveled corner on the holder.
3. Align the battery contacts with the battery compartment connectors, and insert the battery. Replace the back
cover lastly.
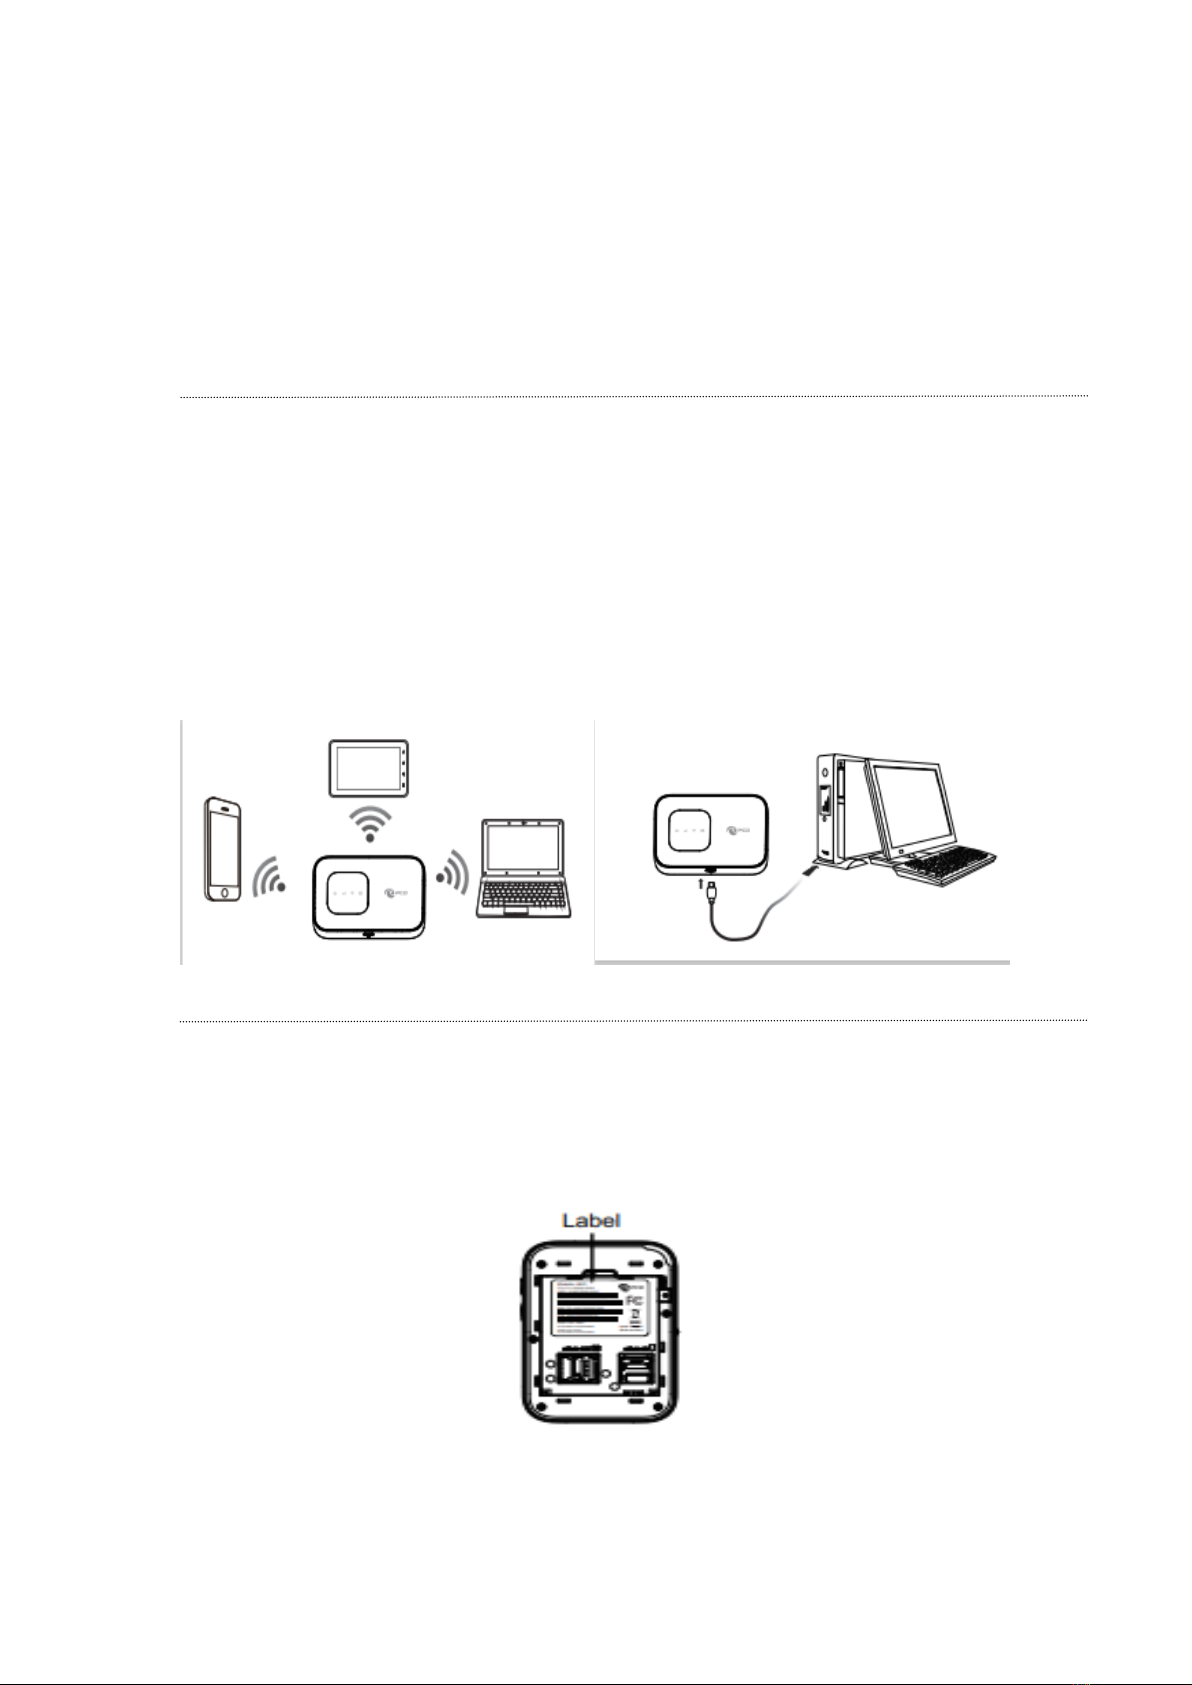
J601 Usage
J601 support 4G/3G/2G networks. Insert the SIM card, Wi-Fi devices and the computer can access the Internet
through J601, enjoy high-speed network services. Smart phones, tablet computers, game consoles and other Wi-Fi
devices can be connected with the J601 Wi-Fi connection for Internet access.
Computers & laptops etc. may be connected to the J601 via USB cable for Internet Access.
J601 computer for the first time via a USB connection, you need to follow the
prompts to install the driver
Wi-Fi wireless Internet access
In order for a Wi-Fi device to establish a connection with the J601 for the first time, you will need to select the
J601SSID (Wi-Fi name) & enter the relevant Wi-Fi password, which you may find in the following ways:
Method one: on the nameplate view the default SSID and Wi-Fi passwords

Method Two: Login management page view
1. Computer, open your browser, input http://192.168.1.1 and enter.
●The default Account is ClaroADM
●The default Password is Adm@XXXX (XXXX are the 2.4G Mac’s last 4-digits)
Enter the Account and Password, login administration pages
2. Enter the Wi-Fi menu , view the default SSID and Wi-Fi password.
The default 2.4G SSID: CLARO_INTERNET_XXX (Where XXX are the last 3 digits of 2.4 MAC Address), and SSID
password: CLAROXXXX (Where XXXX are the last 4 digits of 2.4 GMAC Address)
The default 5G SSID: CLARO_INTERNET_5GHz_XXX (Where XXX are the last 3 digits of 5G MAC Address), and SSID
password: CLAROXXXX (Where XXXX are the last 4 digits of 5G MAC Address)
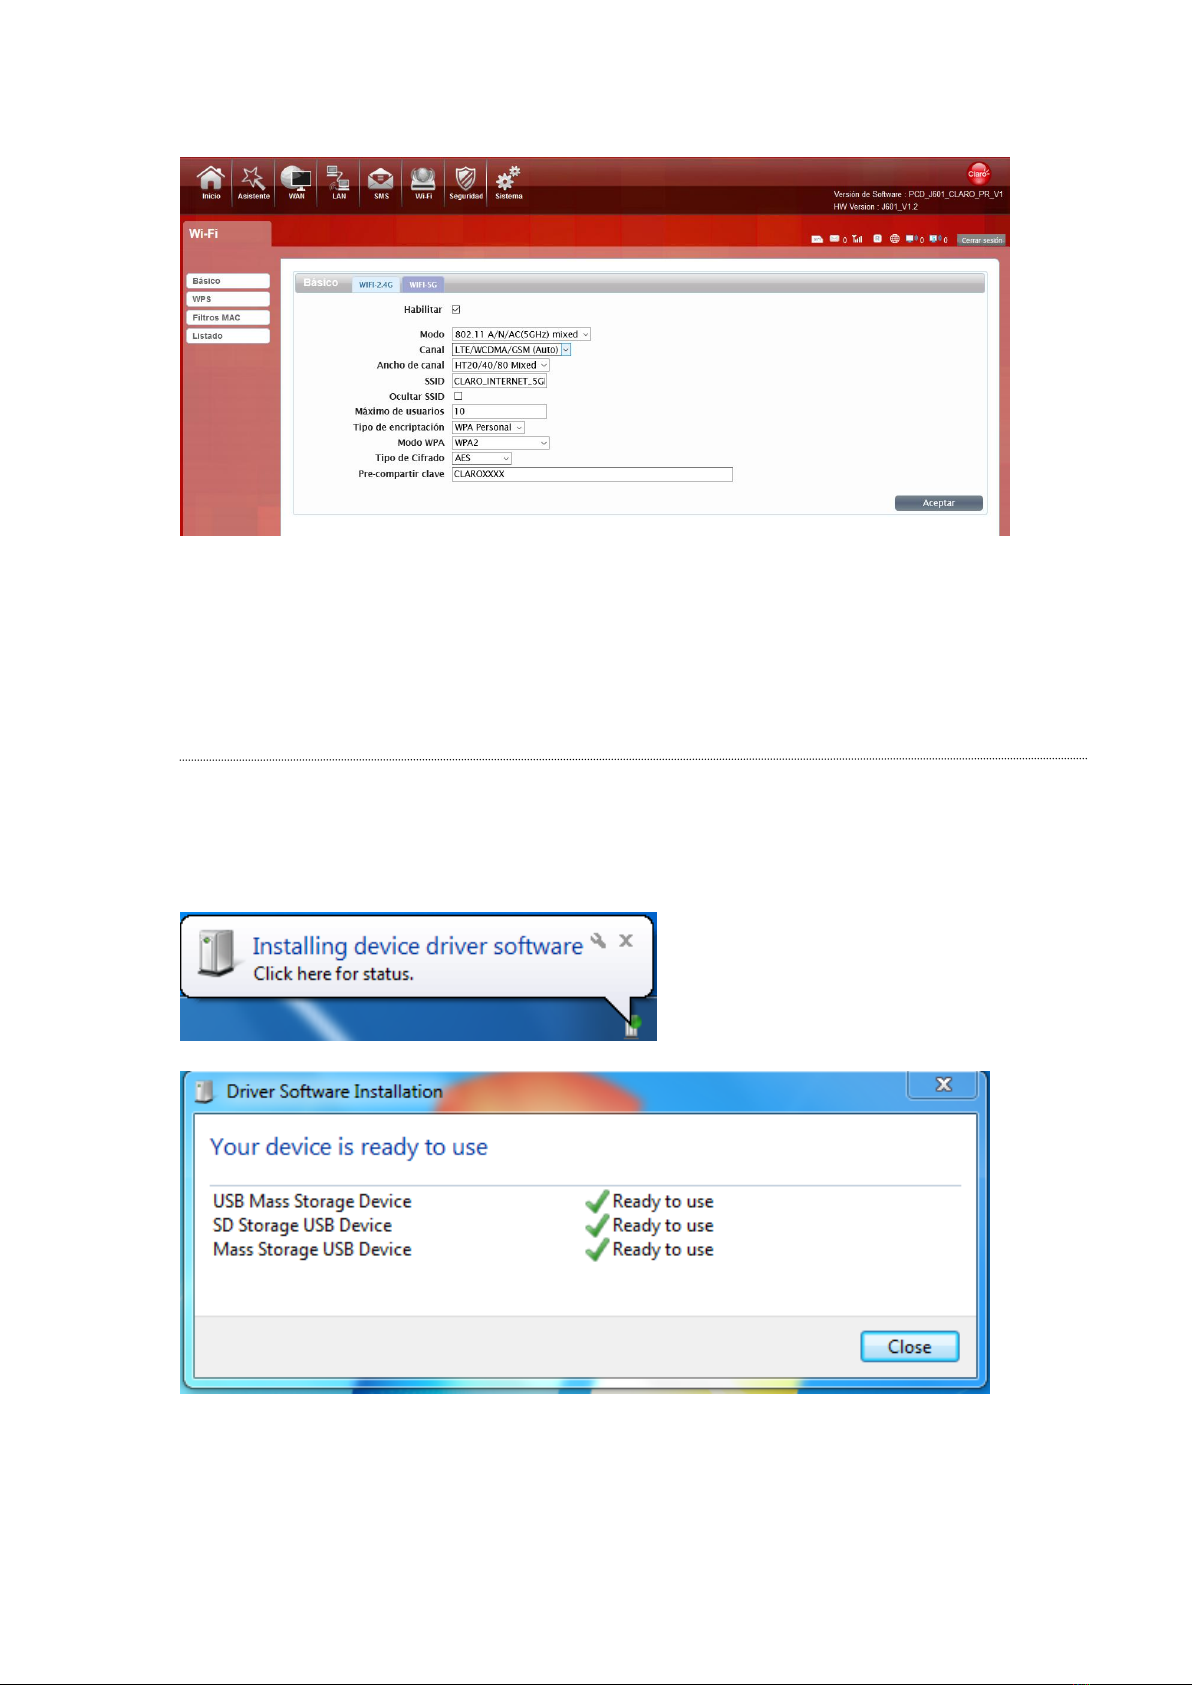
★Recommend that you start using J601 administration pages after setting a convenient
landing memorizing SSID and a higher safety factor Wi-Fi passwords
Install the driver and connecting the device
USB Connection: Windows 7 for example
1. Keep J601 powering on, Plug the device into your computer, it will shows like the following pictures step by
step.

2. Double-click the , wait for the installation to complete
3. Check the network card is installed correctly, like the following pictures

Or,
Establish Wi-Fi connection: you must ensure that the computer equipped with a wireless network card. If the
computer showed the presence of Wi-Fi connectivity, the wireless LAN is available. Otherwise, you need to check
your wireless network card is working properly. (The following will be 2.4GWi-Fi as an example)
1. In the Wi-Fi list, select the 2.4G SSID or 5G SSID consistent with J601 Wi-Fi, click Connect
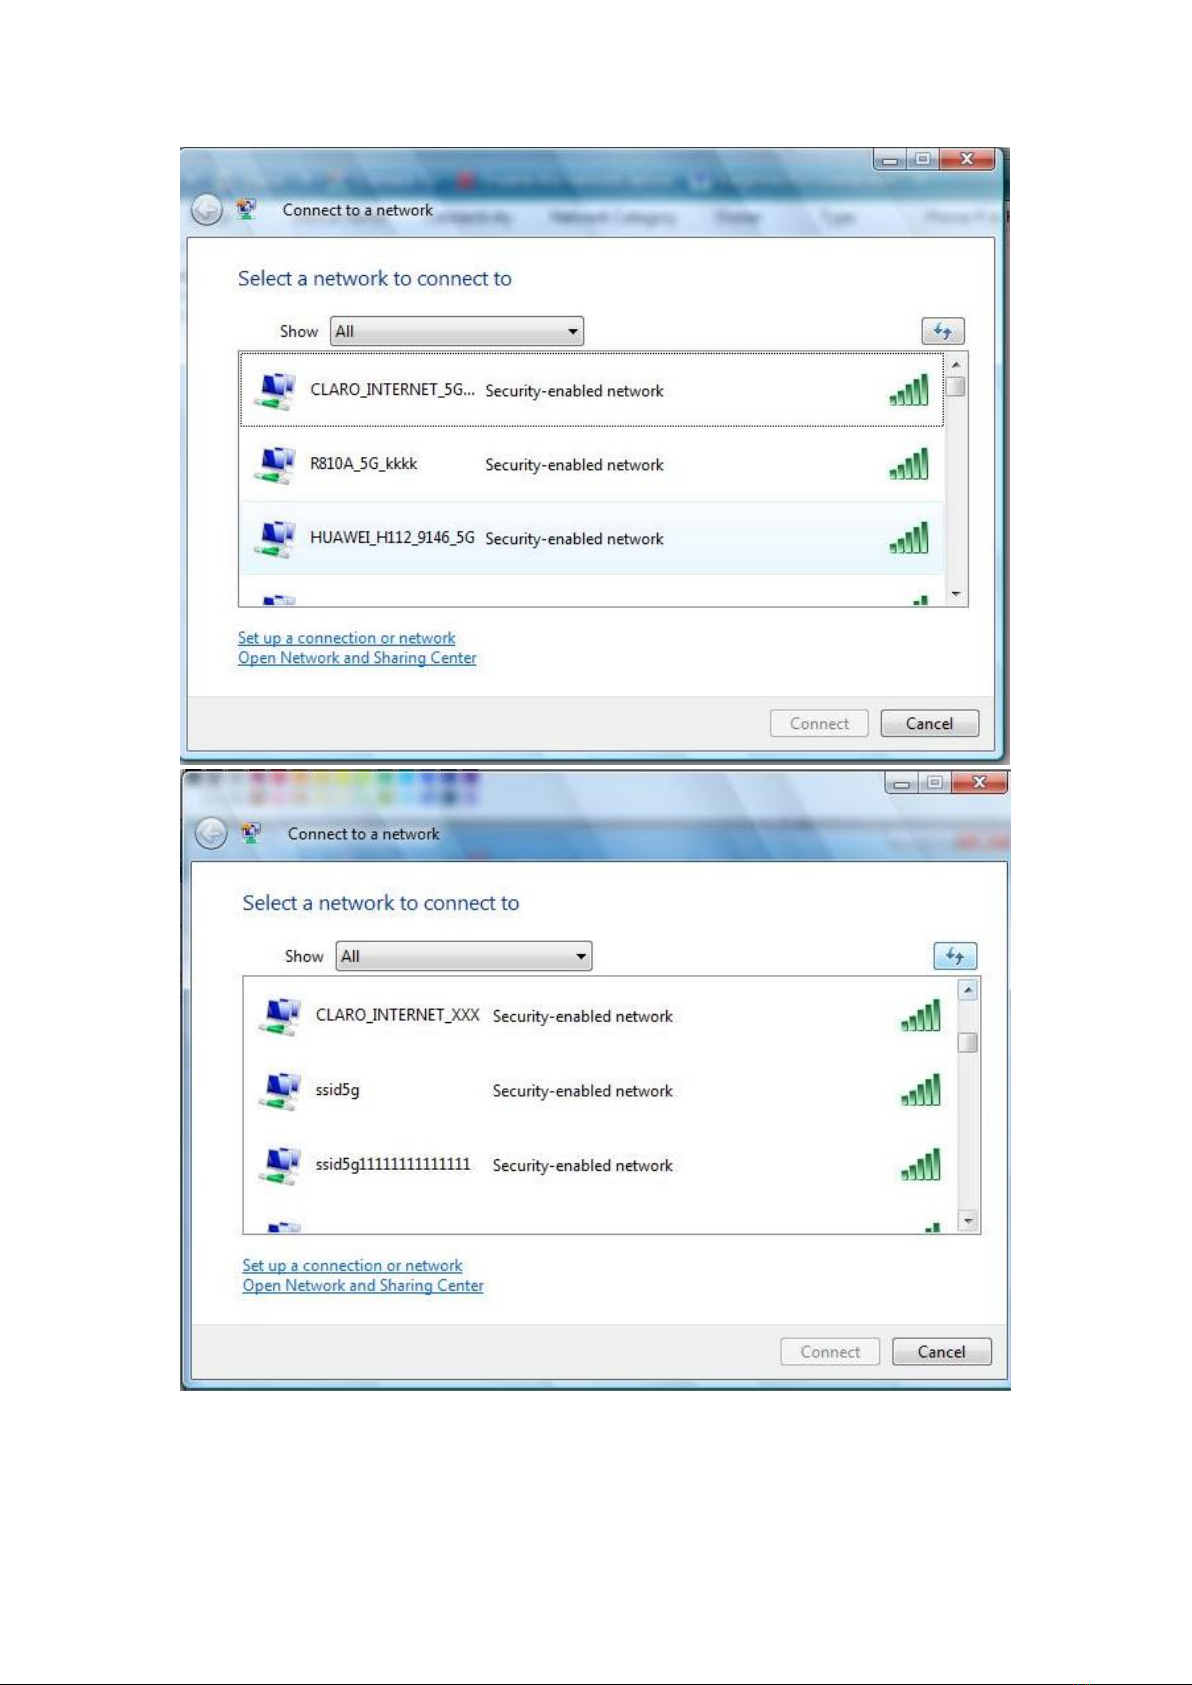
2. Enter the correct 2.4G or 5G Wi-Fi password, click Connect.

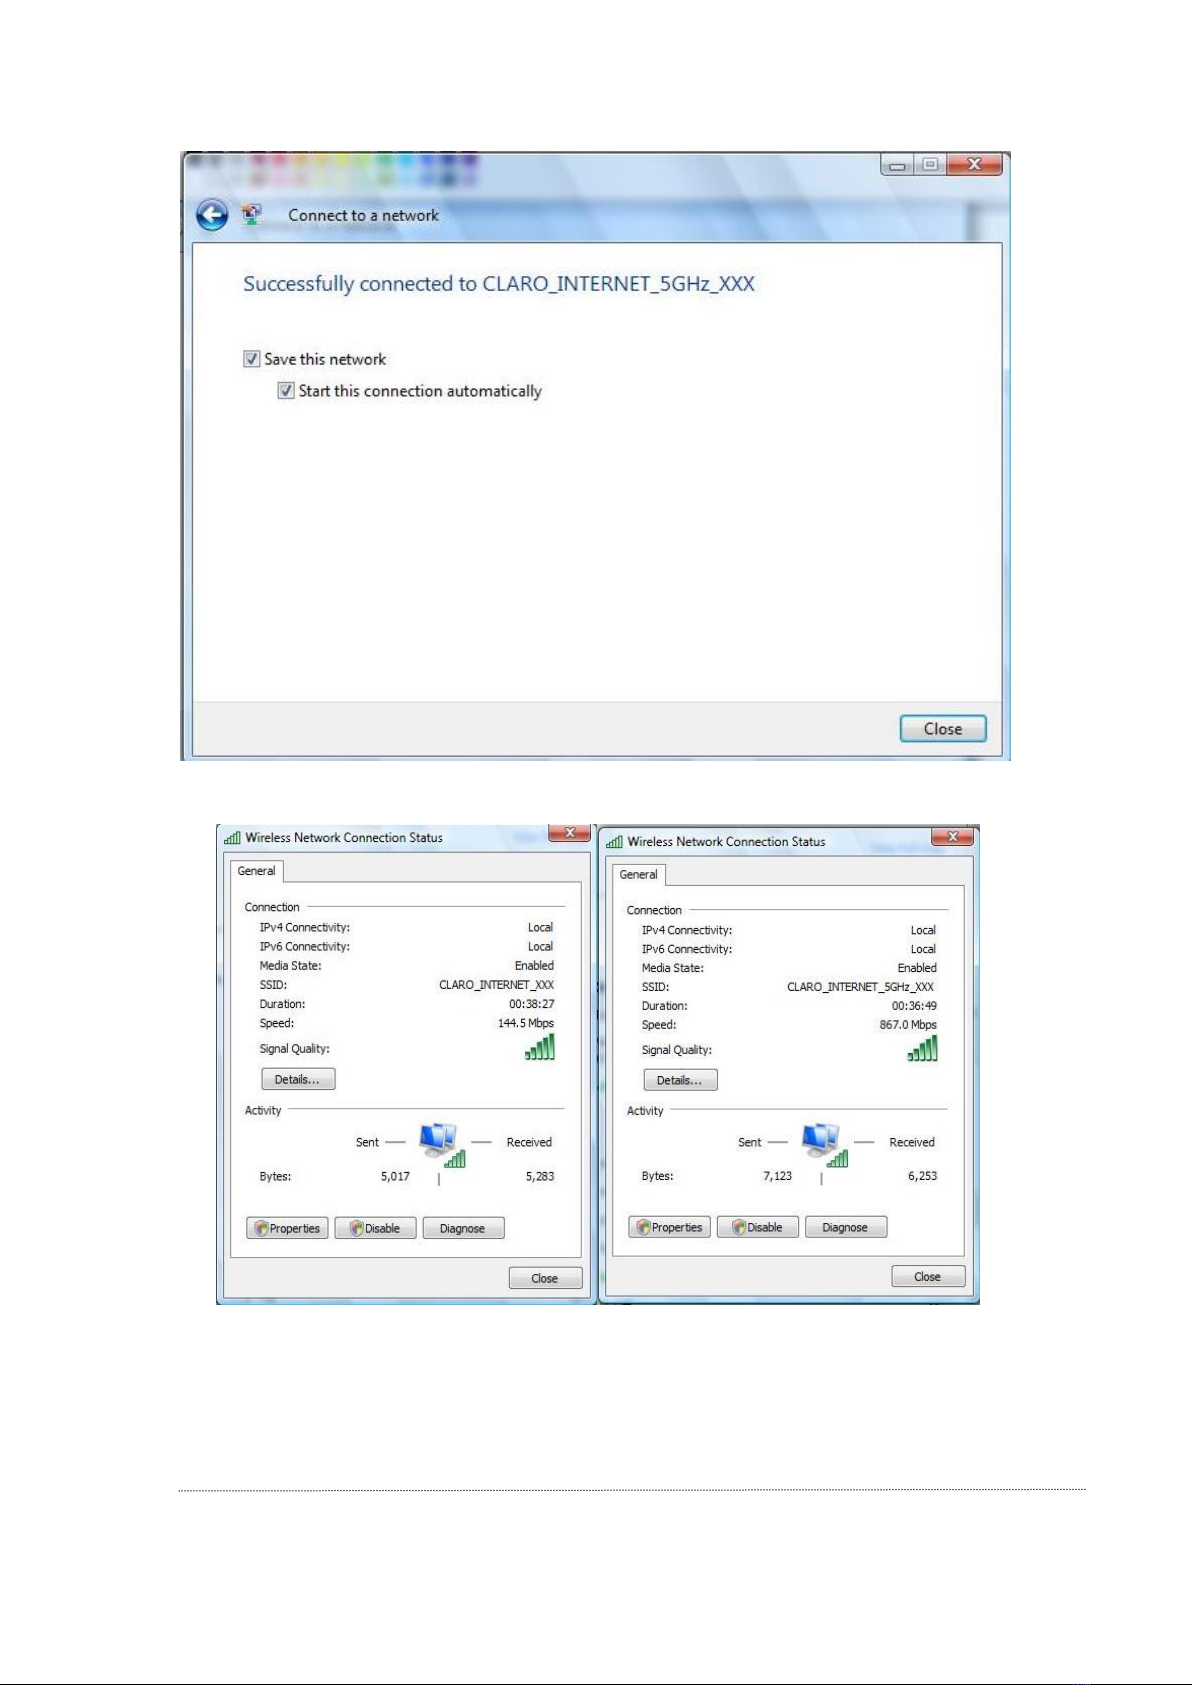
3. Wait a moment, Wi-Fi connection is displayed next to the name, Wi-Fi connection is successful
Table of contents


