–4–
ii. PRODUCT INFORMATION
•Compliant with OSHA's respirable crystalline
dust standards
•Heavy-duty metal and aluminum construction
•OSHA compliant for up to 7" grinders
•HEPA Filtration for improved indoor air quality
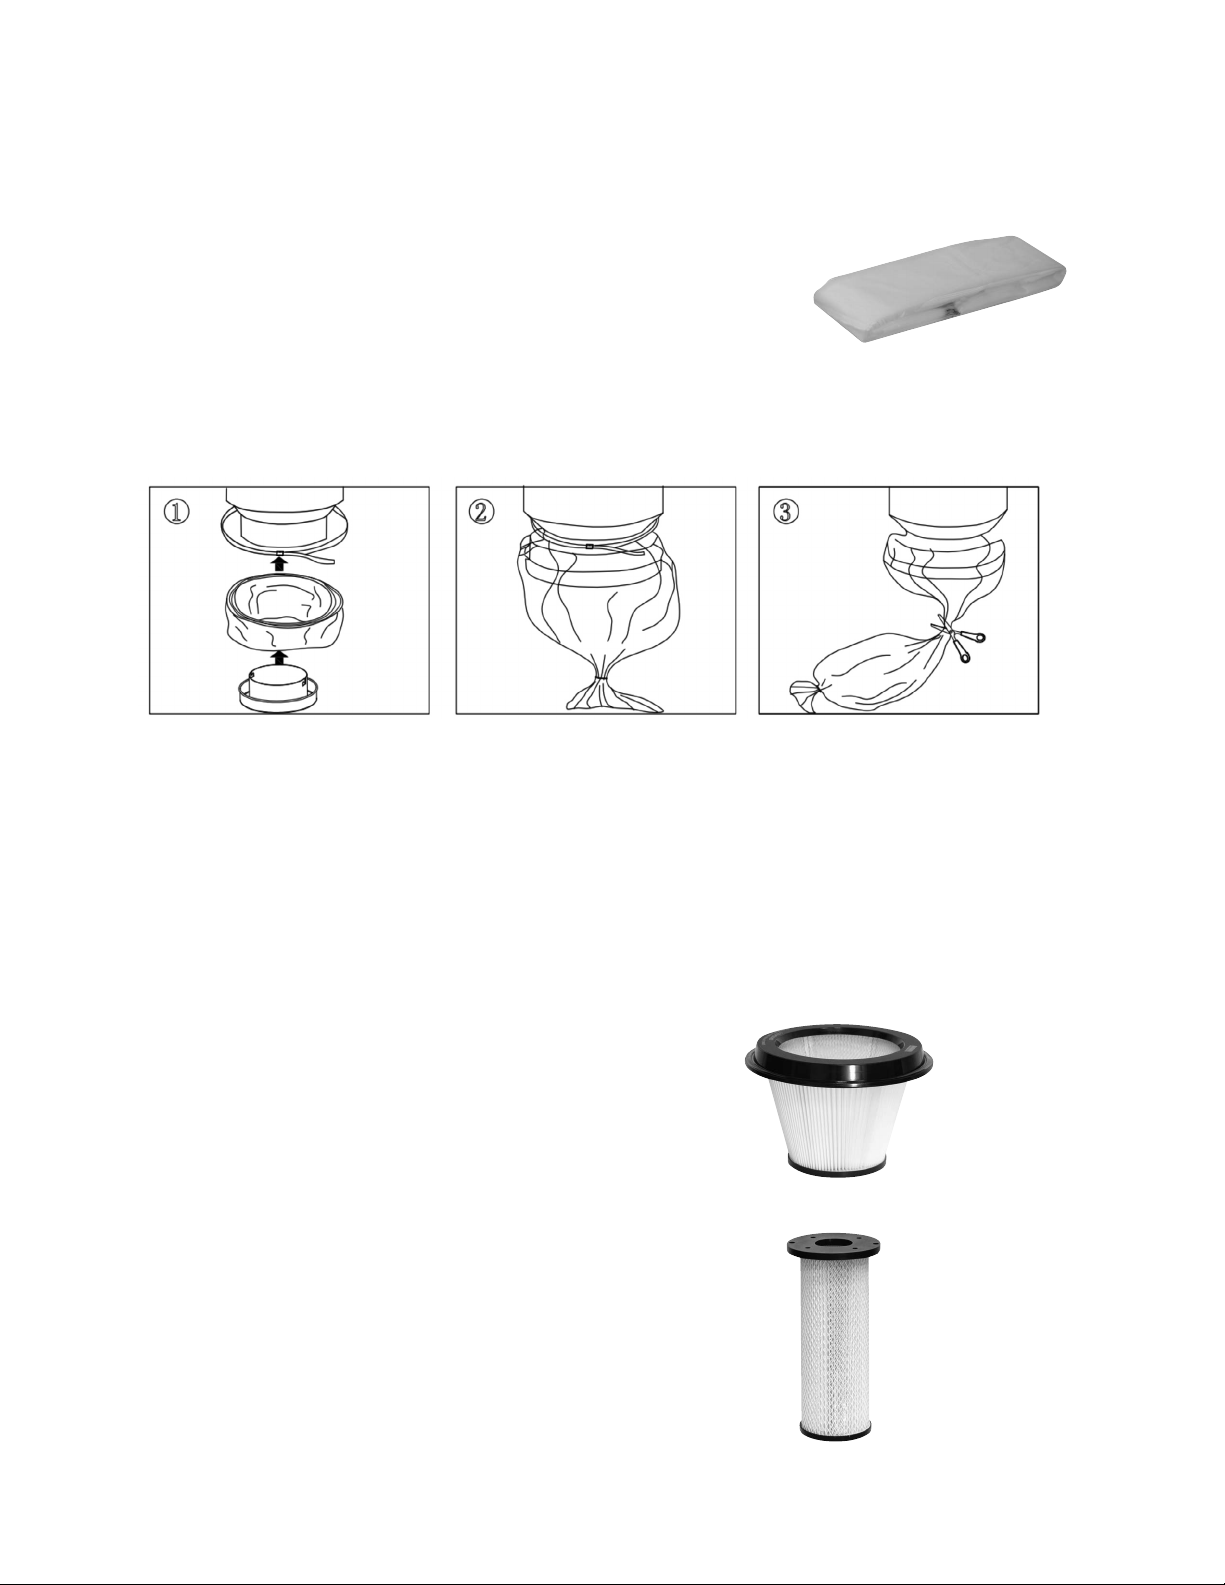
•Mess-free dust disposal with Pearl continuous
bagging system
•1 (PAV18.2); 2 (PAV26.2), or 3 (PAV36.2) switch
system allows you to activate each motor
independently
•1.5" hose (PAV18.2); 2" hose (PAV26.2 &
PAV36.2)
•Air pulse filter cleaning system efficiently purges
the pre-filter within the closed vacuum
•Certified cylindrical shaped HEPA filter
guaranteed 99.99% efficient at 0.3 microns
•Manometer, measures the negative pressure
within the tank and alerts the operator when filter
needs service
•Large heavy-duty wheels for easy transport over
power cords and other floor obstructions
•UL/CSA certified
•Hour meter, helps to monitor HEPA filter life
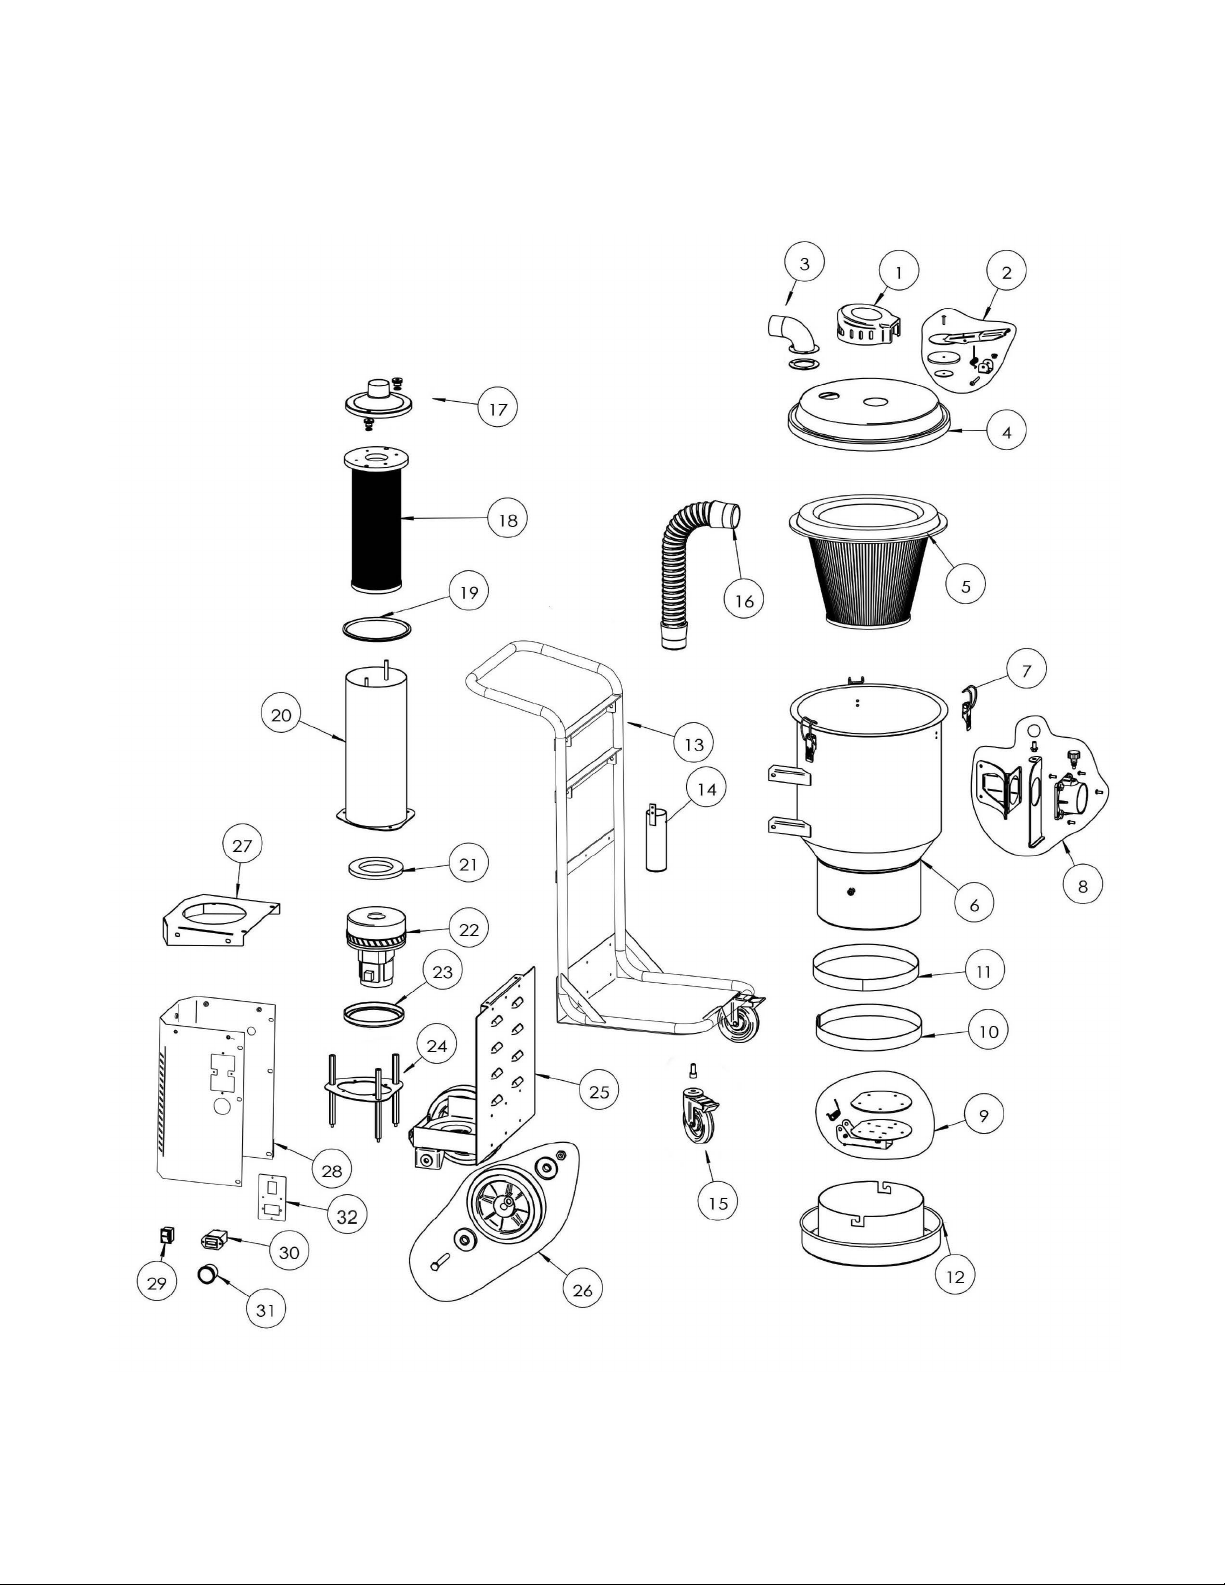
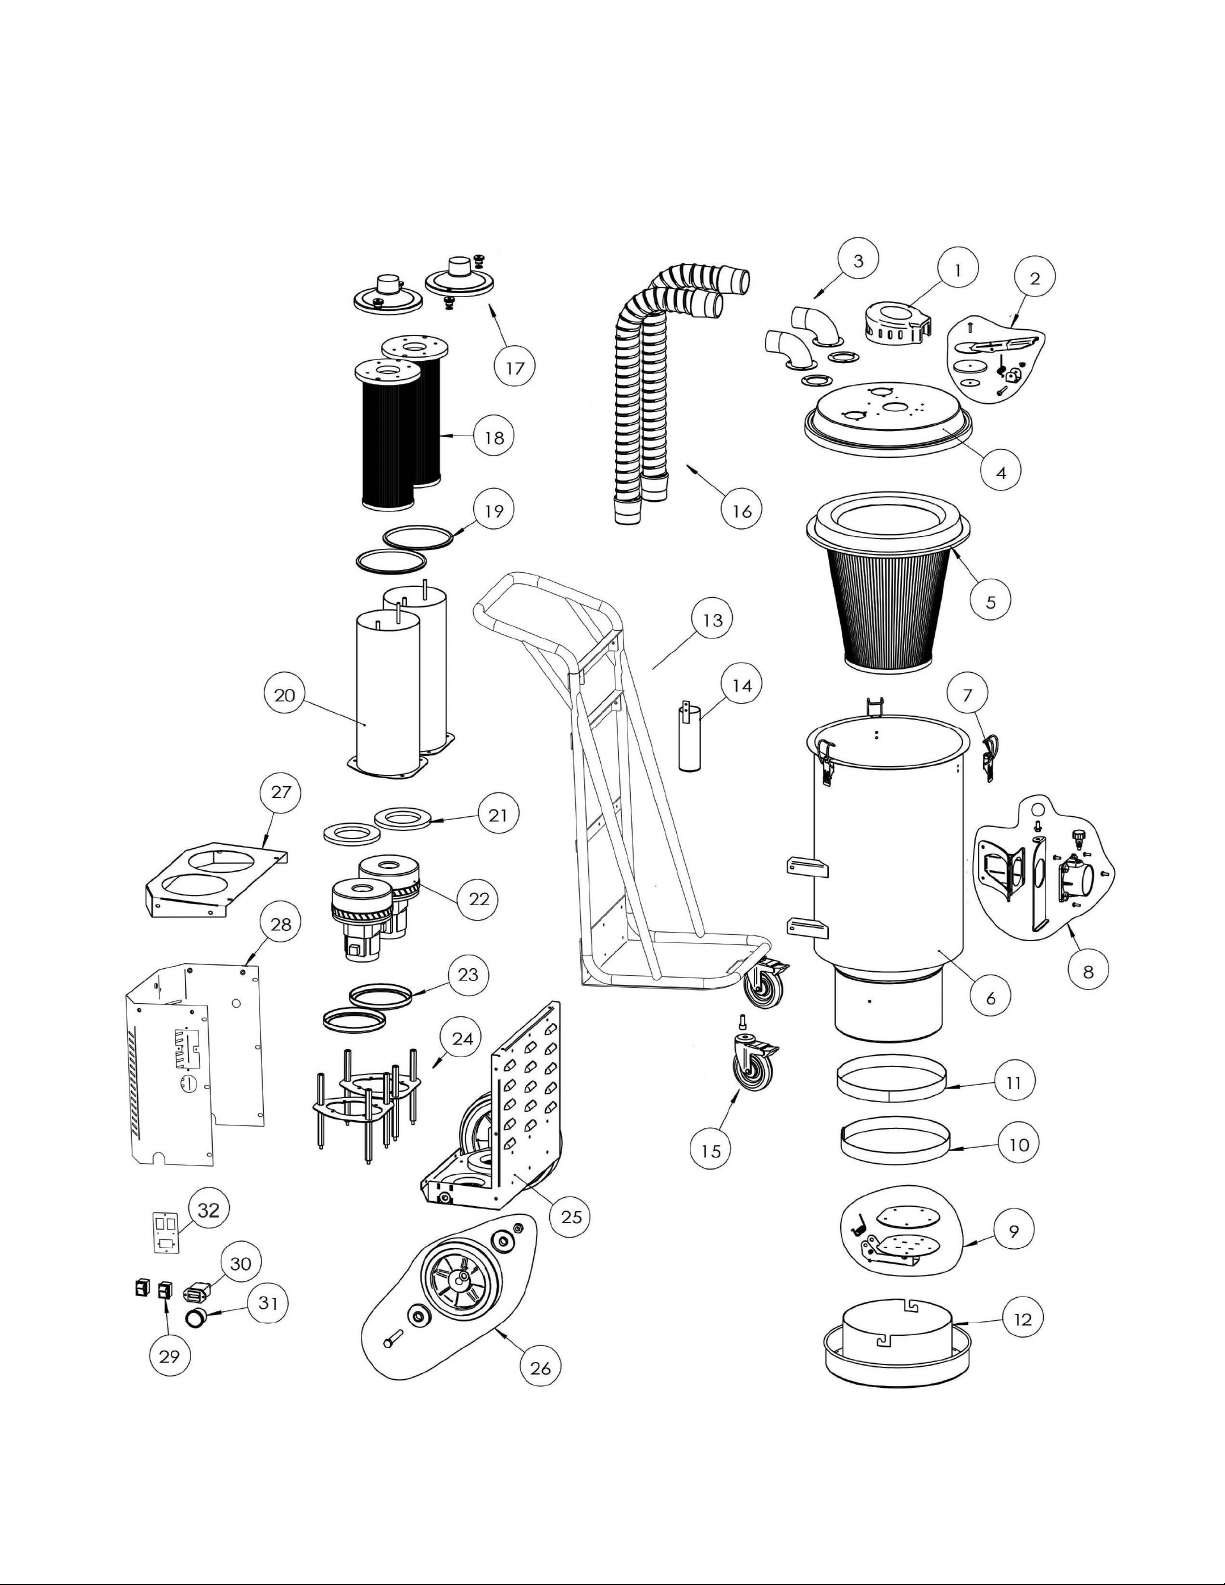
•Vacuum includes: Floor tool with brush, spare
brush, hose, wand, HEPA filter, anti-static filter,
and dust bag
•Two-year limited warranty
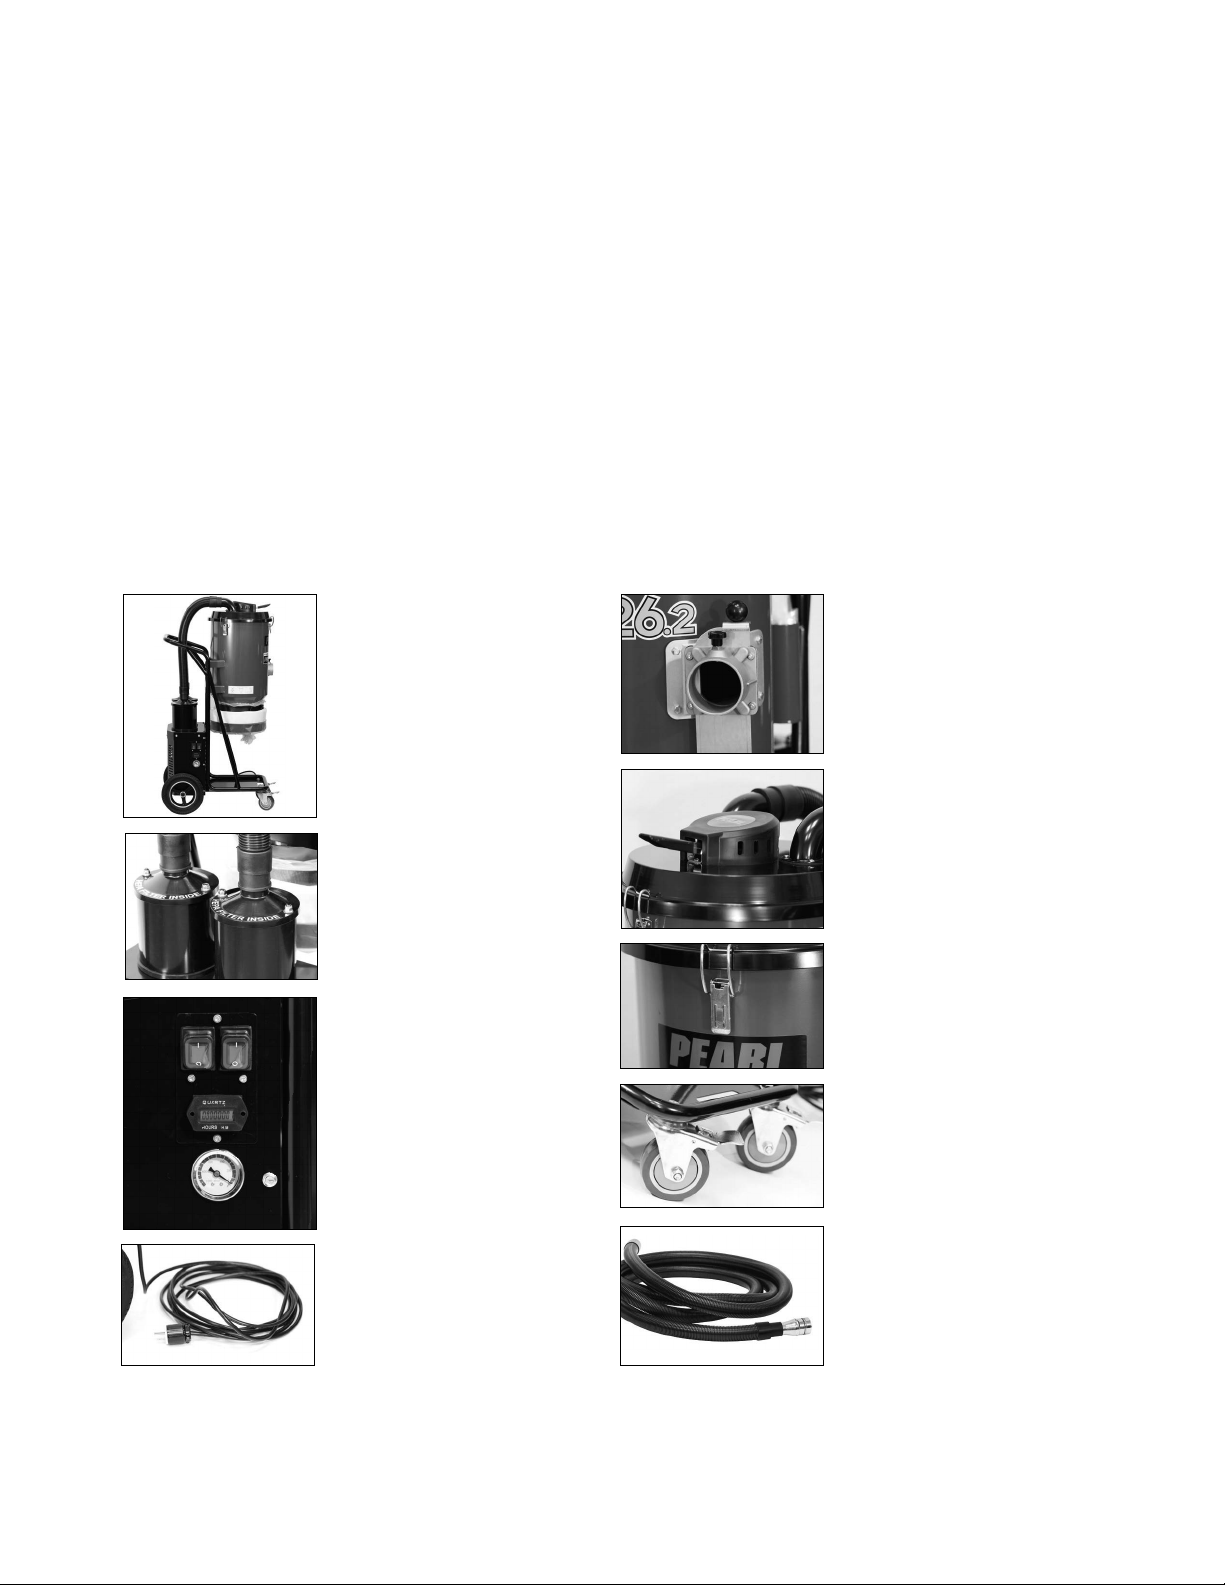
FRAME CONSTRUCTION
Heavy-duty construction for
industrial applications.
- Heavy gauge steel.
- All metal motor housing.
- Heavy-duty replaceable steel
parts that withstand the worst
environments.
Switch system allows you to activate
each motor independently.
- Allows use of one motor for small
dust shrouds where high CFM’s
are not needed.
- Easy access switch panel.
SWITCH SYSTEM
POWER CORD
Heavy-duty power cord.
Easy access to HEPA filters for
replacing or cleaning.
HEPA FILTER ACCESS
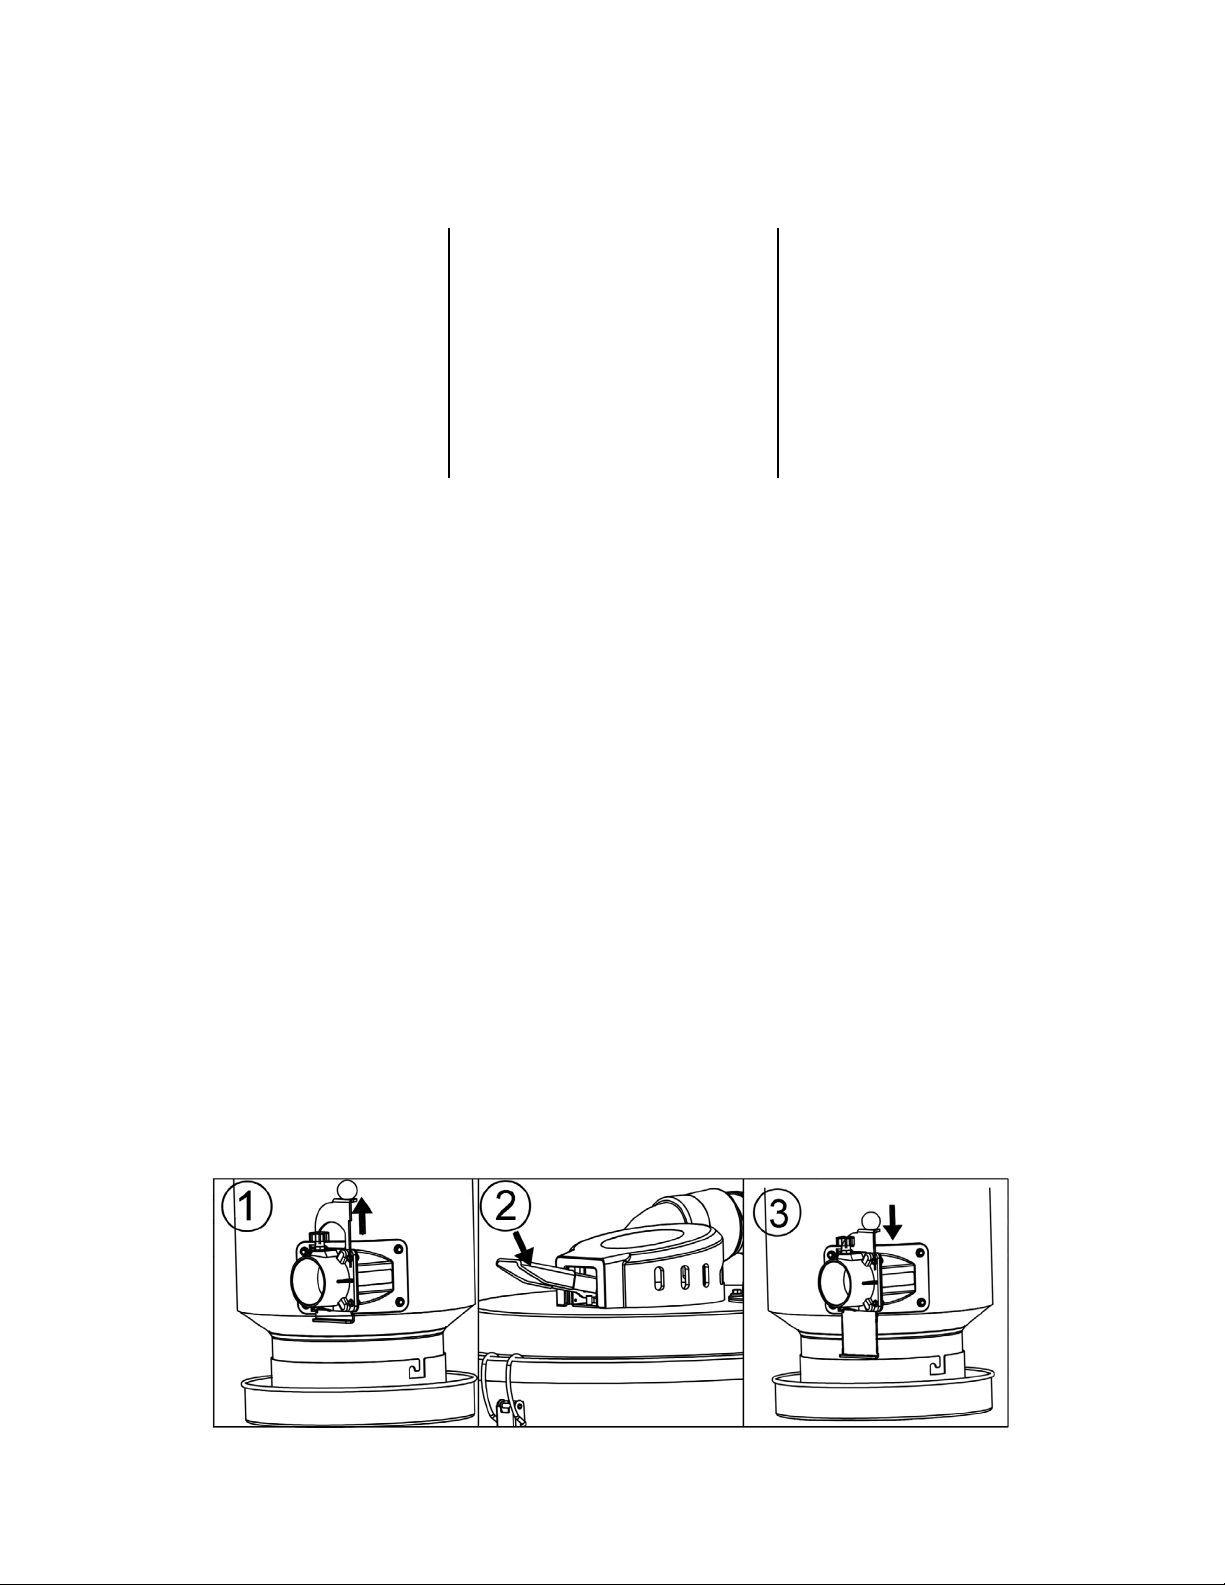
PREFILTER CLEANING
SYSTEM
No need to remove hose to use pre-filter
cleaning system.
- Easy access lever.
LATCHES
Heavy-duty replaceable locking
latches that place the correct
amount of pressure on the seal.
WHEELS
Heavy-duty swivel caster locking
wheels supported with large bolt to
box frame.
Heavy-duty hose.
INCLUDED HOSE
FILTER CLEANING SYSTEM
Metal cover to protect filter
cleaning system with lever.