21
Back Panel
43
44
45
46
47
48
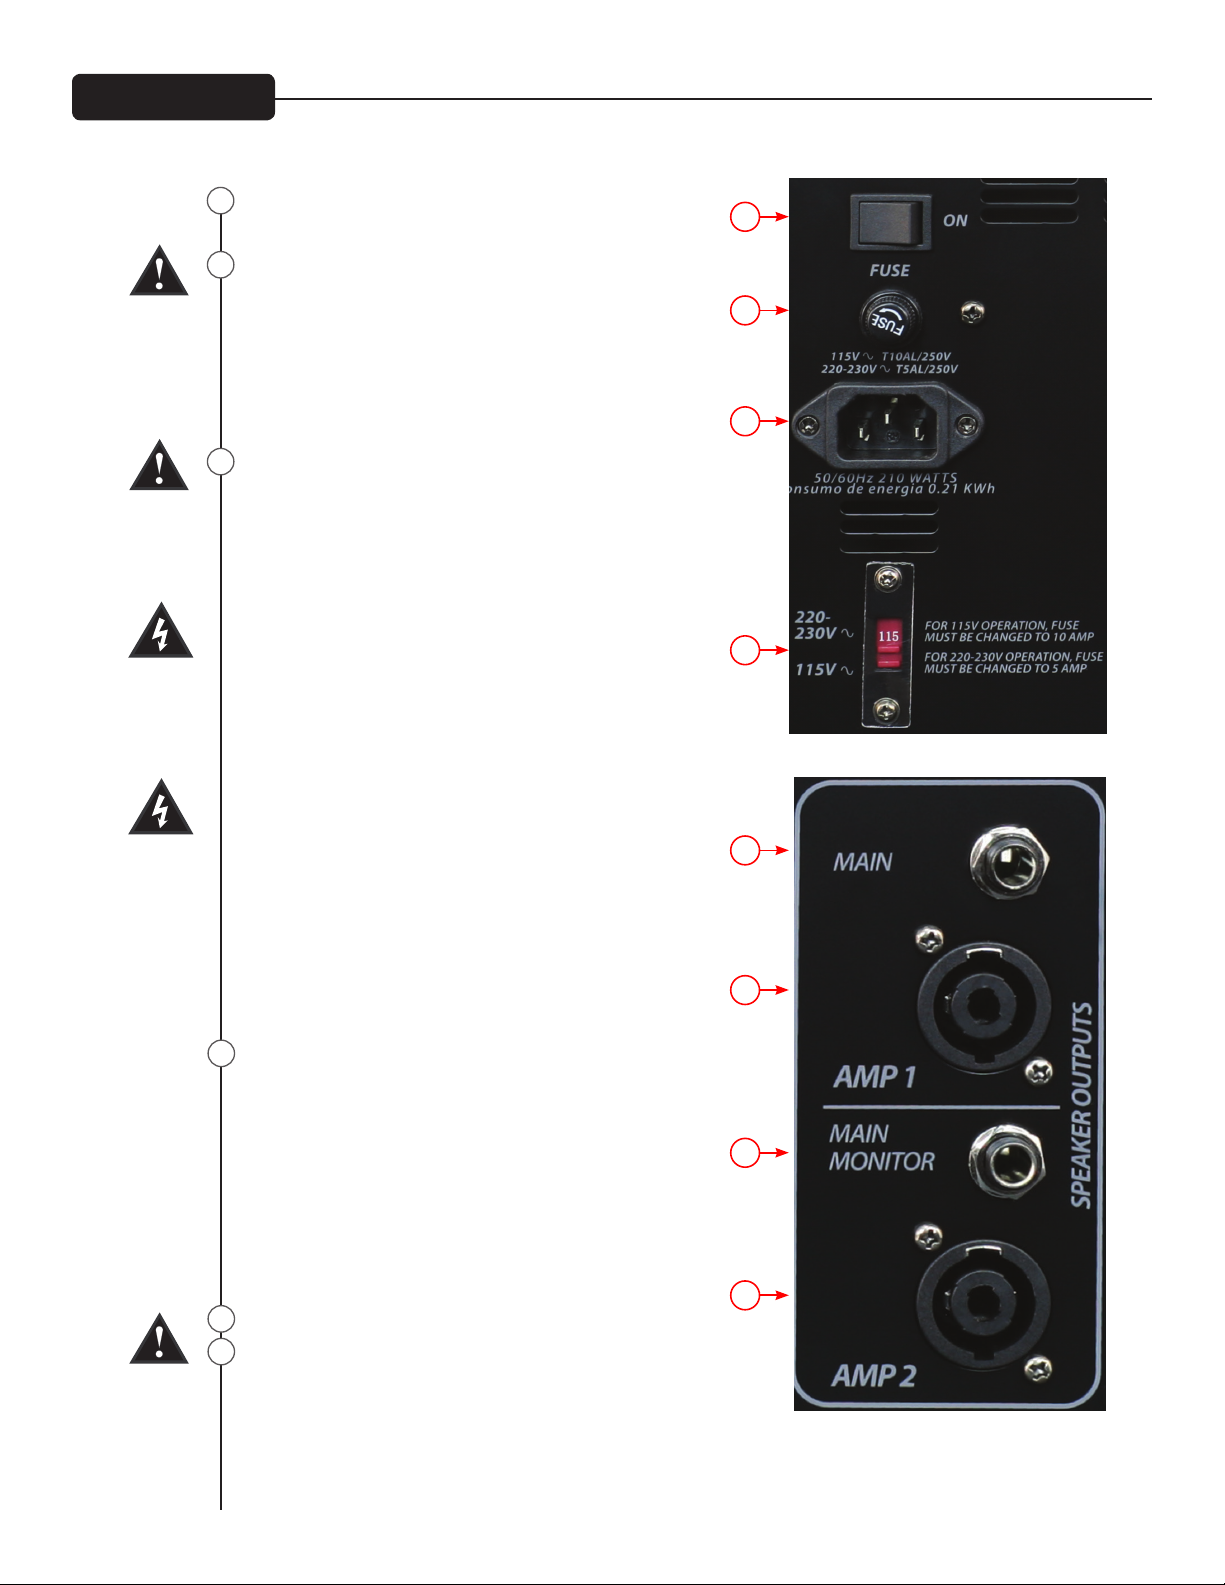
POWER SWITCH
This is the main power switch.
FUSE
This is the main safety fuse for the AC line voltage. Only
replace with a fuse of the exact type and rating. If the
fuse continues to open, do not over fuse. Take the unit
to an authorized Peavey service center.
NOTE: If the main AC voltage is changed, the fuse must
also be changed to one of the appropriate rating for
the voltage you are switching to.
AC POWER INLET
This is the receptacle for an IEC line cord, which provides
AC power to the unit. Connect the line cord to this
connector to provide power to the unit. Damage to the
equipment may result if improper line voltage is used.
(See line voltage marking on unit).
Never break o the ground pin on any equipment. It
is provided for your safety. If the outlet used does not
have a ground pin, a suitable grounding adapter should
be used and the third wire should be grounded proper-
ly. To prevent risk of shock or re hazard, always make
sure that the amplier and all associated equipment is
properly grounded.
NOTE: FOR UK ONLY
As the colors of the wires in the mains lead of this appa-
ratus may not correspond directly with the colored mark-
ings identifying the terminals in your plug, proceed as
follows: (1) The green and yellow wire must be connected
to the terminal which is marked with the letter E, or by
the earth symbol, or is colored green, or green and yel-
low. (2) The blue wire must be connected to the terminal
which is marked with the letter N, or the color black. (3)
The brown wire must be connected to the terminal which
is marked with the letter L, or the color red.
VOLTAGE SELECTOR SWITCH
This switch allows the user to select between 115VAC /
60Hz or 230VAC / 50Hz. To change the voltage selector,
you must first unscrew and remove the plastic cover that
protects the switch. After changing the voltage, please
replace the plastic cover to ensure the voltage level is
not inadvertently altered.
NOTE: The fuse MUST be changed to the appropriate
value to match the voltage you have selected. Please see
the note on the back of the mixer for the correct value.
MAIN / MONITOR SPEAKER OUTPUTS
A two-conductor 1/4" speaker output and Speakon jack
are assigned to each channel. Each amp is rated at 4
ohms minimum impedance. You may connect either
one 4-ohm, one 8-ohm or two 8-ohm speakers to
each output. Do not operate below rated minimum
impedance. For maximum power transfer, be sure to use
speaker cables and not instrument cables to connect to
the speakers. We recommend the use of 18-gauge or
larger speaker wire.
43
44
45
46
47
48
47
48