pellenc Cultivion User manual

pellenc s.a.
Route de Cavaillon
B.P. 47
84122 PERTUIS cedex
(France)
Tel : +33(0)4 90 09 47 00 Fax : +33(0)4 90 09 64 09
www.pellenc.com
58_80347_J - 02/2015
58_15_001A
USER GUIDE
READ THE USER GUIDE CAREFULLY BEFORE USING THE TOOL
ENG
Translation of the
original user guide

2
SAFETY INSTRUCTIONS .....................................................................3
GENERAL SAFETY INSTRUCTIONS FOR THE TOOL..................................................................3
SAFETY INSTRUCTIONS FOR THE WHEEL HOE .....................................................................5
SAFETY MEASURES FOR THE CHARGER AND THE BATTERY .........................................................5
SAFETY EQUIPMENT ...........................................................................................6
SAFETY REFLEXES.............................................................................................6
SAFETY INDICATIONS .......................................................................7
DESCRIPTION AND TECHNICAL CHARACTERISTICS .............................................8
TECHNICAL CHARACTERISTICS ..................................................................................8
PUTTING THE MACHINE INTO SERVICE .......................................................10
ASSEMBLY/DISASSEMBLY OF THE FRONT HANDLE ................................................................10
ASSEMBLING THE WORKING TOOL ..............................................................................10
STARTING AND USE ........................................................................12
HOLDING THE TOOL ...........................................................................................12
STARTING IN NORMAL MODE ...................................................................................12
STARTING IN CONTINUOUS MODE...............................................................................12
SPEED SELECTOR ............................................................................................13
ADJUSTING THE TOOL ANGLE ..................................................................................13
THE VARIOUS USES ...........................................................................................15
SERVICING................................................................................16
SERVICING SCHEDULE ........................................................................................16
TIGHTENING THE BLADES......................................................................................16
SHARPENING THE WORKING TOOL ..............................................................................17
REPLACING THE WORKING TOOL ...............................................................................17
OUT-OF-SEASON STORAGE ....................................................................................18
INCIDENTS ................................................................................19
«PELLENC SA» TERMS OF WARRANTY AND NON-RESPONSIBILITY CLAUSE .......................21
‘‘CE’’ STATEMENT OF CONFORMITY FOR MACHINES ............................................22
Table of contents

3
ENVIRONMENTAL PROTECTION
Your equipment comprises numerous materials which can be valorised or recycled. Entrust
these to your reseller or to an approved service centre so that they can be processed.
All through this user guide you will nd advisory notes and information entitled: REMARK, CAUTION /
WARNING.
A REMARK provides additional information, claries a point or explains a step to be followed in detail.
The CAUTION and WARNING advisories are used to dene a procedure which, if neglected or incorrectly
performed, may lead to serious damage to the equipment and/or personal injury.
This advisory:
G
indicates that if the procedures or instructions are not complied with, any damage will not
be covered by the warranty and the owner will be responsible for the repair costs.
Safety indications are also given on the tool; they remind you of the safety precautions to be taken. Identify
and read these indications before using the tool. Immediately replace any indications that may become
partially illegible or deteriorated.
Refer to the «SAFETY INDICATIONS» heading in order to identify the location of the safety
indications on the tool.
No part of this manual may be reproduced without the written consent of PELLENC. The technical
characteristics and the illustrations given in this manual are for information purposes and are in no way
contractual. PELLENC reserves the right to make any modication or improvement to its products as
deemed necessary without informing customers already in possession of a similar model. This manual
forms an integral part of the tool and must accompany the tool if it changes hands.
SAFETY INSTRUCTIONS
INTRODUCTION
Comply with the regulations in force in your country as concerns environmental protection
associated with your activity.
GENERAL SAFETY INSTRUCTIONS FOR THE TOOL
CAUTION Read all the safety measures and all the instructions.
Retain all the safety measures and instructions for later reading.
SAVE THESE INSTRUCTIONS
You must read THE WHOLE of this user guide before using the tool or before carrying out servicing
operations.
Comply scrupulously with the instructions and illustrations given in this document.
PLEASE KEEP THESE INSTRUCTIONS
This manual contains important information and operating instructions for the following tool:
CULTIVION hoeing machine

4
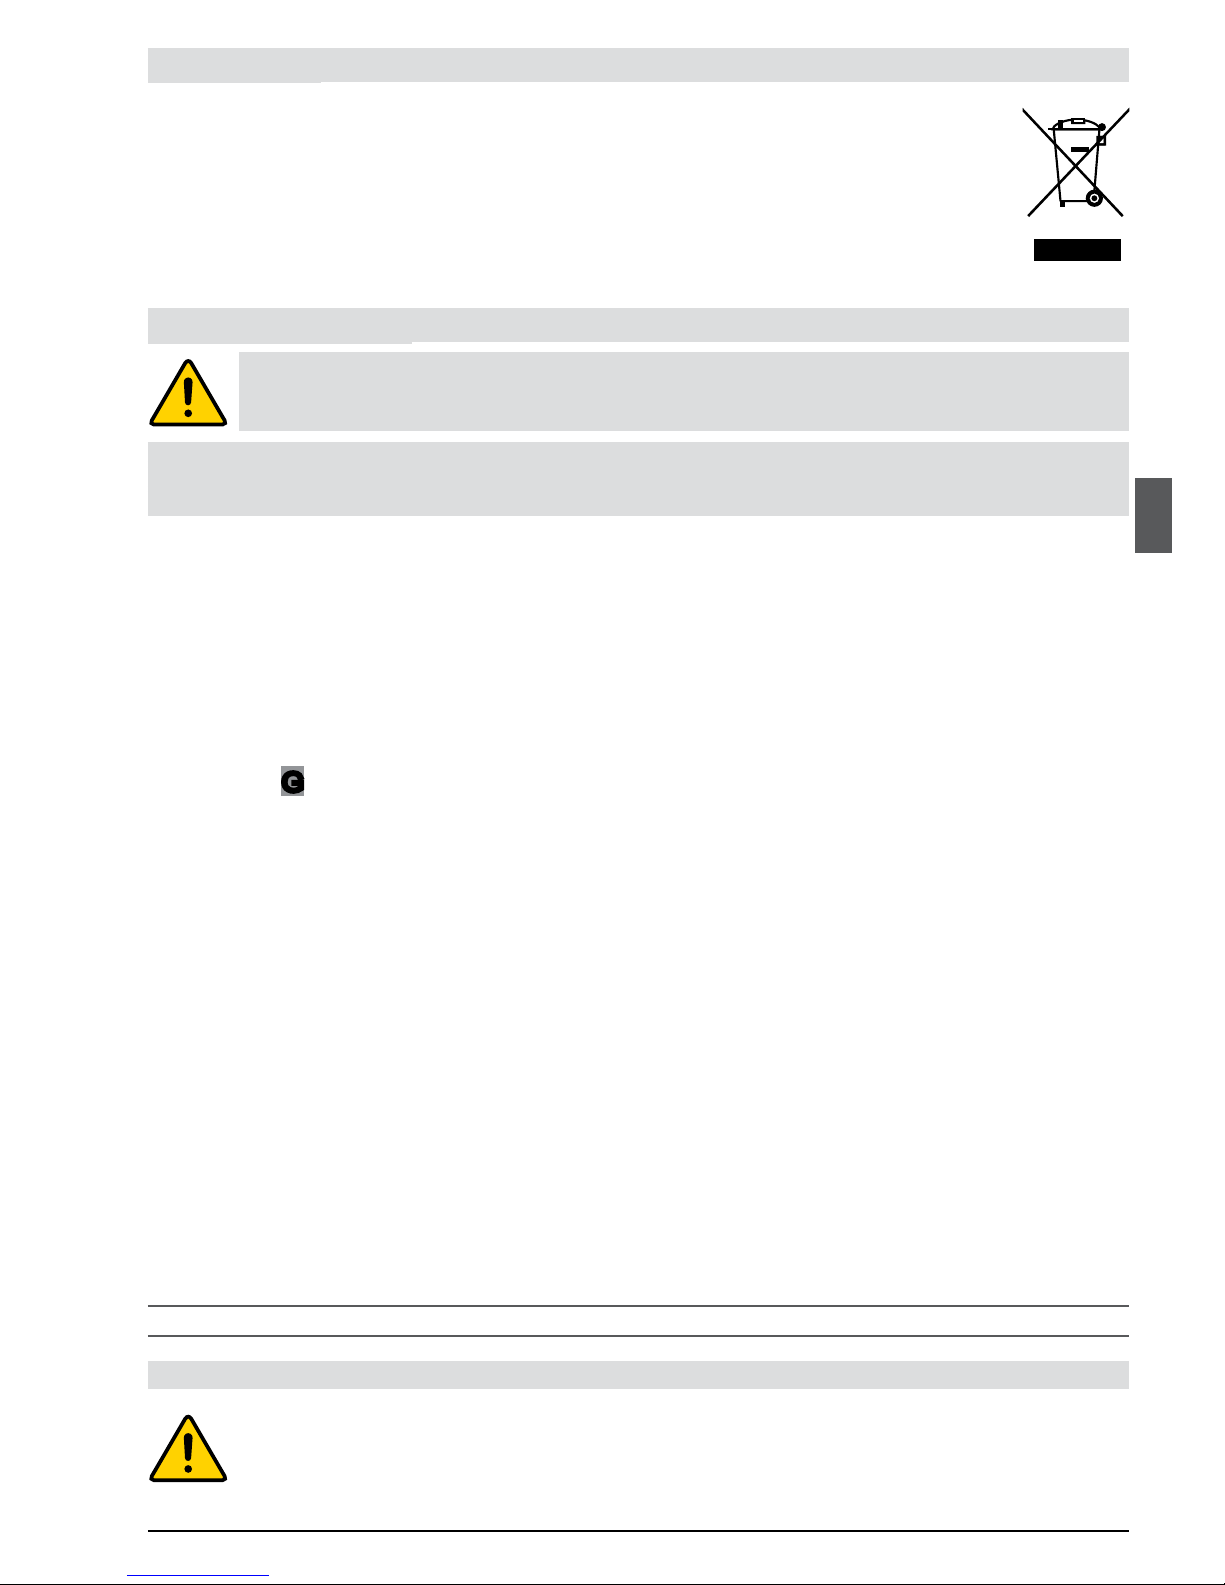
The Cultivion is a professional machine used exclusively for the maintenance of green spaces.
PELLENC declines all responsibility in case of damage caused by improper use and use other than for
which it is intended.
PELLENC also declines all responsibility in case of damage caused by the use of non-genuine parts or
accessories.
SAFETY INSTRUCTIONS
This appliance is not intended for use by persons (including children) with reduced physical,
sensory or mental capabilities, or lack of experience and knowledge, unless they have been given
supervision or preliminary instructions by a person responsible for their safety.
WORK AREA SAFETY
a. Keep the work area clean and well lit.
b. Do not use electric tools in an explosive atmosphere, for example in the presence of ammable liquids,
gases or dust.
c. Keep children and persons present away when using the tool.
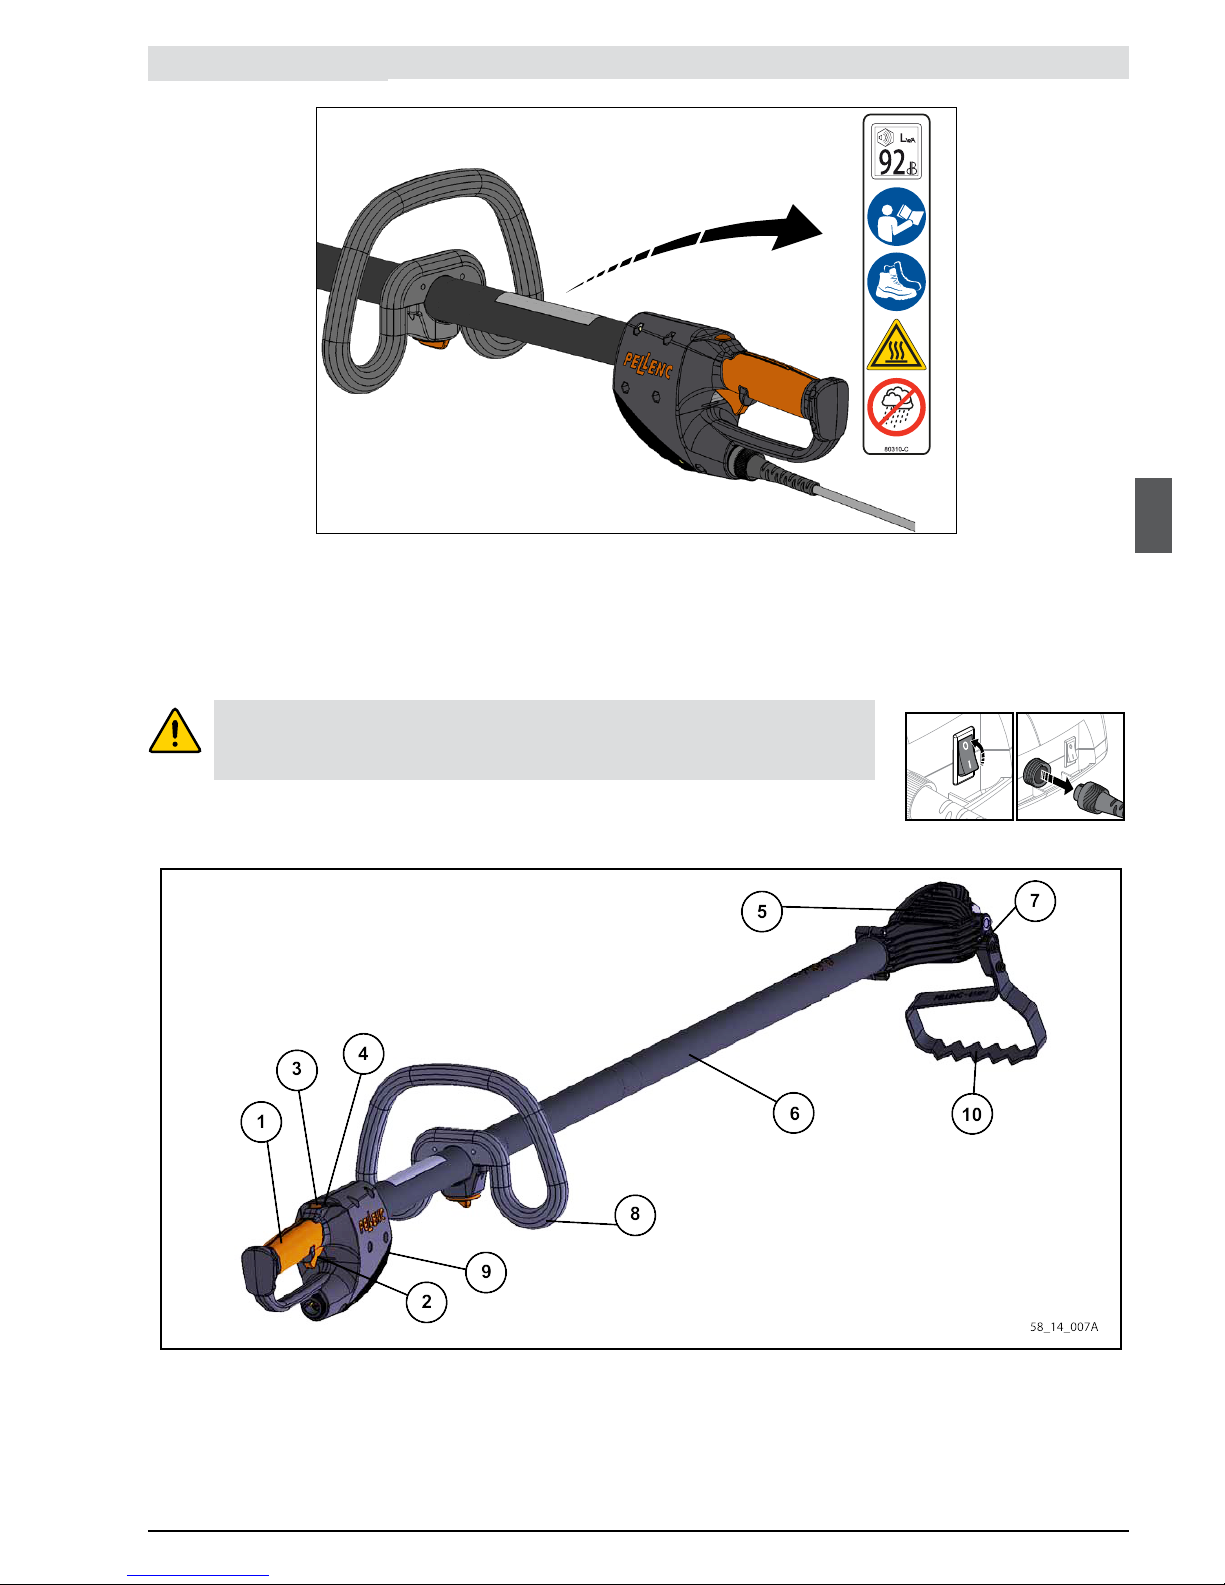
ELECTRICAL SAFETY
a. The plugs of the electric tool must be adapted to the base. Never modify the plug in any way
whatsoever. Do not use adaptors with grounded tools.
b. Avoid any body contact with grounded surfaces such as pipes, radiators, cookers and refrigerators.
c. Do not expose tools to rain or damp conditions.
d. Do not misuse the power cord. Never use the power cord to carry, pull or disconnect the tool. Keep the
power lead away from heat, lubricant, sharp edges or moving parts.
e. When using a tool outdoors, use an extension adapted to outdoor use.
f. If you must use a tool in a damp place, use power supply protected by a residual current device (RCD).
PERSONAL SAFETY
a. Remain vigilant, watch what you are doing and use common sense when using the tool. Do not use a
tool if you are tired or under the inuence of drugs, alcohol or medication.
b. Wear safety equipment. Always wear eye protection.
c. Avoid any untimely starting of the device. Make sure the switch is in the off position before connecting
the tool to the mains and/or battery pack, picking it up or carrying it.
d. Remove any adjustment key before starting the tool.
e. Do not rush. Adopt a suitable position and remain balanced at all times.
f. Wear appropriate clothing. Do not wear loose clothing or jewellery.
g. Keep hair, clothing and gloves away from moving parts.
h. If systems are provided to connect dust extraction and recovery equipment, make sure these systems
are connected and properly used.
TOOL USAGE AND MAINTENANCE
a. Do not force the tool. Use a tool suited to your application.
b. Do not use the tool if the switch does not allow it to be switched on and off.
c. Disconnect the plug of the power supply source and/or battery pack from the tool prior to any

5
SAFETY MEASURES FOR THE CHARGER AND THE BATTERY
Refer to the Pellenc tools battery manual.
SAFETY INSTRUCTIONS
SAFETY INSTRUCTIONS FOR THE WHEEL HOE
1– Clear the work area before working.
2– Make sure that the cultivion is not in contact with anything other than soil and vegetation.
3– Take up a position so as to prevent accidents.
4– Do not use the Cultivion to dig hard, stony ground or near large roots.
5– Keep all persons away when starting up and during use.
6– Never modify the connector in any way whatsoever.
7– As the carbon of the pole conducts electricity, always keep the hedge trimmer well away from power and
telephone lines, and other sources of electric power.
8– THIS TOOL MAY CAUSE SEVERE INJURIES. Read carefully the intructions relative to the proper
handling, operation, maintenance, startup and stop of the hedge trimmer. Familiarize with all its controls
and proper use.
9– Wear safety equipment. Always wear safety footwear.
10– Before starting the motor, make sure that the working tool is not in contact with any object.
11– Always use a suitable lifting device complying with the working regulations in force for overhead works.
12– When in use, the electric motor of the tool may heat up (risk of burns). Avoid contact with skin, clothing
or any ammable products (risk of explosion) during and after use.
13– Nobody other than the user shall be within a radius of 3 meters.
adjustment, change of accessories or before putting the tool away.
d. When not in use, keep tools out of reach of children, and do not allow persons to use the tool if they
do not know how to use it and if they have not read these instructions.
e. Comply with tool servicing instructions. Check that the moving parts are not misaligned or jammed,
that there are no broken parts or that there is no other condition which could affect the operation of
the tool. In the event of damage, have the tool repaired before using it.
f. Keep the cutting components sharp and clean.
g. Use the tool, accessories, blades etc., in accordance with these instructions, taking into account the
working conditions and the work to be performed.
MAINTENANCE AND UPKEEP
a. Have the tool serviced by a qualied repairer using only identical spare parts.

6
1 5
2
6
3
7
4
8
SAFETY MEASURES
SAFETY EQUIPMENT
SAFETY INSTRUCTIONS
Protective equipment Wearing is
1 Helmet
2Visor
3 Hard-wearing gloves
4Safety footwear Mandatory
5 Ear protection Recommended
6Safety goggles Recommended
7Safety jacket or over-sleeves
8Protective trousers Recommended
SAFETY REFLEXES
• Hold the rear handle of the cultivion with the right hand and the front handle with the left hand.
• Hold the left arm straight for better control.
• Use working tools of Pellenc origin.
• Maintain working tools in good operating condition.
• Remain in a steady position.
• Kepp feet away from the working tool.
• Only work soil with the cultivion.

7
1
2
3
4
5
58_12_002B
56_10_016A
1
2
3
4
9
8
6
57
10
58_14_007A
SAFETY INDICATIONS
WARNING:
Before working on the machine, check that the On / Off switch is in
the off position «0» and disconnect the battery power lead.
1– Guaranteed sound power level.
2– Read the user guide.
3– Safety shoes are mandatory.
4– Risk of burns (motor - electronic board cooling radiator).
5– Do not expose to rain.
1– Rear Handle
2– Activating trigger
3– Speed selector (4 speeds)
4– Power ON light and speed indicator
5– Pellenc Motor
6– Aluminum Pole
7– Working tool support
8– Front handle
9– Electronic board cooling radiator
10– Working tool

8
DESCRIPTION AND TECHNICAL CHARACTERISTICS
TECHNICAL CHARACTERISTICS
Cultivion
Model Fixed pole
Revolutionary Pellenc motor with electronic switch-over
Power 380 W
Weight 3100 g
Dimensions (L x w x H) in mm 400 x 1710 x 300
Working tool width as per model
Working tool oscillation frequency 13 à 15 Hz
Working capacity (time) According to use and battery type
Determining the sound levels and vibration rates is based on the operating conditions at the maximum
nominal rating.
Speed 1 Speed 4
Maximum A-weighted sound pressure level (ref. 20 µPa) at the position of the user LpA = 75 dB(A) LpA = 78 dB(A)
Uncertainty K = 2,5 dB(A) K = 2,5 dB(A)
C-weighted peak sound pressure (ref. 20 µPa) at the position of the user LpC < 130 dB(C)
Values dened as per sound measurement standards NF EN ISO 11201 and NF EN ISO 3744.
CULTIVION Hoeing machine Speed 1
(800 strokes/min)
Speed 4
(885 strokes/min)
Front handle, a 9.5 m/s² 17.5 m/s²
Rear handle, a 8.5 m/s² 12.0 m/s²
Measurement uncertainty, K 3.0 3.0
Vibration emission value according to EN ISO 22867 and EN 50260-1
Symbol Value Unit Reference Comment
LWAm 91 dB(A) 1 pW Measured sound power level
LWAg 92 dB(A) 1 pW Guaranteed sound power level
The recording of the measured sound power level and of the guaranteed sound power level has been performed according to a
procedure in accordance with directive 2000/14/CE appendix V.

9
58_11_001A
58_11_002A
58_11_003A
58_11_004A
58_12_004A
DESCRIPTION AND TECHNICAL CHARACTERISTICS
Weeding tool with a 220 mm wide blade.
It is used to work soil in depth.
Weeding tool with a 160 mm wide blade.
It is used to work soil in depth.
Weeding tool with a 220 mm long blade with a
reduced work depth.
It is used for surface weeding only.
Weeding tool with a 160 mm long V-shaped blade.
It is used to plow furrows and weed around the
plants and shrubs while protecting the roots
Arbeidsverktøy med 80 mm langt blad.
Den brukes for å grave mellom plantevekstene,
på trange steder. Den lille størrelsen gjør at
vibrasjonene reduseres.

10
58_10_028A
3
2
1
58_10_020A
58_14_001A
PUTTING THE MACHINE INTO SERVICE
ASSEMBLY/DISASSEMBLY OF THE FRONT HANDLE
ASSEMBLY :
• Install the adjuster knob (2) and front handle (3)
with the 2 bolts (1).
• Lock the adjuster knob (2) in order to block the
front handle's position on the cultivion.
DISASSEMBLY :
• Unlock the adjuster knob (2).
• Unscrew the 2 bolts (1) and remove the front
handle (3) and adjuster knob (2).
ASSEMBLING THE WORKING TOOL
• The machine's head has a rotation axis which is
graduated from de -4 to +4 passing through the 0
position.
• Install the working tool on its support using the two
assemblies (screw and nut).
Tighten the screws to a torque of 6 N.m.
WARNING! Wear protective gloves when handling the working tool.

11
1
2
3
4
58_14_003A
G
G
WARNING: Never work with loose tightening screws.
• Place the working tool support on the output shaft
(1), aligning the support marker (2) with the "0"
marker on the casing (1).
For further information on how to adjust the working
tool position, (see page 13)
PUTTING THE MACHINE INTO SERVICE
ASSEMBLING THE WORKING TOOL
• Install the washer and screw (3) and tighten them
with max torque 6 N.m.
ATTENTION: Do not forget the nut (4) during assembly.

12
G
G
1
58_10_010B
WARNING! Do not work anywhere other than in soil.
1– Hold the machine by the rear and and front handles and check that nothing is touching the working tool.
2– The cultivion is in its starting position.
HOLDING THE TOOL
CAUTION:
Never disconnect the electrical lead from the battery without checking that the ON/OFF switch is
in the OFF position «0».
STARTING AND USE
A. Put the machine into its working position with the
working tool on the ground.
B. Set the Pellenc tool battery ON/OFF switch to
the ON position «I».
From this moment the machine is energized and
is ready to operate.
C. Raise the machine so that it doesn't touch the
ground when starting.
D. Press the starting trigger (1).
E. The machine then operates as long as you keep
the starting trigger (1) pressed.
F. Release the trigger, the machine stops.
A. Place the machine in its starting position, with the working tool on the ground
B. Press the start-up trigger (1).
C. Switch the Pellenc tools battery start/stop switch to the «I» on position, while holding down the trigger (1).
D. Wait for the indicators to light up, and release the trigger.
The machine is now energized and is ready to operate.
E. Raise the machine so that it doesn't touch the ground when starting.
F. Press the start-up trigger once (1) and release.
G. The machine operates continuously.
H. Press the start-up trigger again (1) and release.
I. The machine stops.
STARTING IN NORMAL MODE
Your machine is equipped with a Pellenc-designed electric motor. This motor keeps the speed
constant off load and when working.
Let the cultivion work by pulling towards you without over-forcing.
If at least 1 light on the handle is lit, the machine is supplied with electrical power.
Always turn the motor on before allowing the tool to make contact with the ground.
STARTING IN CONTINUOUS MODE

13
3
4
58_14_008A
x1 x2
x3 x4
58_10_009B
1
2
3
58_14_004A
G
SPEED SELECTOR
STARTING AND USE
Your machine is equipped with a speed selector
system. The speed selector is located on the handle
and allows you to optimize the desired quality of
work.
Four lights located on the handle indicate
the selected speed level when the machine is
energized.
These lights may ash when the temperature of the
machine approaches the safe temperature limit.
1 lights lit Speed 1 (800 strokes/mn) Hard, compact soil
2 lights lit Speed 2 (830 strokes/mn) Quite hard soil
3 lights lit Speed 3 (860 strokes/mn) Neutral soil
4 lights lit Speed 4 (885 strokes/mn) Loose soil
Untighten the tightening screw (1) using the M6
wrench.
Remove the working tool assembly (2).
Turn it so as to place the working tool support
marker (3) opposite the selected marker (-4 to +4).
Push in the tool support up to the stop point.
ADJUSTING THE TOOL ANGLE
Use appropriate gloves when handling the
working tool.
Install the washer and M6 screw (4) and tighten the
unit with max torque 6 N.m.
Be careful not to lose the nut (3)

14
-4-4
00
+4+4
58_10_015B
STARTING AND USE
The ideal working position is: left arm straight, left hand on the front handle.
Right arm slightly bent, right hand on the rear handle.
ADJUSTING THE TOOL ANGLE
Correct setting is achieved when the machine moves backwards with virtually no effort from the user.
Work is carried out moving backwards so as not to step on completed work.
To obtain the correct setting, place the tool in the "0" position:
- If the machine tends to push downwards into the soil and does not move backwards, remove the tool
and place the setting in a position on the "+" side.
- If the machine tends not to dig in depth and pulls out earth while moving violently backwards, turn the
setting to a position on the "-" side.
- Repeat the operation as many times as required.
Remark:
It may be necessary to adjust the tool's angle according to the topology of the terrain (slope, trenches,
mounds, etc.).

15
58_10_027A
58_10_026A
58_10_025A
STARTING AND USE
THE VARIOUS USES
The Cultivium is a soil working machine, which:
• airs and cultivates the earth
• removes weeds
• mixes soil, compost and fertilizer, etc.
Border cutting :
It may also be used to cut borders thanks to the
lateral cutting faces of the tool.
To plow furrows:
It can also be used to plow furrows by tilting the tool
at 45°, or by using the weeding tool (P/N 83849)
Several tool widths are available:
- P/N 81251
- P/N 79779
- P/N 84120
- P/N 83849
- P/N 100422

16
58_14_005A
1
2
56_10_016A
G
SERVICING
SERVICING SCHEDULE
REMARK:
Send the hedge trimmer for overhaul every 200 hours or at least once per year.
When the tool is stored, it must be clean and the battery must be charged.
TIGHTENING THE BLADES
Each time the tool is used
After use
Each year or when
necessary
Cleaning the machine X X
Visually inspect the tool X X
Check the operation of the safety devices X
Check the sharpness and sharpen if necessary X
Check the tightness of the working tool X
Check the battery charge level X
Send the tool to an approved dealer for inspection X
WARNING! Always disconnect the battery
before working on the cutting tool.
Check the screw tightening torque:
- (1) 6 N.m tightening torque.
- (2) 6 N.m tightening torque.

17
56_10_016A
58_14_006A
1
2
58_14_002A
56_10_016A
45°
58_10_032A
56_10_016A
SERVICING
REPLACING THE WORKING TOOL
SHARPENING THE WORKING TOOL
Sharpen the working tool little but often using a at
le.
Check the sharpness of the working tool regularly
during the rst hours of work in order to determine
the necessary sharpening frequency.
Ensure an angle of 45° on the blade during
sharpening.
Unscrew the two assemblies (screw and nut).
Change the working tool.
Reassemble the two assemblies (screw and nut).
Tighten the screws to a torque of 6 N.m.
Take out the support assembly + working tool.
Use appropriate gloves when handling the working tool.
Loosen the M6 screw (1) and its washer.
Remove the nut (2)

18
56_10_016A
58_14_006A
1
2
SERVICING
OUT-OF-SEASON STORAGE
• Make sure the machine is clean when it is stored.
• Make sure the working tool blade is sharp and greased when the tool is stored.
• For battery storage, refer to the battery usage manual.
REPLACING THE WORKING TOOL
WARNING! Always disconnect the battery before any intervention on the cutting tool.
Install the M6 bolt (1) and its washer and nut and
tighten them to a maximum torque of 6 N.m.

19
INCIDENTS
Repaired by
User
PELLENC approved
dealer
User
PELLENC approved
dealer
PELLENC approved
dealer
PELLENC approved
dealer
Solutions
Switch on the battery
switch
Change the cord
Recharge the battery
Change the
electronic board if the
diodes remain off after
starting and checking
the previous points
Change the trigger or
sensor
Change the electronic
board
Checks
Battery switch
Check the cord’s
condition
Check that the battery
is not completey
discharged
At PELLENC
approved dealer
premises
At PELLENC
approved dealer
premises
At PELLENC
approved dealer
premises
Probable cause
Battery off
The power cord is
sectioned
Battery
Electronic board
A trigger no longer
functions
Electronic board
Condition of diodes
Off
Off
On
Battery start/stop
switch position
0
I
Symptoms
The machine does not
start

20
INCIDENTS
Repaired by
User
User
User
Stop then restart the battery and refer to the "The machine does not start" paragraph if necessary
Solutions
Tighten to 6.0N.m
maximum
Tighten to 8.0 N.m
maximum
Reduce the machine
speed or pause for a
while
Allow the machine to
cool down for around
5 minutes
Checks
Tighten to 6.0N.m
maximum
Tighten to 8.0 N.m
maximum
Flashing diodes
4 beeps from the
battery
Probable cause
Tightening of the two
working tool screws
Tightening of working
tool head screw
The machine is close
to its temperature limit
The machine
has reached its
temperature limit
Condition of diodes
On
Flashing
Off
Battery start/stop
switch position
I
I
I
Symptoms
The machine makes
an abnormal noise
The diodes ash
during use
The machine stops
during use
Other manuals for Cultivion
2
Table of contents
Other pellenc Tiller manuals