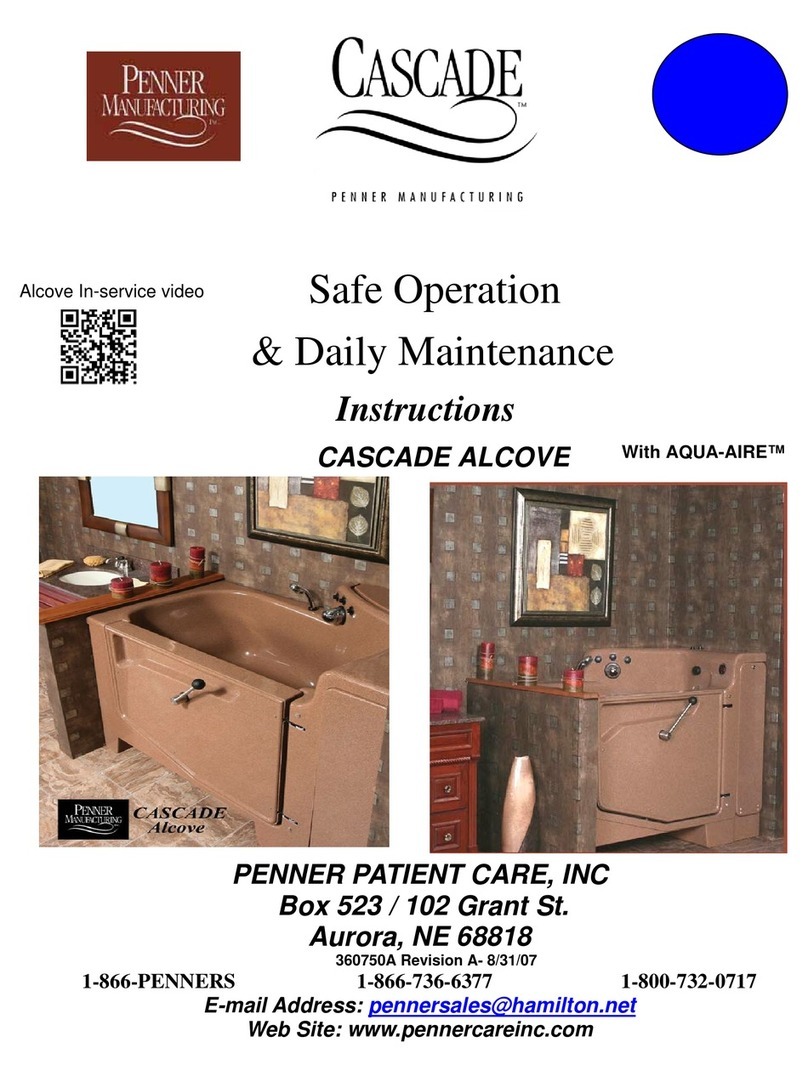
Penner Manufacturing Cascade Installation and operation manual

Cascade™ Wide Tub W/Swivel Lift
Bathing Systems with Aqua-Aire®
Safe Operation & Daily Maintenance
Instructions Manual
PENNER PATIENT CARE, INC
Box 523 / 102 Grant St.
Aurora, NE 68818
360750WT Revision B- 11/07/12
1-866-PENNERS 1-866-736-6377 1-800-732-0717
Web Site: www.pennercareinc.com
Operation Video
With AQUA-AIRE™

2
Table of Contents
TABLE OF CONTENTS........................................................................................................................... 2
INTRODUCTION ..................................................................................................................................... 3
SYMBOLS AND TERMS ......................................................................................................................... 3
TECHNICAL DESCRIPTION................................................................................................................... 3
MODEL NUMBERS, RATINGS, AND REGULATORY INFORMATION............................................……4
SAFETY INFORMAITON…………………………………………………………………………………………5
PATIENT ASSESSMENT FOR THE CASCADE™ SWIVEL LIFT........................................................... 5
CASCADE™ SWIVEL LIFT PATIENT CRITERIA…..……………………………………………..……...….6
BASIC COMPONENTS………………………………………………………………………………..……….…6
CASCADE™ TUB.................................................................................................................................... 7
CASCADE™ DOOR................................................................................................................................ 7
LOCKING CASCADE™ DOOR............................................................................................................... 8
UNLOCKING CASCADE™ DOOR.......................................................................................................... 9
CASCADE™ RESERVOIR...................................................................................................................... 9
SYSTEM PREPARATION (BEFORE BATH)......................................................................................... 10
PREPARATION TO TRANSFER INTO BATH ……………………………………..…………………....…..11
BELTING TECHNIQUE AND TRANSFER PROCEDURE WITH PENNER SWIVEL LIFT…….…..……12
WEIGHING PROCEDURE .................................................................................................................... 13
TRANSFER INTO BATH…………………………………………………………………………………....…..14
BATHING PROCEDURE WITHOUT RESERVOIR ............................................................................... 14
USING CASCADE™ WITH RESERVOIR ............................................................................................. 15
BATHING PROCEDURE....................................................................................................................... 17
TRANSFER OUT OF CASCADE™ SWUIVEL LIFT BATHING SYSTEM............................................. 20
SYSTEM CLEANING (AFTER EVERY BATH)...................................................................................... 21
DAILY MAINTENANCE ......................................................................................................................... 23
DAILY SAFETY CHECKLIST FOR CASCADE™ TUB AND RESERVOIR ........................................... 24

G
3
Introduction
The Cascade™ Wide Tub with Swivel Lift is designed to improve the efficiency
and environmental safety of your nursing care operation. However, the benefits
designed into the Cascade™ Wide Tub with Swivel Lift System will be realized
only if the system is operated and cared for properly. The purpose of this
manual is to provide you with a recommended procedure to help you obtain the
maximum efficiency and safety from your Sit-Bath System.
Symbols and Terms
WARNING
The warning symbol identifies important safety messages. Failure to obey a safety warning
may result in injury to you or to others.
The caution heading identifies important maintenance and operation
information. Failure to obey a caution warning may result in damage to the Sit-
Bath equipment and may void the warranty.
When the terms “left” or “right” are used with reference to the tub, this means
left or right as you look at the control panel from the seat end of the tub
Technical Description
The Cascade™ Wide Tub with Swivel Lift is an “Aqua-Aire®” bathing system intended
for use in nursing homes, hospitals, and assisted living facilities to bath residents
under the direct supervision of trained staff. There is an optional reservoir system that
allows the tub to be filled quickly. Both items are mainly constructed of gel-coated
fiberglass laminate on a steel frame. The tub has an Aqua-Aire® system for bubbling
the water with air. It has a dispensing system to dispense shampoo/body wash and
bath oil, and a disinfecting system to aid in cleaning the tub. The tub has a locking
door on one side for access to the tub by the resident. A thermostatic mixing valve
controls incoming water temperature. Digital temperature read-outs indicate all
incoming and tub water temperatures. A hand shower sprayer is also provided. This
Tub also has a built in Swivel Lift for safe and easy access of the resident in and out
of the tub with swing-away - removable arms. The Swivel Lift has an optional scale
built into it.
C
CA
AU
UT
TI
IO
ON
N
Left or Right

4
Model Numbers, Ratings, and Regulatory Information
Manufacturer: Penner Manufacturing Inc
102 Grant St / PO Box 503
Aurora, NE 68818
(402) 694-5003
Models: Cascade™ - with Swivel Lift
Model 360010-1WT (Aqua-Aire® - Low Wide - Right Hand - White- With Swivel Lift)
Model 360010-XWT (Aqua-Aire® - Low Wide - Right Hand - Color- With Swivel Lift)
Model 360010-1WTL (Aqua-Aire® - Low Wide - Left Hand - White- With Swivel Lift)
Model 360010-XWTL (Aqua-Aire® - Low Wide - Left Hand - Color- With Swivel Lift)
Models: Cascade™ Reservoir
Model 370000-1W (White Wide Right Hand) Model 370000-1WL (White Wide Left Hand)
Model 370000-XW (Color Wide Right Hand) Model 370000-XWL (Color Wide Left Hand)
Aqua-Aire® Ratings: 120 Volts AC Reservoir Ratings: 120 Volts AC
With Swivel Lift 9.5 Amps (includes reservoir’s .75 amps) 60 Hz
60Hz 1Phase
1 Phase
400 Lbs. Maximum Capacity
Duty: 10% Int.; 1 min on / 9 min off
15 1/2 inches Minimum clearance from floor
30 3/4” inches Maximum clearance from floor
UL Classification: Class I; Type B; Ordinary EQUIPMENT
Equipment not suitable for use in the presence of a flammable anesthetic mixture with air or with oxygen or
nitrous oxide.
MEDICAL EQUIPMENT
WITH RESPECT TO ELECTRIC SHOCK
FIRE AND MECHANICAL HAZARDS ONLY
IN ACCORDANCE WITH UL2601-1, AND
CAN/CSA C22.2 NO. 601.1
All temperature read-out values are accurate to +/- 2ºF (per NSF C-2). The read-out range is
-40/199ºF. The resolution is 1º.
An electrical circuit diagram can be found on the inside of the lid of the electrical box located inside the
larger service access door of the tub.
Service parts and technical information are available by contacting your distributor or by calling one of
the telephone numbers located on the front or back cover of this manual.
Environmental conditions for transport and storage for up to 15 weeks (as packaged from the
manufacturer) are as follows:
Temperature range -40º F (-40º C) to 120º F (49º C)
Relative Humidity 10% to 90%
Atmospheric Pressure 7.5 PSI to 15.5 PSI
61LN

5
Safety Information
Penner Transfer Lifts are designed and manufactured to meet or
exceed the safety requirements for patient care equipment. In addition,
they have been tested to insure their safety. It is important, however to
know that materials can fail due to normal wear caused by use over
time. Therefore before each patient transfer, it is required that the
nursing staff inspect for proper operation and missing or worn parts
such as belts. It is also required that a qualified maintenance staff
inspect the lift at least monthly for missing parts or excessive wear that
might cause the transfer lift to fail. A permanent record of each
inspection and repairs should be kept by the facility.
Only personnel who have been thoroughly trained in the
operation of the Penner Transfer Lift System should operate this
equipment. Operation of this equipment by untrained personnel could
result in injury to the operator or patient. Your Penner Patient Care
distributor is available at your request to provide complete in-service
training on the equipment’s proper operation.
Patient Assessment for the Cascade™ Swivel Lift
Before using the Cascade™ Wide Tub with Swivel Lift, patients must be
assessed by the facility’s professional nursing or professional rehabilitation
staff to determine which patients are suitable for using the Cascade™ Wide
Tub with Swivel Lift, and the number of staff members necessary to transfer
each patient. Although one person can perform this procedure, certain
patients or situations may require the help of one or more additional staff
members. For example, patients with unpredictable behavior due to dementia
may require additional help if their behavior poses risk of injury to themselves,
staff members, or patients being lifted and bathed in the Cascade™ Wide Tub
with Swivel Lift.

6
Cascade™ Swivel Lift Patient Criteria
The Patient Must:
a. Have no injuries or medical conditions that might be aggravated
by the Swivel Lift procedure.
b. Weigh less than 400 pounds.
c. Be able to follow simple directions.
d. Be able to sit upright or restrained by the Chest Belt.
e. Evaluated for safety of extremities that are rigid, or any other
problem the patient has that could cause injury or conflict with the
safe operation of the Cascade™ Wide Tub with Swivel Lift.
Basic Components
The Cascade™ Wide Tub with Swivel Lift is composed of the following
components:
Cascade™ Tub
Cascade™ Door
Cascade™ Reservoir (optional)
Cascade™ Swivel Lift no Scale
Cascade™ Swivel Lift with Scale
The remainder of this section describes the components and their
relationship to each other.

7
Cascade™ Tub
The Aqua-Aire® Cascade™ tub is a specialized tub with built-in air
jets. It has been designed to help bathe your patients automatically.
The tub has a built-in control panel, which provides controls for all the
functions of the tub, as shown below, see Figure 1.
SHOWER ON/ AUTO-OFF BUTTON
TUB FILL ON/OFF BUTTON
FILL SPOUT
FILL/SHOWER TEMPERATURE CONTROL
(MIXING VALVE)
BATH OIL DISPENSING SPOUT
Aqua-Aire® ON/OFF BUTTON
(OPTIONAL) RESERVOIR OUTLET
FILL/SHOWER TEMPERATURE
HAND SHOWER
SHAMPOO DISPENSING SPOUT
BATH OIL DISPENSING PUMP PLUNGER
SHAMPOO DISPENSING PUMP PLUNGER
DRAIN PLUG CABLE
RINSE BUTTON
(
ON SIDE- NOT SHOWN
)
DISINFECT BUTTON
(ON SIDE NOT SHOWN)
TUB TEMPERATURE READ-OUT
Figure 1
TUB OVERFLO
W

8
Cascade™ Door
The Cascade™ Door see Figure 2, is a specially designed reinforced
door with locking lever to open and close the door.
Locking the Cascade™ Door
1. With lever in the upright position, close the door tight against the
tub.
2. When the door is against the tub, push the lever over to the right
so the lever is the LOCK position. (Label at base of lever
indicates “UNLOCK” or “LOCK” positions)
3. The door is now locked in place.
4. Note: To extend the life of the Water Door Seal, leave the door
open when not in use.
DOOR LOCK LEVE
R
DOOR HANDLE RELEASE
Figure 2

9
Unlocking the Cascade™ Door
WARNING
DO NOT UNLOCK THE WATER DOOR WHILE THERE IS ANY
WATER IN THE TUB. FAILURE TO HEED THIS WARNING MAY
RESULT IN INJURY TO A RESIDENT AND OR OPERATOR.
1. To unlock, first pull up on the door handle release (Figure 2), and
hold it.
2. Then move the lever to the “unlock” position.
3. The door is now unlocked and able to be opened.
Cascade™ Reservoir
The optional Cascade™ Reservoir see Figure 3, is a specially designed
water holding tank that you fill with water first, and then once the
resident has been transferred into the tub you release the water into the
tub. By filling the reservoir first, it allows you to fill the tub in 70 seconds
or less and keeps the time the resident is unclothed and out of water to
a minimum.
WARNING
Figure 3
RESERVOIR TEMPERATURE READ-OUT
RESERVOIR FILL ON BUTTON
RESERVOIR FILL OFF BUTTON
(NOT SHOWING)
RESERVOIR RELEASE VALVE HANDLE

10
System Preparation (Before Bath)
WARNING
Only personnel who have been thoroughly trained in the operation
of the Cascade™ Wide Tub with Swivel Lift should operate this
equipment. Operation of this equipment by untrained personnel
could result in injury to the operator or patient. Your Penner
Patient Care distributor is available at your request to provide
complete in-service training on the equipment’s proper operation.
Before Starting to transfer the patient into the bath, prepare and fill the
Reservoir (if applicable) of your Cascade™ Bathing System by following the
instructions on page 15 of this manual.
Prior to the bath, make sure you have all bathing aids ready such as
a washcloth and towels.
Note: Check the level of Penner Bath Oil, Penner Shampoo, and
Penner Disinfectant concentrate in the supply bottles daily to ensure
that adequate amounts are available for the day’s bathing
requirements. These bottles are located behind the small access
door on the left side of the tub. Replace a bottle before it runs out to
avoid re-priming the system.
You are now ready to bring the Resident to the bathing area with your
Patient Transfer or Wheel Chair.

11
Preparation to Transfer into Bath
1. Make sure bathing area is clear of all unneeded equipment. Open the
water door to its widest position.
2. Rotate or swing the Swivel Lift chair out
of the tub all the way. By pushing the
(DOWN) button se Figure 4, located
outside of the tub near the water door
entrance shown at the right, lower the
Lift Chair all the way.
3. The arm rests of the Penner Swivel Lift
chair can swing upwards and back,
or be removed to provide a
variety of options in providing care.
4. Once the resident has been brought to the bathing area, place the resident
near the Swivel Lift and position him or her for a normal wheel chair- to-chair
transfer. Insure the floor near the entry of the Cascade™ has a non-slip
surface to prevent the resident from slipping. Dry any damp or wet areas on
floor.
5. Lock the brakes of your transport equipment before transferring the resident
into the Swivel Lift of the tub.
WARNING
Failure to insure the floor, near the entry of the Cascade™, has a non- slip
surface, could result in injury to the operator or patient. Dry any damp or wet
areas on floor.
WARNING
Failure to lock the caster brakes of your transfer equipment before
the resident is transferred, could result in injury to the operator or patient.
Figure 4

12
Belting Technique of Transfer Procedure with the
Penner Swivel Lift
All residents must always be securely belted at the waist when using the
Penner Swivel Lift system.
For residents who are unable to support themselves in an upright position,
Penner supplies a second (chest) belt which allows you to secure the
resident in an upright position as shown in Figure 5.
1. Route the belt(s) through the slots of the chair as shown in Figure 5 prior to
placing the resident into the chair. If a chest belt is needed for the resident,
you have the choice of the upper or lower chest belt slots.
2. Ensure that the belt is routed through the loose buckle end as shown in
Figure 6. If routed the opposite way, the belt will slip.
3. Transfer the resident into the Penner Swivel Lift using proper nursing
transfer techniques. Bring the seat belt around the resident, to the D-ring
connector.
4. Connect the belt to the D-ring as shown at the right.
a) Use the technique as shown at the right.
WARNING
Failure to secure the resident properly with the seat belt and chest belt
could result in injury to the resident or operator.
Figure 5 Figure 6

13
Weighing Procedure
1. Before seating the resident in the chair, ensure all belts are on the chair and
the patient is properly secured.
2. Press the “ON / ZERO” button once to turn on. Press again to zero.
3. The scale weighs in increments of ½ Lb. accuracy +/- 1 Lb.
4. The indicator should show “0”. This should only need to be done once a day
or when seat empty indicates anything other than zero.
5. If indicator reads anything other than zero, start over and zero again. If it
does not read “0” the scale may need to be recalibrated. Note: Negative
weights are indicated by the weight flashing on and off.
6. Pressing the Penner Patient Care Logo or the recall button, recalls the last
weight which was “Held”.
7. Press the “Lb./Kg.” button and hold to convert to Lb. or Kg.
8. Once the patient is in the seat, ensure that the arms, legs, or feet are not
touching anything. This would give an inaccurate reading.
9. After the resident is stabilized the scale indicates “HOLD”, a reading of the
weight may now be taken.
10.The battery for the Scale read out is located in the bottom of the read out.
There are four AA batteries.
Figure 7

14
Transfer into Bath
WARNING
Failure to insure hands, arms and legs are clear of any objects
when transporting or lifting could result in injury to the resident
or operator. Release the Up or Down button located by the water
door to stop the lift at any time during raising and lowering of the
resident.
1. Once the resident is belted securely into the Swivel Lift, completely
raise or extend the Lift by pushing the (UP) button located by the water
door (see Figure 4). To stop the lift at any time during raising and
lowering of the resident, release the Up or Down button located
by the water door.
2. Keep hands, arms and legs clear of any objects while transporting or
lifting the resident.
3. Carefully rotate or swing the chair and resident into the tub.
4. Use acceptable nursing techniques if the resident needs help with his
or her feet or legs getting into or out of the bath.
5. Lower the chair to its lowest position inside the tub.
6. Close the door and lock in place. Ensure that the belt does not get
caught in the door when it is closed.
Failure to keep the belt from getting pinched in the door can
result in damage to the tub seal.
The tub is now sealed and you are ready to fill the tub with water.
Bathing Procedure Without Reservoir
1. Place the drain plug in the drain.
2. Press the Tub Fill Button to begin filling the tub (see Figure 1).
C
CA
AU
UT
TI
IO
ON
N

15
3. Monitor the water temperature by watching the Fill /Shower Water
Temperature Readout (see Figure 1) and check the water temperature
by allowing it to run over your wrist. Adjust the water temperature by
turning the Temperature Control Knob to a normal bathing
temperature, 95 to 105 degrees Fahrenheit.
WARNING
Failure to monitor the temperature readout and check the water
temperature by allowing it to run over your wrist, could result in a
hot-water burn to the resident or the operator Do not touch water
over 110°.
4. When filled, press the Fill Button (see Figure 1) again to stop the
water flow.
Using Cascade™ Tub with Reservoir
See Figure 3 for locations of the controls listed in this section.
1. Press the reservoir fill ON button to begin filling the reservoir.
2. Monitor the reservoir water temperature by watching the temperature
readout located on the reservoir. To adjust the temperature of water
flowing into the reservoir, turn the mixing valve handle (see
Figure 1) to a normal bathing temperature, 95-105 degrees
Fahrenheit as shown on the fill/shower temperature read-out (see
Figure 1).
3. The reservoir can hold up to 48 gallons of water and can be stopped at
anytime during the filling process if you desire. To stop the filling of the
reservoir, simply push the reservoir fill OFF button located on the
reservoir.
4. If you do not stop the filling of the reservoir by using the reservoir fill
OFF button, the filling of the reservoir will stop filling
AUTOMATICALLY once it is full.

16
5. The reservoir is now full and the water ready to be checked for safety.
To make sure the temperature of the water in the reservoir is suitable
for bathing, first close and lock the tub door, then open the reservoir
release valve slightly to release some water from the reservoir and
manually check the water temperature by letting the water run over you
wrist. Close the reservoir release valve if the temperature is suitable
and continue preparing your resident for his or her bath. If water is too
hot or too cold, open the reservoir release valve and let the water run
out of the reservoir into the empty tub and start over at step number
one, above.
WARNING
FAILURE TO MANUALLY CHECK THE WATER TEMPERATURE
BEFORE PUTTING A RESIDENT IN THE TUB MAY RESULT IN
BURN INJURIES TO THE RESIDENT AND/OR OPERATOR.
6, Unlock and open the door.
7. Place drain plug in the drain.
8. Once the resident is secured with the safety belts, transfer the resident
into the Cascade™ Swivel Lift Bathing system and close and lock the
door. Refer to instructions on pages 10, 11 and 12 for proper transfers
into Cascade™ Swivel Lift Bathing system.
9. Once the resident is securely in Cascade™ Tub, and all the above
steps have been followed, and the water in the reservoir is suitable for
bathing, you are ready to release the water from the reservoir, and give
a bath.
10.Open the reservoir release valve on the reservoir to release the water,
checking again for the second time with your wrist to make sure the
water is not too hot or not too cold. If the temperature is suitable for
bathing (95 to 105 degrees Fahrenheit) continue to let the reservoir
empty.
11.If the temperature is not correct after double- checking, remove the
resident from the Cascade™ Tub and empty the reservoir into the
vacant tub. Fill reservoir again with the correct temperature of water.
Repeat steps 7 and 8.
Note: A unique feature of the Cascade™ Tub is that you are able
to fill the tub with the water from the reservoir and fill with the
spigot at the same time. This cuts down your filling time and
limits the time your resident sits in the tub unclothed.

17
12.In order to fill the tub with the water from the reservoir and fill with the
spigot at the same time after transferring your resident into the
Cascade™ Swivel Lift Bathing system, close and locked the door, and
put the drain plug in the drain, open the reservoir release valve.
13.Once the reservoir release valve has been opened, push the Tub Fill
button located on the Cascade™ Control Panel (Figure 1), and adjust
the water temperature by turning the Temperature Control knob
(Figure 1) to normal bathing temperature, 95 to105 degrees
Fahrenheit.
14.When desired level of water is achieved, push Tub Fill button again to
shut water off coming from the spigot.
Bathing Procedure
You are now ready to begin washing the resident. The suggested
bathing time is 5 to 10 minutes.
To bathe the resident, use the following procedures:
See Figure 1 for the location of the controls listed in this section.
1. On Aqua-Aire®Start the air blower by pressing the Aqua-Aire®
ON/OFF button (Figure 1).
2.Push the Bath Oil Dispensing Pump Plunger (Figure 1) to add Penner
Bath Oil to the water. The amount of Penner Bath Oil will vary
according to the resident’s skin condition.
Note: Penner Bath Oil is a non-aqueous, liquid bathing oil
containing refined lanolin similar to natural skin oil. When
combined with water, Penner Bath Oil can penetrate the skin.
This combination of water and oil restores moisture to the
patient’s skin and benefits the nursing attendant, whose hands
are frequently in water. Additionally, the use of Penner
Shampoo & Body Wash reduces the risk of cross-contamination
which can result from sharing a single bar of soap.

18
WARNING
In the following bathing instructions you are required to
rinse the resident with the shower sprayer (Figure 1).
Before doing so each time, make sure the temperature is
between 95 and 105 degrees Fahrenheit by viewing the
temperature readout (Figure 1). As a further precaution,
always test the water on the inside of your wrist before
turning the shower sprayer toward the resident. Failure to
follow the precautions in this could result in a burn injury
to the operator or the resident.
3. Bathe the resident’s body as follows:
a) Position one hand or hand with washcloth under the
Shampoo dispensing spout and push the Shampoo
Dispensing Pump Plunger (Figure 1) to dispense
Penner Body Wash and Shampoo. Apply it directly to the
resident’s body.
b) Begin gently washing the resident’s body. Pay special
attention to folds or creases in the skin and under the
arms. If the scalp is flaky, apply a small amount of
Penner Bath Oil to the problem area and let it soak in
until time for shampoo.
4. Rinse the body with the shower sprayer as follows.
c) Pick up the Hand-Held Shower Sprayer (Figure 1)
located off to the side of the control panel.
d) Press the Shower Button (Figure 1) to activate the
Shower Sprayer.
Note: Once the shower sprayer is activated, it will stay
activated for a period of time and then automatically
shut off. This time period (up to 10 minutes) is
adjustable by maintenance personnel only. The shower
can be re-activated at any time by pressing the shower
button.

19
e) Adjust the water temperature by turning the Temperature
Control Knob to the normal bathing range of 95 to 105
degrees Fahrenheit as shown below. Monitor the
temperature by viewing the Fill/Shower Temperature
Readout.
f) While pointing the sprayer into the tub, not onto the
resident, press the Shower Trigger, located on the
sprayer. As a further precaution, always test the
water on the inside of your wrist before turning the
sprayer toward the resident.
g) Repeat the washing and rinsing steps for the body a
second time.
5. To shampoo the resident’s hair, use the following procedure:
a) Wet the resident’s hair with the shower sprayer.
b) Push the Shampoo Pump Plunger (Figure 1) and apply
a small amount of Penner Body Wash and Shampoo to
the wet hair.
Note: Penner Body Wash and Shampoo is a special
formula with lanolin for use with residents who have dry
scalp and/or skin conditions. Penner Body Wash and
Shampoo’s special conditioning formula helps assure that all
residues will be removed quickly and easily, leaving hair
clean, conditioned, and shining.
c) Massage the resident’s head to create lather. Continue
the massage to fully clean the hair and scalp.
d) Rinse with the shower sprayer.
e) Shampoo and rinse a second time if required.

20
Transferring Out Of Cascade™ Swivel Lift Bathing
System
After the bath has been given, you are now ready to transfer the
resident out of the tub.
1. Drain the tub by pulling the drain plug (Figure 1) from the
drain. Allow the tub to be drained completely.
WARNING
Failure to have the tub completely drained before
unlocking the door could cause injury to the operator and
resident.
2. Unlock door by pulling up on the door handle release, and
pulling up on the lever at the same time.
3. Open door to widest position.
4. Dry off resident.
5. Raise the Swivel lift completely.
6. Rotate or Swing resident completely out of the tub
7. Lower the Swivel Lift completely.
8. Insure the floor has a non-slip surface before removing the
resident from the Cascade™ bathing system and that the floor
is not wet.
Table of contents
Other Penner Manufacturing Hot Tub manuals
Popular Hot Tub manuals by other brands

Aquatic
Aquatic SYMPHONY 9 AIIS6030lSYTo Specification sheet

American Standard
American Standard CADET 2775.XXXW Series installation instructions

Trade-wind
Trade-wind SW3060LH installation instructions

Beurer
Beurer FB 35 Instructions for use

Bestway
Bestway Lay-Z-Spa Series manual

WELONDA
WELONDA BIO WASH installation manual

Jacuzzi
Jacuzzi Tara Pure Air II Bath EB00 Specification sheet

Saturn
Saturn ST-BC7309 quick start guide

ThermoSpas
ThermoSpas Executive Series owner's manual

Sanycces
Sanycces SPA 407 installation manual

Aquatic
Aquatic HOTSOAK 53 ai6042ClHS Specification sheet

Aquatic
Aquatic SOUTH PADRE ai6636R Specification sheet