manuals.online logo
Brands
  1. Home
  2. •
  3. Brands
  4. •
  5. Pentax
  6. •
  7. Binoculars
  8. •
  9. Pentax MARINE 7x50 User manual

Pentax MARINE 7x50 User manual

MARINE 7x50
Binocular
Owner’s Manual
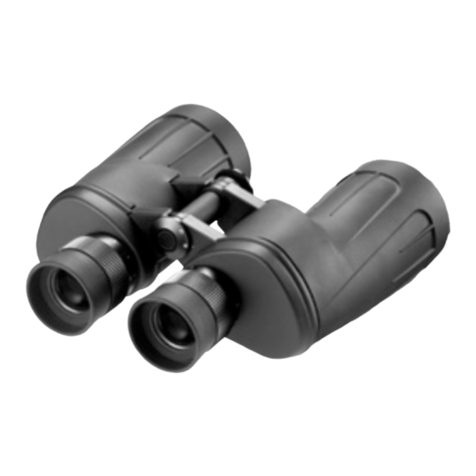
The PENTAX Marine roof prism binocular is de-
signed particularly for the boating enthusiast, but
is also ideal for any demanding environment or ap-
plication where accuracy and durability is required.
Featuring a liquid-lled compass built in to the
viewing optics, compass “swing” stops immediately
due to an advanced dampening design. Bearings are
dened in easy-to-read precise 1-degree increments,
ideal for navigation and locating objects accurately.
A range-nding scale allows the user to estimate
range based on objects of known size. The PENTAX
Marine binocular is fully waterproof, fogproof, and
shock-protected with sure-grip rubber armoring and
twist-out eyecups for easy use. PENTAX Optics are
fully multi-coated for excellent light transmission
and clarity. The PENTAX Marine binocular comes
complete with a rugged nylon case and neck strap.
Built to last, the PENTAX Marine binocular features
our lifetime Worry-Free Warranty.
SPECIFICATIONS:
Lens Construction 7 elements / 5 groups
Lens Coating Fully multi-coated
Magnication 7X
Objective Lens Diameter 50mm
Prism Type / Coating BaK4 – silver deposited
Eye Relief 17.6mm
Real Field of View 6.6 degrees
Field of View @ 1000 yds. 348 .
Field of View @ 1000 m 116m
Exit Pupil Diameter 6.8mm
Relative Brightness 51
Diopter Adjustment Range +/-3
Interpupilary Adj. Range 56mm-73mm
Focus Range 3.3 feet – innity (3m –innity)
Eyecup Helicoid type
Waterproof Nitrogen-lled, 1.5m depth
Dimensions 7” H x 5.4”
Weight 34.4 oz (976 g)
How to Use:
1. Adjust interpupilary distance until a single image
circle is formed.
2. Acquire a test subject and sharply focus the le
eye using the center focusing knob.
3. Looking through the right eyepiece turn the di-
opter to sharply focus on the same subject.
Each user may have to re-adjust the binocular to suit
their particular vision correction.
Using the Compass:
The built-in precision compass features extremely
fast dampening, so there is almost no “swing” and
it is corrected for latitude (dip). The compass scale is
dened in 1 degree increments and is aligned with
the vertical range nding scale. When using the
compass, always keep in mind the local variation
between magnetic and true North.
I
I
I
I
I
I
I
I
I
I
I
I
I
I
I
I
I
I
I
I
I
I
I
I
I
I
I
I
I
I
I
I
I
I
I
I
I
1
7
0
1
8
0
1
9
0
80
60
40
20
0 20 60 80
Reticle:
The vertical scale of this reticle, (visible through the
right half of the binocular), allows you to calculate
distance from your position to an object, provided its
height is known. You may also calculate the height
of an object if you know its distance from you. De-
tailed instructions follow in this manual.
Compass Illumination:
The PENTAX Marine binocular features a compass
illuminator that functions with available ambient
light. Light enters through a small white diuser
disc on top of the compass housing to illuminate the
compass scale. Bright ambient light levels make the
scale appear bright and low light levels make the
scale appear dim. In order to adequately view the
compass scale in ambient light, make certain not to
cover the diuser disc.
Using the Compass Illuminator Lamp:
The PENTAX Marine binocular is equipped with a
built-in LED compass illuminator for use at night
and in low light conditions. The
compass housing is located on
the top right side of the binocu-
lar. When the ambient light level
does not permit you to see the
compass scale clearly, depress
the black power buon on top of the compass hous-
ing to power the lamp. The lamp is illuminated only
while the buon is depressed. If the illuminator
lamp is dim or does not come on, replace the baer-
ies. If fresh baeries do not provide illumination, the
unit may require service.
Changing Baeries:
Both baeries should always be changed at the same
time. To change baeries, use a thin coin to unscrew
the baery chamber cover, by turning it counter-
clockwise. Remove the old bat-
teries. Insert both new baeries
properly seated with “+” facing
up. Replace the baery chamber
cover by turning it in a clock-
wise direction; making certain it
is properly sealed (to prevent penetration of outside
moisture). If the binocular is not to be used for an
extended time, remove the baeries. This keeps the
binocular safe from baery leakage during storage.
Baery type: (2) LR43 (1.5v alkaline)
Equivalent types: AG12, G12, 386, CX186 - (1.5v)
IMPORTANT:
AFTER DIRECT EXPOSURE TO SALTWATER OR
SALT-SPRAY, RINSE THE BINOCULAR THOR-
OUGHLY WITH FRESH WATER AND WIPE DRY.
AVOID EXTENDED EXPOSURE TO BRIGHT DI-
RECT SUNLIGHT AND SEVERE TEMPERATURE
FLUCTUATIONS. IF USED IN VERY COLD TEM-
PERATURES, GRADUALLY EXPOSE THE UNIT
TO WARMER TEMPERATURES IN ORDER TO
AVOID CONDENSATION BUILD-UP.
Ranging Reticle:
This reticle features vertical and horizontal scales.
Each minor division on the horizontal scale and ver-
tical scale indicates 5 mils and each major division
indicates 10 mils.
Equivalents:
5 mils = .3 degrees
10 mils = .6 degrees
1 degree = 17.8 mils
1 degree = 60 minutes
360 degrees = 6400 mils
Using the Reticle to Measure Azimuth:
Azimuth is dened as the angle (usually in degrees)
between a reference plane and a point. In navigation,
the reference plane is typically true North which is
dened as 0 degrees North. In rotating your view-
ing position clockwise to a point due East (from true
North), the azimuth is 90 degrees; due South the
azimuth is 180 degrees, due West the azimuth is 270
degrees, and due North is referenced as 360 degrees
on the compass scale.
The PENTAX Marine’s mil reticle can measure the
azimuth angle, altitude (elevation) angle, and can
help you calculate distance from the viewer to the
object, and the size of an object based on known
distance from the viewer.
I
I
I
I
I
I
I
I
I
I
I
I
I
I
I
I
I
I
I
I
I
I
I
I
I
I
I
I
I
I
I
I
I
I
I
I
I
1
7
0
1
8
0
1
9
0
80
60
40
20
0 20 60 80
How to Measure Azimuth Angle:
In the binocular, azimuth angle is dened by the
horizontal reticle scale. If the size of an object falls
within the horizontal scale, select a single point on
this scale as the reference, and position this mark
on an outside edge of the visible object, and hold
the binocular steady. Looking at the opposite out-
side edge of the object, simply read o the mils as
indicated on the scale. (This is the distance from one
edge of the object to its other edge - in mils).
If the size of an
object is larger than
the extent of the
reticle scale, the
same general method
is employed, but
by making several
“step-by-step” mea-
surements. Starting
at an outside edge
of the object, place
either end mark of
the scale on that edge so the scale overlaps the ob-
ject, and read the distance to the opposite end of the
scale, which will fall somewhere on the object. Visu-
ally note this location on the object. Move the same
end mark of the reticle scale to meet this new refer-
ence point and note the remaining distance on the
scale to the opposite outside edge of the object. Then
simply add the sum of each step-by-step measure-
ment to determine total azimuth in mils.
Azimuth can also be used to determine the distance
(in mils) between two objects on the horizon. How-
ever, if the distance between two objects is greater
than the range on the reticle scale, a point (or points)
of reference on the horizon between the objects must
be present for accurate step-by-step measurement.
Using the Reticle to Measure the Altitude
(Elevation) Angle:
Altitude is dened as the angle (usually in degrees)
from a point on the horizon, to a point above or
below.
How to Measure the Altitude Angle:
In the binocular, altitude angle is dened by the ver-
tical reticle scale. If the size of an object falls within
the range of the vertical scale, and is measured
above the horizon, select the boom point of the
vertical scale as the reference, and position this mark
on the horizon (or boom) of the visible object being
measured, and hold the binocular steady. Looking
at the top edge of the object, simply read o the mils
as indicated on the scale. (This is the altitude angle
from the boom of the object to its top - in mils).
If the size of an object falls within the range of the
vertical scale, and is measured below the horizon,
select the boom mark of the vertical scale as the
reference, and position this mark on the boom end
of the object being measured, and hold the binocu-
lar steady. Looking at the end of the object on the
horizon, simply read o the mils as indicated on the
scale. (This is the altitude angle from the horizon to
the end of the object below the horizon - in mils).
If the size of an object is larger than the extent of the
reticle scale, the same method is employed, but by
making several “step-by-step” measurements. Start-
ing at an outside edge of the object, place either end
mark of the scale on
that edge so the scale
overlaps the object,
and read the distance
to the opposite end
of the scale, which
will fall somewhere
on the object. Visu-
ally note this new
reference location
on the object. Move
the same end mark
of the reticle scale to meet this new visual reference
point and note the remaining distance on the scale to
the other outside edge of the object. Then simply add
the sum of the step-by-step measurements to deter-
mine total altitude in mils.
Using the Reticle to Determine Distance:
The reticle can be used to determine the distance
from the viewer to the object.
Formula:
L(km)=H(m)/W
L = distance from observer to object (in kilometers)
H = height of object in meters
W = altitude angle measured with the reticle (in
mils)
EXAMPLE:
To determine distance, the object height must rst
be known or estimated. Then, measure the altitude
angle with the vertical reticle scale.
I
I
I
I
I
I
I
I
I
I
I
I
I
I
I
I
I
I
I
I
I
I
I
I
I
I
I
I
I
I
I
I
I
I
I
I
I
1
7
0
1
8
0
1
9
0
80
60
40
20
0 20 60 80
I
I
I
I
I
I
I
I
I
I
I
I
I
I
I
I
I
I
I
I
I
I
I
I
I
I
I
I
I
I
I
I
I
I
I
I
I
1
7
0
1
8
0
1
9
0
80
60
40
20
0 20 60 80
In this example the object is estimated to be 30m in
height (H=30).
The altitude angle is measured in the reticle at 60
mils (W=60).
Simply divide the height by the altitude angle to
determine distance.
30/60 = .5
The distance of the object is .5 kilometers from the
viewer.
Using the Vertical Reticle to Determine the Height
of an Object Using Altitude Readings:
You can calculate subject height using the following
formula:
H=D x W
H= Object height
D= Distance from the viewer
W = Altitude angle
First, estimate the distance from the object being
measured. Then, measure the altitude angle. Multi-
ply the distance in kilometers by the altitude angle
indicated by the reticle. This equals object height.
EXAMPLE:
The estimated distance from the viewer to the object
being measured is .6km.
The altitude angle is 60 mils (0-60)
H = .6 X 60 = 36m
The object height is 36m
Using the Horizontal Reticle to Determine the
Width of an Object Using Azimuth Readings:
You can calculate subject width using the following
formula:
W = D X L
EXAMPLE:
D = estimated distance from the viewer to the object
is .4km.
L = azimuth angle - which is 40 mils (0-40)
W = .4 X 40 = 16m
The object is 16m wide.
Using the Compass:
Azimuth angle can also be determined using the
compass which is built-in to the right half of the
binocular. It indicates azimuth (in degrees). Each
graduation mark on the compass scale indicates 1
degree. The compass scale is below the reticle and
is separate from it. However, the compass indicator
mark is in direct line with the center of the vertical
(altitude) reticle scale.
Identifying Compass Headings in Degrees:
North - 0 degrees (referenced as 360 degrees on
PENTAX Marine’s compass scale)
East - 90 degrees
South - 180 degrees
West - 270 degrees
In order to maintain accurate compass readings, the
binocular should be held horizontally and as level as
possible. This insures smooth uid movement of the
compass indicator, and reduces “jumping”, “drag-
ging” or binding of the scale (which can cause errors
in readings). To increase accuracy, it is important to
allow the compass scale to sele to a complete stop
before aempting to determine headings.
Seing Your Position:
To verify your directional positioning (or bearings),
simply rotate your viewing position until “360” is
indicated in the center of the compass scale. This in-
dicates the viewer is facing due North. For the great-
est accuracy, always keep in mind the local variation
between magnetic and true North.
Locating the Heading of an Object:
To locate the heading of an object relative to your
position, simply align the vertical (altitude) reticle
on the object and read the heading on the compass
scale.
Compass Illuminator:
When ambient light levels are too low to see the
scale, the scale illuminator lamp must be employed.
However, in order to save baery power, do not use
the illuminator lamp when ambient light levels are
sucient to see the scale.

Other Pentax Binoculars manuals

Pentax UCF G 8x24 User manual

Pentax

Pentax UCF G 8x24 User manual

Pentax FB-7 Lite User manual

Pentax

Pentax FB-7 Lite User manual

Pentax 62553 - DCF HRc - Binoculars 8 x 42 User manual

Pentax

Pentax 62553 - DCF HRc - Binoculars 8 x 42 User manual

Pentax UCF X 8x25 User manual

Pentax

Pentax UCF X 8x25 User manual

Pentax FB Zoom User manual

Pentax

Pentax FB Zoom User manual

Pentax UCF V 8x24 User manual

Pentax

Pentax UCF V 8x24 User manual

Pentax DCF WP II 10x42 User manual

Pentax

Pentax DCF WP II 10x42 User manual

Pentax 62591 - DCF MC II User manual

Pentax

Pentax 62591 - DCF MC II User manual

Pentax 62552 - DCF WP II User manual

Pentax

Pentax 62552 - DCF WP II User manual

Pentax 8x25 DCF SW User manual

Pentax

Pentax 8x25 DCF SW User manual

Pentax Digibino DB 100 User manual

Pentax

Pentax Digibino DB 100 User manual

Pentax #62217 - UCF Zoom II 8-16x21 Binos User manual

Pentax

Pentax #62217 - UCF Zoom II 8-16x21 Binos User manual

Pentax 7x50 PIF User manual

Pentax

Pentax 7x50 PIF User manual

Pentax DCF 7x20 User manual

Pentax

Pentax DCF 7x20 User manual

Pentax 9x28 DCF LV Instruction Manual

Pentax

Pentax 9x28 DCF LV Instruction Manual

Pentax 9x28 DCF LV User manual

Pentax

Pentax 9x28 DCF LV User manual

Pentax CompactZOOM 9-16x21 UCF ZOOM User manual

Pentax

Pentax CompactZOOM 9-16x21 UCF ZOOM User manual

Pentax DCF 10x42 HRc User manual

Pentax

Pentax DCF 10x42 HRc User manual

Pentax PCF WP II 8x40 User manual

Pentax

Pentax PCF WP II 8x40 User manual

Pentax FB 10 User manual

Pentax

Pentax FB 10 User manual

Pentax 8.40 PCF WP II User manual

Pentax

Pentax 8.40 PCF WP II User manual

Pentax 8x25 DCF SW User manual

Pentax

Pentax 8x25 DCF SW User manual

Pentax 8x42 DCF WP II User manual

Pentax

Pentax 8x42 DCF WP II User manual

Pentax FB-7 Lite User manual

Pentax

Pentax FB-7 Lite User manual

Popular Binoculars manuals by other brands

Velleman NV60 user manual

Velleman

Velleman NV60 user manual

Bresser BINOCOM 7x50 Instructions for use

Bresser

Bresser BINOCOM 7x50 Instructions for use

Kite Optics BONELLI Instructions and warranty

Kite Optics

Kite Optics BONELLI Instructions and warranty

ATN Night Scout user guide

ATN

ATN Night Scout user guide

Renkforce 1496559 operating instructions

Renkforce

Renkforce 1496559 operating instructions

OWIM 100520 Operation and safety notes

OWIM

OWIM 100520 Operation and safety notes

Renkforce 1377849 operating instructions

Renkforce

Renkforce 1377849 operating instructions

VORTEX OPTICS Binocular product manual

VORTEX OPTICS

VORTEX OPTICS Binocular product manual

Vivitar VIV-AV-842 instruction manual

Vivitar

Vivitar VIV-AV-842 instruction manual

AGM Global Vision 10x42 BINOCULARS user manual

AGM Global Vision

AGM Global Vision 10x42 BINOCULARS user manual

Conrad Electronic 671439 operating instructions

Conrad Electronic

Conrad Electronic 671439 operating instructions

Minox BL 10x42 BR instruction manual

Minox

Minox BL 10x42 BR instruction manual

Minox BL8x33HD instruction manual

Minox

Minox BL8x33HD instruction manual

Leica ULTRAVID 8/10 x 32 HD instruction manual

Leica

Leica ULTRAVID 8/10 x 32 HD instruction manual

Nikon 7x15DCF Titanium brochure

Nikon

Nikon 7x15DCF Titanium brochure

Opticron HR ED Series User instructions

Opticron

Opticron HR ED Series User instructions

Swarovski Optik CL Companion manual

Swarovski Optik

Swarovski Optik CL Companion manual

Swarovski Optik CL POCKET user manual

Swarovski Optik

Swarovski Optik CL POCKET user manual

manuals.online logo
manuals.online logoBrands
  • About & Mission
  • Contact us
  • Privacy Policy
  • Terms and Conditions

Copyright 2025 Manuals.Online. All Rights Reserved.