Perfect Aire 1PMB09 User manual

MICROWAVE ENERGY EXPOSURE PRECAUTIONS........................................... 2
TECHNICAL DATA .................................................................................................. 2
IMPORTANT SAFETY INSTRUCTIONS ................................................................. 3
GROUNDING INSTRUCTIONS .............................................................................. 4
POWER CORD WARNINGS ...................................................................................5
RADIO INTERFERENCE ........................................................................................ 5
CONTAINER USE ................................................................................................... 5
MICROWAVE SAFE MATERIALS............................................................................ 6
MICROWAVE SET
UP ............................................................................................
7
PARTS DIAGRAM .............................................................................................. 7
TURNTABLE INSTALLATION ............................................................................. 7
INSTALLATION GUIDE ........................................................................................... 8
CONTROL PANEL ................................................................................................... 9
OPERATION INSTRUCTIONS .........................................................................10-14
MAINTENANCE ..................................................................................................... 15
TROUBLESHOOTING .......................................................................................... 16
TABLE OF CONTENTS
1

Model:
Rated Voltage:
Rated Input Power(Microwave):
Rated Output Power(Microwave):
Microwave Capacity:
Turntable Diameter:
External Dimensions:
Net Weight:
A
appliance
appliance
appliance h
repaired by
SAVE THESE INSTRUCTIONS
TECHNICAL DATA
1PMB09
120V~60Hz
1450W
900W
.9 Cu. ft. (24.7L)
10 in. (270mm)
18.6 x 14.7 x 10.7 in. (473 x 374 x 272mm)
Approx. 26 Lbs. (11.8 kg)

exposure to excessive microwave
energy, follow the safety precautions stated below.
1. Read all instructions before use.
Read and follow the on
page 2.
3.
4.
combustible materials are placed inside to facilitate even cooking and prevent
overcooked food.
Remove all wire twist-ties or metal handles from paper or plastic containers/
bags before putting them in the microwave.
If anything ignites inside the microwave, keep the door closed and turn it off,
then unplug it. If needed, shut off the power at the fuse or circuit breaker panel.
Do not use the microwave for storage purposes; do not leave any
paper products, cooking utensils, or food inside when it's not in use.
This microwave must be grounded and connected to a properly grounded outlet
only. See the found on page 4.
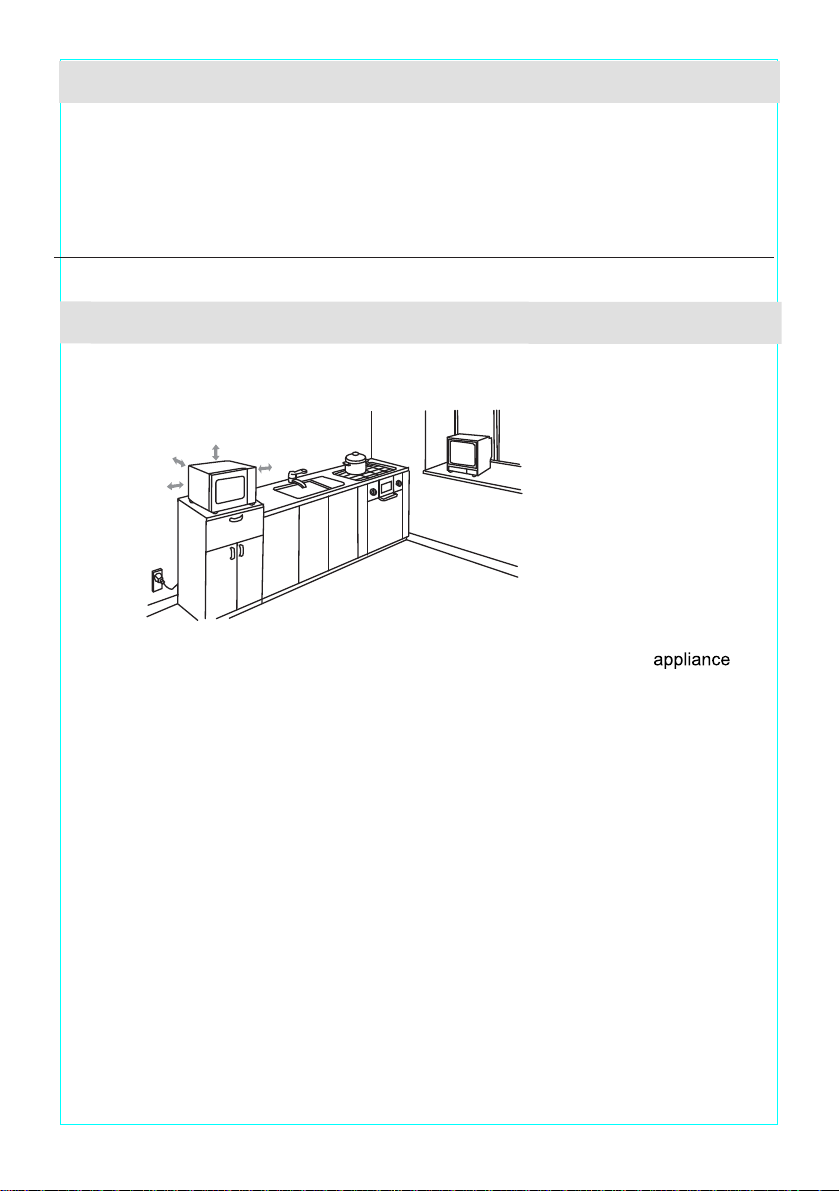
Install or locate this appliance as directed by the installation instructions provided
Some products, such as whole eggs, sealed containers, or closed glass jars may
explode and should not be heated in the microwave.
Use the microwave for its intended uses only, as described in this manual. Do not
use corrosive chemicals or vapors in this appliance as it's specifically designed to
heat, cook, or dry food. It is not designed for industrial or laboratory use.
This appliance is not intended for use by children, unless it's with close adult
supervision.
10. Do not operate the microwave if its cord or plug is damaged, if it's not working
properly, or if it has been damaged or dropped.
11. This appliance has no user serviceable parts. Contact customer service or a
qualified technician for examination, adjustments, or repairs.
Do not cover or block any air vents or other openings on the microwave.
Do not store or use the microwave outdoors.
Do not use the microwave near water (near a kitchen sink, in a wet
basement, near a swimming pool) or similar wet locations.
Do not immerse either the cord or plug in water.
Keep the cord away from heated surfaces.
Do not operate an empty microwave.
To reduce the risk of a fire:
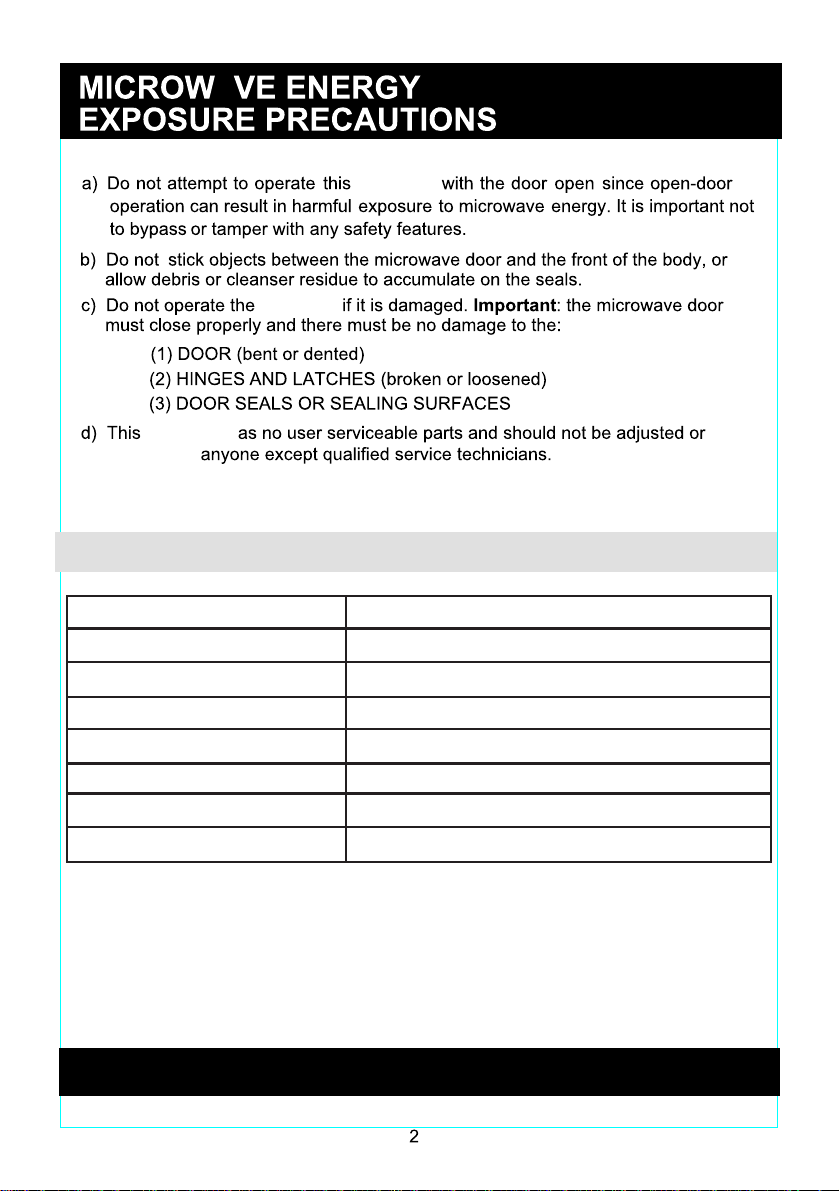
a)
Carefully supervise operation of the microwave when paper, plastic, or other
b)
c)
d)
WARNING
IMPORTANT SAFETY INSTRUCTIONS
in this manual.

4
19. Liquids such as water, coffee, or tea may be heated beyond the boiling point
Electric Shock Hazard
This appliance has no user serviceable parts.
Touching some of the internal components can cause
serious personal injury or death. Do not disassemble
this microwave.
Electric Shock Hazard
Improper grounding can result in electric shock, fire, or personal injury. Do not plug this
microwave into an outlet until it's properly installed and grounded.
This appliance must be grounded. In the event of an electrical short circuit, grounding
reduces the risk of electric shock by providing an escape route for the electric current.
This is equipped with a cord having grounding wire and a 3-pronged
grounding plug, which must not be removed or tampered with in any way. The
microwave must be plugged into an outlet that is properly installed and grounded.
Consult a qualified electrician if the grounding instructions are not completely
understandable, or if you have doubts as to whether or not the appliance is properly
grounded. If using an extension cord is necessary, it must have a 3-pronged
grounding plug and a 3-slot outlet that will fit the plug on the . The marked
rating of the extension cord must be equal to or greater than the electrical rating of
the appliance.
b)
c) Stir liquids both before and halfway through heating them.
Do not use straight-sided containers with narrow necks.
Before removing the container, allow it to stand in the microwave for a short
time once the cooking time ends.
Use extreme care when inserting a spoon or other utensil into the container.
d)
e)
without appearing to be boiling, when a container is removed from the
microwave. Bubbling or boiling liquids are not always visible, resulting in them
suddenly boiling over when the container is disturbed, or a utensil is inserted into
the liquid.
a) Do not overheat liquids.
Do not let the cord hang over the edge of a table or counter.
When cleaning the interior or exterior surfaces use only mild, nonabrasive soaps
or detergents applied with a sponge or soft cloth.

See the instructions listed in "Microwave-safe Materials" on page 5 .
There may be certain non-metallic containers that are not safe to use in the microwave.
When in doubt, test the container in question using the procedure below.
Operating the microwave may cause interference to your radio, TV or electronics.
If you experience interference, take the following measures to try and reduce or
eliminate it:
a)
b)
Clean door and sealing surface of the microwave.
Reposition the receiving antenna of the radio or television.
Relocate the microwave with respect to the antenna.
Move the microwave away from the equipment.
Plug the microwave into a different outlet so the microwave
and the electronics are on separate circuits.
Place a microwave-safe containerfilled with 1 cup of cold water (250ml), along with
the (empty) container in question, inside the microwave.
Cook for 1 minute on maximum power.
Feel the empty container carefully; if it's very warm, do not use it in the microwave
again.
Do not exceed the 1-minute cooking time.
a)
b)
c)
CAUTION
Personal Injury Hazard
Tightly-closed containers may explode. Containers should be opened and plastic
pouches should be pierced before cooking.
CONTAINER USE
A short power cord is provided to reduce the risk of becoming entangled and
tripping over over a longer cord.
Extension cords may be used if they're correctly exercised as instructed below.
If an extension cord is used:
The marked electrical rating of the extension cord should be equal to or
greater than the electrical rating of the microwave.
The extension cord must be a 3-pronged grounding cord.
The extension cord should be arranged so that it doesn't drape over the
counter, tabletop, within the reach of children, or can be tripped
over unintentionally.
RADIO INTERFERENCE
POWER CORD
Container Test:
d)
5

Follow the manufacturer’s instructions. The bottom of the browning
dish must be at least 3/16 in. (5mm) above the turntable. Incorrect
usage may cause the turntable to break.
Microwave-safe dishes only. Follow all manufacturer's instructions.
Do not use any cracked or chipped dishes.
Always remove the lid and only use jars to heat food until it's just
warm. Most glass jars are not heat resistant and they may
Use heat-resistant oven-proof glassware only. Make sure there is no
metallic trim. Do not use any cracked or chipped dishes.
Follow all manufacturer’s instructions. Do not close the bag with a
metal twist tie. Make slits in order for steam to escape.
Can be used for short periods of cooking or warming only. Do not
leave any food unattended while cooking.
Can be used to cover food for reheating or for absorbing fat only with
supervision for short periods of cooking only.
Can be used as a cover to prevent food splatter or as a wrap for
steaming foods.
Only plastics labeled "Microwave Safe" should be used. Follow all
manufacturer’s instructions. Some plastics soften as the food inside
them gets hot. "Boiling bags" and other tightly closed plastic bags
should be slit, pierced, or vented as directed by the package.
Microwave-safe meat and candy thermometers only.
Instructions
Metal ties
Metal prevents the food from heating. Metal will cause
arcing or sparks.
May cause a fire in the microwave.
When exposed to high temperature, plastic foam may melt
or contaminate the liquid inside.
Wood dries out when it's used in the microwave and it may split
or crack.
May cause arcing or sparks. Transfer food into a microwave-safe dish.
May cause arcing or sparks and could cause a fire in the appliance.
Materials
Instructions
Containers/
Materials
Containers/
MICROWAVE-SAFE MATERIALS
NON-MICROWAVEABLE MATERIALS
Plastic foam
Microwave-safe plastic wrap can be used to cover food during cooking
to retain moisture. Do not allow the plastic wrap to touch your food.
Can be used as a cover to both prevent food splatter and retain moisture.
6

A)
Control panel
B)
Turntable shaft
C)
Turntable ring assembly
D)
Glass tray
E)
Viewing window
F)
Door assembly
G)
Safety lock system
E D
MICROWAVE SET UP
Parts Diagram
Remove the appliance and all materials from both the carton and microwave cavity.
Glass tray
Turntable ring assembly
Instruction Manual
Turntable ring assembly
Hub (underside)
Glass tray
Turntable shaft
Never turn the glass tray upside down; its
movement should never be restricted.
Both the glass tray and the turntable ring
assembly must always be used during cooking.
All food, or containers of food, must always be
placed on the glass tray.
)
b)
c)
TURNTABLE INSTALLATION
-
-
-
7

8
(1) A minimum clearance of 3 inches (7.5 cm) is required between the
and any adjacent walls. One side must be completely open. (See Fig. 1)
(2) Leave a minimum clearance of 12 inches (30 cm) above the microwave.
(See Fig. 1)
(3) Do not remove the legs from the bottom of the microwave.
(4) Blocking the air exhaust vents can damage the microwave.
(5) Place the microwave as far away from both radios and TVs as possible. An
operating microwave may cause interference to your radio or affect TV reception.
b) Plug your microwave into a grounded 115-120V AC outlet. Be sure the voltage
WARNING: Do not install the microwave above a stove, oven, or other heat-producing
appliance. If installed above or nearby a heat source, the microwave could be damaged
and the warranty would be voiced.
3.0 inch
(7.5cm)
3.0 inch(7.5cm) 12 inch(30cm)
OPEN
a) Select a level surface that provides enough open space for the air exhaust vents.
Fig. 1
INSTALLATION
COUNTERTOP INSTALLATION
Remove all packaging materials and accessories. Examine the microwave for any
damage, such as dents or a broken door. Do not install a damaged microwave.
Cabinet:Remove any protective film foundon the microwave cabinet surface. Do
not remove the lightbrownMica coverattached inside the microwave protecting the
magnetron.
and frequency are the same as the voltage and frequency listed on the rating label.

(1) Time Cook
(2) Time Defrost
(3) Power
(4) Clock
(5) Auto Cook Functions: Popcorn, Potato, Pizza,
Frozen Vegetable, Beverage, Dinner Plate
(6)
(7) Weight Defrost
(8) Kitchen Timer Function
(9) Stop/Clear: clears any setting selected before pressing Start.
During operation press once to pause cooking; twice to stop
and clear the active settings.
(10) 0/Memory function
(11) Start/+30Sec.
CONTROL PANEL
(1)
(2)
(3)
(4)
(5)
(9)
(6)
(7)
(8)
(11)
(10)
Number Buttons: 1-9
9

OPERATION INSTRUCTIONS
Level
Power
Display
10
100% 9
90% 8
80% 7
70% 6
60% 5
50% 4
40% 3
30% 2
20% 1
10%
a) Press , the screen will display the following flashing
b) Use the number keys to enter the current time. For example,
if the time is 10:12 now, press 1, 0, 1, 2in that order.
c) Press again to finish setting the time. The " " symbol will flash
d) If the numbers entered are outside the - range, the setting will be voided until a
valid time is entered.
Note: (1) The kitchen timer is different from the clock. is only a timer.
(2) While the kitchen timer is active, any additional programs cannot be set.
b) Press the number keys to enter the cooking time. The maximum cooking time
is 99 minutes and 99 seconds.
0
0%
a) Press once, the screen will display .
There are 11 power levels available, as shown below.
a)Press , the screen will display the following flashing numbers .
Press the number keys to set the chosen timer (the maximum timer length
is 99 minutes and 99 seconds.
Press / to confirm and start the timer setting.
When the timer is finished, the microwave will beep 5 times.
If the clock is set, the screen will return to display the current time.
b)
c)
d)
Note: (1) At any point during setting the time, if / is pressed, or if no
action is taken within 1 minute, the microwave automatically returns
to the previous setting.
(2)If the clock needs to be reset for any reason, please repeat steps1 through 3.
Press once and the screen will display . The default
power level is 100%. Use the number keys to adjust the power level.
Press / to start cooking.
c)
d)
and the time will light up.
numbers 00:00.
10

a) Press and the screen will display .
b) Use the number keys to enter the desired defrost timer length.
The timer range is 00:01~99:99.
The default power level is 3. If you want to change the power level,
press POWER once, and the screen will display PL3. Use the number
keys to select the level you want.
want.
d) Press START/+30SEC to start defrosting. The remaining cooking time
will be displayed
a) Press and the screen will display .
b) Press the number buttons to enter the weight of the frozen food.
The weight range must be between 4~100 oz.
c) If the weight entered is not within the 4~100 oz range, it will be
considered invalid.
d) Press / to start defrosting. The remaining cooking time
will be displayed.
b) 30 seconds of instant cooking time at a 100% power level can be started instantly by
pressing / . Each press of the button increases the cooking time by 30
seconds. The maximum cooking time is 99 minutes and 99 seconds.
Note: During cooking and defrosting modes, time can be added by pressing
the / button.
EXPRESS
a) 1 to 6 minutes of instant cooking time at a 100% power level can be started instantly
by pressing numbers 1 to 6 on the number pad. During cooking, press
/ to increase the cooking time. The maximum cooking time is
99 minutes and 99 seconds.
For example: at a
level
a) Press once, the screen will display .
b) Press , , , in that order.
c) Press once, then press to select 50% microwave power.
d) Press / to start cooking.
Note: (1)
c)
At any time during programming, if / is pressed, or if no
If is selected, only the microwave fan will operate, without heating power.
At any time during programming, you can change the required power
level. Press until the current power level lights up, then use the
number keys to change the power. Food will cook at the selected power for
the remaining time.
(2)
(3)
action is taken within 1 minute, the microwave automatically returns to the
previous setting.
11

a) Press repeatedly until the size of the vegetable package
appears on the screen ( , , oz); numbers will display in order.
For example, press FROZEN VEGETABLE once, 4.0 appears.
b) Press START/+30 SEC to begin; the microwave will beep once.
c) When the cooking time ends, it beeps five times and then returns idle.
Note: 1 ounce is approximately 28 grams.
a) Press repeatedly until the number you want appears on the screen
For example, press BEVERAGE once, 1appears.
b) Press START/+30 SEC to begin; the microwave will beep once.
c) When the cooking time ends, it beeps five times and then returns idle.
a) Press DINNER PLATE repeatedly until the number you want appears on the screen.
For example, press DINNER PLATE once, 9.0
appears.
b) Press START/+30 SEC to begin; the microwave will beep once.
c) When the cooking time
Note: 1 ounce is approximately 28 grams.
ends, it beeps five times and then returns idle.
(1, 2, 3); numbers will display in order.
Settings: 1: 1 potato (approximately 8.0oz/230g)
2: 2 potatoes (approximately 16.0oz/460g)
3: 3 potatoes (approximately 24.0 oz/690g)
For example, press POTATO once, 1appears.
b) Press START/+30 SEC to begin; the microwave will beep once.
c) When the cooking time ends, it beeps five times and then returns idle.
a) Press POPCORN repeatedly until the size of the popcorn package appears on the
screen (1.75, 3.0, 3.5 oz); numbers will display in order.
For example, press POPCORN once, 1.75 appears.
b) Press START/+30 SEC to begin; the microwave will beep once.
c) When the cooking time ends, it beeps five times and then returns idle 0.
Note: 1 ounce is approximately 28 grams.
POPCORN
POTATO
a) Press POTATO repeatedly until the number you want appears on the screen
DINNER PLATE
(1, 2, 3cup); numbers will display in order. One cup is about 250ml.
(9.0, 12.0, 18.0 oz.); numbers will display in order.
12

PIZZA (Reheat)
a) Press PIZZA repeatedly until the weight of your pizza appears on the screen
(4.0, 8.0, 14.0 oz); numbers will display in order.
PIZZA 4.0
b) Press START/+30 SEC to begin; the microwave will beep once.
c) When the cooking time ends, it beeps five times and then returns idle.
Note: 1 ounce is approximately 28 grams.
MEMORY FUNCTION
Up to 2 stages can be set for cooking purposes. In multi-stage cooking, defrost will
automatically be set as the first stage, if it is selected as one of the stages.
Note: Auto cook functions do not work in multi-stage cooking.
Example:
The steps are as follows:
(1) Press TIME COOK once, then press 5, 0, 0to set the cooking time;
(2) Press POWER once,then press 8to select 80% microwave power.
(3) Press TIME COOK once, then press 1, 0, 0, 0to set the cooking time;
(4) Press POWER once, then press 6to select 60% microwave power.
(5)
Press START/+30 SEC to start cooking.
Example: Memory 2
The steps are as follows:
MULTI-STAGE COOKING
continue to program them. Only one or two stages can be programmed per setting.
After programming the setting, press START/+30 SEC once to save it. If you press
START/+30 SEC again, it will start operation.
c)
a)
Press 0/MEMORY repeatedly to select setting 1, 2, or 3; numbers will display in
order.
b) If the settings have been programmed, press START/+30 SEC to use one. If not,
(1) While idle, press 0/MEMORY twice, stopping when the screen displays 2.
(2) Press TIME COOK once, then press 3, 2, 0in that order.
(3) Press POWER once, until the screen displays PL10, then press 8
to display
PL8.
(4) Press START/+30 SEC to save the setting. The microwave will beep once and
the screen will display 2. Press START/+30SEC again to save the setting as
Memory 2 and begin operation.
(5) If the electricity is not cut off, the settings will remain saved. If it is, the settings
will need to be reprogrammed.
(6) To run Memory 2: while idle, press 0/MEMORY twice until the screen displays
2, then press START/+30SEC to begin.
13

a) While idle, if it's set, the screen will display the current time and the " :" icon will
flash; otherwise, the display shows 0:00.
INQUIRY FUNCTIONS
a)
While cooking, press CLOCK to make the screen display the clock for 3 seconds.
b) While cooking, press POWER to display the current microwave power level for 3
seconds. After 3 seconds, the display screen will turn back to the cooking timer.
In multi-stage cooking, the inquiry function can be done the same way as described above.
"
LOCK: Press STOP/CLEAR for 3 seconds, until you hear a long beep signaling that
the lock mode has been activated. When locked, the display will show "
UNLOCK: From the locked state, press STOP/CANCEL for
3 seconds, until you hear a long beep signaling that the lock is released.
When the cooking time has ended, the microwave will beep 5 times to signal it’s finished.
OTHER FUNCTIONS
.
When selecting a setting from the pad, the screen displays the
corresponding setting.
When operating, or paused, the screen displays the remaining cooking time.
b)
c)
Function
POPCORN
POTATO
PIZZA
FROZEN
VEGETABLE
BEVERAGE
DINNER
PLATE
Weight
Display
Option
COOKING TIME END REMINDER
1.75 oz (50 g)
3.0 oz (85 g)
3.5 oz (100 g)
1 (about 8 oz/230 g)
2 (about 16 oz/460 g)
3 (about 24 oz/690 g)
4.0 oz (113 g)
8.0 oz (230 g)
14.0 oz (395 g)
4.0 oz (113 g)
8.0 oz (230 g)
16.0 oz (450 g)
1 cup (236 ml)
2 cup (473 ml)
3 cup (710 ml)
9.0 oz (255 g)
12.0 oz (340 g)
18.0 oz (510 g)
1.75
3.0_
3.5_
1
2
3
4.0_
8.0_
14.0_
4.0_
8.0_
16.0_
1_
2_
3_
9.0_
12.0_
18.0_
14

MAINTENANCE
1.
2.
3.
4.
5.
6.
7. .
8.
9. 1 5
10.
11.
12. .
15

ISSUE
will
not start
POSSIBLE CAUSE SOLUTION
a. The power cord is unplugged.
b. The door is open.
c.
The
wrong setting was selected.
again.
a. Plug into the outlet.
b. Close the door and try
c. Check the cooking
instructions.
Arcing or
sparking
a.
b.
Non-
microwaveable materials
were used. See page 5.
The microwave is operated
when it's empty.
c. Spilled food remains inside
the microwave.
a.Use microwave-safe
cookware only.
b.Do not operate the
microwave while it's empty.
c.Clean the inside with a
damp towel.
Uneven
cooking
a. Non-microwaveable materials
were used. See page 6.
b. Food is not defrosted
completely.
c.Either cooking times or power
levels are unsuitable.
d. Food was not turned or
stirred.
a. Use microwave-safe
cookware only.
b. Completely defrost all food.
c. Use the correct cooking
times and power levels.
d. Turn or stir the food while
cooking.
Overcooked
foods Either cooking times or
power levels are unsuitable.
Undercooked
foods
b.
c. The air vents are obstructed.
d. Either cooking times or power
levels are unsuitable.
a.Use microwave-safe
cookware only.
b. Completely defrost all food.
c. Make sure the air vents are
not blocked.
d. Use the correct cooking
times and power levels.
Uneven
defrosting
a. Use only microwave-safe
cookware.
b. Use the correct cooking
time and power level.
c. Turn or stir the food while
defrosting.
a. Non-microwaveable materials
were used. See page 6.
Food was not defrosted
completely.
TTROUBLESHOOTING
a. Non-
microwave safe
containers
were used. See page 6.
b. Cooking time or power level is
not suitable for the food.
c. Food was not turned or stirred.
Use the correct cooking times
and power levels
16
If you’re looking for quality home appliances, visit our website.
Table of contents
Other Perfect Aire Microwave Oven manuals

Perfect Aire
Perfect Aire 1PMB13 User manual

Perfect Aire
Perfect Aire 1PMWSP14 User manual

Perfect Aire
Perfect Aire 1PMSS11 User manual

Perfect Aire
Perfect Aire 2WWM07 User manual

Perfect Aire
Perfect Aire 2WSSM11 User manual

Perfect Aire
Perfect Aire 1PMW13 User manual

Perfect Aire
Perfect Aire 1PMW07 User manual