Perfect Fine Series User manual

USER MANUAL
Version 1.0
9 9
FINE

Unpacking Instructions
1
Read Manual before Operation
Please note the warnings in bold which will ensure the safe and smooth operation. These warnings are
important to a certain extent.
Important! Indicates important information to protect personnel from laser incident or injury.
Caution! Prevent damage or injury from incorrect operation.
Laser! Laser safety warming labels.
Warning Data
As receiving a fixture, carefully unpack the carton, checking contents to ensure that all parts are in
good condition. Informing the shipper immediately and retaining packing material for inspection if any
parts damaged from shipping or device damaged. Keep packing materials as evidence for shipper’s
confirmation.
Unpacking Instructions
This unit is in perfect condition before delivery; please check all accessories when unpacking the unit.
User should follow this user manual to operate this unit, and make sure that you are clear on all laser
safety information and unit operation before power it on. Any wrong operation will make this unit out of
warranty.
Carefully move after receiving it, checking whether there is any damage from shipping, and all the
accessories in it.
Attention!
Attention! Indicates a skill or other useful information for special situations.
Warning!
If the external flexible cable or cord of this luminaire is damaged, it shall be replaced by a
special cord or cord exclusively available from the manufacturer or his service agent.
Shields, lenses or ultraviolet screens shall be changed if they have become visibly damaged to such an
extent that their effectiveness is impaired, for example by cracks or deep scratches.
NAME
Laser Light
Power Cord
Switch Keys
Interlock Connector
Keyboard
USER MANUAL
Carton Case
QTY
1
1
2
1
1
1
1
Dear user,
Thanks for choosing our laser device, believing this brand new product will bring you unlimited marvel
and happiness. Before operating this device, please read this manual thoroughly, and retain it for
future reference.

Safety Instructions
2
Safety Instructions
0.2m
To protect the environment, please try to recycle the packing material as much as possible.
The projector is for indoor use only, IP20. Use only in dry locations. Keep this device away from
rain and moisture, excessive heat, humidity and dust. Do not expose the device to water or any
other fluids, or metallic objects
Don’t throw this product away just as general trash, please deal with the product follow the
abandon electronic product regulation in your country.
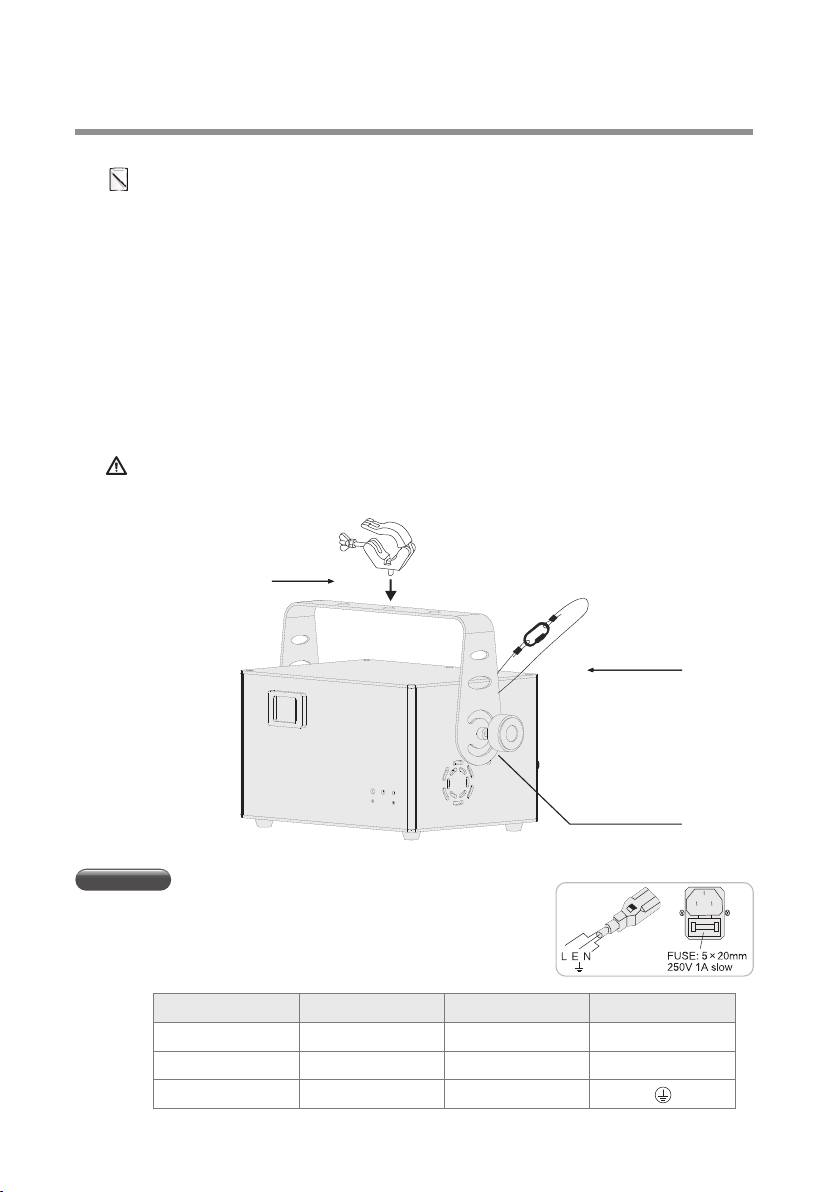
Locate the fixture in a well ventilated spot, away from any flammable materials and/or liquids. The
fixture must be fixed at least 20cm from surrounding walls
To avoid condensation to be formed inside, allow this unit to adapt to the surrounding temperatures
when bringing it into a warm room after transport. Condense sometimes prevents the unit from
working at full performance or may even cause damages
Don’t cover any ventilation openings as this may result in overheating.
Don’t install it on flammable object.
Don not use it when maximum ambient temperature is higher than 40 degree,
Unplug the unit when it is not used for a longer time or before replacing the bulb.
Don’t open the top cover to avoid unit damage.
Please use the original packing when the device is to be transported.
◆
◆
◆
◆
◆
◆
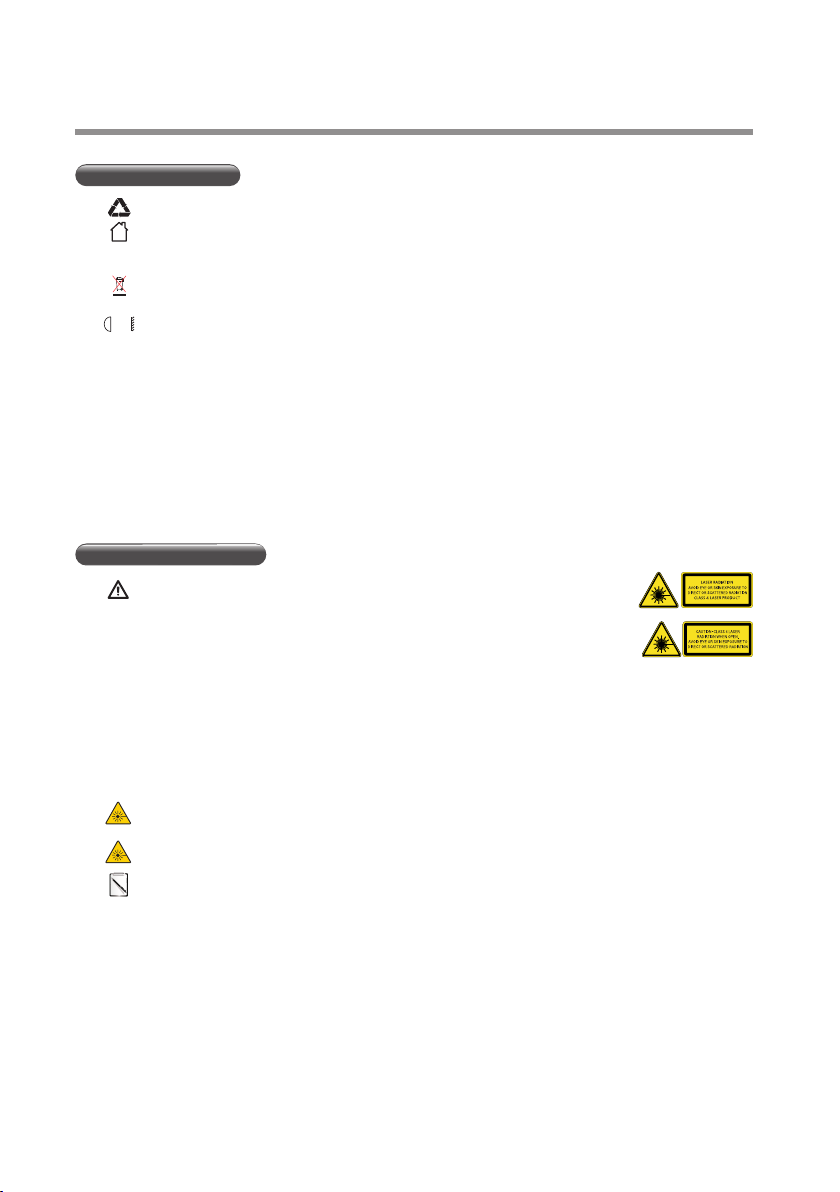
According to EN 60825-1:2007, this product belongs to class 4. Direct eye
contact may cause injury.
This is so-called show laser, emitting radiation with a wavelength spectrum between 400 and
700nm and producing lighting effects for shows.
International laser safety regulations require that the vertical height from installment to ground is
more than 3 meters, horizontal distance is 2.5 meters from audience.
Never direct the laser beam to people or animals and never leave this device running unattended.
The legal requirements for using laser entertainment products vary from country to country. The
user is responsible for the legal requirements at the location/country of use.
◆
◆
◆
◆
◆
Laser Safety Protection Feature
Laser Safety Warnings
Caution! The laser security measures are designed according to the specific terms of the relevant
international laser safety standards and has the following laser safety protection means
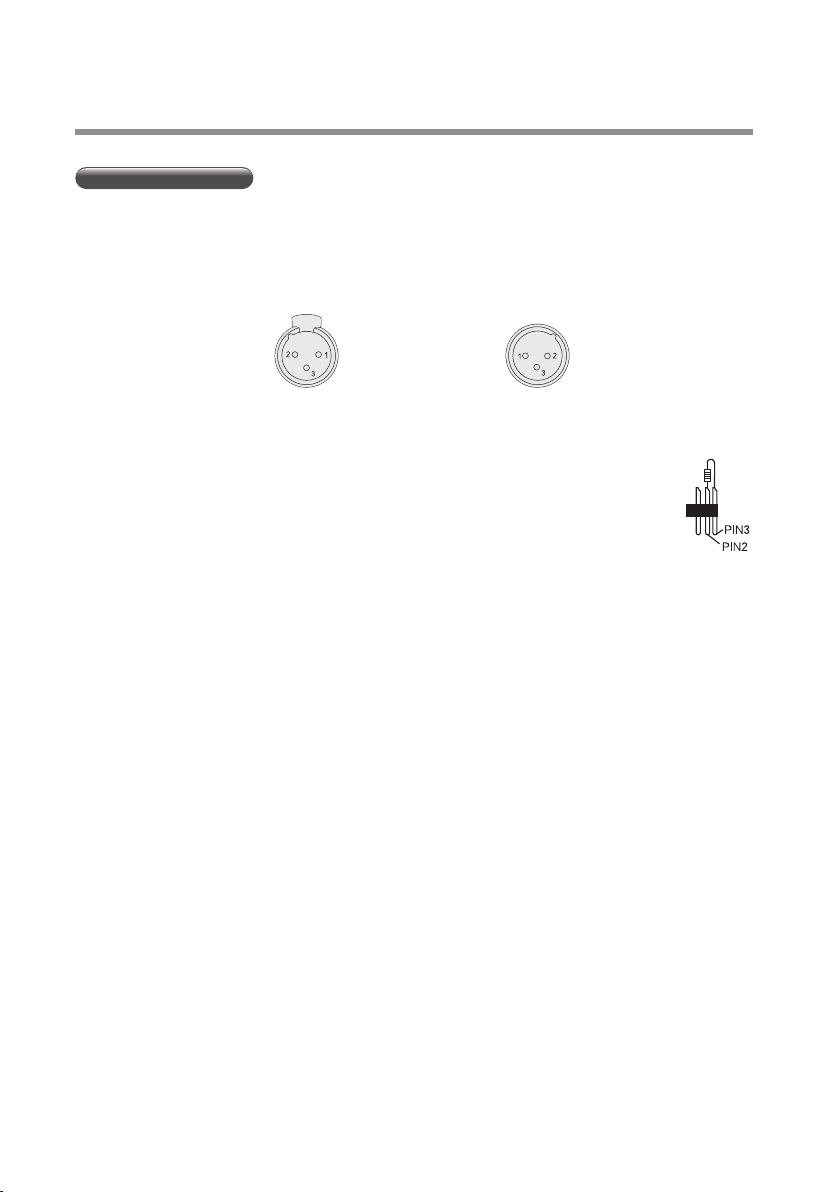
Laser key switch: laser is available only when the key is turned on.
Laser remote Emergency switch: remote connecting switch, which will cut off the laser light path
emergently once the device in potential hazard;
Laser indication : laser indication indicating the front panel of the laser light“ laser-ready "
Laser safety labels: affixed line with European standards for multiple chassis laser safety stickers
laser modulation closed : When the laser scanning pattern is less than ± 1 degree, built-in single
chip will close the light after comparison operation.
Laser shutter protection: When the laser scanning pattern is less than ± 1 degree, shutter
protection will cut off light path. (Remark: When the device work with ILDA or DMX program, there
has the status of shutter protection, and the pattern is less than ± 1 degree, it’s normal protection,)
◆
◆
◆
◆
◆
◆
◆
This product is for laser show only. The class 3B laser light should be operated
by professional operator only.
Warning! Avoid direct eye contact with laser beams during operation, especially when the laser
beams stay still, or injury to eyes may occur.

Overhead Rigging
3
Attention! The installation must be carried out by qualified service personal only. Improper
installation can result in serious injuries and /or damage to property. Overhead rigging required
extensive experience! Working load limits should be respected, Certified installation materials
should be used, the installed device should be inspected regularly for safety.
Make sure the area below the installation place is free from unwanted persons during rigging, de-
rigging and servicing.
Locate the fixture in a well ventilated spot, far away from any flammable materials and/or liquids.
The fixture must be fixed at least 50cm from surrounding walls
The device should be installed out of reach of people and outside areas where persons may walk
by or be seated.
The device should be well fixed; a free swinging mounting is dangerous and may not be
considered!
Do not cover any ventilation opening as this may result in overheating
Before the first time use, it must be inspected by professional staff to make sure safety, inspection
regularly every year.
◆
◆
◆
◆
◆
◆
Before rigging make sure that installation area can hold the 10 times weight of device. Using the
steel rope which can hold 12 times weight of device, through the eye-bolt for assisting hang
installment.
Please use the attached power, note that power voltage and
frequency are the same as the marked voltage and frequency of
device when connecting power. Every device’s power should be
connected separately, so that device can be controlled individually.
AC Power
Cable(EU)
Brown
Liht blue
Yellow/Green
Cable(US)
Black
White
Green
Pin
Live
Neutral
Earth
International
L
N
Safety-rope
Adjust Angle
Clamp

DMX-512 connection
Connection between laser lights and DMX must use the shied cable of diameter more than 0.5mm.
Please use the attached 3 pin XLR plug/socket to connect the DMX output/input interface. The
connection between socket and cable as below( note the plug/socket’s 3 pin number and position).
Note, XLR plug/socket’s 3pin cannot be touched by inner hull, connection between pins is not allowed.
Except above connection, XLR plug/socket cannot be connected with XLR control line. Device receives
international standard DMX512 (1990) control signal.
When using standard DMX512 control signal, the last device’s output interface must be
connected to a DMX plug. This plug is putting a 120 ohm resistance between “canon”
plug’s 2 pin and 3 pin. Showing as below pic. Sticking this plug into the last device’s signal
output interface, it will avoid the interference during the process of signal transmission.
4
DMX-output
XLR mounting-sockets(rear view)
DMX-input
XLR mounting-plugs(rear view)
1-Shield
2-Shield(-)
3-Shield(+)
Overhead Rigging

Operation instructions
5
NO NAME FUNCTION
17
18
19
20
ILDA THROUGH
ILDA INPUT
Power Switch
Power input
The laser effect output aperture. Never look inside the fixture through this aperture
while the fixture is operating.
The receiver of remote controller
Main power indicated LED. Red is ON.
Turn the knob to adjust the sound activated sensitivity.
Receiving sound signal
Indicated light of music signal. Synchronize to detected music signal
Used for hanging the light.
Used to attach a safety cable when the fixture is rigged. Check more details in RIGGING
3PIN Female XLR port,using for DMX
3PIN Male XLR port, using for DMX
Switch off the laser manually if error occurs
Make sure the professional person use
Indicated light of laser. Red is on.
Indicated light of power. White is on.
For setting mode
Connecting PS/2 keyboard , or PS/2 USB keyboard of adaptor
Standard ILDA DB25 Output(through)
Standard ILDA DB25 Input
Power ON/OFF.
Power input socket, built-in protective tube and spare tube
Laser Aperture
Remote
POWER
Potentiometer
MIC
Music LED
Handle
Safety Eye
DMX output
DMX input
Urgent and safe switch
Key switch
Laser Indicator
Power Indicator
LED display
PS/2 interface
1
2
3
4
5
6
7
8
9
10
11
12
13
14
15
16
3.15
DMX-512
INTERLOCK
CONTROL
ILDA
POWER
1 2
7
3 6
4
5
8
9 10
11
12
13
14 15
16
17 18
19 20

When laser is powered on, LCD monitor on rear panel shows the current operating standalone mode or
DMX address of DMX mode. With help of LCD control panel, is very easy to set and change the
operating mode of laser. After every resetting and saved, the new mode information will be shown on
LCD monitor at next power on.
Menu operating instruction
6
LED Display
Model choice ,return to the previous menu.
Go into the deeper menu.
For higher numeric value operation.
For lower numeric value operation.
Auto Mode 1
Auto Mode 2
Built-in holiday programs: 3.New Year, 4.Christmas. 5.Love,
6.Birthday, 7.Party, 8.Halloween, 9.Music
Loop playback of built-in TEX0-9.
Text program saved in 0-9.
Time Mode.
Time display mode:Time & Date or Only Time.
Time setting:year/month/date/week/hour/min/second/12or24h
Countdown Mode.
Built-in holiday programs: 3. New Year, 4.Christmas. 5.Love,
6.Birthday, 7.Party, 8.Halloween, 9.Music
Functional Description
Sound Mode1
Sound Mode 2
Setting countdown time. ENTER to confirm. UP to start, DOWN to stop.
Signal reception menu.(when DMX is not connected, LED letters will twinkle)
Channel addresses setting.
Slave Mode.
Mirror setting:N-PP/PN/NP/NN
Image size setting:SH01-SH16;SY01-SY16
Master Mode.
IR Mode.
Restore the factory initial setup.

7
Menu operating instruction

Initial Setting
Auto/Sound
Programs To choose program effect through UP/DOWN, ENTER to confirm.
Text
Editing
Mode
TEXT
TEXT0-TEXT9
Loop playback of saved TEX0-9.
Text program 0-9, ENTER to play.
Time
Mode
Smod(SHOW MODE) To choose time
display mode.
SETT(SETTING) Time Setting Mode
d-dt(DATE&TIME)
d—t(ONLY TIME)
Time & Date Mode.
Only Time Mode.
Auto1-Auto9
Sound1-Sound9
Count
down
Mode
d001
To check DMX signal.
When DMX is not connected,
LED letters will twinkle
DMX Mode
COUN ENTER into
Countdown Mode
0000-9999
TEX0-TEX9
(LINK TO 0-9)
ENTER to confirm.
UP to start,
DOWN to stop.
ENTER to confirm
and
back to the previous step
year:****
month:n **
date:d**
hour:h-**
minute:N-**
second:S-**
12/24h
Directly link to
TEX0-9 after countdown.
001-492 Setting DMX value.
slav ENTER into Slave Mode, When there is no signal, LED letters will twinkle
SLAVE
Mode
MIRR
(SET MIRROR)
Zoom
(SET SIZE)
N-En
Irem
(SET REMOTE)
Setting pattern direction
Setting pattern size
Master Mode
IR Mode
N-PP/PN/NP/NN
SH01-SH16
SY01-SY16
ON/OFF
ON/OFF
ENTER to confirm
and
back to the previous step
System
setting
8
REST ENTER to restore the factory initial setup
Menu operating instruction

9
Remote controller operation instruction
Music shows
Auto shows
Color choices circulating to the left/Previous step
Time mode
Coundown mode
Power ON/OFF
Color choices circulating to right/Next step
Pausing patterns changing
Text mode
Number buttons
Patterns mirror seleted
FUNCTION
BUTTON DESCRIPTION
Press AUTO, enter into Auto mode, it will play Auto show randomly. Press to change
different programs.
Power ON/OFF and black out. When it is pressed, enable laser light output, press again
blackout the laser, and circle as it.
ON/OFF
Auto
Sound
Press MUSIC enter into Sound mode, it will play Auto show randomly. Press to change
different programs.
Press MUSIC for 2 seconds, enter into sound sensitivity adjustment. Then choose
NO.1-9, 9 is the most sensitive, 1 is the slowest.
Press C enter text model, then by choose to save text.
Single number and double number setting.
Every press, pattern changes in 4 kinds of mirror direction, after getting the right pattern
direction, stop press.
Pause
Pattern
rotation
Numeric key
Mirror function
Count down
mode Press B for 2 seconds, adjust the value by 1-9, press B to count down, press to stop.
Press A, enter into time mode.
Press A again, circle play among YEAR, MONTH,DAY,WEEK,TIME
Press it, program and color change will be paused, press again to continue play.
Between the choice of 12R and 24R, press to choose 12R, press again to choose 24R
Time mode
Color choices circulating to the left/Previous step
Color choices circulating to right/Next step
Press A for 2 seconds, enter into time adjust mode. The adjusted number flicker, press
numeric key to choose the right value, press color choice key to choose last or
next, then press A to save.
Left
Right
Press B, enter into countdown mode.

Keyboard operation instruction
Press WINDOWS button on the keyboard enter menu option. Laser will show corresponding menu.
BUTTON DESCRIPTION
Menu option
FUNCTION
Laser will show corresponding menu, press to change below mode.
Then save by “ENTER”
1、AUTO 2、MUSIC
3、TEXT 4、CLOCK
5、COUNT DOWN 6、DMX
7、SLAVE 8、SYSTEM
Press WINDOWS , enter menu, Laser will show corresponding menu. Pressing UP/DOWN to choose 1、
AUTO, Press ENTER to AUTO mode
1、Keyboard operation instruction of AUTO mode
Keyboard
operation InstructionOld New Pattern
AUTO
In Auto Mode, press UP/DOWN to choose auto shows
TAB MIRROR Display repeat setting, from the saved text.
F2 COLOR Choose last edited text, if one key without text, it will not display
Press WINDOWS enter menu option. Laser will show corresponding menu. Pressing UP/DOWN to choose
2、MUSIC , Press ENTER to MUSIC mode
2、Keyboard operation instruction in MUSIC mode
RGB
Press to stop, press again to continue.
PAUSE
In Sound Mode, press UP/DOWN to choose sound shows
TAB MIRROR Mirror, pattern cycle change at 4 kinds mirror direction, when
arrive favor pattern, press stop key.
F2 COLOR MUSIC color setting, to choose different color effect
RGB
Press to stop, press again to continue.
PAUSE
SOUND
3、Keyboard operation instruction in TEXT model
Press WINDOWS enter menu option. Laser will show corresponding menu. Pressing UP/DOWN to choose
3、TEXT, Press ENTER to TEXT mode.
Keyboard
operation InstructionOld New Pattern
F1
F2
F3
FLOW
COLOR
Draw
Text flow setting, FLOW/STOP, press UP/DOWN to set flow speed
Color setting, to choose different color
Draw setting, press UP/DOWN to set speed
RGB
10
Keyboard
operation InstructionPattern
Old New
text edit

11
F4
F5
F6
F7
F8
F9
F10
F11
F12
TAB
ZOOM
X Move
Y Move
Y Roll
X Roll
Z Roll
WAVE
Text Qty
Play TIME
Mirror
Zoom setting, zoom in /zoom out/in and out, press UP/DOWN to set speed
Clear the cache area
Delete one character
Text head
Text end
Go ahead/back, move
Delete all text and task on every NO. key
DEL
BACKSPACE:
HOME:
Ctrl+Alt+del:
END:
ALT+NO. Play+NO Save text and text parameter, No. KEY means content saved on it
INS Loop Playback Display repeat setting, from the saved text.
PgUp
PgDn
Pause
Choose last edited text, if one key without text, it will not display
Choose next edited text, if one key without text, it will not display
Display paused
CTRL+NO SAVE+NO Save text and text parameter, No. KEY means content saved on it
3、Keyboard operation instruction in TEXT model
Press WINDOWS enter menu option. Laser will show corresponding menu. Pressing UP/DOWN to
choose 3、TEXT, Press ENTER to TEXT mode.
Keyboard operation instruction
Keyboard
operation InstructionPattern
Old New
Keyboard
operation InstructionPattern
Old New
Keyboard
operation InstructionPattern
Old New
text edit
X axis move right or left, STOP/MOVE AHEAD/MOVE OPPOSITE,
press UP/DOWN to set speed
Y axis move UP or DOWN. STOP/MOVE AHEAD/MOVE OPPOSITE,
press UP/DOWN to set speed
Y axis roll, STOP/ COROTATION/REVERSE, press UP/DOWN to set speed
X axis roll, STOP/ COROTATION/REVERSE, press UP/DOWN to set speed
Z axis roll, STOP/ COROTATION/REVERSE, press UP/DOWN to set speed
Wave effect, wave range/wave quantity/wave frequency,
press UP/DOWN to set speed
Display character quantity,12. 10. 8. 6. 4
Setting display time, follow the cue , to set by the NO. key
Mirror pattern, pattern cyclic change at 4 kinds of mirror pattern direction.
text saving
text
display

12
5、Keyboard operation instruction of COUNTDOWN
COUNT
DOWN
ENTER Enter into countdown mode, No. is flicker, press0-9 set countdown second,
4 number countdown time is maximum, press ENTER to confirm
Delete previous character
Press SPACE KEY or PAUSE, timing and timing pause switch
BACKSPACE
TAB MIRROR Mirror, pattern cycle change at 4 kinds mirror direction,
when arrive favor pattern, press stop key
F2 COLOR choose different color effect
SPACE KEY
PAUSE
Timing again
ESC
RGB
4、Keyboard operation instruction of CLOCK
Press WINDOWS enter menu option. Laser will show corresponding menu. Pressing UP/DOWN to
choose 4、CLOCK, Press ENTER to CLOCK mode
clock
setting
Enter into CLOCK mode
ENTER
SHOW MODE
SETTING
**** YY
**.** M D
**:** TIME
DATE&TIME
ONLY TIME
Time & Date Mode
Time setting
Press UP/DOWN choose setting value, or press 0-9 to set.
ENTER to confirm.
12R/24R Press UP/DOWN to choose 12R Mode or 24R Mode.
Save setting, back to time setting mode
Give up save, withdrawn from time setting mode. To clock time mode
ESC
TAB MIRROR Mirror, pattern cycle change at 4 kinds mirror direction, when arrive
favor pattern, press stop key
F2 COLOR Choose different color effect
RGB
Keyboard operation instruction
Press WINDOWS enter menu option. Laser will show corresponding menu. Pressing UP/DOWN to
choose 5、COUNTDOWN. Press ENTER to CLOCK mode
Keyboard
operation InstructionPattern
Old New
Keyboard
operation InstructionPattern
Old New
PRESS ENTER
Only Time Mode

13
DMX Channels Chart
Several optional operating modes were preprogrammed set into this laser projector at DMX channel 1.
Before control other DMX channels, please be sure that the channel 1 was set in proper mode (value).
CH2 AUTO MODE
Value
000-029
030-059
060-089
090-119
120-149
150-179
180-209
210-239
240-255
Description
AUTO1
AUTO2
AUTO3
AUTO4
AUTO5
AUTO6
AUTO7
AUTO8
AUTO9
CH2
Channel
CH2 MUSIC MODE
Value
000-029
030-059
060-089
090-119
120-149
150-179
180-209
210-239
240-255
Description
MUSIC1
MUSIC2
MUSIC3
MUSIC4
MUSIC5
MUSIC6
MUSIC7
MUSIC8
MUSIC9
CH2
Channel
Value
000-009
010-049
050-099
100-149
150-200
200-255
Description
Blackout
Auto Mode
Sound Mode
TEXT Mode
The first pattern
The second pattern
Channel
CH1
MODE
CHOICE
CH2-CH3 TEXT MODE
Value
000-255
Description
CH2 Key show
Channel
CH3
Scrolling speed 000-255
Shows stored in the Key 0-9 of when programing with the keyboard
Scrolling Speed for key show if scrolling effect applied

Value
000-031
032-063
064-095
096-127
128-159
160-191
192-223
224-255
000-255
Description
First pattern group
Second pattern group
Third pattern group
Fourth pattern group
Fifth pattern group
Sixth pattern group
Seventh pattern group
Eighth pattern group
Every 16 values for a pattern, total for 128 patterns
CH2
PATTERN
GROUP
Channel
14
DMX Channels Chart
CH2-CH3 Mode First pattern&Seconde Pattern
CH3 Pattern
CH4-CH20 TEXT MODE First pattern&Seconde Pattern Mode
CH4
COLOR
CH 5
Clipping
CH 6
Zooming
CH 7
Zooming Speed
CH 8
Y Rotation
CH 9
Rotational Speed
CH 10
X Rotation
Value
000-007
008-015
016-023
024-031
032-039
040-047
048-057
058-063
064-111
112-159
160-207
208-255
000
001-127
128-255
000-127
128-169
170-209
210-255
000-255
000-127
128-191
192-255
000-255
000-127
128-191
192-255
Description
Built-in colors
R
G
R+G
B
R+B
G+B
R+G+B
Single color conversion
Multi-color moving up and down
Multi-color moving left to right
Strobe
Whole pattern
0%-99% clipping fixed pattern
Clipping speed (slow to fast)
100%-5% pattern zooming
Zoom in
Zoom out
Loop zooming in/out
Fast to slow
Fixed position after rotating 0-359°
Clockwise rotation
Anticlockwise rotation
Fast to slow
Fixed position after rotating 0-359°
Clockwise rotation
Anticlockwise rotation
Channel

15
DMX Channels Chart /Product specification
Product specification
Model
Size
Weight
Power
Voltage
Red LD
Green LD
Blue LD
Laser Class
Scanner Speed
Auto Show
Sound Show
Fine 3W
337×198×231mm
5.56kg
80W
100-240V 50/60Hz
800mW 638nm
1000mW 520nm
2000mW 450nm
Class 4
30K
9
9
CH 11
Rotational Speed
CH 12
Z Rotation
CH 13
Rotational Speed
CH 14
X Movement
CH 15
Movement Speed
CH 16
Y Movement
CH 17
Movement Speed
CH 18
Wave Size
CH 19
Wave Frequency
CH 20
Wave Speed
000-255
000-255
000-255
000-127
128-255
Wave position
Movement speed
Fast to slow
Wave size
Wave frequency
Value
000-255
000-127
128-191
192-255
000-255
000-127
128-191
192-255
000-255
000-127
128-191
192-255
Description
Fast to slow
Fixed position after rotating 0-359°
Clockwise rotation
Anticlockwise rotation
Fast to slow
128 different fixed position on X axis
Clockwise rotation
Anticlockwise rotation
Fast to slow
128 different fixed position on X axis
Clockwise rotation
Anticlockwise rotation
Channel
Fine 1W
291×200×120mm
3.6kg
25W
100-240V 50/60Hz
200mW 638nm
200mW 520nm
600mW 450nm
Class 4
20K
9
9
Fine 6W
322×215×251mm
5.75kg
175W
100-240V 50/60Hz
1000mW 638nm
2000mW 520nm
3000mW 450nm
Class 4
30K
9
9
This manual suits for next models
3
Table of contents
Popular Dj Equipment manuals by other brands

Serato
Serato TERMINAL MIX 4 quick start guide

PR Lighting
PR Lighting XR 1700 FRAMING user manual

EVA
EVA EVA-HY Series Mounting Installation Instructions

Chaovet
Chaovet Line Dancer user manual

American Audio
American Audio PSX - REV 1-2 User guide and reference manual

Chauvet DJ
Chauvet DJ REEDOMCHARGE-CYC quick start guide