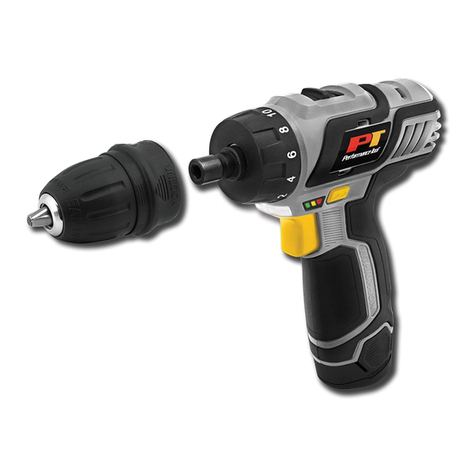
Performance Tool W50086 User manual

VARIABLE SPEED DRILL
OWNER’S MANUAL
Item Number W50086
WARNING:
It is the owner and/or operators’ responsibility to study all WARNINGS, operating, and
maintenance instructions contained on the product label and instruction manual prior to operation
of this product. The owner/operator shall retain product instructions for future reference.
The owner and/or operator are responsible for maintenance, maintaining all decals or warning
labels and while in use, maintaining the unit in good working order. If the owner and/or operator
are not fluent in English, the product warnings and instructions shall be read and discussed with
the operators’ native language by the purchaser/owner or his designee. Make sure that the
operator comprehends its contents. Safety information shall be emphasized and understood prior
to usage. The product shall be inspected per the operating instructions.
Users of this product must fully understand these instructions. Each person operating this product
must also be of sound mind and body and must not be under the influence of any substance that
might impair their vision, dexterity or judgment.
Protect yourself and others by observing all safety information.
Failure to comply with instructions could result in personal injury and/or property damage!

2
SAFETY GUIDELINES / DEFINITIONS
UNPACKING AND INSPECTION
SPECIFICATIONS
Specifications are
subject to change
without notice.
Input Voltage .........................................................120V ~60hz
Rated Current ....................................................................3.2A
No-Load Speed ....................................................0-3000 RPM
Chuck Capacity (MAX) ......................................................3/8"
WARNING: Read and understand this entire instruction manual before attempting to assemble, install, operate or
maintain this product. Failure to comply with the instructions may result in serious personal injury and/or property
damage!
The following signal words are used to emphasize safety warnings that must be followed when using this
product:
This instruction manual is intended for your benefit. Please read and follow the safety, installation, maintenance and
troubleshooting steps described within to ensure your safety and satisfaction. The contents of this instruction manual are
based upon the latest product information available at the time of publication. The manufacturer reserves the right to make
product changes at any time without notice.
DANGER Indicates an imminently hazardous
situation that, if not avoided, WILL result in death or
serious injury.
WARNING Indicates a potentially hazardous
situation that, if not avoided, COULD result in death
or serious injury.
CAUTION Indicates a potentially hazardous situation
that, if not avoided, MAY result in minor or moderate
injury.
NOTICE Indicates important information, which if not
followed, MAY cause damage to equipment.
After opening the carton, unpack your new product and related parts & accessories. Please inspect it carefully for
any damage that may have occurred during transit. Please check it against the photograph on carton.
WARNING: DO NOT operate this product if damaged during shipment, handling or misuse. Do not operate the
product until the parts have been replaced or the fault rectified. Failure to do so may result in serious personal
injury or property damage. All damaged parts must be repaired or replaced as needed prior to operating this
product. Check to see that all nuts, bolts and fittings are secure before putting this product into service.
Please have the serial number, model number, and date of purchase available for reference when calling.
IMPORTANT SAFETY INFORMATION
WARNING:
READ, UNDERSTAND AND FOLLOW ALL INSTRUCTIONS AND WARNINGS BEFORE OPERATING THIS
PRODUCT. FAILURE TO DO SO MAY RESULT IN PERSONAL INJURY AND/OR PROPERTY DAMAGE AND
WILL VOID WARRANTY.
1.Always use common sense and pay particular
attention to all the DANGER, WARNING,
CAUTION and NOTICE statements of this
manual. The safety instructions provided are
not intended to cover all possible conditions
and practices that may occur when operating,
maintaining and cleaning power tools.
2.Observe work area conditions. Do not use ma-
chines or power tools in damp or wet locations.
Don’t expose to rain. Keep work area well
lighted. Do not use electrically powered tools in
the presence of ammable gases or liquids. Do
not bring combustible materials near the tools.
Power tools create sparks, which may ignite
the dust or fumes. Keep work area clean and
well lit. Cluttered work areas invite accidents.
3.Use personal protective equipment. Wear
ANSI approved safety goggles. Protective
equipment such as dusk mask, non-skid safety
shoes, hard hat, heavy duty work gloves or
hearing protection used for appropriate condi-
tions will reduce personal injuries.
4. Keep bystanders, children and visitors away
while operating this product. Distractions can
cause you to lose control.
5.Stay alert. Watch what you are doing, and use
common sense when operating this product.
Do not use this product while tired or under

3
IMPORTANT SAFETY INFORMATION
the inuence of drugs, alcohol, or medication.
A moment of inattention while operating this
product may result in serious personal injury.
Keep proper footing and balance at all times.
Do not reach over or across running machines,
hoses, cords, etc.
6.Dress properly. Do not wear loose clothing or
jewelry. Keep your hair, clothing, and gloves
away from moving parts. Loose clothes, jew-
elry or long hair can be caught in moving parts.
7.Work Safe. Operate tool a safe distance from
yourself and others in the work area. Keep
proper footing and balance at all times. Do not
overreach, especially on ladders. Be certain
ladders being used are sturdy, stable, on a rm
surface and erected as safe working angles.
Do not reach over or across running machines,
hoses, cords, etc.
8.Inspect before every use; do not use if parts
are loose or damaged.
9.Do not alter this product in any way.
10. Use the right tool for the job. Do not attempt
to force a small tool or attachment to do the
work of a larger industrial tool. Don’t use a
tool whose performance is not adequate for
your work. Do not modify this tool and do not
use this tool for a purpose for which it was
not intended.
11. Power tool plugs must match the outlet.
Never modify the plug in any way. Do not use
any adapter plugs with earthed (grounded)
power tools. Unmodied plugs and matching
outlets will reduce risk of electric shock.
12. People with pacemakers should consult their
physician(s) before use. Electromagnetic
elds in close proximity to heart pacemaker
could cause pacemaker interference or
pacemaker failure. In addition, people with
pacemakers should:
• Avoid operating alone.
• Do not use with power switch locked on.
• Properly maintain and inspect to avoid
electrical shock.
• Any power cord must be properly
grounded. Ground Fault Circuit Interrupter
(GFCI) should also be implemented – it
prevents sustained electrical shock.
13.
Avoid body contact with earthed or grounded
surfaces such as pipes, radiators, ranges and
refrigerators. There is an increased risk of elec-
tric shock if your body is earthed or grounded.
14. Do not expose power tools to rain or wet
conditions. Water entering a power tool will
increase the risk of electric shock.
15.
Do not abuse the cord. Never use the cord for
carrying, pulling or unplugging the power tool.
Keep cord away from heat, oil, sharp edges
or moving parts. Damaged or entangled
cords increase the risk of electric shock.
16. When operating a power tool outdoors,
use an extension cord suitable for outdoor
use. Use of a cord suitable for outdoor use
reduces the risk of electric shock.
17. If operating a power tool in a damp location
is unavoidable, use a ground fault circuit
interrupter (GFCI) protected supply. Use of a
GFCI reduces the risk of electric shock.
Use power tool ONLY on adequately
rated circuits to avoid overheating of
electrical systems.
18.
Prevent accidental starting. Ensure switch is in
the “OFF” position before connecting to power
source and/or battery pack, picking up or car-
rying the tool. Carrying power tools with your
nger on the switch or energizing power tools
that have the switch “ON” invites accidents.
19. Do not use the power tool if the switch
does not turn it on and off.Any power tool
that cannot be controlled with the switch is
dangerous and must be repaired.
20. Have your power tool serviced by a qualied
repair person using only identical replace-
ment parts. This will ensure that the safety
of the power tool is maintained. Follow
instructions in the Maintenance section of
this manual. Use of unauthorized parts or
failure to follow Maintenance Instructions
may create a risk of shock or injury.
21. Disconnect the plug from the power source
and/or the battery pack from the power tool
before making any adjustments or changing
accessories. Such preventive safety mea-
sures reduce the risk of starting the power
tool accidentally.
22. Maintain power tools. Check for misalign-
ment or binding of moving parts, breakage of
parts and any other condition that may affect
the power tool’s operation. If damaged, have
the power tool repaired before use. Many
accidents are caused by poorly maintained
power tools.
23.
Keep cutting tools sharp and clean. Properly
maintained cutting tools with sharp cutting edges
are less likely to bind and are easier to control.
24. Use the power tool, accessories and tool bits
etc. in accordance with these instructions,
taking into account the working conditions
and the work to be performed. Use of the
power tool for operations different from


4
IMPORTANT:
Some of the following symbols may be used on your tool. Please study them and learn
their meaning. Proper interpretation of these symbols will allow you to operate the tool better and safer.
SYMBOL DEFINITIONS
V Volts Voltage (Potential)
A Amperes Current
Hz Hertz Frequency (Cycles per Second)
W Watt Power
Kg Kilograms Weight
Alternating Current Type of Current
Direct Current Type of Current
Alternating or Direct Current Type of Current
Earthing Terminal Grounding Terminal
Class II Construction Denotes Double Insulation
min Minutes Time
s Seconds Time
Ø Diameter Size of Drill Bits, Grinding Wheels, etc.
n0No load speed No-load Rotational Speed
.../min Revolutions per Minute Revolutions, Surface Speed,
Strokes, etc. per Minute
1,2,3,... Ring Selector Settings Speed, Torque or Position Settings
Symbol Name Explanation
those intended could result in a hazardous
situation.
25. Store idle equipment. When not in use,
tools must be stored in a dry location to
inhibit rust. Always lock up tools and keep
out of reach of children and other untrained
persons. Switch off all unused electrical tools
when stored. Disconnect plug from power
source. Tools are dangerous in the hands of
untrained users.
WARNING: Some dust created by power
sanding, sawing, grinding, drilling and other
construction activities contains chemicals known
to the State of California to cause cancer, birth
defects or other reproductive harm.
WARNING: This product and its packag-
ing contain a chemical known to the State of
California to cause cancer, birth defects, or other
reproductive harm.
IMPORTANT SAFETY INFORMATION

5
CONTROLS AND COMPONENTS
1. Keyless Chuck
2. Chuck Grip
3. Belt Hook
4. Grip
5. Lock on Button
6. Trigger
7. Forward/Reverse Lever
4
6
7
1
3
5
OPERATING THE DRILL
OPERATING THE ON/OFF SWITCH
WARNING: Never tape the trigger switch
down to provide continuous high speed.
The tool may fail under such conditions
causing fire or personal injury.
Squeeze the trigger switch to turn the tool
“ON”. Release the trigger switch to turn
the tool “OFF”. The amount of pressure put
on the trigger will vary the speed of the drill.
Fully pressing the trigger will increase the
rpms to maximum.
When drilling for extended periods, the
“Lock-On” switch may be used, but do not
use this switch in situations where the drill
is likely to bind or kickback. If kickback
does occur, the sudden motion of the tool
may make it difcult to release the “Lock-
On” switch and turn the drill off.
REVERSING SWITCH LEVER
NOTICE: Be sure the trigger is released
when changing the position of the lever.
Always check the direction of the Drill’s
rotation before use.
The reversing switch lever reverses the
rotation of the drill bit. It is located just
above the trigger switch. ALWAYS turn the
motor off and let the bit come to a
complete stop before moving the switch.
Move the switch to the right for a forward
rotation of the bit. Move the switch to the
left to put the bit into reverse.
CAUTION: Do not change the direction
of a moving bit. Make sure the bit comes
to a complete standstill before moving
switch. Changing direction while the bit is
moving can cause damage to the drill.
INSTALLING ACCESSORIES
BIT INSERTION
• Unplug the drill. Never change bits on a
live drill.
• Make sure the bit is undamaged,
sharp and free from wood or metal
shavings. Foreign material on the bit may
keep the chuck from tightening fully. A
loose bit may cause injury.
• Push the bit into the chuck as far as it
will go.
• Make sure the bit is in the center of the
chuck. If the bit is off-center, it will not be
held securely and may fly loose during use
causing serious injury.
• Rotate the keyless chuck clockwise until
tight while holding the chuck grip to lock the
bit in place.
OPERATION
WARNING: Always unplug the tool before changing accessories.
2

6
OPERATION
BIT REMOVAL
• Unplug the drill.
• Rotate the keyless chuck
counterclockwise while holding the chuck
grip to unlock the bit.
• Remove the bit
WARNING: In certain situations, the bit
may bind and the drill will kickback in the
opposite direction. This sudden reaction
could lead to loss of control and possible
serious injury. Always be prepared for the
possibility of kickback, especially when
breaking through material to complete
a hole.
DRILLING METAL
Use an even pressure, hard enough to
keep the drill biting, but not so hard that
the bit spins in the hole. Spinning the bit
will dull it quickly. Soft metals like copper,
cast iron, brass or aluminum will take less
pressure than harder materials like steel.
When drilling harder metals, use lubricating
oil on the tip of the bit.
DRILLING MASONRY
NOTICE: Always use carbide tip bits for
drilling masonry.
Use an even pressure, hard enough to
keep the drill biting, but not so hard that
the bit spins in the hole. Spinning the bit
will dull it quickly. Bricks and similar soft
materials will take less pressure than a
hard material like concrete.
DRILLING WOOD
WARNING: Always clamp the work
piece to a steady base. Never hold in
your hand or across your legs.
Apply pressure in line with the bit. Applying
pressure at an angle could cause the bit
to bind or break. Thin materials that may
splinter should be drilled with another piece
of wood placed underneath. Twist bits can
be used for wood drilling but will overheat
if the flutes are not cleared of wood chips
periodically. To prevent splintering when
finishing holes, stop drilling just before the
hole breaks through and complete the hole
from the other side.

CARE & MAINTENANCE
ACCESSORIES
WARNING:
Unplug the drill before per-
forming maintenance or cleaning.
NOTICE:
This Drill is lubricated before it
leaves the factory. This lubrication should
last for the life of the tool. No further
lubrication is required.
• Never immerse tool in liquid. Never let any
liquid inside tool housing.
• Clean with a damp cloth and mild soap. Do not
use solvents or harsh detergents.
• Check brushes periodically. Worn
brushes should be replaced by
qualied service personnel.
• Keep air vents clean and free from debris.
Blocked air vents can lead to overheating
Use only accessories that are recommended by the manufacturer for your model. Accesso-
ries that may be suitable for one tool may become hazardous when used on another tool.
Always attach grounded (3-prong) extension cords to grounded (3-hole) outlets. If you
must use an extension cord, be sure that the gauge is large enough to carry the amount
of current necessary for your power tool. If not, your tool may experience a loss of power,
excessive voltage drop or overheating. The smaller the gauge number, the heavier the cord
(see table below).
Rely only on high-grade drills and drivers offered on our virtual shelves.
Table of contents
Other Performance Tool Drill manuals

Performance Tool
Performance Tool M648 User manual

Performance Tool
Performance Tool W50092 User manual

Performance Tool
Performance Tool W50095 User manual

Performance Tool
Performance Tool W50094 User manual

Performance Tool
Performance Tool M651 User manual

Performance Tool
Performance Tool W50031 User manual