Performer Goal-26X User manual

Congratulations on your purchase of Goal-26X. Goal-26X is made to enhance
comfort without compromising on performance and to fit your various needs on touring,
shopping and communicating. Let’s have fun with your new recumbent.
When you receive your reucmbent, please make sure all parts referred to in the
instructions have been included. Your new recumbent has been assembly 50%. Please
refer to assembly guide for more details on individual steps.


Goal-X parts in the carton
Quick release
Cable housing
Pedal
Rubber
Reflector
Tool
Chain
Brake wire
Shifter wire
Rear derailleur

- 1-
Table of content
ASSEMBLY GUIDE............................................................................................................................2
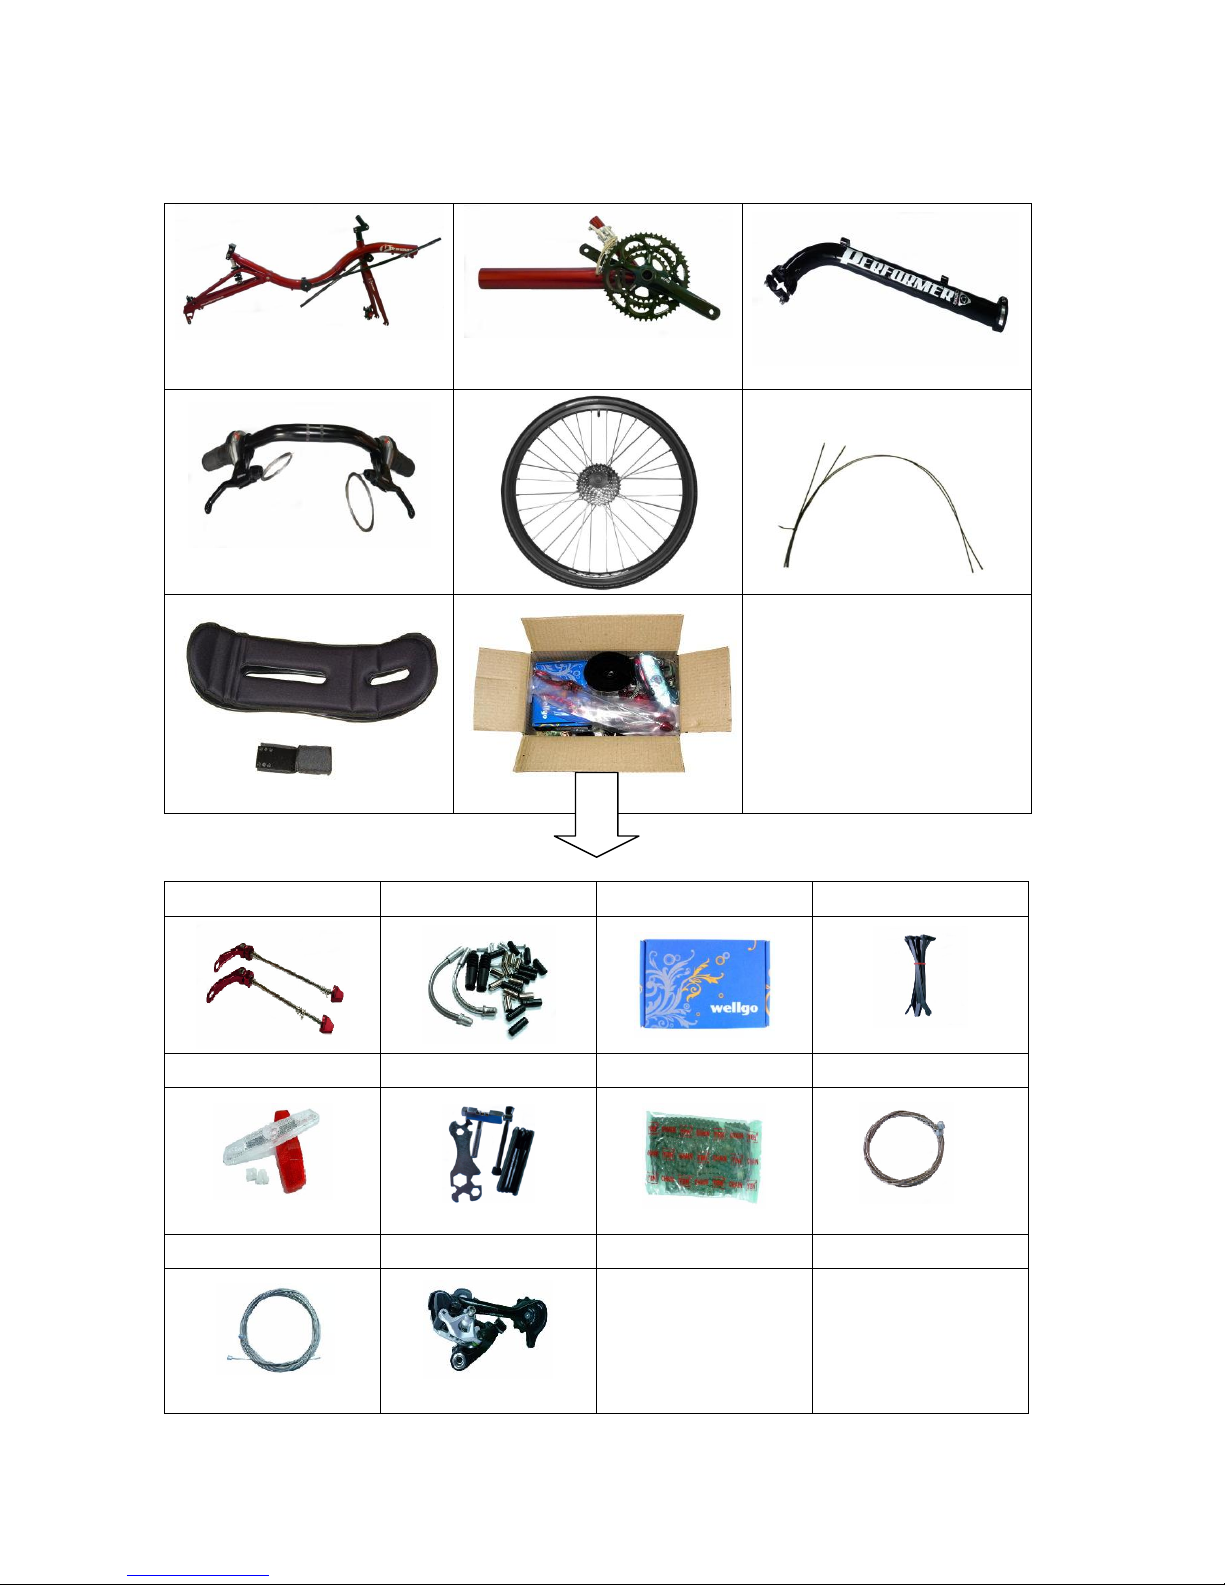
ASSEMBLY MAIN FRAME AND WHEELS....................................................................................................2
ROUTING CHAIN...............................................................................................................................3
ADJUST THE CHAIN LENGTH ..................................................................................................................5
INSTALL BRAKE AND SHIFTER CABLE..........................................................................................6
INSTALL HANDLEBAR ............................................................................................................................6
ADJUST HANDLEBAR ............................................................................................................................6
INSTALL BRAKE AND SHIFTER CABLE..........................................................................................9
SHIFTER CABLE....................................................................................................................................9
CABLE FOR REAR DERAILLEUR (AT RIGHT SIDE).......................................................................................9
CABLE FOR FRONT DERAILLEUR (AT LEFT SIDE).....................................................................................10
ADJUST DERAILLEUR .......................................................................................................................... 10
BRAKE CABLE.................................................................................................................................... 11
REAR BRAKE CABLE (AT RIGHT SIDE): ................................................................................................... 11
FRONT BRAKE CABLE (AT LEFT SIDE) .................................................................................................... 11
ADJUST BRAKE .................................................................................................................................. 12
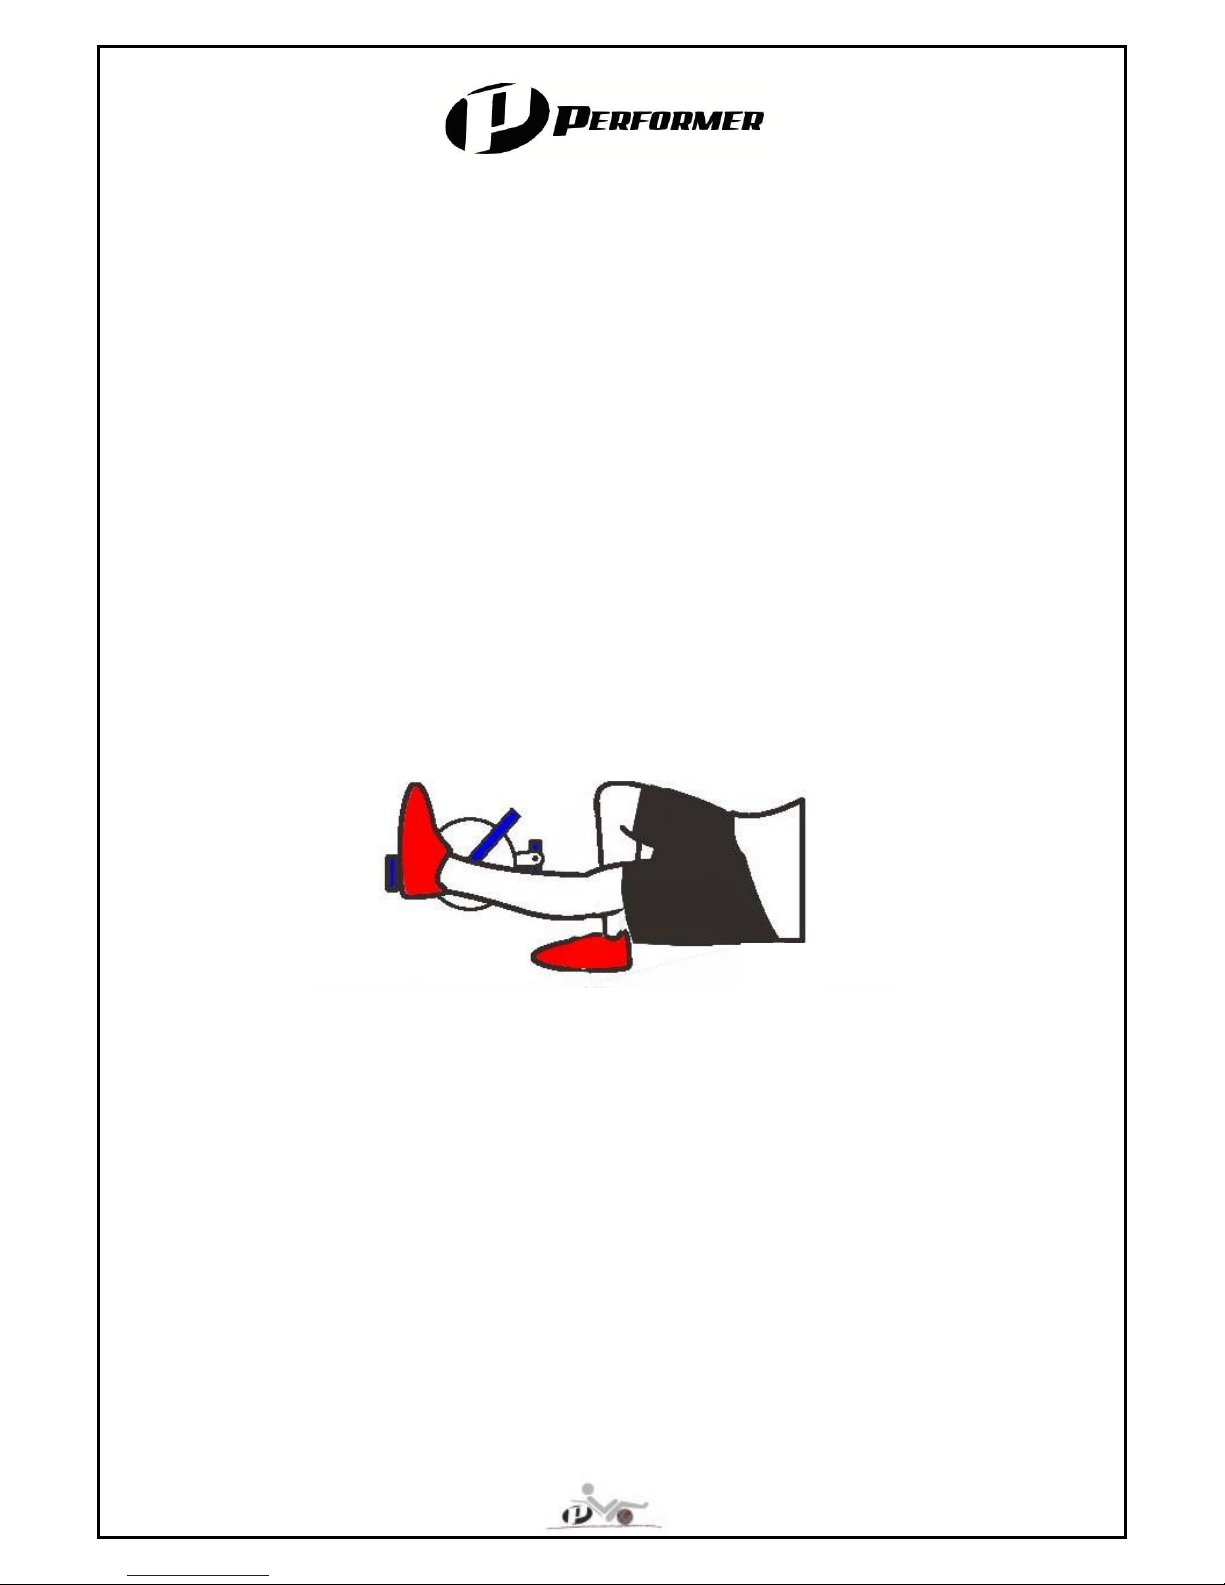
INSTALL PEDAL.............................................................................................................................. 13
SEAT ................................................................................................................................................ 13
WARRANTY.....................................................................................................................................14
LIMITED WARRANTY ............................................................................................................................14
DOES NOT COVER...............................................................................................................................14
PROCEDURE....................................................................................................................................... 14

- 2-
Assembly guide
Assembly main frame and wheels
1. Install rear derailleur (pic 1)
2. Install rear wheels on the main frame by rotating the quick release on rear wheel (pic 2)
3. Install front wheels on the main frame by rotating the quick release on front wheel (pic 3)
4. It is better to adjust rear derailleur first. Press derailleur leg inward. The leg needs to be
parallel to the biggest sprocket
Note: The spare paint on the fork dropout will lead to the difficulty of installing wheel.
Please clean paint out when it happen.
Pic 1
Pic 2
Pic 4
Pic 3

- 3-
Routing chain
Normally, our recumbent is suitable for people with 165cm~195cm tall. As a result, we
always make our front boom long enough to fit various peoples’ height. Some people
need to cut boom shorter to find suitable position.
Insert front boom to main frame then sit on seat and step vertically on pedal and move
front boom in or out to adjust a comfortable leg length. No matter you decide to cut the
boom or not, make sure the crank leg never touch the wheel when turning. If touched,
that means the boom is too further in. Please move backward. When the boom can not
be inserted further in frame tube and it is still far for your leg to reach pedal, you need to
cut is shorter. When cutting the boom, don’t forget to the reserve extra 10cm more on the
boom to clamp in the frame. Once you find out a proper leg length, tighten front boom.
(pic 5)
Pic 5

- 4-
1. Attaching the chain through the front derailleur cage (pic 6)
2. Run through the upper chain tube
3. Under big pulley and over the sprockets and down through rear derailleur (pic 7/8)
4. For Goal 26X: Put the rest of chain above small pulley and through the lower tube.
For Goal X: Put the rest of chain through the lower tube.
5. Please don’t cut or link the chain unless you find out the proper chain length. (Please
refer to adjust chain length)
Pic 7
Pic 6
Pic 8

- 5-
Adjust the chain length
The proper chain length is determined by the sitting place of rear derailleur (pic 9). When
the derailleur cage is sitting too high, the chain is too long (pic 10). On the other hand,
the chain is too short
1. Shift onto the smallest chainring in the front and shift down to the smallest cog in
the rear
2. Pull the chain taut until the rear derailleur is extended like pic 9
3. Check the sitting place of rear derailleur
4. Use the master link to hold the chain together
Pic 10
Pic 9

- 6-
Install Brake and shifter cable
Install handlebar
There are two handlebar options for Goal suspension recumbent. OSS and USS.
OSS Handlebar
1. Place the Riser on the stem and tighten riser clamp (pic 11)
2. Align the riser to the front wheel
3. If the stem doesn’t align to the front wheel, please adjust stem by loosing stem axle.
4. After alignment, tighten stem
5. Remove top cover from riser, place handlebar and tighten top cover (pic 12)
USS Handlebar
1. Remove top cover from extension holder on the fork , place handlebar and tighten top
cover
2. Align the fork to the front wheel
3. After alignment, tighten stem
Pic 11
Pic 12
Pic 13

- 7-
Adjust OSS handlebar
By adjusting stem
To adjust the angle of handlebar, push the raiser forward and turn the backstop screw in or
out. The backstop screw is close to the stem axle. Turing bolt in and out to let handlebar fold
further back or up. Don’t turn the screw out so far which will touch the top of stem when folded
back.
By spacer
If the handlebar is too high to hold after you screw in so far. Please take apart the stem first
then take out spacers from fork. There are 2~4 spacers with 1cm in width. The more spacer
you take off the lower handlebar is. Most riders only need to take 2 spacers off and adjust the
backstop screw. Please note that the handlebar should not touch your knees while riding.
Afterward, install the stem and extra spacer you took off then tighten it.
By fork
If you want to cut fork shorter, the cutting distance is based on 1cm (spacer width) and it’s
multiple. You can contact with your local bike shop to cut for you, if you are not familiar with
doing that.
By Cutting riser
In case you are still not comfortable with handlebar position, you can cut the raiser shorter.
1. Remove shifter and brake cable
2. Remove the top cap.
3. Loosen the riser clamp.
4. Take off riser from steer tube
5. Pull out riser
6. Cut the riser to the desired length.
7. Reassemble.

- 8-
Adjust USS handlebar
Loosen the screws of the handlebar clamping and turn the handlebar to your favorite position.
Most riders are comfortable with a 45°angle. Make sure the stem clamps in the middle tightly.
After handlebar adjusting, please re-thread brake and shifter cable to avoid sharp turns.

- 9-
Pic 13
Install Brake and shifter cable
The routing way is not important, while sharp bends are avoided.
If your hand shifter is twister, it has been installed on handlebar and been threaded
shifter wire. As for bar-end shifter, please slide the shifter wire into the small hole of
bar-end shifter first. Cable guides are on the front boom, rear chain stay or under the
frame.
Shifter cable
Cable for rear derailleur (at right side)
1. String shifter wire into cable
2. Tuck cable into cable guide (pic14)
3. Thread shifter cable into rear derailleur, pull tightly and seal the end (pic 15/16)
4. Check the cable between the cable stop and derailleur, which shouldn’t be slack
Pic 18
Pic 15
Pic 14
Pic 16

- 10-
Cable for front derailleur (at left side)
Repeat the same for the other side
Adjust derailleur
1. Check whether the chain can shift to the largest and smallest cog.
2. If doesn’t work, loosen L/H on rear derailleur.
3. When rear shifter won’t go to the largest cog, you need to loosen the L. When it won’t
shift to the smallest cog, you need to loosen the H.
4. When front shifter won’t go to the largest chainring, you need to loosen the H. When it
won’t shift to the smallest chainring, you need to loosen the L.
Pic 17
Pic 18
Pic 19

- 11-
Brake cable
Rear brake cable (at right side):
1. Squeeze the brake lever to open it up and place the head of the cable into the lever.
2. String the brake wire into cable. (pic20)
3. Tuck the cable into cable guide. (pic 21/22)
4. Thread brake cable into brake arm.(pic 23)
5. When the wheel starts to drag slightly, adjust the brake pad relief by using the pad
adjusting knobs.
Front brake cable (at left side)
Repeat the same for the other side
Pic 21
Pic 20
Pic 22
Pic 23

- 12-
Adjust brake
Performer recumbent is equipped with disc brake or rim brake. Please read the manual
from brake manufacturer.
Rim brake
1. Check brake pads, make sure they are aligned on the rim.
2. If not, turning the adjusting barrel on rim brake
3. Turning spring-tension adjusters to balance brake arms
Disc brake
1. Spin the wheel
2. Rotor should run freely in the center of disc brake without any drag.
3. If not, turn the adjusting knob clockwise until the rotor is in the center
4. Lock the two bolts on disc brake

- 13-
Install pedal
Grease pedal and screw in right pedal clockwise and left pedal anti-clockwise. Make
sure it’s tight enough.
Seat
Install seat onto the seat bracket, once you find your prefer position. Lock seat clamp
and headrests tightly. Please make sure the seat is completely tight, otherwise the
loosed bolts on FRP seat will break the seat from the bottom after a period of time. Then,
stick open cell foam on FRP seat.
Guidance for safety use
1. Inspect your Recumbent before every ride.
2. Tighten every loosening parts
3. Find comfortable seat positions and seat angles for your ride.
4. The tires should be inflated to the pressure indicated on the rim.
5. Replace your tires before they wear out.
6. Be careful to ride in wet weather conditions. Ride slower through corners to avoid skid.
7. Equipped reflectors and a front and rear light to ride at night.

- 14-
Warranty
Performer Bike warrants each new recumbent against defects in workmanship and
materials for the Limited Coverage Periods listed below. Under this warranty we will repair
or replace a defective frame, fork or part with the same or comparable model. The
decision to repair and replace is at the sole discretion of Performer. This warranty
coverage extends only to the original purchaser, and is not transferable.
Limited warranty
1. Metal Frame: Five years from the date of purchase
2. Carbon Frame: Three years from the date of purchase
3. Non consumable parts and components: One year from the date of purchase
(exclude tire, brake and shifter cable, grip, crankset, cog and chain)
Does not cover
1. Normal wear and tear, improper assembly or maintenance, or installation of parts or
accessories not originally intended for or incompatible with the bicycle as sold.
2. Any damage caused by crash, misuse or improper riding way and riding place.
3. If you elect to repair a defective product yourself or use the services of someone else
than Performer, or if you use a replacement part not supplied by Performer,
Performer will not be liable for any damage
Procedure
Please notify Performer in writing with attached picture of the frame showing damage to
christine@performer.com.tw
This manual suits for next models
1
Table of contents
Popular Exercise Bike manuals by other brands

Pro-Form
Pro-Form 320 Cx Bike manual

Life Fitness
Life Fitness Life Cycle 90C-0XXX-01 parts list

Pro-Form
Pro-Form 785 Watts Bike Manuel de l'utilisateur

CARDIOSTRONG
CARDIOSTRONG BX70i Touch Assembly and operating instructions

Pro-Form
Pro-Form PFIVEX29415.1 manual

Life Fitness
Life Fitness LIFECYCLE R9i Operation manual