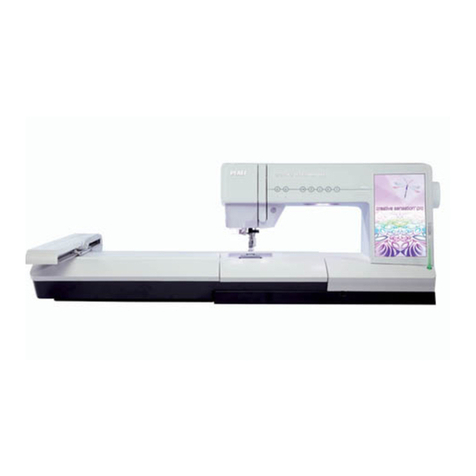
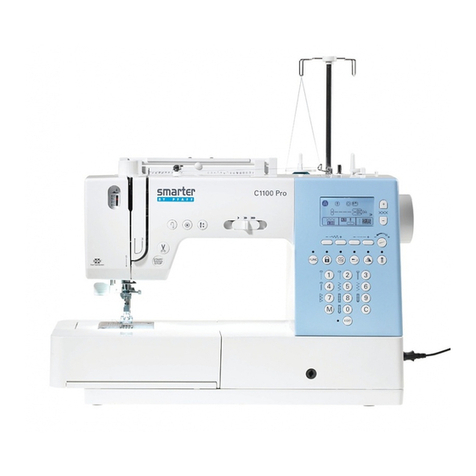
Pfaff creative icon User manual

User’s Guide

This household sewing machine is designed to comply with IEC/EN 60335-2-28 and UL1594.
IMPORTANT SAFETY INSTRUCTIONS
When using an electrical appliance, basic safety precautions should always be followed, including
the following:
Read all instructions before using this household sewing machine. Keep the instructions at a
suitable place close to the machine. Make sure to hand them over if the machine is given to a third
party.
DANGER –TO REDUCE THE RISK OF ELECTRIC SHOCK:
• A sewing machine should never be left unattended when plugged in. The electrical socket, to
which the machine is plugged in should be easily accessible. Always unplug this sewing machine
from the electric outlet immediately after using and before cleaning, removing covers, lubricating
or when making any other user servicing adjustments mentioned in the instruction manual.
WARNING –TO REDUCE THE RISK OF BURNS, FIRE, ELECTRIC
SHOCK, OR INJURY TO PERSON:
• Do not allow to be used as a toy. Close attention is necessary when this sewing machine is used
by or near children.
• Use this sewing machine only for its intended use as described in this manual. Use only
attachments recommended by the manufacturer as contained in this manual.
• Never operate this sewing machine if it has a damaged cord or plug, if it is not working properly,
if it has been dropped or damaged, or dropped into water. Return the sewing machine to the
nearest authorized dealer or service center for examination, repair, electrical or mechanical
adjustment.
• Never operate the sewing machine with any air openings blocked. Keep ventilation openings of
the sewing machine and foot control free from the accumulation of lint, dust, and loose cloth.
• Keep fingers away from all moving parts. Special care is required around the sewing machine
needle.
• Always use the proper needle plate. The wrong plate can cause the needle to break.
• Do not use bent needles.
• Do not pull or push fabric while stitching. It may deflect the needle causing it to break.
• Wear safety glasses.
• Switch the sewing machine off (“0”) when making any adjustment in the needle area, such as
threading needle, changing needle, threading bobbin, or changing presser foot, etc.
• Never drop or insert any object into any opening.
• Do not use outdoors.
• Do not operate where aerosol (spray) products are being used or where oxygen is being
administrated.
• To disconnect, turn all controls to the off (“0”) position, then remove plug from outlet.
• Do not unplug by pulling on cord. To unplug, grasp the plug, not the cord.
• The foot control is used to operate the machine. Avoid placing other objects on the foot control.
• Do not use the machine if it is wet.

• If the LED lamp is damaged or broken, it must be replaced by the manufacturer or its service
agent or a similarly qualified person, in order to avoid a hazard.
• If the cord connected with the foot control is damaged, it must be replaced by the manufacturer
or its service agent or a similarly qualified person, in order to avoid a hazard.
• This sewing machine is provided with double insulation. Use only identical replacement parts.
See instructions for Servicing of Double-Insulated Appliances.
SAVE THESE INSTRUCTIONS
FOR CENELEC COUNTRIES ONLY:
This appliance can be used by children aged from 8 years and above and persons with reduced
physical, sensory or mental capabilities or lack of experience and knowledge if they have been given
supervision or instruction concerning use of the appliance in a safe way and understand the
hazards involved. Children shall not play with the appliance. Cleaning and user maintenance shall
not be made by children without supervision.
The noise level under normal operating conditions is less than 80dB(A).
The machine must only be used with foot control of type FR5 manufactured by Shanghai Binao
Precision Mould Co., Ltd.
FOR NON CENELEC COUNTRIES:
This sewing machine is not intended for use by persons (including children) with reduced physical,
sensory or mental capabilities, or lack of experience and knowledge, unless they have been given
supervision or instruction concerning use of the sewing machine by a person responsible for their
safety. Children should be supervised to ensure that they do not play with the sewing machine.
The noise level under normal operating conditions is less than 80dB(A).
The machine must only be used with foot control of type FR5 manufactured by Shanghai Binao
Precision Mould Co., Ltd.
SERVICING OF DOUBLE INSULATED PRODUCTS
In a double-insulated product, two systems of insulation are provided instead of grounding. No
ground means is provided on a double-insulated product, nor should a means for grounding be
added to the product. Servicing of a double-insulated product requires extreme care and knowledge
of the system and should be done only by qualified service personnel. Replacement parts for a
double-insulated product must be identical to those parts in the product. A double-insulated
product is marked with the words ‘DOUBLE INSULATION’ or ‘DOUBLE INSULATED’.

Federal Communication Commission Interference Statement
For the USA and Canada
Responsible party: VSM Group AB (wholly owned subsidiary of SVP Worldwide)
Drottninggatan 2, 56184 Huskvarna, SWEDEN
Product name: PFAFF® creative icon™ sewing and embroidery machine
Model number: SFP1
This device complies with Part 15 of the FCC Rules. Operation is subject to the following two
conditions: (1) This device may not cause harmful interference, and (2) this device must accept any
interference received, including interference that may cause undesired operation.
This equipment has been tested and found to comply with the limits for a Class B digital device,
pursuant to Part 15 of the FCC Rules. These limits are designed to provide reasonable protection
against harmful interference in a residential installation. This equipment generates, uses and can
radiate radio frequency energy and, if not installed and used in accordance with the instructions,
may cause harmful interference to radio communications. However, there is no guarantee that
interference will not occur in a particular installation. If this equipment does cause harmful
interference to radio or television reception, which can be determined by turning the equipment off
and on, the user is encouraged to try to correct the interference by one of the following measures:
• Reorient or relocate the receiving antenna.
• Increase the separation between the equipment and receiver.
• Connect the equipment into an outlet on a circuit different from that to which the receiver is
connected.
• Consult the authorized PFAFF® retailer or an experienced radio/TV technician for help.
The included interface cable should be used in order to ensure compliance with the limits for a
Class B digital device.
Any changes or modifications not expressly approved by the party responsible for compliance could
void the user's authority to operate this equipment.
Declaration of Conformity
For Europe
Hereby, VSM Group AB (wholly owned subsidiary of SVP Worldwide), declares that this sewing
and embroidery machine is in compliance with the essential requirements and other relevant
provisions of Directive 2014/53/EU.

TABLE OF CONTENTS
1 Built-in User’s Guide............................ 10
Welcome to the Built-in User’s Guide! .........10
Finding a Topic ........................................... 10
Navigating the User’s Guide ........................ 10
2 Introduction ............................................ 11
Machine Overview........................................11
Front........................................................... 11
Needle Area................................................ 12
Right Side ................................................... 12
Rear............................................................ 12
Top............................................................. 13
Accessory Tray............................................ 13
Storing a Needle Plate.................................. 14
Embroidery Unit ......................................... 14
Function Buttons...........................................15
Presser Foot Up and Extra Lift ...................... 15
Presser Foot Down and Pivot ....................... 15
Automatic Needle Threader ......................... 15
Cut Function ............................................... 15
Immediate Tie-Off ....................................... 16
Stitch Re-Start.............................................. 16
Needle Stop Up/Down ................................ 16
Start/Stop................................................... 16
Reverse....................................................... 16
Basic Gestures for the Multi-Touch
Screen ............................................................17
Accessories....................................................18
Included Accessories ................................... 18
Included Hoops........................................... 18
Presser Feet ...................................................19
Stitch Overview ............................................21
Utility Stitches............................................. 21
Stitch Menu Overview ................................. 25
Alphabets ................................................... 25
3 Preparations ........................................... 26
Unpacking Machine and Embroidery
Unit ...............................................................26
Connect the Power Cord and Foot
Control ..........................................................26
Pack Away After Sewing ..............................27
USB Ports ......................................................27
Using a USB device...................................... 27
Getting Started with WiFi and
mySewnet™ Cloud.........................................28
LED Lights ....................................................28
Free Arm .......................................................28
Manual Thread Cutter ..................................28
Knee-Lift .......................................................29
Speed Control Lever .....................................29
Thread Sensor ...............................................29
Telescopic Thread Guide ..............................30
Spool Pins......................................................31
Spool Caps ....................................................31
Threads .........................................................32
Needles .........................................................33
Important Needle Information...................... 33
Changing the Needle ....................................34
Threading......................................................35
Threading the Upper Thread ........................ 35
Automatic Needle Threader ......................... 37
Threading Tips and Hints ............................ 39
Threading for Twin Needle .......................... 40
Bobbin Winding............................................42
Winding Through the Needle ....................... 43
Inserting the Bobbin......................................44
Changing the Bobbin Case............................45
IDT™ System (Integrated Dual Feed) ..........46
Engaging the IDT™ System.......................... 46
Disengaging the IDT™ System ..................... 46
Changing the Presser Foot............................47
Remove Presser Foot.................................... 47
Attach Presser Foot...................................... 47
Attaching the Sensormatic Buttonhole
Foot ...............................................................47
Attaching the Dynamic Spring Foot 6D .......48
Changing to Straight Stitch Needle Plate .....49
4 Embroidery Preparations................... 50
Embroidery Unit ...........................................50
Embroidery Hoop Overview ........................50
Dynamic Spring Foot 6D ..............................50
Straight Stitch Needle Plate ..........................51
Designs..........................................................51
creative icon™ Sampler Book....................... 51
Connect the Embroidery Unit.......................52
Remove the Embroidery Unit.......................52
To Hoop the Fabric .......................................53
Slide on/off the Hoop...................................53
5 The Multi-Touch Screen...................... 54
Multi-Touch Screen.......................................54
Gestures...................................................... 54
Start Page ......................................................55
Start Sewing................................................ 55
Start Embroidering ...................................... 55
Load From mySewnet™ ................................ 55
Open Help Center........................................ 55
Main Functions .............................................56
Save............................................................ 56
Home ......................................................... 56
Mode Switch ............................................... 56
Common Functions.......................................56
OK.............................................................. 56
Cancel......................................................... 56
Touch & Hold ............................................. 56
Table of contents
Other Pfaff Sewing Machine manuals

Pfaff
Pfaff 3117 User manual

Pfaff
Pfaff 63 User manual

Pfaff
Pfaff powerquilter 1600 User manual

Pfaff
Pfaff CREATIVE 2124 User manual

Pfaff
Pfaff hobby 4240 User manual

Pfaff
Pfaff Series 580 Owner's manual

Pfaff
Pfaff Synchromatic 1209 User manual

Pfaff
Pfaff expression 2.0 User manual

Pfaff
Pfaff select 150 User manual

Pfaff
Pfaff 463 User manual

Pfaff
Pfaff FreeStyle User manual

Pfaff
Pfaff 2438 plusline User manual

Pfaff
Pfaff 1025 User manual

Pfaff
Pfaff creative 1.5 User manual

Pfaff
Pfaff Embroidery Mode-Stitch-Out User manual

Pfaff
Pfaff 561 User manual

Pfaff
Pfaff 3811-3/55 User manual

Pfaff
Pfaff EXPRESSION 2038 - User manual

Pfaff
Pfaff Creative Vision User manual

Pfaff
Pfaff 571 User manual