manuals.online logo
Brands
  1. Home
  2. •
  3. Brands
  4. •
  5. Pfister
  6. •
  7. Kitchen & Bath Fixture
  8. •
  9. Pfister lyla RT6-5TR User manual

Pfister lyla RT6-5TR User manual

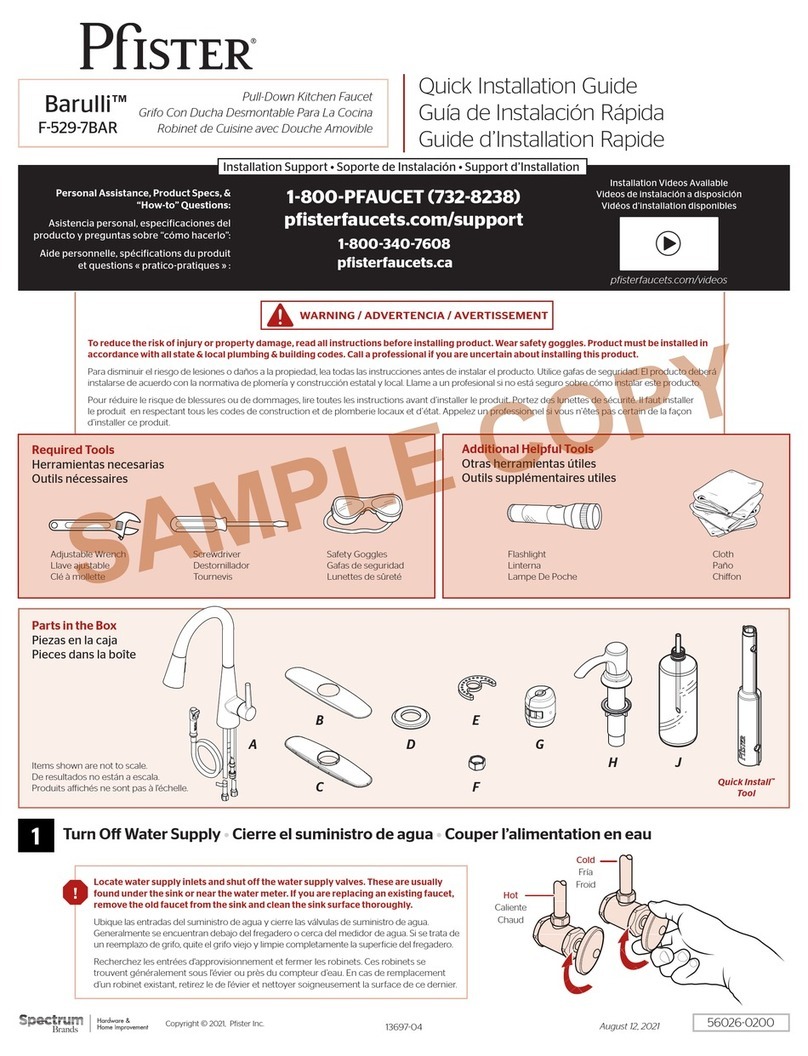
To reduce the risk of injury or property damage, read all instructions before installing product. Wear safety goggles. Product must be installed in
accordance with all state & local plumbing & building codes. Call a professional if you are uncertain about installing this product.
This product has been designed for use with the Pister™ 0X605 or 0X615 Roman Tub series rough-in. It will not work with any other product.
For optimum performance of your roman tub, a minimum water pressure of 25 PSI (172 kPa) is recommended.
Para disminuir el riesgo de lesiones o daños a la propiedad, lea todas las instrucciones antes de instalar el producto. Utilice gafas de seguridad. El
producto deberá instalarse de acuerdo con la normativa de plomería y construcción estatal y local. Llame a un profesional si no está seguro sobre
cómo instalar este producto. Este producto ha sido diseñado para uso con la tubería empotrada para bañera romana 0X605 o 0X615 de Pister™. No
trabajará con ningún otro producto. Para un desempeño óptimo de su bañera romana, se recomienda una presión de agua mínima de 25 PSI (172 kPa).
Pour réduire le risque de blessures ou de dommages, lire toutes les instructions avant d’installer l’appareil. Porter des lunettes de sécurité. Il faut
installer l’appareil en respectant tous les codes de construction et de plomberie locaux et d’État. Appelez un professionnel si vous n’êtes pas certain
de la façon d’installer cet appareil. Cet appareil a été conçu pour utiliser avec la plomberie brute Pister série 0X605 ou 0X615 baignoire romaine. Il ne
fonctionnera pas avec un autre appareil. Pour obtenir la performance optimale de votre baignoire romaine, une pression d’eau minimale de 25 PSI (172
kPa) est recommandée.
WARNING / AVERTENCIA / AVERTISSEMENT
Turn O Water Supply Cierre el suministro de agua Couper l’alimentation en eau
1

B (x2) C (x2)A D
434080100
December 9, 2013

Installation Videos Available

Vidéos d’installation disponibles
Required Tools
Herramientas necesarias
Outils nécessaires
Additional Helpful Tools
Otras herramientas útiles
Outils supplémentaires utiles
Plumber’s Putty
Masilla para plomeria
Mastic de plombier
Safety Goggles
Anteojos de seguridad
Lunettes de sûreté
Adjustable Wrench
Llave ajustable
Clé réglable
pisterfaucets.com/videos
Quick Installation Guide
Guía de instalación rápida
Guide d’installation rapide
Locate the water supply inlets & shut o the water supply valves. These are usually found near the water
meter.
If you are replacing an existing unit, remove the old unit & clean mounting surface thoroughly.
Ubique las entradas del suministro de agua y cierre las válvulas de suministro. Estas se encuentran
generalmente cerca del medidor de agua. Si reemplaza una unidad existente, retírela y limpie completamente
la supericie de montaje.
Repérez les entrées d’alimentation d’eau et fermez les robinets d’arrêt. Ils sont normalement trouvés près du
compteur d’eau. Si vous remplacez un appareil existant, enlevez le vieil appareil et nettoyez soigneusement la
surface de montage.
Personal Assistance, Product Specs, &
“How-to” Questions:
Asistencia personal, especiicaciones del

Aide personnelle, spéciications du produit

1800PFAUCET (7328238)
pisterfaucets.com/support
Flashlight
Linterna
Lampe-torche
Cloth
Paño de limpieza
Chion
Copyright © 2013, Pister Inc.
Hot
Caliente
Chaud
Cold
Fría
Froid
Hex Wrench
Llave hexagonal
Clé hexagonale
1042000
RT65TR
Iyla™3Hole Roman Tub Trim
Borde para bañera romana con 3 agujeros
Garniture de baignoire romaine avec 3 trous
2
2
Spout Gap Dimensions
Dimensiones del espacio del conducto
Dimensions de espace de bec
Prepare Rough-In & Set Up Stem Rotation


2B
Thin Surface Installation (1 3⁄8" Max)
(35 mm)
Installation sur une surface mince (35 mm)
Stem Rotation Set Up
Determinacion de la rotacion de las espigas
Rotation de la tige
Thick Surface Installation (1 3⁄8" – 2 3⁄4" Max)
(41 mm – 70 mm)
Installation sur une surface épaisse (41 mm – 70 mm)
Hot
Caliente
Chaud
Cold
Fría
Froid
Hot
Caliente
Chaud
Cold
Fría
Froid
Option 1 • Opción 1 • Option 1
Option 2 • Opción 2 • Option 2
If deck thickness exceeds 1 3⁄8" (35 mm), Pister™ Stem Extension Kit
974375 must be used.
Si el grosor de la plataforma excede 1 3/8 pulg. (35 mm), se debe utilizar un
juego de extensión del vástago 974375 de Pister™.
Si l’épaisseur du plateau de montage dépasse 1 3/8 po. (35 mm), il est
nécessaire d’utiliser un kit de prolongement de tiges Pister™ 974375.
Stem Stop can be inserted into Stem in either of two ways, depending on
the rotation you want to have for your handles.
El tope de la espiga puede ser insertado en la espiga en dos posiciones,
dependiendo de la rotación que se quiera tener en los puños.
L’Arrêt De La Tige peut être introduit dans la tige de deux façons, selon la
rotation que l’on veut obtenir pour les leviers.
2A
Stem Stop
Tope del vástago
Arrêt de la tige
Stem Stop
Tope del vástago
Arrêt de la tige
Stem
Vástago
Tige
Stem
Vástago
Tige
1 5⁄8" (41 mm)
2 3⁄4"
(70 mm)
Max
1 3⁄8" (35 mm)
73/4"
(197.2 mm)
3
3B3A
3
Hex Wrench
Llave hexagonal
Clé hexagonale
Plumber’s Putty
Masilla para plomeria
Mastic de plombier
Adjustable Wrench
Llave ajustable
Clé réglable
Refer to 0X6/JX6 Installation Instructions for correct placement of valves.
Reiérase a las instrucciones de instalación 0X6/JX6 para la correcta colocación de las válvulas.
Voir les instructions d’installation 0X6/JX6 pour l’emplacement correct des valves.
Apply Plumber’s Putty in
highlighted grooves beneath C
(x2). If installing on marble, no
putty needed.
Aplique masilla de
plomero en los surcos
destacados debajo
de C (x2). Si instala en
mármol, no es necesario
aplicar masilla.
Appliquez le mastic de plombier
dans les rainures soulignées
sous C (x2). Le mastic n’est pas
nécessaire si vous installez sur
du marbre.
Use Hex Wrench to tighten set screw behind A.
Utilice una llave hexagonal para apretar lo tornillo de ijación detrás de A.
Utilisez une clef hexagonale pour serrer le vis derrière A.
Install Handles & Spout
Instale las manijas y el surtidor

B (x2) C (x2)
AD
Hot & Cold
Caliente y fría
Chaud et froid
x2
A
D
B
C
For Additional Installation Help:


1800PFAUCET (7328238)
pisterfaucets.com
Turn On Water & Conirm Proper Installation


4
4A
Hot
Caliente
Chaud
Cold
Fría
Froid
Check for leaks above and below the sink.
Revise si hay fugas encima y debajo del fregadero
Assurez-vous qu’il n’y a pas de fuite au dessus ou au dessous du lavabo
Flush the Faucet
Enjuague el grifo
Vidanger l’robinet
5
5A
Allow full hot & full cold water to run for at
least 15 seconds each.
Deje correr el agua caliente y fría durante al menos
15 segundos cada una.
Permettez à l'eau chaude et l'eau froide de couler
au moins 15 secondes chacun.
15
sec

Other Pfister Kitchen & Bath Fixture manuals

Pfister Avalon LF 36 Series User manual

Pfister

Pfister Avalon LF 36 Series User manual

Pfister Lima F-072-7LM User manual

Pfister

Pfister Lima F-072-7LM User manual

Pfister Vorena F-042-VO User manual

Pfister

Pfister Vorena F-042-VO User manual

Pfister Vorena F-048-VO User manual

Pfister

Pfister Vorena F-048-VO User manual

Pfister Kai GT529-IH User manual

Pfister

Pfister Kai GT529-IH User manual

Pfister Kenzo RT6-5D1 User manual

Pfister

Pfister Kenzo RT6-5D1 User manual

Pfister Venturi LF-049-VN User manual

Pfister

Pfister Venturi LF-049-VN User manual

Pfister Hanover F529-7TM User manual

Pfister

Pfister Hanover F529-7TM User manual

Pfister Rosslyn F-529-7RSSR User manual

Pfister

Pfister Rosslyn F-529-7RSSR User manual

Pfister Lita GT72-SM User manual

Pfister

Pfister Lita GT72-SM User manual

Pfister Miri F-529-7MR User manual

Pfister

Pfister Miri F-529-7MR User manual

Pfister Seahaven F-529-7SVN User manual

Pfister

Pfister Seahaven F-529-7SVN User manual

Pfister Clarify F-529-FCY User manual

Pfister

Pfister Clarify F-529-FCY User manual

Pfister Weller LG89-XWR User manual

Pfister

Pfister Weller LG89-XWR User manual

Pfister Allegan F-036-4AGC User manual

Pfister

Pfister Allegan F-036-4AGC User manual

Pfister Selia LF-049-SL User manual

Pfister

Pfister Selia LF-049-SL User manual

Pfister Kenzo G89-XDF User manual

Pfister

Pfister Kenzo G89-XDF User manual

Pfister Hanover LF-043-TM User manual

Pfister

Pfister Hanover LF-043-TM User manual

Pfister Delton 35 Series User manual

Pfister

Pfister Delton 35 Series User manual

Pfister Pasadena F-042-PD User manual

Pfister

Pfister Pasadena F-042-PD User manual

Pfister Penn LF-042-1PE User manual

Pfister

Pfister Penn LF-042-1PE User manual

Pfister Zuri GT-529-MP User manual

Pfister

Pfister Zuri GT-529-MP User manual

Pfister Carnegie 016-WE0 User manual

Pfister

Pfister Carnegie 016-WE0 User manual

Pfister Allegan F-036-4AG User manual

Pfister

Pfister Allegan F-036-4AG User manual

Popular Kitchen & Bath Fixture manuals by other brands

Lefroy Brooks M1-1005 Installation, operating,  & maintenance instructions

Lefroy Brooks

Lefroy Brooks M1-1005 Installation, operating, & maintenance instructions

Hansa HANSACONCERTO 6446 2201 Mounting and operating instructions

Hansa

Hansa HANSACONCERTO 6446 2201 Mounting and operating instructions

Axor Starck X 10974000 Instructions for use

Axor

Axor Starck X 10974000 Instructions for use

PEERLESS Precept P7947LF-SS quick start guide

PEERLESS

PEERLESS Precept P7947LF-SS quick start guide

Hans Grohe Axor Carlton 17134 Series Instructions for use/assembly instructions

Hans Grohe

Hans Grohe Axor Carlton 17134 Series Instructions for use/assembly instructions

Brizo Levior 65397LF- LHP-ECO Series manual

Brizo

Brizo Levior 65397LF- LHP-ECO Series manual

ProFlo PFXCM1M200 installation instructions

ProFlo

ProFlo PFXCM1M200 installation instructions

Allen + Roth 67798W-120802 manual

Allen + Roth

Allen + Roth 67798W-120802 manual

Alape EB.ME500U Assembly instruction

Alape

Alape EB.ME500U Assembly instruction

Glacier bay VUR2318A1 Use and care guide

Glacier bay

Glacier bay VUR2318A1 Use and care guide

Moen SHOW HOUSE TS373 manual

Moen

Moen SHOW HOUSE TS373 manual

Signature Hardware LAYNE 476287 quick start guide

Signature Hardware

Signature Hardware LAYNE 476287 quick start guide

Kohler K-3362 installation guide

Kohler

Kohler K-3362 installation guide

baliv KV-4050 manual

baliv

baliv KV-4050 manual

Fantini Rubinetti Mint F165 instructions

Fantini Rubinetti

Fantini Rubinetti Mint F165 instructions

Dornbracht 33 840 760-FF installation instructions

Dornbracht

Dornbracht 33 840 760-FF installation instructions

Hans Grohe Metris Select 320 Eco 1jet 14785 Series Instructions for use/assembly instructions

Hans Grohe

Hans Grohe Metris Select 320 Eco 1jet 14785 Series Instructions for use/assembly instructions

Glacier bay FSUZAS2721A1SA1 Use and care guide

Glacier bay

Glacier bay FSUZAS2721A1SA1 Use and care guide

manuals.online logo
manuals.online logoBrands
  • About & Mission
  • Contact us
  • Privacy Policy
  • Terms and Conditions

Copyright 2025 Manuals.Online. All Rights Reserved.