Philco PLD32HSC9 User manual

SERVICE MANUAL
PLD32HSC9/NT72563
1. Caution…………………………………………………………………………
2. Specification……………………………………………………………………
3. Alignment Procedure…………………………………………………………
4. Scheme Diagram………………………………………………………………
5. Troubleshooting…………………………………………………………………
6. Explode drawing…………………………………………………………………
This manual is t he latest at the time of printing, and does not
include the modification which may be made after the printing, by
the constant improvement of product

CA UTION: TO RE DUCE THE RIS K OF
ELECTR ICA L SHOCK, DO NOT RE MOVE
COVER (OR BACK). NO USER SERVICEABLE
PAR TS INS IDE . RE FER SER VIC ING TO
QUALIFIED SERVICE PERSONNEL.
The lighting flash with arrowhead symbol, with an equilateral triangle is intended to
alert the user to the presence of uninsulated voltage within the products
enclosure that may be of sufficient magnitude to constitute a risk of electric shock to
the person.
The exclamation point within an equilateral triangle is intended to alert the user to the
presence of important operating and maintenance (servicing) instructions in the
literature accompanying the appliance.
CAUTION:
Use of controls, adjustments or procedures other than those specified herein may result in
hazardous radiation exposure.
CA U T ION
RISK
RISK OF
ELECTR I
ELECTR IC
SHOCK
SHOCK DO
NOT
NOT
OPEN.
OPEN.
dangerous
WARNING: TO REDUCE RISK OF FIRE OR ELECTRIC SHOCK, DO NOT
EXPOSE THIS APPLIANCE TO RAIN OR MOISTURE.
SCHNEIDER ELECTRONICS GMBH-GERMANY
1. CAUTION

1. When the power cord or plug is damaged or frayed, unplug this television set from the wall outlet and refer servicing to
qualified service personnel.
2. Do not overload wall outlets and extension cords as this can result in fire or electric shock.
3. Do not allow anything to rest on or roll over the power cord, and do not place the TV where power cord is subject to
traffic or abuse. This may result in a shock or fire hazard.
4. Do not attempt to service this television set yourself as opening or removing covers may expose you to dangerous
voltage or other hazards. Refer all servicing to qualified service personnel.
5. Never push objects of any kind into this television set through cabinet slots as they may touch dangerous voltage
points or short out parts that could result in a fire or electric shock. Never spill liquid of any kind on the television set.
6. If the television set has been dropped or the cabinet has been damaged, unplug this television set from the wall outlet
and refer servicing to qualified service personnel.
7. If liquid has been spilled into the television set, unplug this television set from the wall outlet and refer servicing to
qualified service personnel.
8. Do not subject your television set to impact of any kind. Be particularly careful not to damage the picture tube surface.
9. Unplug this television set from the wall outlet before cleaning. Do not use liquid cleaners or aerosol cleaners. Use a
damp cloth for cleaning.
10.1. Do not place this television set on an unstable cart, stand, or table. The television set may fall, causing serious injury
to a child or an adult, and serious damage to the appliance. Use only with a cart or stand recommended by the
manufacturer, or sold with the television set. Wall or shelf mounting should follow the manufacturer s instructions, and
should use a mounting kit approved by the manufacturer.
10.2. An appliance and cart combination should be moved with care. Quick stops, excessive force, and uneven surfaces
may cause the appliance and cart combination to overturn.
CAUTION:
Read all of these instructions. Sa ve these instructions for later use . Follo w all W arnings and
Instructions marked on the audio equipment.
1. Read Instructions-All the safety and operating instructionsshouldbe read before the productis operated.
2. Retain Instructions- The safety and operating instructions should be retained for future reference.
3. Heed Warnings- All warnings on the product and in the operating instructions should be adhered to.
4. Follow Instructions- All operating and use instructions should be followed.
SCHNEIDER ELECTRONICS GMBH-GERMANY
IMPORTANT SAFETY INSTRUCTIONS
FOR YOUR PERSONAL SAFETY

11. Do not use this television set near water ... for example, near a bathtub, washbowl, kitchen sink, or laundry tub, in a
wet basement, or near a swimming pool, etc.
Never expose the set to rain or water. If the set has been exposed to rain or water, unplug the set from the wall
outlet and refer servicing to qualified service personnel.
12. Choose a place where light (artificial or sunlight) does not shine directly on the screen.
13. Avoid dusty places, since piling up of dust inside TV chassis may cause failure of the set when high humidity persists.
14. The set has slots, or openings in the cabinet for ventilation purposes, to provide reliable operation of the receiver, to
protect it from overheating. These openings must not be blocked or covered.
Never cover the slots or openings with cloth or other material.
Never block the bottom ventilation slots of the set by placing it on a bed, sofa, rug, etc.
Never place the set near or over a radiator or heat register.
Never place the set in enclosure, unless proper ventilation is provided.
15.1. If an outside antenna is connected to the television set, be sure the antenna system is grounded so as to provide some
protection against voltage surges and built up static charges, Section 810 of the National Electrical Code, NFPA No.
70-1975, provides information with respect to proper grounding of the mast and supporting structure, grounding of the
lead-in wire to an antenna discharge unit, size of grounding conductors, location of antenna discharge unit, connection
to grounding electrode, and requirements for the grounding electrode.
15.2. Note to CATV system installer : (Only for the television set with CATV reception)
This reminder is provided to call the CATV system attention to Article 820-40 of the NEC that provides
guidelines for proper grounding and, in particular, specifies that the cable ground shall be connected to the grounding
system of the building, as close to the point of cable entry as practical.
16. An outside antenna system should not be located in the vicinity of overhead power lines or other electric lights or power
circuits, or where it can fall into such power lines or circuits. When installing an outside antenna system, extreme care
should be taken to keep from touching such power lines or circuits as contact with them might be fatal.
17. For added protection for this television set during a lightning storm, or when it is left unattended and unused for long
periods of time, unplug it from the wall outlet and disconnect the antenna. This will prevent damage due to lightning
and power-line surges.
ANTENNA
LEAD- IN WIRE
ANTENNA DISCHARGE
UNIT (NEC SECTION
810-20)
GROUNDING
CONDUCTORS
(NEC SECTION810-21)
GROUND CLAMPS
POWER SERVICE GROUNDING
ELECTRODE SYSTEM
(NEC ART 250. PART H)
ELECTRIC SERVICE
EQUIPMENT
GROUND CLAMP
NEC-NATIONAL ELECTRICAL CODE
EXAMPLE OF ANTENNA GROUNDING AS PER
NATIONAL ELECTRICAL CODE
EXAMPLE OF ANTENNA GROUNDING AS PER NATIONAL ELECTRICAL CODE INSTRUCTIONS
a built-in
installer s
SCHNEIDER ELECTRONICS GMBH-GERMANY
PROTECTION AND LOCATION OF YOUR SET

18.
This television set should be operated only from the type of power source indicated on the marking label.If you are not
sure of the type of power supply at your home, consult your television dealer or local power company. For television
sets designed to operate from battery power, refer to the operating instructions.
19. If the television set does not operate normally by following the operating instructions, unplug this television set from the
wall outlet and refer servicing to qualified service personnel. Adjust only those controls that are covered in the operating
instructions as improper adjustment of other controls may result in damage and will often require extensive work by a
qualified technician to restore the television set to normal operation.
20. When going on a holiday : If your television set is to remain unused for a period of time, for instance, when you go on
a holiday, turn the television set and unplug the television set from the wall outlet.
21. If you are unable to restorenormal operation by followingthe detailedprocedurein your operatinginstructions,
do not attempt any further adjustment. Unplug the set and call your dealer or service technician.
22. Whenever the television set is damaged or fails, or a distinct change in performance indicates a need for
service, unplug the set and have it checked by a professional service technician.
23. It is normal for some TV sets to make occasional snapping or popping sounds, particularly when being
turned on or off. If the snapping or popping is continuous or frequent, unplug the set and consult your
dealer or service technician.
24. Do not use attachments not recommendedby the television set manufacturer as they may cause hazards.
25. When replacementparts are required, be sure the service technicianhas used replacementparts specified
by the manufacturer that have the same characteristics as the original part. Unauthorized substitutions
may result in fire, electric shock, or other hazards.
26. Upon completion of any service or repairs to the television set, ask the service technician to perform
routine safety checks to determine that the television is in safe operating condition.
off
SCHNEIDER ELECTRONICS GMBH-GERMANY
OPERATION OF YOUR SET
IF THE SET DOES NOT OPERATE PROPERLY
FOR SERVICE AND MODIFICATION

Product Type LCD Smart TV Music
MP3, MKV, AVI
Chassis NT72563( 5NT725A2ISA ) Picture
JPEG/PNG/BMP
CPU CA9 *2, 896MHz H.264,H.265,MPG1/2/4,WMV,VC1,VP8,VP9
GPU
GPU Mali-400*2
OS Linux File ---
Memory 768M DDR +4G EMMC
OSD Language English/Spanish/Portuguese
ATV: NTSC-M, PAL M/N Component Video Format ---
DTV: ISDB DVI Video Format ---
AV System PAL,NTSC HDMI Video Format Up to 1080P
TV Channels (Air)
2
~
69 PC Compatibility ---
TV Channels (Cable) 1~135
Power Supply AC 110V-240V 50/60Hz
Power Consumption
(
TV On
)
55W Backlight Unit LED
Power Consumption
(
Standby
) ≤
0.5W Panel supplier CSOT
Certification --- Aspect Ratio 16:9
Wired Network Default Panel Size (inch) 32"
Built in wireless(802.11 b/g/n 2x2) Display Resolution 1366×768
Wake-on-LAN --- Brightness (cd/m2)(typ.) 220(typ.)
Contrast Ratio 3000:1
Response Time (G to G) 6.5ms
Viewing Angle (H/V) 178°/178°
Auto Source Yes Life Time(Typ.) >
30,000hrs
EPG Yes(at DTV) Color 16.7M (8 bit)
Closed Caption Yes Refresh Rate 60Hz
Parental Control Yes
Sleep Timer Yes
System Update Yes HDMI 2
Hotel Mode --- USB 1
Input Method Virtual keyboard AV in 1
MHL --- YPbPr in No
Lightsensor --- AUDIO out 1
GINGA --- VGA in No
CEC Yes VGA audio in No
ARC Yes RJ45 1
Time shift Yes SPDIF out Optical
PVR Yes Earphone out 0
--- RF Input 1
DCC(Dynamic Contrast Control)Yes
Backlight Adjustable Yes (0~100)
Color Temperature Cool,Normal,Warm,custom
Picture Mode Standard,Dynamic,Natural,Movie,Stadium,Persanal
Picture Size
16:9 format
,
4:3 format,Cinerama,16:9 Zoom 16:9 zoom up,14:9 zoom
Picture enhancement technology On/Off
Speakers Integrated speakers (Bottom side)
Audio Power Output (THD=7%) 2×5W
Auto Volume Yes
Sound Mode Standard/Movie/Music/voice/Personal/Stadium
Sound Control Balance
Frequency range Equalizer
Essential Accessories (Default)
NetFlix Yes Operation Manual English (Default)
Youtube Yes Remote Control RC311S
Golive —— Base Stand Integrated Packaging
Browser —— AC power cord 1 pcs
APP Store ——
Wireless Display Yes Wall Mount WMB331
File Share Yes WI-FI ---
Fast cast Yes Batteries 2 pcs
Diagonal size(cm)80.04 L1(mm)732.1
Slim Edge Design---Up(mm)14.2 W1(mm)75.8
Slim Edge Design---Bottom(mm)20.1 H1(mm)431.7
Slim Edge Design---L&R(mm)14.2 L2(mm)673
Carton Dimensions LxWxH(mm)800*128*520 W2(mm)182
Container Loading---20 feet(pcs)504 H2(mm)478.3
Container Loading---40 feet(pcs)1008 Net Weight With Stand(Kg)4.1
Container Loading--40 feet High (pcs) 1242 Net Weight Without Stand (Kg) 4.03
VESA Mounting Dimensions LxH(mm)100*100 Gross Weight With Packaging(Kg)5.2
RF 2.4G and Air mouse No
IR Remote Yes
Voice Control No
Design and specifications are subject to change without notice!
Drafted by: Approved by:
Remote Performance and ID Picture
PRODUCT SPECIFICATION RELEASE
Model: 32D1240A/NT72563
Version:01 Issued On: 2019-06-28
Signal Format Capability
TV System
Basic Information Media Format
Terminals
Panel Specification
Internet Link
Basic Function
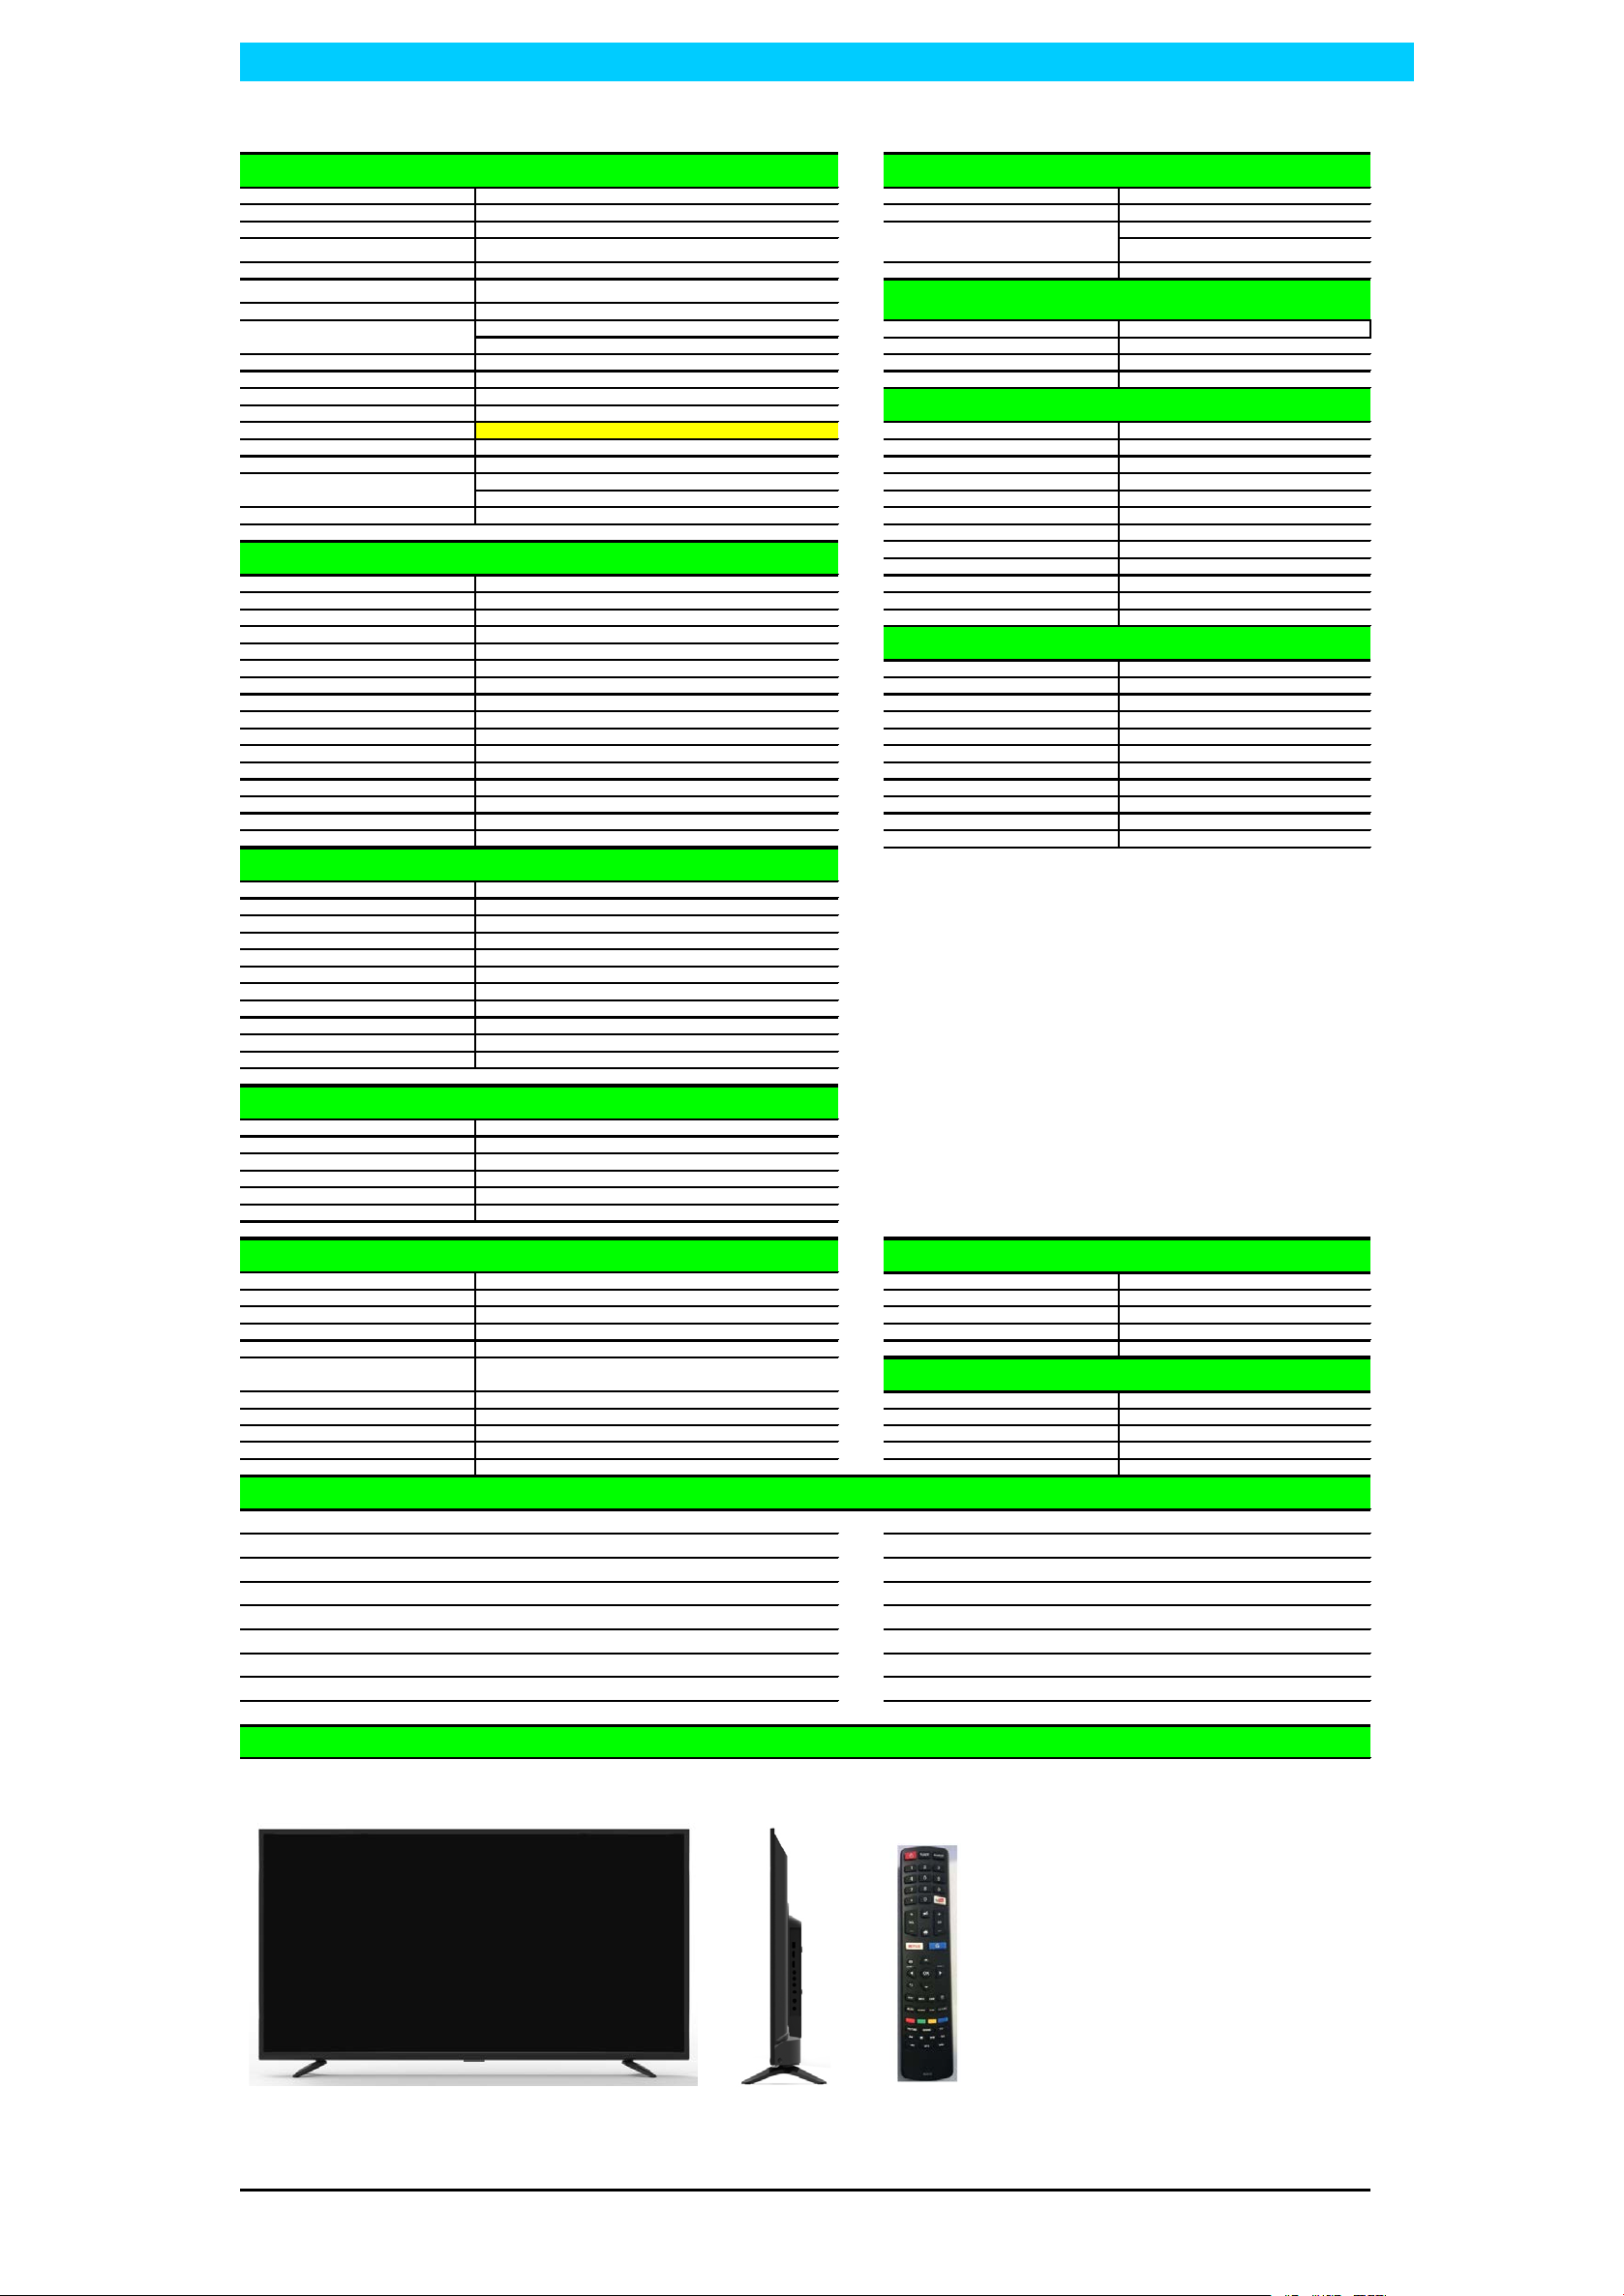
Mechanical ID Picture
Optional Accessories
Picture
Sound
Pre-Installed Application List
Video
Other APP ——
(picture for referrence only)

NT72563 Factory Menu Spec
V1.0
2017.10.17
Drafted by Checked by Approved By
Kim yuan

CONTENTS
1INTRODUCTION ........................................................................................................................................1
2OPEN THE FACTORY MENU METHOD...............................................................................................1
3WHITE BALANCE......................................................................................................................................2
4OTHER SUBMENU.....................................................................................................................................3
5NVM RESET SUBMENU............................................................................................................................4
6PRESET FACTORY CHANNEL SUBMENU ..........................................................................................4
7POWER ON MODE SUBMENU................................................................................................................4
8USB CLONE&&UPDATE SUBMENU .....................................................................................................4

Date
2017/10/18
Page 1
Index
V1.
0
of
5 pages
Name
1Introduction
ITEM STATE
COMMENT REMARK
FAC_HOTKEY
On/Off
when set On, we can enter
factory menu
with
pressing
þreturnÿ
on remote
control directly.
Factory out :OFF
WARM-
UP
On/Off
Aging mode ON:The
flashingcharacter‘P
W’and
the time of aging display on
the
below-
left of the screen.
Only in TV source will
display noise picture
when WARM
-
UP set on
Disable on designer mode
Factory out :OFF
Press
“MENU”
on the
Keyboard can exit
Warm_UP mode.
Reset S
hop
Do
InitiFactory mode data reset
It will be done before
shop initial if needroduct
line, HOTKEY will be di
White Balance
WhiteBalance Adjustment
Other
Set some TV setup
NVM
reset
Do Clear NVM values
Preset Factory
Channel Preset TV Channel
Power on mode
STB/ON/LAST
Set the TV’s state when AC
on
USB
Clone&&Udate
Update by USB
DiveceID test
Do Test the divece ID
2Open the Factory Menu method
2.1 Follow the below steps to pop-up the Factory menu in case of “Factory Key” is
disabled:
-Press RCU “MENU” key to display main menu
-Select “Setting” and press “OK” key to enter into setting submenu
-Select “Picture” and press “OK” key to enter into picture submenu
- Scroll down to “Contrast” item
-Press the subsequence RCU keys “9”, “7”, “3” and “5”

Date
2017/10/18
Page 2
Index
V1.
0
of
5 pages
Name
2.2 In case of “Factory Key” is enabled, just press RCU “Return” key to pop-up again the
Factory menu.
3White balance
I
tem
Sub-item Value Note
White
Balance
Source
HDMI/TV/AV
Color temperature
Standard
Warm
Cool
Select Tone by pressing”< >”key
R Gain 0~255
Set R Gain by pressing”< >”key
G Gain 0~255
Set G Gain by pressing”< >”key
B Gain 0~255
Set B Gain by pressing”< >”key
R Offset 0~255 Set R Offset by pressing”< >
”key
G Offset 0~255
Set G Offset by pressing”< >”key
B Offset 0~255
Set B Offset by pressing”< >”key
White Balance Init
Do
Press “>” key to initialize RGB
Gain/Offset values
Picture Related
Press “>” key to activate submenu
Item
Sub-item Value
Note
Picture
Related
Dynamic Contrast
On/Off
Press “< >” key to enable/disable
Light Sensor
Press “>” key to activate submenu
Back light 0~100
Set Backlight by pressing”< >”key
Dynamic Backlight
control
0/1/2/3
Select by pressing”< >”key
Energy Save
High/Low/Off
Press “< >” key to enable/disable
APL1 0~255
Set APL1 point value by
pressing”< >”key
APL1_BL 0~100
Set APL1 Backlight value by
pressing”< >”key
APL2 0~255
Set APL2 point value by
pressing”< >”key
BP 0~100
Set B point value by
pressing”< >”key
K 0~100
Set K value by pressing”< >”key

Date
2017/10/18
Page 3
Index
V1.
0
of
5 pages
Name
Print_Enable
On/Off
Press “< >” key to enable/disable
DBC_Enable
On/Off
Press “< >” key to enable/disable
4Other submenu
Item
Sub-item
Value
Note
Watch
Dog
Watch Dog
On/Off
Press “<
>” key to enable/disable
Update CI+
Credential
Update CI+ Credential
Press “
ok/>” key to activate
CI+ key
Project ID
Project ID ***
Set Project ID by pressing”< >”key
Name ***
info
Panel ***
info
RCU ***
info
Region ***
info
PSU ***
info
Running Time
***
info
G
rey Ctl
Grey Ctl ***
Select Grey ctrl ON or OFF by
pressing”< >”key
to control picture
menu Grey or not
Update CI+
Credential
Update
CI+ Cre
dential
Do
Press “ok/
>” key to remove CI+
key
Update F
rom USB
Do
Press “ok/ >” key to copy CI+
key
from USB
Erase CI+ Credential
Do
Press “ok/ >” key to remove CI+ key
IPTV
Update
MAC
address
Press “ok/ >” key to
activate sub
menu
Client type ***
info
Motion
clarity
Motion clarity
On/
Off
Motion clarity switch
NETFLX
ESN
ESN number ***
info
CI+ Key
CI+ key status
info.
***
info
Reset ALL
Do
Press “>” key to reset all data

Date
2017/10/18
Page 4
Index
V1.
0
of
5 pages
Name
5NVM Reset submenu
Item
Sub-item Value
Note
R
eset
ALL
Do
Press “ok/ >” key to default NVM
ac
cording to selected Project ID
(all
adjustments are defaulted,
channel
Maps are cleared, Hotkey
is
enable,…)
6Preset Factory Channel submenu
Item
Sub-item Value
Note
Preset
Factory
Channel
*** Preset TV Channel
7Power on Mode submenu
Item
Sub-item Value
Note
Power
on
Mode
ON
STB
LAST
Select starting sequence by
pressing”< >”key
-ON: Force TV to start
-STB: Force TV to standby
-LAST: Force TV to standby
or to
start depending on latest operation
8USB Clone&&Update submenu
Item Sub-item V
alue
Note
USB
Clone&&Update
Main Upgrade
Press “ok” key to update main
software
FRC Upgrade
Press “
ok” key to update F
RC
software
FRC Backup
Press “ok” key to copy FRC
software to USB
USB TO TV
ALL
User
Data
CH list
Press “ok” key to copy USB
template context to TV
depending on Cloning mode
TV TO USB
ALL
User
Data
CH list
Press “ok” key to copy TV
template context to USB
depending on Cloning mode
ESN Key U
pgrade
Press “ok” key to upgrade ESN
key

Date
2017/10/18
Page 5
Index
V1.
0
of
5 pages
Name
HDCP2.0
Upgrade
Press “ok” key to upgrade
HDCP2.0 key
HDCP Upgrade
Press “ok” key to upgrade
HDCP key
WideVine Upgrade
Press “ok” key to upgrade
WideVine
Device id Upgrade
Press “ok” key to upgrade
Device ID

RD1
47K
12V
T
PW-ON
POWER_ON
POWER-ON
GND
L101
220R
220R
L100
STBC_3V3
10K
R104
10K
NC/
R103
0.01U
C102
BT3906
Q100
C
E
B
GND
Q02C
BT3904
E
C
B
4K7
R06C
CORE0V9
MAIN5V
WIFIVCC
GND
R32C
22K
Q10C
PMV65XP
S
D
G
C15C
1U
R22C
22K
GND
0.1U
CD3
12V_M
GND
0.1U
CD10
GND
0.1U
CD5
GND
LD1
4.7UH
22P
CD6
NC/
IN
LX
6
EN FB
BS 1
GND
SY8113B
UD1 2
34
510U
CD7 CD8
10U
CD9
10U
CD2
10U
RD5
33K
3K6
RD6
T
5V
RD2
10K
1K
RD3
0.01U
CD4
GND
WIFIVCC
10K
RDC2
330R
RDC7
5K6
RDC6
RDC5
27K
T
STBC_3V3
IN
LX
6
EN FB
BS 1
GND
SY8113B
UDC1 2
34
522P
CDC6
NC/
STBC_3V3
CDC2
10U
LDC1
4.7UH
GND
0.1U
CDC5
GND
0.1U
CDC10CDC9
22U
CDC8
22U
22U
CDC7
GND
12V_M
0.1U
CDC3
GND
GND
T
GND
T
Q10B PMV65XP
S
D
G
T
MAIN3V3
GND
R06B
4K7
C07B
0.1U
R22B
22K
R32B
22K
C15B
1U
CORE0V9
T
MAIN2V5
GND
C53D
10U
GND
0.1U
C51D
GND GND
10U
C50D
MAIN5V
0.01UCDJ7 STR_EN
GND
STBC_3V3
T
MAIN1V5
GND GND
CDJ5
0.1U
CDJ1
10U CDJ2
0.1U CDJ6
22P
LDJ1
2.2UH
GND
GND RDJ4
100K
RDJ2
33K
RDJ3
33K
CDJ4
22U
LX
GND
EN
VIN
FB
UDJ1
RT8096A
5
4
1
2
3
LED
T
IR
KEY
GND
C114
0.1U
STBC_3V3
10K
R115
STBC_3V3
GND
STBC_3V3
L103
220R
T
IR_3V3
R117
1K
C110
330P
0.01U
C112
R118
4K7 R119
22K
NAME Last modifDESCRIPTIONDATE DRAWN CHECKED
ON:
BY: BY:
ON: PAGE:
OF :
123456789101112
H
G
F
E
D
C
B
A
12 11 10 9 8 7 6 5 4 3 2 1
THIS DRAWING CANNOT BE COMMUNICATED TO UNAUTHORIZED PERSONS COPIED UNLES S PERMITTED IN WRITING
FORMAT DIN A1
H
G
F
E
D
C
A
Index-Lab
Last saved :
TCLNO:
SBU :
DESIGNATION
.............
DESIGNATION
MAIN1V5
GND
GND/ADJ
OUT
VIN
4
UD25
AZ1117-2.5
4
3
2
1
MAIN3V3
STBC_3V3
MAIN2V5
220R
RDJ5
Q02B
BT3904
E
C
B
NC/ESD5451R
D101 12
RDC1
47K
RDJ1
100K
NC/
L102
220R
0.01U
CDC4
C116
0.01U
12V_M
WOL
KEY_IN
INT_IR
IR3V3SB
KEY
AMP_VCC
LED_OUT
H: OFF
L: ON
(Vin=4.5V-18V)
Fsw=500KHz
Vref=0.6V
EN=1.5V(on),0.4V(off)
@Max2.8A
@Max2.8A
Vref=0.6V
Fsw=500KHz
EN=1.5V(on),0.4V(off)
(Vin=4.5V-18V)
(Vin=2.5-6V)
EN=1.5V(on),0.4V(off)
Vref=0.6V
Fsw=1.5MHz @Max1A
T
KGND
GND
C147
0.01U
RD8
0R
RDC8
0R
DDD3
8V2NC/
C07C
1U
D110
B
E
C
BT3906
Q111
470R
R112
100R
R111
F1 10U
C113
10K
R113
2 1
D112
PESD5V0S1BL
2 1
PESD5V0S1BL
D111
NC
R114
GND
R120
0R
GND
GND
IR3V3SB
GND
R116
0R
C111
100P
C111&R116 for Value eMMC
interfere ATV issue
RD7
750R
LX2
GND3
VCC
NC2
BYP
FB
ILMT
TEST
EN
NC1
PG
GND2
GND1
LX1
IN4
IN2
IN1
BS
LX3
IN3
T
GND
GND
GND
GND
GND
GND
19
18
17
16
15
14
13
12
11
10
9
8
7
6
5
3
2
1
20
4
SYT286A
UDF1
0.68UHLDF1
RDF5
51K
NC/
100K
RDF1
12V_M
NC/
220P
CDF13
CORE0V9
22U
CDF9
22U
CDF10 CDF11
22U 0.1U
CDF12
22U
CDF8
CORE0V9
CDF2
10U 0.1U
CDF3
33K
RDF4
CDF7
2U2
10U
CDF1
1U
CDF5
GND
0.1U
CDF6
POWER_ON
47K
RDF3
3K3
RDF2
0.01U
CDF4
GND 0R
RDF6
Vref=0.6V
Pseudo Fsw=600KHz
EN=1V(on),0.4V(off)
ILMT=1, 13.3A
ILMT=float, 10.3A
(Vin=4V-23V)
ILMT=0, 7.8A
@ 0.988V
@Max6A
IR1
VS
OUT
GND2
GND1
HS75438
R105
470R
T
MAIN5V
K100
GND
220R
L104

T
AVOUT
GND
C246 0.047U
R269
100R
C272
0.1U
C273
2U2
C274
0.1U
C275
2U2
GND
GND
GND
GND
GND
GND
GND
MAIN3V3
GND
GND
12V_M
C288
1500P
R218
33K
R219
1K
C220
150P
C219
1500P
R220
1K
C221
150P
R221
33K
LINN
OUTL
UVP
GND2
VDD
CP CN
VSS
MUTE
GND1
OUTR
RINN
RINP
LINP
U200
AD22653
14 1
2
3
4
5
6
7
8
9
10
11
12
13
C222
1U
C223
1U
C225
0.1U
L200 120R
C226
22U
R216
8K2
8K2
R217
C287 2U2
C286 2U2
GND
C224
1000P
TVDAC_OUT
VGA_B
VGA_G
VGA_R
ADC3M
ADC2M
ADC1M
SCART1_B_PB
SCART1_G_Y
SCART1_R_PR
SCART0_FB
SCART0_Y
ADC0M
CVBS0
CVBS_OUT
SOG_1
SOG_0VGA_HS
VGA_VS
TUNER_CVBSIN
NT72563M2
ADC/DAC
US1
NT72563
H21
K19
J18 M22
K23
H22
J23
J22
J21
K20
K21
L21
M21
K22
L22
M23
K18
L18
L19
J16
AUD_VRM
DACOUT_R1
DACOUT_L1
DACOUT_R0
DACOUT_L0
AUD_VRP
ADIN_R1
ADIN_L1
ADIN_R0
ADIN_L0
DEMOD-
DEMOD+
AUD_VCM
SI+
SI-
SQ+
SQ-
GPD_9/I2S_OUT_A_DATA
GPD_10/I2S_OUT_A_WS
GPD_11/I2S_OUT_A_BCLK
GPD_12/I2S_OUT_A_MCLK
GPD_27/SPDIF_IN
GPD_28/SPDIF_OUT
NT72563M2
AUDIO/IF
US1
NT72563
U10
T10
Y9
W9
V9
U9
F21
G23
G21
G22
C23
F23
F22
D22
D21
E22
E21
D23
B22
A23
C22
B23
C21
HP_MUTE
DACOUT_R1
DACOUT_L1
YPBPR_PB
YPBPR_PR
CVBS_RIN
CVBS_LIN
SOG_0
CVBS_VIN
YPBPR_Y
SPDIF_OUT
S2_IP
S2_IN
HP_R_OUT
HP_L_OUT
I2S_DATA
I2S_MCLK
I2S_BCLK
I2S_LRCK
S2_QP
S2_QN
DACOUT_R0
DACOUT_L0
VIFN
VIFP
HP AMP
Audio Out/HP Out
Audio_Out
HP_Out
L201/
L202 L203/
L204 C281/
C227 C283/
C214 R210/
R211 R212/
R213
0R
10uH
0R
2200P
NC
0.1u
330P
1K
47K
10R
100R
GND
GND
GND
R215
470R
C285
3300P
R214
470R
C228
3300P
DACOUT_R1
DACOUT_L1
Close to SOC
Close to SOC
470R
R234
470R
R235
HP_L
DACOUT_L0
HP_R
DACOUT_R0
Audio_Out
HP_Out
R214/
R215 R234/
R235 R222 R226
NC
470R
1K
NC
470R
1K
NC
NC
GND
GND
R267
100R
R225
75R
C254
33P
C276 2U2
C241
470P
R200
10K
C240
470P
R201
10K
R230
10K R202
10K
C277 2U2
C244 0.047U
VIN
VIN
CVBS_RIN
CVBS_LIN
RIN
LIN
CVBS_VIN
AV in
close to SOC
R203
100R SOG_0
AU_MUTE
R228
5K6
R229
47K
R224
47K
R207
0R
NC
P201
4
2
3
1
GND
GND
TT
GND
GND GND
T
GND
T
L203
0R/10UH
L204
0R/10UH
HPRHPL
L201
0R/1000R
L202
0R/1000R
HP_DET
C280
0.1U
C227
2200P
/NC
/NC
2200P
C281
R209
10K
HPGND HPDET
GND
HP_R_OUT
HP_L_OUT
HP_NC:H
HP_IN:L
Close to SOC
HPR
HPL
P203
3
2
5
4
1
HPL
R208
1K
R207
NC/0R
MAIN3V3
C283
330P
C214
330P
R210
47K
R211
47K
R212
100R
R213
100R
R204
0R
NC P203
P201
SOCKET
R226
1K
R222
NC/1K
1000R
HPR
GND
/NC
/NC
0R
R204
HPDET
HPDET
R223
10K
R227
10K
C230 470P
P202
2
5
4
1
3
2 1
ESD5451R
D400
GND
GND
LIN
VIN
T T
T
T
VIN
LIN
RIN GND
GND
TT
GND
GND GND
T
VCC
VIN
GND
GND1
GND2 TX
LED
IC
DRIVE
R270
NC/120R
GND-S
SPDIF
SPDIF_OUT
ESD5451R
D200
12
3V3-S
C279
0.1U
MAIN3V3
cloce to SOC
OPTICAL
SPDIF
P204
5
4
1
3
2
C278
47P
R205
33R
RIN
R240
NC/10K
MAIN3V3
GND

RT8 1000R
RT9 1000R
GND
T
FAT-
T
TAGC
T
TSDA
T
T3V3
T
TSCL
T
FAT+
T
TGND
GND
GND
CT8
33P CT9
33P
LT10 1000R
T
TU_3V3
GND
C153
10U
GND
0.1U
C151
GND GND
10U
C150
MAIN5V TU_3V3
GND/ADJ
OUT
VIN
44
3
2
1
UD33
AZ1117
GND
RT33
10K
GND
TU-SDA
TU-SCL
VIFP
VIFN
GND
CT52
22P
NC/
CT53
22P
NC/
IFAGC-T
CT21
0.1U
RT16 100R
RT15 100R
RT52
1K5 RT53
1K5
CT7
0.1U
GND
MAIN3V3
GND
RT50 0R
RT51 0R
LT11 1000R
GND
CT33
22P
CT34
22P
GND GND GND
CT36
22P
CT35
22P
CT50
0.1U
GND6GND2
GND3
GND4
GND1
IF_N
VCC
IF_P
IF_AGC
GND5
SDA
SCL
TUN1
11
10
9
5
4
2
3
1
8
7
6 12
100R
RT7
0.1UCT10
CT11 0.1U
TUNER_FAT-
TUNER_FAT-
TUNER_FAT-
TUNER_FAT+
TUNER_FAT+
TUNER_FAT+
TUNER-SCL
TUNER-SCL
TUNER-SCL
TUNER-SDA
TUNER-SDA
TUNER-SDA
TU-SCL1
TU-SDA1
TU_3V3
TU_3V3
IF_AGC_D
IF_AGC_D
IF_AGC_D
Close to SOC
Close to SOC
Close to SOC
Tuner
120R
L150
GPC_0/STSIN0_CLK/INT_1/I2C_MB_SDA
GPC_1/STSIN0_VALID/INT_2/I2C_MB_SCL
GPC_2/STSIN0_START/INT_3/I2C_MC_SDA
GPC_3/STSIN0_DATA/INT_4/I2C_MC_SCL
GPA_9/PTSIN1_D5/I2S_OUT_A_DATA/PTSIN2_D5 B16
GPA_10/PTSIN1_D6/I2S_OUT_A_WS/PTSIN2_D6 C15
GPA_11/PTSIN1_D7/I2S_OUT_A_BCLK/PTSIN2_D7 B15
GPA_12/PTSIN2_ERR/DEMODOUT_ERR/I2S_OUT_A_MCLK/CI_CD_1#/PTSIN2_CLK A15
GPA_6/PTSIN1_D2/I2S_IN_DATA/I2C_MD_SDA/PTSIN2_D2 A17
GPA_7/PTSIN1_D3/I2S_IN_WS/I2C_MD_SCL/PTSIN2_D3 B17
GPB_3/CI_HA1/CI_ALE/I2S_IN_BCLK/NAND_D1
GPA_8/PTSIN1_D4/I2S_IN_MCLK/DEMOD_QLED/PTSIN2_D4 C16
GPB_2/CI_HA0/CI_ALE0/ARM_UART_D_RX/I2C_MF_SDA/I2S_IN_WS/NAND_D0
GPA_0/TSI1_ERR/STSI0_ERR/I2C_MA_SDA B20
GPA_1/TSI1_CLK/STSI1_CLK/I2C_MA_SCL C19
GPA_2/PTSIN1_VALID/STSIN1_VALID/I2C_MB_SDA/PTSIN2_VALID C18
GPA_3/PTSIN1_START/STSIN1_START/I2C_MB_SCL/PTSIN2_START B18
GPA_4/PTSIN1_D0/STSIN1_DATA/I2C_MC_SDA/PTSIN2_D0 A18
GPA_5/PTSIN1_D1/I2C_MC_SCL/PTSIN2_D1 C17
GPB_14/CI_HA12/TENSILICA_TDO/LED_PWM_0/LED_SPI_STT_HSC_SDA/NAND_WP#
GPB_15/CI_HA13/TENSILICA_TDI/LED_PWM_1/LED_SPI_DI/HSC_SCL/NAND_RB#
GPB_16/CI_HA14/TENSILICA_TRST/LED_PWM_2/LED_SPI_CLK/LED_YDIO/NAND_CE_0#
GPB_17/CI_HAD0/I2S_OUT_B_MCLK/LED_PWM_3/LED_SPI_DO
GPB_18/CI_HAD1/I2S_OUT_B_BCLK/LED_PWM_4/LED_SPI_CS_0
GPB_19/CI_HAD2/I2S_OUT_B_WS/LED_PWM_5/LED_SPI_CS_1/LED_SPI_STT/HSC_SDA
GPB_20/CI_HAD3/I2S_OUT_B_DATA/LED_PWM_6/LED_SPI_CS_2LED_SPI_DI_HSC_SCL
GPB_21/CI_HAD4/I2S_OUT_C_MCLK/LED_PWM_7/LED_SPI_CS_3
GPB_22/CI_HAD5/I2S_OUT_C_BCLK/3D_IR/3D_BT/3D_ACTIVE
GPB_23/CI_HAD6/I2S_OUT_C_WS/LR0_DELAY
GPB_24/CI_HAD7/I2S_OUT_C_DATA/LR1_DELAY
GPA_26/CI_CE#/BT_SHOP_VS_IN/BT_SHOP_LR_IN
GPB_6/CI_HA4/FRC_DIMMING1/DSU_BRE/LEONDSU_BRE/OPROC_DSU_BRE/NAND_D4
GPB_7/CI_HA5/FRC_DIMMING2/DSU_ACT/LEONDSU_ACT/NAND_D5
GPB_8/CI_HA6/AMBI_SPI_CLK/DSU_TX/LEONDSU_TX/OPROC_DSU_TX/NAND_D6
GPB_9/CI_HA7/AMBI_SPI_DO/DSU_RX/LEONDSU_RX/OPROC_DSU_RX/NAND_D7
GPB_10/CI_HA8/AMBI_SPI_CS/DSU_EN/LEONDSU_EN/NAND_RE#
GPB_11/CI_HA9/FR_PWM/LED_VS_OUT/NAND_CLE
GPB_13/CI_HA11/TENSILICA_TMS/USB1_PWEN/AMBI_SPI_DI/NAND_WE#
GPA_16/PTSOUT_D0/PTSIN2_D0/DEMODOUT_D0 F19
GPA_17/PTSOUT_D1/PTSIN2_D1/DEMODOUT_D1 F18
GPA_18/PTSOUT_D2/PTSIN2_D2/DEMODOUT_D2 E18
GPA_19/PTSOUT_D3/PTSIN2_D3/DEMODOUT_D3 D18
GPA_20/PTSOUT_D4/PTSIN2_D4/DEMODOUT_D4 D17
GPA_21/PTSOUT_D5/PTSIN2_D5/DEMODOUT_D5 E17
GPA_22/PTSOUT_D6/PTSIN2_D6/DEMODOUT_D6 F17
GPA_23/PTSOUT_D7/PTSIN2_D7/DEMODOUT_D7 G17
GPA_15/PTSOUT_START/PTSIN2_START/DEMODOUT_START/DEMOD_EMERGENCY E19
GPA_14/PTSOUT_VALID/PTSIN2_VALID/DEMODOUT_VALID/VIF_IF_AGC/DEMOD_IF_AGC/T2_AGC D20
GPA_13/PTSOUT_CLK/PTSIN2_CLK/DEMODOUT_CLK/RFAGC_VSYNC/S2_AGC E20
GPA_25/CI_CD_0#/DISEQC_RX
GPA_24/CI_RST/DISEQC_TX
GPA_28/CI_IORD#/SPDIF_OUT
GPA_27/CI_IREQ#/SPDIF_IN
GPA_29/CI_IOWR#/ARM_UART_A_TX
GPA_30/CI_OE#/ARM_UART_A_RX
GPA_31/CI_WE#/ARM_UART_C_TX
GPB_0/CI_REG#/ARM_UART_C_RX/I2S_IN_MCLK
GPB_1/CI_HWAIT#/ARM_UART_D_TX/I2C_MF_SCL/I2S_IN_DATA
GPB_4/CI_HA2/USB2_PWEN/NAND_D2
GPB_5/CI_HA3/USB3_PWEN/NAND_D3
GPB_12/CI_HA10/TENSILICA_TCK/USB0_PWEN/AMBI_SPI_DI/NAND_ALE
NT72563M2 CI/TS PANEL_ON
US1
NT72563
D10
H13
G13
D13
H14
G14
F14
E14
G15
D14
B19
H17
D9
E10
F10
G10
H10
G11
G12
G16
D6
E6
F6
G6
H7
G7
G8
H9
G9
F9
E9
E13
F13 A2
B2
A3
B3
R1245
10K
MAIN3V3

100R
RA08
T
R+
T
R-
GND
GND
T
L-
GND GND
GND
GND
GND
GND
GND
GND
GND
GND
RA03
100R
1U
CA09
16V 0.1U
CA10
120R
LA01
GND
CA02
0.1U
0.1U
CA27
0.1U
CA26
CA25
0.22U
22UH
LA04
LA05
22UH
CA17
0.1U
0.47U
CA16
CA15 0.47U
LA03
22UH
0.22U
CA22
0.1U
CA24
CA23
0.1U
22UH
LA02
0.1U
CA14
RA01
10K
CA01
1000P
100RRA05
NC/
15P CA06
RA02
4K7
RA98
4K7
RA99
4K7
NC/
15P CA08
CA0515P
NC/
NC/
15P CA07
VDDRA
NC1
RA
GNDR
PD
ERROR
SDATA
LRCIN
SDA
SCL
RESET
VSS RB
VDDRB
VDDLB
LB
GNDL
NC2
VDDLA
LA
VDD
SA0
MCLK
BCLK
12
11
10
9
22
24
23
21
20
19
18
178
7
6
5
4
3
2
1
16
15
14
13
UA01
AD82587D
T
L+
CA11
4U7 CA12
4U7 CA13
4U7
NC/
22P CA04
CA0322PNC/
RA04 100R
RA06
100R
100R
RA07
RA09
100R
POWER_ON
AMP_RESET
AMP_SCL
AMP_SCL
AMP_SDA
AMP_SDA
MAIN3V3
I2S_DATA
I2S_MCLK
I2S_BCLK
I2S_LRCK
AMP_VCC
AMP_VCC
L+
L-
R-
R+
Close to SOC
IIC Addr:0X60
AMP AD82587
25V
470U
CA18
GND P01A
1
2
P02A
1
2
WHITE
RED
MAIN3V3

51R
R581
R561
100R
GND
GND
GND
R551
1K
4K7
R504
R505
10K
R562
27K STBC_3V3
R565 2R2
R582 2R2
2R2
R583
R584 2R2
R585 2R2
2R2
R586
R587 2R2
R588 2R2
GND
GND
R523
1K
GND
GND
GND
GND
GND
R580
100R
100R
R579
GND
GND
GND
GND
GND
R590
100R
100R
R589
HB_5V
47K
R521
R526
4K7
GND
R527
10K
GND
R592 2R2
R593 2R2
R594 2R2
R595 2R2
R596 2R2
R597 2R2
R598 2R2
R599 2R2
R522
47K
47K
R501R502
47K
LINE2
GND2
NC2
NC1
LINE3
NC4
LINE4
GND1
LINE1
NC3
AZ1045-04F
U517
9
1
3
5
10
4
6
7
8
2
LINE2
GND2
NC2
NC1
LINE3
NC4
LINE4
GND1
LINE1
NC3
AZ1045-04F
9
1
3
5
10
4
6
7
8
2
U515
HA_5V
GND
LINE2
GND2
NC2
NC1
LINE3
NC4
LINE4
GND1
LINE1
NC3
AZ1045-04F
U516
9
1
3
5
10
4
6
7
8
2
LINE2
GND2
NC2
NC1
LINE3
NC4
LINE4
GND1
LINE1
NC3
U514
AZ1045-04F
9
1
3
5
10
4
6
7
8
2
GND
BT3904
Q507
E
C
B
BT3904
Q506
E
C
B
D597
ESD5451R
1 2
ESD5451R D596
1 2
D591
ESD5451R
1 2
ESD5451R D590
1 2
ESD5451R D564
1 2
ESD5451R D592
1 2
RX2+
GND1
RX2-
RX1+
GND2RX1-
RX0+
GND3
RX0-
RXC+
GND4
RXC-
NC1
NC2
DDCCLK
DDCDA
GND5
VCC
HPD
P502
19
18
17
16
15
14
13
12
11
10
9
8
7
6
5
4
3
2
1
D511 1N4148WS
RXB_2+
RXB_2-
RXB_1+
RXB_1-
RXB_0+
RXB_0-
RXB_CLK+
RXB_CLK-
PWR5V_B/STBC_GPI_17
RXA_2+
RXA_2-
RXA_1+
RXA_1-
RXA_0+
RXA_0-
RXA_CLK+
RXA_CLK-
PWR5V_A/STBC_GPI_16
HDMI_CEC/STBC_GPG_31
HDMIB_SDA/STBC_GPF3
HDMIB_SCL/STBC_GPF2
HDMIA_SDA/STBC_GPF1
HDMIA_SCL/STBC_GPF0
HDMI_ARC
STBC_GPI_15/MHL_CBUS
MHL_CDS/STBC_GPG_24
RXC_CLK-
RXC_CLK+
RXC_0-
RXC_0+
RXC_1-
RXC_1+
RXC_2-
RXC_2+
PWR5V_C/STBC_GPI_4
HDMIC_SCL/STBC_GPF4
HDMIC_SDA/STBC_GPF5
NT72563M2
HDMI/MHL
US1
NT72563
Y19
W18
AB20
AA20
AC19
AB19
AA19
AB18
AA18
AB17
AC17
Y16
W16
Y14
W17
Y17
V17
Y18
V16
AC20
AA11
AC11
AB11
AB12
AA13
AB13
AC13
AA14
AC21
AC14
AB14
AA15
AB15
AA16
AB16
AC16
AA17
HDMIA_SDA
HDMIA_SDA
HDMIB_SCL
HDMIB_SCL
HDMIB_SDA
HDMIB_SDA
HDMIA_SCL
HDMIA_SCL
RXC1-
RXC1+
RXC2-
RXCC+
RXCC-
RXC2+
RXC0+
RXC0-
RXB0-
RXB0-
RXB2+
RXB2+
RXB2-
RXB2-
RXB1+
RXB1+
RXB1-
RXB1-
RXBC+
RXBC+
RXBC-
RXBC-
RXB0+
RXB0+
HDMI_ARC
HDMI_ARC
HDMI_ARC
CEC
CEC CEC
CEC
H_CEC
H_CEC
RXAC-
RXAC-
RXA0+
RXA0+
RXA2+
RXA2+
RXA1+
RXA1+
RXAC+
RXAC+
RXA2-
RXA2-
RXA1-
RXA1-
RXA0-
RXA0-
HA_5V
HA_5V
PWR5V_A
PWR5V_A
HA_HPD
HA_HPD
PWR5V_C
HDMIC_SCL
HDMIC_SDA
HB_5V
HB_5V
PWR5V_B
PWR5V_B
HB_SDA
HB_SDA
HA_SCL
HA_SCL
HA_SDA
HA_SDA
HB_SCL
HB_SCL
HB_HPD
HB_HPD
HDMI2&ARC+URAT
HDMI1
RX2+
GND1
RX2-
RX1+
GND2RX1-
RX0+
GND3
RX0-
RXC+
GND4
RXC-
NC1
NC2
DDCCLK
DDCDA
GND5
VCC
HPD
1
2
3
4
5
6
7
8
9
10
11
12
13
14
15
16
17
18
19
P501
GNDGND
T
T
GNDGND
B
C
EBT3904
Q520
B
C
EBT3904
Q521
B
C
EBT3904
Q522
4K7
R531
4K7
R530
STBC_3V3
HB_5V
HDMIB_SDA
HDMIB_SCL
TXD
RXD
R1051
470R
470R
R1050
TXD
C1051
NC/10PNC/10P
C1050
RXD
10K
R529
10K
R532
R506
100R
R525
100R
HDMIA_DET
B
C
E
Q500
BT3904 STBC_3V3 B
C
E
Q501
BT3904
HDMIB_DET
STBC_3V3
10K
R500
10K
R510
R508
47K
R503
47K
R524
47K
R515
47K
P1101
4
3
2
1
GND
R528
1K
ESD5451R D598
1 2
ESD5451R D599
1 2
1 2
D594
ESD5451R
1 2
D593
ESD5451R

100R
R605
GND
T
L-SEL
T
PANEL_VCC
T
O0+
T
O1-
T
O1+
T
O2-
T
O2+
T
OC-
T
OC+
T
O3-
T
03+
T
O4-
T
E0-
T
E0+
T
E1-
T
E1+
T
E2-
T
E2+
T
EC-
T
EC+
T
E3-
T
E3+
T
E4-
T
PANEL_VCC1
T
E4+
T
O4+
T
O0-
GND
T
P_GND
Q600 PMV65XP
S
D
G
R608
2K7
GND
R600
47K
12V_M
0.1UC618
PANEL_VCC
3K3
R607
GND
C617
0.1U
R604
4K7
PANEL_ON
GND
GND
P802
30
1
29
28
27
26
25
24
23
22
21
20
19
18
17
16
15
13
12
11
10
9
8
7
6
5
4
3
2
14
0.1U
C627
0.1U
C626
Q601
BT3904
E
C
B
LVO_4+
LVO_4-
LVO_3+
LVO_3-
LVO_CLK+
LVO_CLK-
LVO_2+
LVO_2-
LVO_1+
LVO_1-
LVO_0+
LVO_0- LVE_0-
LVE_0+
LVE_1-
LVE_1+
LVE_2-
LVE_2+
LVE_CLK-
LVE_CLK+
LVE_3-
LVE_3+
LVE_4-
LVE_4+
NT72563M2
LVDS
US1
NT72563
C14
A14
B14
C13
B13
C12
B12
A12
C11
A11
B11
C10A6
B6
C6
B7
C7
B8
A8
C8
A9
B9
C9
B10
LVDS_SEL
LVDS_SEL
TXE2+
TXE2+
TXE2+
TXE2+
TXO0+
TXO0+
TXO0+
TXO0-
TXO0-
TXO0-
TXO1+
TXO1+
TXO1+
TXO1-
TXO1-
TXO1-
TXO2+
TXO2+
TXO2+
TXO2-
TXO2-
TXO2-
TXOC+
TXOC+
TXOC+
TXOC-
TXOC-
TXOC-
TXO3+
TXO3+
TXO3+
TXO3-
TXO3-
TXO3-
TXO4+
TXO4+
TXO4+
TXO4-
TXO4-
TXO4-
TXE0+
TXE0+
TXE0+
TXE0+
TXE1+
TXE1+
TXE1+
TXE1+
TXE1-
TXE1-
TXE1-
TXE1-
TXE2-
TXE2-
TXE2-
TXE2-
TXEC+
TXEC+
TXEC+
TXEC+
TXEC-
TXEC-
TXEC-
TXEC-
TXE3+
TXE3+
TXE3+
TXE3+
TXE3-
TXE3-
TXE3-
TXE3-
TXE4+
TXE4+
TXE4+
TXE4-
TXE4-
TXE4-
TXE0-
TXE0-
TXE0-
TXE0-
PANEL_VCC
PANEL_VCC
OUT
OUT
OUT
3
2
4
6
7
8
10
11
12
PANEL_VCC
PANEL_VCC
TXE3+
TXE3-
GND
TXEC-
GND
TXE2+
TXE1-
TXE0+
TXE0-
TXO4+
TXO4-
TXO3+
TXO3-
TXOC+
TXOC-
GND
TXO2+
NC
NC
51
50
49
48
46
45
44
9
13
14
15
16
17
18
5
19
20
21
22
23
24
25
26
27
28
29
30
31
32
33
36
35
34
37
38
39
40
41
42
43
47
TXO2-
TXO1+
TXO1-
TXO0+
TXO1-
TXE4+
TXE4-
TXEC+
TXE2-
TXE1+
3D_EN
GND
LD_EN
1
No.
PWM
OUT
OUT
PWM
IN
OUT
MCU
GND
PANEL_VCC
PANEL_VCC
FFC PIN NAME
3D_FORMAT0/SDA/WP
LG_DIM
3D_FORMAT1
SCL
3D_VSYNC_IN
NC
3D_LR_OUT
NC
GND
GND
GND
NC
PANEL_VCC
PANEL_VCC
PANEL_VCC
NC
NC
3
2
1
4
5
6
7
8
9
10
11
12
13
14
15
16
17
18
19
20
21
22
23
24
25
26
27
28
29
30
NC
NC
GND
GND
GND
GND
TXEC-
TXEC+
TXE3+
TXE3-
TXE2+
TXE2-
GND
TXE1+
TXE1-
GND
TXE0+
TXE0-
GND
NC
LVDS_SEL
GND
GND
NC
PANEL_VCC
SDA/SCL/WP
LVDS_SEL
LVDS Test Point
FHD HD
@Max3A
LVDS Out FHD/HD 60Hz
P801 30
1
29
28
27
26
25
24
23
22
21
20
19
18
17
16
15
13
12
11
10
9
8
7
6
5
4
3
2
14
GND
PANEL_VCC
TXE3+
TXE3-
TXEC+
TXEC-
TXE2+
TXE2-
TXE1+
TXE1-
TXE0+
TXE0-
LVDS_SEL
P601 51
50
49
48
47
46
45
44
43
42
41
40
39
38
37
36
35
34
33
32
31
30
29
28
27
26
25
24
23
22
21
20
19
18
17
16
15
13
12
11
10
9
8
7
6
5
4
3
2
1
14

10P
NC/
CN7 0.1UCN4
GND
GND
GND
RN1
2R2
RN3
2R2
2R2 RN4
RN5
75R
75R
RN6
RN7
75R
75R
RN8
0.1U
CN1
0.01U
CN2CN5
1000P
GND
10P
NC/
CN6
LINE2
GND2
NC2
NC1
LINE3
NC4
LINE4
GND1
LINE1
NC3
ESD
UN1
9
1
3
5
10
4
6
7
8
2
ESD5451R
DN1
1 2
2R2 RN2
RXC
TXC
TX1P
RX1N
ETHERNET_TD+
ETHERNET_TD-
ETHERNET_RD+
ETHERNET_RD-
RX1P
TX1N
Must be differential 100ohm
RJ45 Jack
T T T TT T
GND
GND
RXC
TXC
TX1N
TX1P
RX1N
RX1P
RXC
TXC
TX1P
RX1N
RX1P
TX1N
3
4
5
6
7
8
1
2
9
10
11
12
PN1
CN3
1000P
1
2
3
4
5
6
7
8 9
10
11
12
13
14
15
16
UN2
TS8121CLF
This manual suits for next models
1
Table of contents